
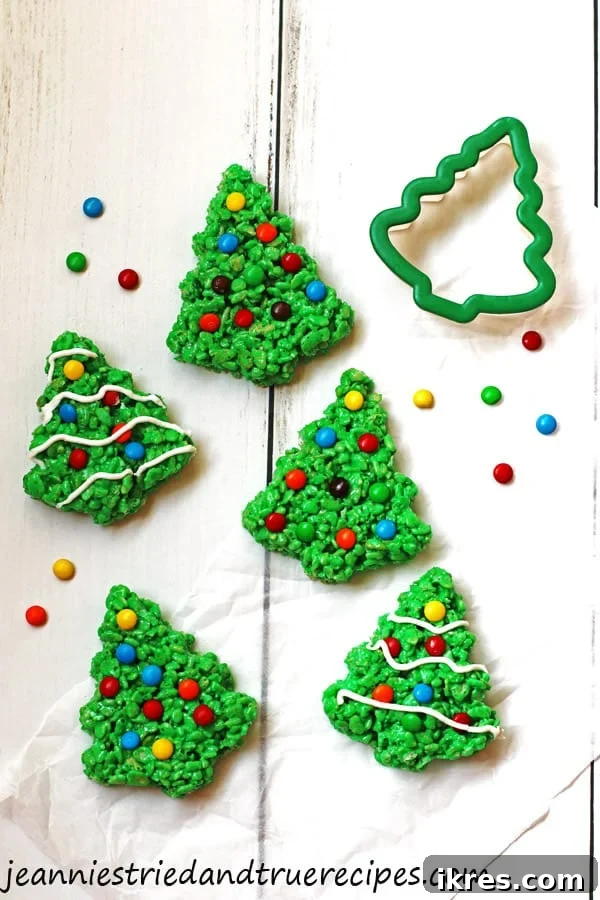
Festive Christmas Rice Krispie Treats: Easy & Fun Holiday Dessert for Kids
The holiday season sparkles with joy, warmth, and, of course, delicious treats! Among the many festive delights, Christmas Rice Krispie Treats stand out as a beloved classic. These aren’t just any treats; we’re talking about vibrant, tree-shaped masterpieces, perfect for sharing with family and friends. What makes them truly special is their incredible ease of preparation, making them an ideal activity for kids and a stress-free option for busy adults. They’re not only fun to create but also wonderfully festive, adding a burst of green and cheer to any holiday spread.
For those who shy away from intricate baking or find themselves pressed for time during the bustling holiday season, this recipe is a true gift. Forget complicated cookie cutters, lengthy oven times, or a mountain of ingredients. Our Christmas Rice Krispie Treats recipe uses just a handful of simple components, comes together in under an hour, and delivers delightful results every single time. It’s the ultimate no-fuss, no-bake solution for a memorable holiday dessert that both adults and children will adore.
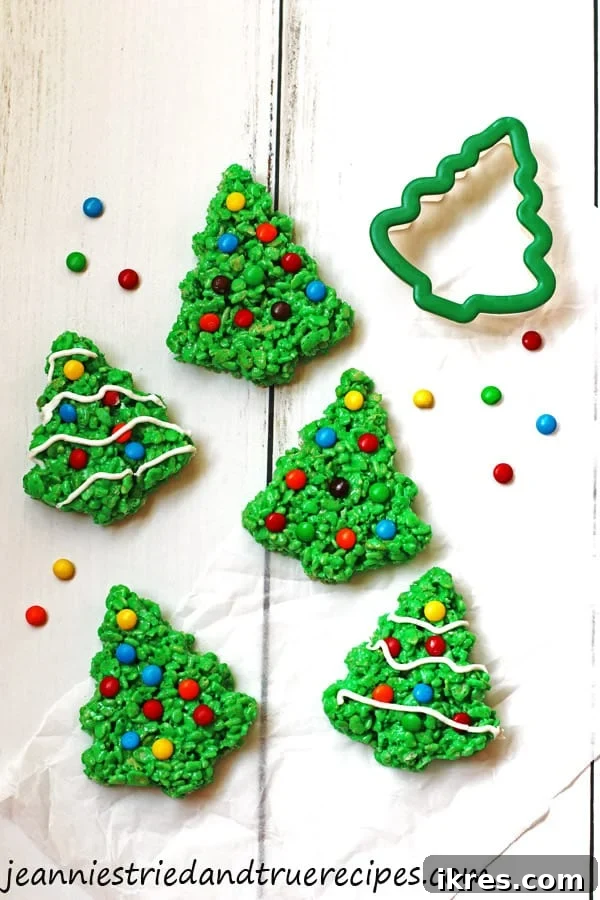
There’s an undeniable charm about Rice Krispie Treats, isn’t there? They evoke a sense of nostalgia, a taste of simple pleasures that resonates with everyone. Their crispy, chewy texture combined with the sweet marshmallow goodness is universally appealing. And when you introduce a touch of chocolate with mini M&M’s, you elevate them to an even higher level of deliciousness, making them an absolute hit with chocolate lovers of all ages. This holiday version, shaped like charming Christmas trees, makes them even more irresistible and perfect for festive celebrations.
Table of Contents
- Why This Recipe Is Your Holiday Go-To
- Essential Grocery Shopping List
- Step-by-Step: Crafting Your Rice Krispie Trees
- Adding a Touch of “Snow” with Icing
- Expert Tips for Perfect Christmas Rice Krispie Treats
- More Delightful Holiday Dessert Ideas
- Printable Christmas Rice Krispie Treats Recipe Card
Why This Recipe Is Your Holiday Go-To
In the whirlwind of holiday preparations, finding recipes that are both impressive and easy can feel like searching for a needle in a haystack. This Christmas Rice Krispie Treats recipe, however, ticks all the boxes, making it an undeniable holiday favorite for countless reasons:
- Minimal Ingredients: You’ll be amazed that such a festive and delicious treat requires only five core ingredients! This simplicity saves you time and trips to the grocery store, perfect for busy schedules.
- Effortless Preparation: This is a genuinely simple recipe, requiring no special skills or fancy kitchen gadgets. If you can melt butter and marshmallows, you can master these treats.
- Perfect for Young Helpers: It’s a fantastic kid-friendly recipe! Children can enthusiastically participate in almost every step, from stirring the mixture (with adult supervision for hot elements) to pressing the treats and, most excitingly, decorating the trees. This hands-on involvement creates cherished holiday memories.
- Lightning-Fast Creation: From start to finish, these treats can be ready in less than an hour. This makes them ideal for last-minute party contributions, spontaneous family activities, or simply when a holiday craving strikes.
- No-Bake Brilliance: Free up your oven for other holiday dishes! These treats require no baking, which is a huge bonus during a season often dominated by oven-intensive recipes.
- Customizable Fun: While we suggest M&M’s and white icing, the decoration possibilities are endless, allowing for creative expression and unique festive designs.
Essential Grocery Shopping List
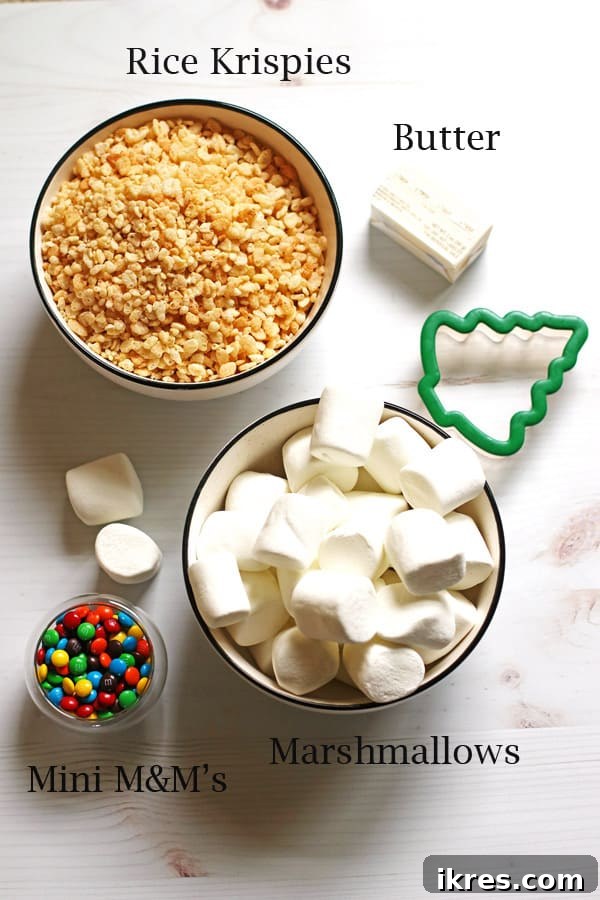
One of the beauties of these Christmas Rice Krispie Treats lies in their straightforward ingredient list. Chances are, you already have most of these staples in your pantry. Here’s what you’ll need to gather:
- Unsalted Butter: Essential for both flavor and preventing sticking.
- Marshmallows: One standard 10-ounce bag of mini or regular marshmallows will do. Mini marshmallows melt slightly faster, but either works perfectly.
- Rice Krispies Cereal: The star of the show, providing that iconic crispy texture.
- Mini M&M Candy: For colorful “ornaments” on your Christmas trees, adding a delightful chocolate crunch.
- Green Food Coloring: To transform your treats into vibrant, festive trees.
- White Cookie Icing (Optional): For a beautiful “snowy” effect on your finished trees, adding an extra layer of festive charm.
When it comes to coloring your cereal mixture, standard liquid food coloring will certainly work to achieve a pleasant green hue. However, for a truly eye-catching, more vibrant and brilliant green, consider using a gel-based food coloring like Chefmaster. These professional-grade colorings are highly concentrated, meaning you only need a small amount—just a few drops—to achieve a stunning, bright green that will make your Rice Krispie trees truly pop. A set of gel food colorings can also come in handy for other holiday baking projects, such as coloring royal icing for gingerbread cookies or tinting dough for festive cut-out sugar cookies.
Step-by-Step: Crafting Your Rice Krispie Trees
Creating these delightful Christmas Rice Krispie Treats is a straightforward process, making it enjoyable for chefs of all ages. Follow these steps for perfect, festive results:
Prepare Your Pan
First, thoroughly grease a 13×9 inch baking pan. You can use butter, cooking spray, or even a thin layer of vegetable oil. Ensuring the pan is well-greased is crucial to prevent the sticky marshmallow mixture from adhering, making it much easier to press and remove your treats later. Set this prepared pan aside.
Melt Butter and Marshmallows
In a medium to large-sized pot or saucepan, melt the unsalted butter over very low heat. Low heat is key here to prevent the butter from browning or scorching, which can alter the flavor of your treats. As the butter is just about melted and shimmering, add in the entire bag of marshmallows. Stir continuously with a large spoon or a heat-resistant spatula. Continue stirring until the marshmallows are completely coated with the melted butter and have transformed into a smooth, creamy, and lump-free liquid. Immediately remove the pan from the heat once the marshmallows are fully melted; overcooking them can lead to hard treats.
Add the Festive Green Color
This is where the magic happens! It’s best to incorporate the green food coloring into the melted marshmallow mixture *before* adding the Rice Krispies cereal. This method allows the color to disperse more evenly and thoroughly throughout the mixture, resulting in beautifully consistent green trees.
The type of food coloring you use significantly impacts the final shade:
- Regular Liquid Food Coloring: Start with approximately 8-10 drops. Stir well and assess the color.
- Gel-Based Food Coloring (e.g., Chefmaster): These are highly concentrated, so begin with just 4-5 drops. Stir thoroughly.
Pro Tip for Color: If you desire a darker or more intense green, add additional drops of food coloring one or two at a time. Stir well after each addition until you achieve your preferred vibrant shade. Remember, you can always add more color, but you can’t take it away!
Combine with Cereal
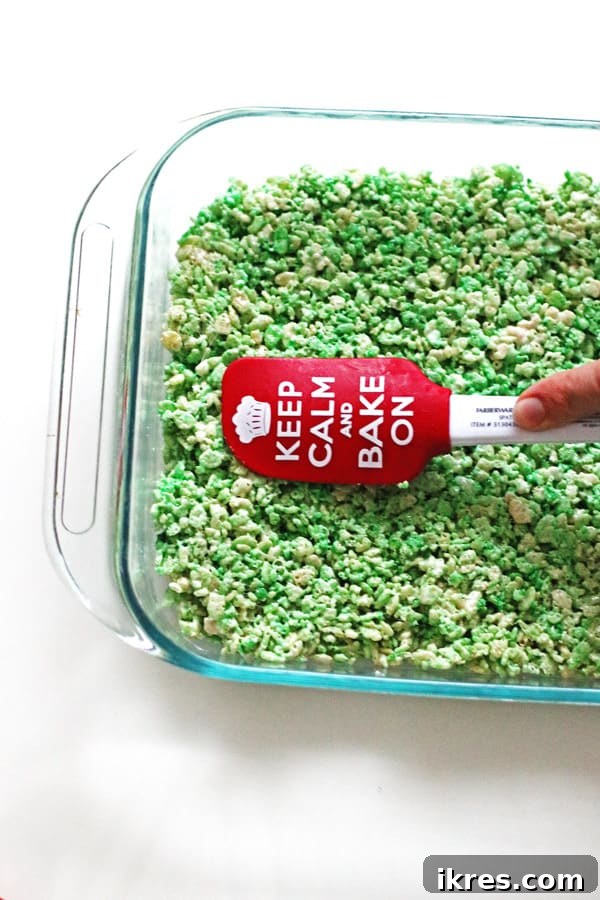
Once your marshmallow mixture is a beautiful shade of green, it’s time to add the Rice Krispies cereal. To ensure easy mixing and even coating, add the cereal in stages, about two cups at a time. Gently fold the cereal into the marshmallow mixture using your large spoon or spatula. Continue adding and mixing until all the cereal is thoroughly coated and evenly distributed with the green marshmallow goodness.
Press into the Pan
Using a spatula or the back of your spoon that has been lightly buttered (this is a game-changer for preventing stickiness!), gently and evenly press the cereal mixture into your prepared 13×9 inch pan. The goal is to create an even layer of treats, not to compact them too tightly, which can result in overly dense and hard treats. Just a gentle, firm press will suffice.
Recipe Tip: Buttering your spatula or spoon is an absolute lifesaver when working with sticky Rice Krispie Treat mixtures. It prevents the cereal and marshmallow from clinging to your tools, making the spreading process much smoother and easier!
Cut Your Christmas Trees
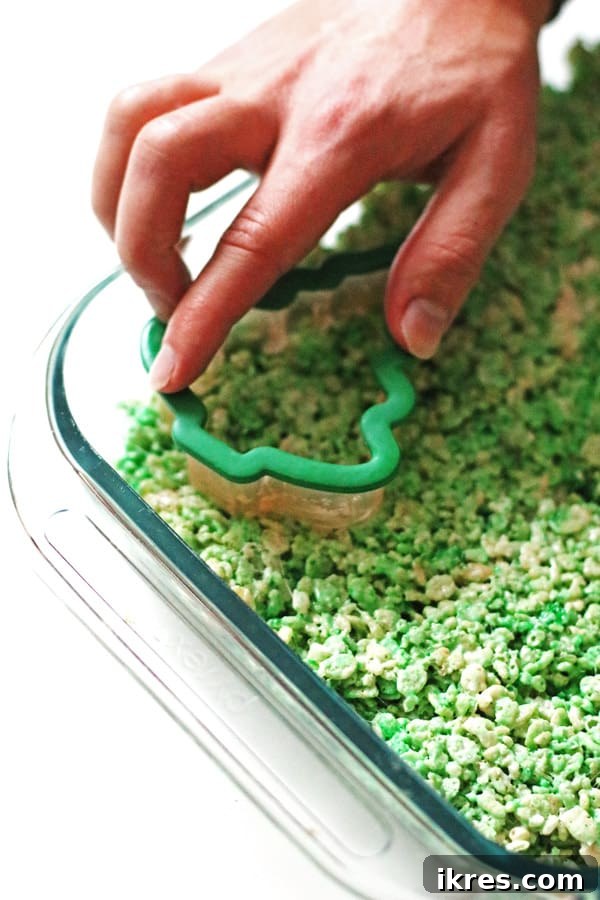
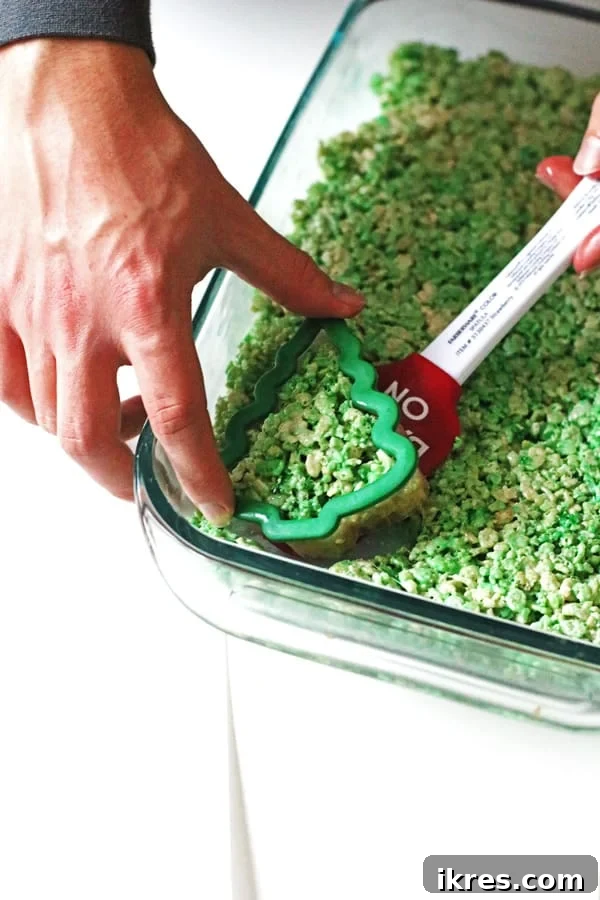
Now for the fun part: shaping your treats! Lightly butter the edges of your chosen tree-shaped cookie cutter. Press the cookie cutter all the way down into the still-warm Rice Krispie treats, ensuring a clean cut. Immediately, and carefully, remove the cookie cutter along with the perfectly formed Rice Krispie tree. If the treat sticks slightly inside the cutter, gently use the buttered spatula to help lift it out.
Decorate Your Trees
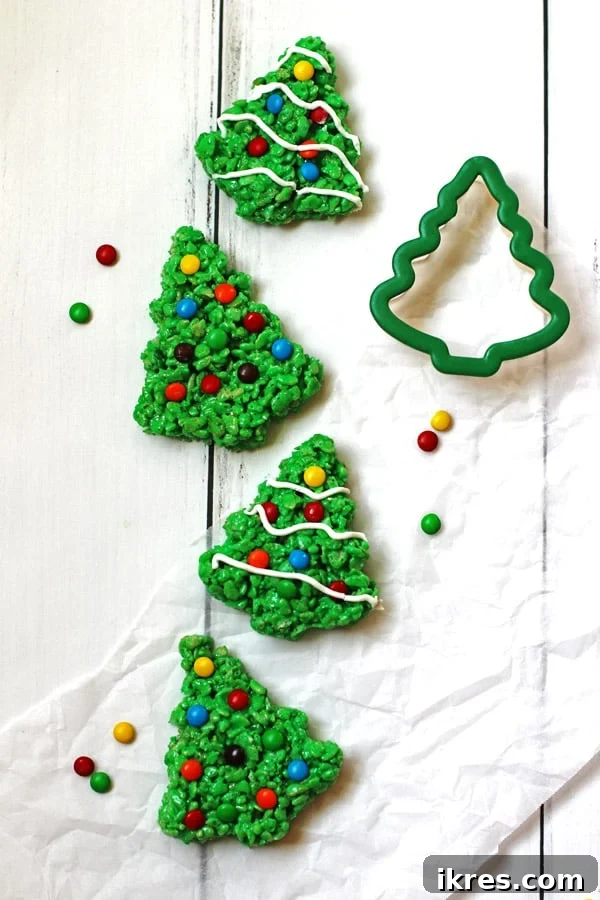
Place your newly cut Rice Krispie trees onto a sheet of parchment paper. This prevents them from sticking to your counter or table and makes for an easier cleanup. While the treats are still warm and slightly pliable, gently press the mini M&M candies onto the trees to create colorful “ornaments.”
Recipe Tip: It is crucial to decorate immediately while the treats are still warm. The warmth helps the M&M’s (or any other candies) adhere securely to the marshmallow mixture. If you wait too long, the treats will cool and harden, and your decorations won’t stick as well. This decorating step is fantastic for involving kids, allowing them to personalize each tree!
Adding a Touch of “Snow” with Icing
While the green trees with M&M ornaments are lovely on their own, adding a touch of white cookie icing can transform them, giving them a magical, snowy appearance. This step is entirely optional but adds an extra layer of festive charm and visual appeal.
To achieve this “snowy” effect, simply squeeze the white cookie icing (store-bought or homemade) over the tops and branches of your cooled Rice Krispie trees. Create gentle, curvy, zig-zag lines across each tree, mimicking fresh snowfall. You can also add a small dollop to the very top as a star or a peak of snow. This simple addition makes the treats look even more enchanting and winter wonderland-ready.

Yield and Leftovers
The number of Rice Krispie trees you’ll get from this recipe largely depends on the size of your cookie cutter. With a standard 3-inch tree-shaped cookie cutter, you can typically expect to make about 16 festive treats. To maximize your yield, try to cut the trees as close together as possible, like puzzle pieces, minimizing the amount of unused mixture.
What if you have extra cereal mixture after cutting? Don’t let any go to waste! Gather the remaining mixture. You can use buttered hands to press it back together, flatten it out, and cut out a few more trees. If only a small amount remains, simply roll it into charming little balls, adding a few extra M&M’s if you wish. These scraps are just as delicious and make perfect bite-sized treats!
Expert Tips for Perfect Christmas Rice Krispie Treats
To ensure your Christmas Rice Krispie Treats turn out perfectly crispy, chewy, and utterly delightful every time, keep these expert tips in mind:
- Butter Everything: Seriously, butter is your best friend when making Rice Krispie Treats. Generously butter your spatula, spoon, and especially your cookie cutter. This simple trick prevents the sticky cereal and marshmallow mixture from clinging, making the process much smoother and less frustrating.
- Add Cereal in Stages: Instead of dumping all the Rice Krispies at once, incorporate them a couple of cups at a time. This makes it significantly easier to thoroughly combine the ingredients, ensuring every piece of cereal is evenly coated with the delicious marshmallow mixture.
- Parchment Paper is Key: After cutting out your festive trees, transfer them directly onto sheets of parchment paper. This prevents them from sticking to your countertop or table surface, making cleanup a breeze and ensuring your beautiful shapes remain intact.
- Maximize Your Cuts: To get the most treats from your batch, arrange your cookie cutter cuts strategically. Try to cut the trees close to each other, minimizing the gaps and maximizing the usable surface area of your pressed mixture.
- Decorate While Warm: The best time to add your mini M&M’s or other candies is immediately after you’ve cut out the trees. While the treats are still warm and slightly soft, the candies will adhere much more easily and securely, preventing them from falling off later.
- Optimal Freshness and Storage: Rice Krispie Treats are undoubtedly at their best when enjoyed within two days of making them. Store them in an airtight container at room temperature to maintain their softness and chewiness.
- Revive Stale Treats: If your treats aren’t as soft as you’d like after a couple of days, don’t despair! A quick zap in the microwave for just 5-10 seconds can work wonders, bringing back their delightful soft and chewy texture.
- Gentle Pressing: When pressing the mixture into the pan, be firm but gentle. Over-compressing the mixture can result in overly dense and hard treats. A light, even pressure is all that’s needed.
- Adult Supervision: If making with children, ensure an adult handles the hot stovetop steps (melting butter and marshmallows) to prevent burns, allowing kids to safely participate in mixing and decorating.
More Delightful Holiday Dessert Ideas
The holiday season is a perfect excuse to indulge in a variety of sweet treats. If you’re looking to expand your festive baking repertoire beyond these wonderful Rice Krispie Trees, here are some of our other favorite cookie and dessert recipes that are perfect for holiday gatherings (though they’re delicious any time of year!):
- Classic Peanut Butter Kiss Cookies: A timeless favorite combining rich peanut butter with a decadent chocolate kiss.
- Easy Christmas Wreath Fudge: Simple to make, incredibly creamy, and easily shaped into a festive wreath for a beautiful display.
- Perfect Cut-Out Sugar Cookies: The quintessential holiday cookie, ideal for decorating with colorful icing and sprinkles.
- Light and Airy Meringue Cookies: Delicate, melt-in-your-mouth cookies that can be tinted and shaped into festive designs.
Each of these recipes brings its own unique flavor and charm to your holiday celebrations, promising more opportunities for sweet success and joyful memories.
If you’ve made this recipe, let us know how you liked it in the comments and ratings below! We absolutely love hearing from you and seeing your festive creations.
You can also FOLLOW US on INSTAGRAM, FACEBOOK, or PINTEREST for more delicious recipes and holiday inspiration.
Christmas Rice Krispie Treats
These Christmas Rice Krispie Treats are fantastic to make with kids. They are incredibly easy and fun to create, and their festive look makes them a perfect addition to your holiday celebrations!
- Author: Jeannie Z
- Servings: 16 trees (approximately, depending on cookie cutter size)
- Prep Time: 40 mins
- Total Time: 40 mins
- Course: Dessert
- Cuisine: American
Ingredients
- 3 tablespoons unsalted butter
- 1 package (10 ounce) marshmallows
- 6 cups Rice Krispies cereal
- Green food coloring
- Mini M&M’s
- Extra butter (to grease pan, spatula, and cookie cutter)
- White cookie icing, optional (for snowy effect)
Instructions
- Grease the bottom and sides of your 13×9 inch baking pan generously with butter. Set the pan aside.
- In a large saucepan, melt the 3 tablespoons of butter over low heat until it’s just shimmering and almost completely liquid. Add in the entire package of marshmallows. Stir continuously with a large spoon or spatula until the marshmallows are fully coated with butter and completely melted into a smooth, creamy mixture. Immediately remove the pan from the heat.
- Add in the green food coloring. If using regular liquid food coloring, start with 8-10 drops. If using a concentrated gel food coloring (like Chefmaster), start with 4-5 drops. Stir thoroughly until the color is well mixed and evenly distributed. For a darker green, add a couple more drops at a time and stir until your desired vibrant shade is achieved.
- Gradually add the Rice Krispies cereal to the green marshmallow mixture, about two cups at a time. Stir well after each addition, ensuring all the cereal is evenly coated with the marshmallow mixture.
- Using a spatula that has been lightly buttered, press the cereal mixture evenly into your prepared 13×9 inch pan. Apply gentle but firm pressure to create a compact, even layer.
- Lightly grease the edges of your tree-shaped cookie cutter with butter. Press the cookie cutter down into the warm Rice Krispies treats to cut out shapes. Carefully remove the cookie cutter along with the Rice Krispie tree, gently assisting with a buttered spatula if needed. Place the cut trees onto a sheet of parchment paper. While the treats are still warm, gently press mini M&M candies onto them to decorate as ornaments.
- Continue cutting out Christmas trees, arranging your cuts closely together to maximize the number of treats from your mixture. Gather any remaining scraps, press them together, and cut additional shapes or roll into balls.
- If desired, once the trees have cooled, drizzle white cookie icing over them in wavy lines to create a “snowy” effect.
- Store your finished Christmas Rice Krispie Treats in an airtight container at room temperature for up to two days for optimal freshness.
Notes
- Always butter your spatula, spoon, and cookie cutter to prevent the sticky cereal mixture from sticking.
- For easier mixing and even coating, add the Rice Krispies cereal in stages, a couple of cups at a time.
- Place cut treats on parchment paper to prevent sticking and for easy cleanup.
- Maximize your yield by cutting the trees close to each other when pressing with the cookie cutter.
- Ensure decorations like mini M&M’s are added immediately after cutting while the treats are still warm for best adhesion.
- These treats are best consumed within two days. If they lose some softness, microwave for 5-10 seconds to revive.
- The exact number of trees produced depends on your cookie cutter size; a 3-inch cutter typically yields around 16 treats.
Nutrition information is approximate and is automatically calculated, so should only be used as a guide.
Update Note: This festive recipe for Christmas Rice Krispie Treats was originally shared previously, but was re-published in 2020 with enhanced step-by-step directions, additional expert tips, and new, vibrant photos to inspire your holiday baking!