
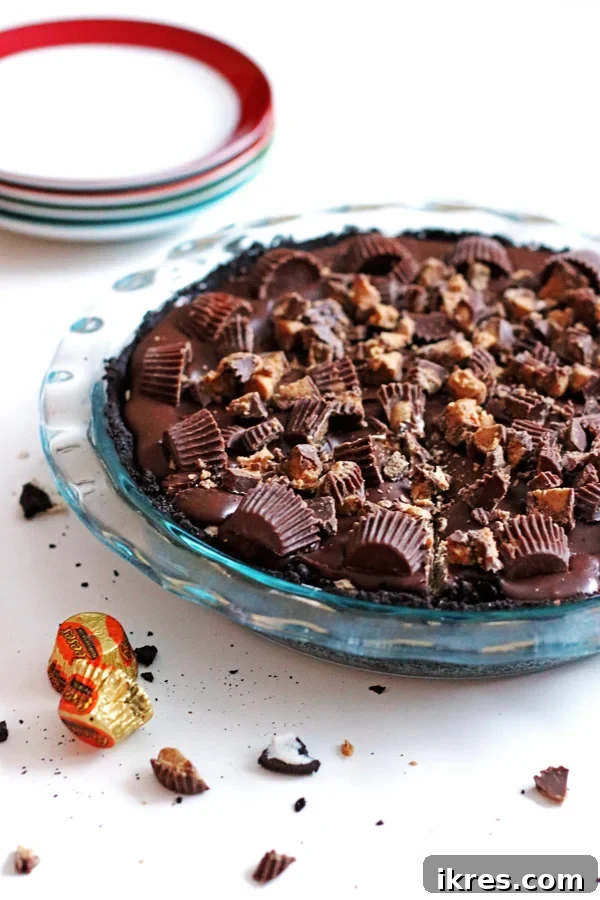
If you love the irresistible combination of creamy peanut butter and rich chocolate, then prepare to meet your new favorite dessert: the No-Bake Chocolate Peanut Butter Pie. This isn’t just any pie; it’s a cold, velvety, utterly decadent dream that captures the iconic flavor of your beloved peanut butter cups in an effortlessly elegant form. Perfect for any occasion, it’s chocolatey, peanutty, and so incredibly delicious, you’ll wonder how you ever lived without it.
There’s a reason why the classic pairing of chocolate and peanut butter remains one of the most cherished flavor combinations in the world. From beloved candies like Reese’s Peanut Butter Cups to homemade treats, this duo creates a symphony of sweet and salty, rich and nutty that’s simply addictive. Many aficionados even prefer their peanut butter cups chilled, a trick that enhances their firm texture and intensifies the flavor. If you haven’t tried that simple pleasure yet, we highly recommend giving it a go – it’s a game-changer! This no-bake pie embodies that same chilled, harmonious blend, elevating it to a show-stopping dessert that requires minimal effort and no oven time.
Imagine a dessert that delivers maximum flavor with minimal fuss. Our No-Bake Chocolate Peanut Butter Pie is precisely that! It’s the ultimate summer treat, but equally delightful year-round. The “no-bake” aspect is a true blessing, especially when the weather heats up and the thought of turning on your oven is unbearable. Beyond saving you from a sweltering kitchen, no-bake recipes are often incredibly straightforward, making them perfect for novice bakers and seasoned pros alike. This pie proves that you don’t need complicated techniques to create something truly spectacular. It’s all about simple ingredients coming together to form a masterpiece.
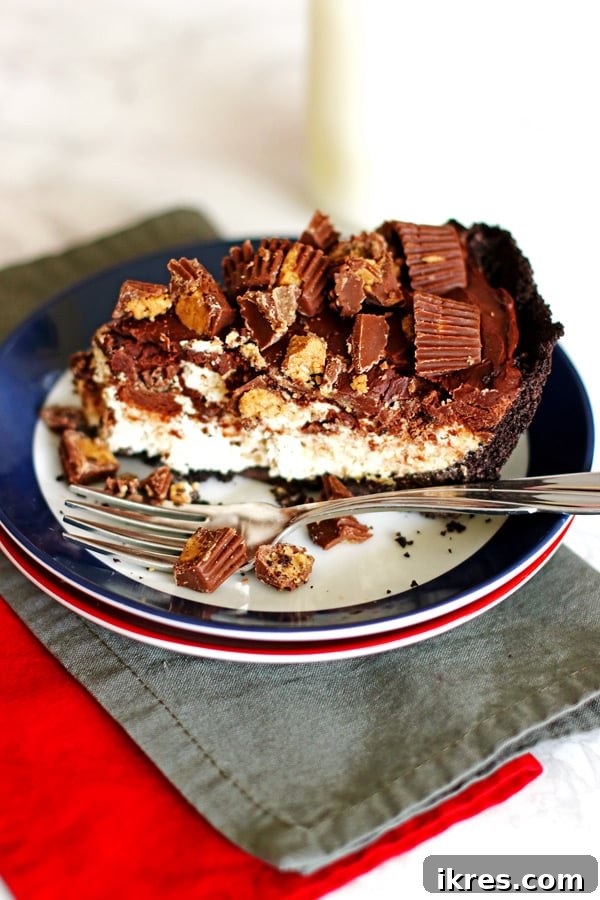
The Irresistible Appeal of No-Bake Desserts
No-bake desserts are a revelation, offering a host of advantages that make them a favorite in kitchens everywhere. Here’s why you’ll love adding this Chocolate Peanut Butter Pie to your no-bake repertoire:
- Beat the Heat: When summer temperatures soar, the last thing you want is to crank up your oven. No-bake recipes keep your kitchen cool and comfortable, allowing you to enjoy delicious treats without breaking a sweat.
- Effortlessly Easy: These recipes typically involve simple mixing, pressing, and chilling. Forget about complicated baking techniques, precise oven temperatures, or worrying about your dessert collapsing. They’re usually incredibly straightforward to make, perfect for beginners or when you’re short on time.
- Quick Assembly: While chilling time is essential for no-bake pies to set, the active prep time is often minimal. This means you can whip up a fantastic dessert in a flash, freeing up your schedule for other activities.
- Perfect for Any Occasion: From casual family dinners to elaborate holiday gatherings, a no-bake pie always feels special. Its chilled nature makes it a refreshing end to any meal, and its stunning appearance is sure to impress.
- Foolproof Results: With fewer variables like oven temperature and baking times, no-bake desserts are remarkably forgiving, almost guaranteeing a delicious outcome every time.
Key Ingredients for Your Chocolate Peanut Butter Dream Pie
Crafting this incredible pie requires a few simple, accessible ingredients, each playing a crucial role in creating its iconic flavor and texture. We’ll break down what you’ll need for each layer, along with a few tips for selection.
For the Decadent Pie Crust
The foundation of our pie is a rich, chocolatey crust. You have two excellent options:
- Oreos: A full package of classic Oreo cookies provides the perfect chocolate base. When crushed finely and mixed with butter, they create a crumbly, yet firm crust that perfectly complements the filling.
- Melted Butter: Unsalted butter, melted, binds the Oreo crumbs together, forming a sturdy crust that won’t fall apart when sliced.
- Premade Oreo Pie Crust: For ultimate convenience, feel free to use a store-bought Oreo pie crust. This saves a step without sacrificing flavor.
For the Creamy Peanut Butter Filling
This is where the magic truly happens – a light, airy, and intensely peanut buttery filling.
- Creamy Peanut Butter: Opt for a smooth, creamy peanut butter for the silkiest filling. While natural peanut butter can be used, ensure it’s well-stirred and doesn’t separate too much, as oil separation can affect the consistency.
- Cream Cheese: Full-fat cream cheese, softened to room temperature, adds tanginess, richness, and structure to the filling, preventing it from being too sweet and giving it a wonderful creamy texture.
- Cool Whip: Thawed Cool Whip (or another whipped topping) is essential for achieving that light, fluffy, and perfectly chilled consistency. It incorporates air and sweetness without adding excessive density. While homemade whipped cream can be used, Cool Whip offers stability and ease.
For the Silky Chocolate Ganache Topping
A glossy, smooth layer of chocolate ganache seals the deal, adding a touch of elegance and intense chocolate flavor.
- Semi-Sweet Chocolate Chips: These provide a balanced chocolate flavor that isn’t too bitter or overly sweet. High-quality chocolate chips will result in a superior ganache.
- Heavy Whipping Cream: The high-fat content of heavy whipping cream is crucial for creating a stable, emulsified ganache. It melts the chocolate chips into a smooth, pourable consistency.
To Adorn Your Masterpiece: The Finishing Touch
No peanut butter pie is complete without its namesake candy!
- Peanut Butter Cups: Miniature peanut butter cups work best for easy cutting and decorating. You’ll want some chopped coarsely to sprinkle generously over the entire pie, and others sliced in half to arrange beautifully around the edges. This gives every slice that unmistakable Reese’s flavor and a delightful visual appeal.
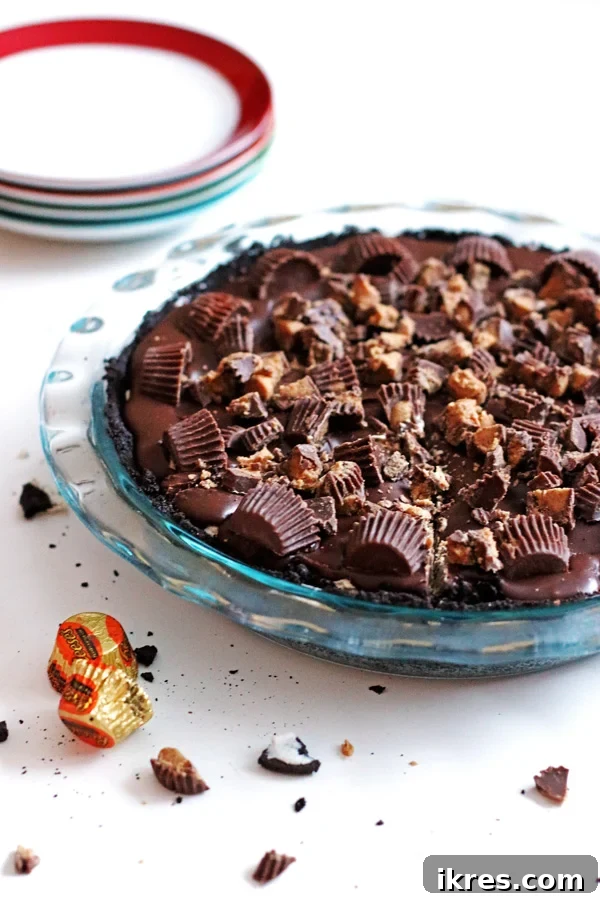
How to Master This No-Bake Reese’s Pie: A Step-by-Step Guide
Creating this show-stopping dessert is simpler than you might think. Follow these detailed steps to achieve a perfectly layered and utterly delicious No-Bake Chocolate Peanut Butter Pie:
Step 1: Prepare Your Peanut Butter Cups for Garnish
Before you begin assembling the pie, it’s wise to get your peanut butter cup garnish ready. This prevents any rushed chopping while your ganache is setting. We suggest preparing about 9 miniature peanut butter cups by carefully slicing them in half. These halves will beautifully adorn the pie’s edge. Additionally, chop a generous amount of extra miniature peanut butter cups coarsely; these will be sprinkled over the entire pie for that extra burst of flavor and texture.
Pro Tip for Easy Cutting: To avoid a sticky mess and ensure clean cuts, place your peanut butter cups in the refrigerator or freezer for about 10-15 minutes before attempting to slice or chop them. This chills the chocolate and peanut butter, making them less prone to melting and sticking to your knife and fingers, especially if your kitchen is warm.
Once your peanut butter cups are prepped, set them aside. They’ll be ready when your pie is.
Step 2: Crafting the Perfect Oreo Crust
The base of your pie is a simple yet satisfying Oreo crust. If you’re using a premade crust, you can skip this step entirely and proceed to the filling!
- Crush the Oreos: Using a food processor, blender, or even a sturdy zip-top bag and a rolling pin, crush an entire package of Oreo cookies until they resemble fine, even crumbs. Consistency is key here for a uniform crust.
- Combine with Butter: In a medium bowl, add the melted unsalted butter to your Oreo crumbs. Stir thoroughly with a spoon or spatula until all the crumbs are moistened and evenly coated. The mixture should resemble wet sand.
- Form the Crust: Pour the crumb mixture into your 9-inch pie dish. Using the back of a spoon or the bottom of a flat-bottomed glass, firmly press the mixture across the bottom and up the sides of the pie plate. Ensure an even thickness for a sturdy crust.
- Chill the Crust: Place the formed crust into your freezer for at least 30 minutes. This chilling time is crucial for the butter to solidify and bind the crumbs, creating a firm base for your filling.
Step 3: Mixing the Irresistible Peanut Butter Filling
While your crust is chilling, it’s time to whip up the star of the show – the creamy, dreamy peanut butter filling.
- Cream Together: In a large mixing bowl, combine the creamy peanut butter and the softened cream cheese. Using an electric mixer (handheld or stand mixer), beat on medium speed until the mixture is light, smooth, and well-blended. Ensure there are no lumps of cream cheese remaining.
- Fold in Cool Whip: Gently fold in the thawed Cool Whip with a spatula until everything is just combined. Be careful not to overmix, as this can deflate the whipped topping and make the filling less airy. The mixture should be light and fluffy.
- Fill the Crust: Remove your chilled pie crust from the freezer. Spoon the peanut butter filling evenly into the crust, spreading it with a spatula until it forms a smooth, level surface.
- Second Chill: Return the pie to the freezer for another 30 minutes. This allows the filling to firm up slightly, creating a stable layer for the ganache.
Step 4: Preparing the Silky Chocolate Ganache
The rich ganache provides a beautiful, glossy finish and an intense chocolate flavor.
- Heat the Cream: In a small saucepan, gently heat the heavy whipping cream over low to medium heat, stirring occasionally. Watch it carefully; you want it to just begin to simmer around the edges, not boil vigorously.
- Combine with Chocolate: Place your semi-sweet chocolate chips into a heatproof bowl. Once the cream is hot, pour it immediately over the chocolate chips. Let it sit undisturbed for 1-2 minutes. This allows the heat from the cream to melt the chocolate.
- Stir Until Smooth: Begin stirring the chocolate and cream with a spatula, starting in the center and slowly working your way outwards. Continue stirring in the same direction until the mixture emulsifies and becomes a smooth, glossy ganache. If needed, switch to a wire whisk for a truly silky finish. A little muscle might be required, but it will come together beautifully.
- Cool the Ganache: It’s crucial to let the ganache cool to room temperature before pouring it over the pie. If it’s too warm, it can melt the peanut butter filling. Stir occasionally while it cools to prevent a skin from forming.
Step 5: The Grand Assembly and Final Chill
Now for the exciting part – bringing all the delicious layers together and adding the finishing touches.
- Pour and Spread Ganache: Once the ganache is at room temperature and slightly thickened but still pourable, retrieve your pie from the freezer. Pour the ganache evenly over the peanut butter filling, gently spreading it with a spatula if needed to cover the entire surface.
- Decorate Immediately: This step needs to be done quickly before the ganache begins to set. Gently press the halved peanut butter cups along the edges of the pie, arranging them in a decorative pattern. Then, generously sprinkle the coarsely chopped peanut butter cups over the entire surface of the pie. The still-wet ganache will help them adhere.
- The Long Chill: Now comes the hardest part – waiting! Cover the pie loosely with aluminum foil, making sure the foil doesn’t touch the top if possible to preserve the decoration. Place the pie back into the freezer for at least 2 hours. This extended chill time is essential for all the layers to firm up perfectly, making it easy to slice and ensuring that delightful cold, creamy texture.
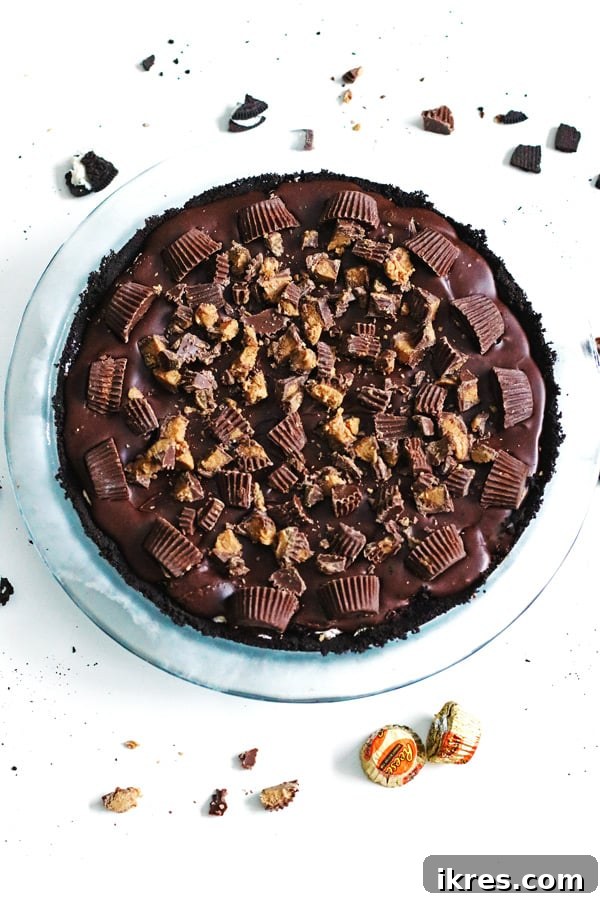
Once your two hours are up, remove the pie from the freezer. Let it sit on the counter for a few minutes to soften slightly before slicing. This will make cutting easier and prevent the ganache from cracking. Remember, this pie is wonderfully rich and sweet, so we recommend starting with smaller slices. You can always go back for more!
Storage and Make-Ahead Tips for Your Peanut Butter Pie
One of the many beauties of a no-bake pie is its fantastic make-ahead potential and easy storage. This makes it an ideal dessert for entertaining or simply having a delicious treat on hand.
- Storing Leftovers: Any leftover pie should be covered tightly with plastic wrap or aluminum foil and placed back in the freezer. Stored correctly, this pie will maintain its deliciousness for up to 2-3 weeks. However, we highly doubt it will last that long in your freezer!
- Serving from Frozen: When ready to enjoy a slice, simply remove the pie from the freezer and let it sit at room temperature for about 10-15 minutes before slicing. This allows it to soften slightly, achieving that perfect creamy texture.
- Make Ahead: This pie is an excellent candidate for making ahead. You can prepare it a day or two in advance, keeping it covered in the freezer until about 15 minutes before you plan to serve. This frees up your time on the day of your event, making host duties much more enjoyable.
Loved this recipe? Be sure to follow us on Instagram and Pinterest for more delightful recipes and kitchen inspiration!
More Peanut Butter & Chocolate Creations You’ll Adore
If the magical pairing of peanut butter and chocolate truly is your culinary passion, then you’re in for a treat! Explore these other fantastic recipes that celebrate this iconic duo:
- Ultimate Peanut Butter and Chocolate Chip Cookies
- Peanut Butter Chocolate Kiss Cookies
- Chocolate Peanut Butter Smoothie Bowl
Did you whip up this incredible No-Bake Chocolate Peanut Butter Pie? We’d love to hear about it! Please leave a comment and rating below to share your experience. Your feedback makes our day!
Chocolate Peanut Butter Pie
If you love peanut butter and chocolate, this Chocolate Peanut Butter Cup Pie is a dessert for you. It is chocolatey, peanutty, cold, creamy & so delicious.
Jeannie Z
12
20 mins
2 hrs
2 hrs 20 mins
Ingredients
For the Pie Crust
- 1 package Oreos (finely crushed)
- ¼ cup unsalted butter (melted)
For the Filling
- ¾ cup creamy peanut butter
- 4 ounces cream cheese (softened)
- 12 ounces cool whip (thawed)
For the Chocolate Ganache
- 1 ½ cup semisweet chocolate chips
- ½ cup heavy whipping cream
To Top the Pie Off
- Peanut Butter Cups (about 9, cut in half to place along the edge of the pie – miniature peanut butter cups recommended)
- Peanut Butter Cups (coarsely chopped, to sprinkle over the pie – miniature peanut butter cups recommended)
Instructions
- Prepare Peanut Butter Cups: Cut some peanut butter cups in half for the pie’s edge and coarsely chop others for sprinkling over the pie. Chill them briefly beforehand for easier cutting.
For the Crust
- Crush the Oreo cookies into fine crumbs using a blender or food processor.
- Mix together the crumbs and melted butter in a bowl until well blended.
- Form a pie crust using the back of a spoon in your pie dish, pressing firmly on the bottom and sides.
- Place the crust in your freezer for 30 minutes or until the filling is ready.
For the Filling
- Mix together the peanut butter and softened cream cheese with an electric mixer until smooth.
- Add in the thawed Cool Whip and mix gently until just combined and fluffy.
- Scoop the filling into the chilled pie crust and spread it out evenly. Freeze for another 30 minutes.
For the Chocolate Ganache
- Heat the heavy whipping cream in a pot on low heat until it just begins to simmer, stirring occasionally.
- Place the chocolate chips into a medium-sized bowl. Pour the hot heavy whipping cream over the chocolate chips and let it sit for 1-2 minutes.
- Stir with a spatula in the same motion, switching to a whisk once it starts to combine, until the ganache is smooth and glossy.
- Let the ganache sit to cool to room temperature before pouring it onto the pie.
Topping Off the Pie
- Pour the cooled ganache evenly over the pie.
- Immediately and gently press the halved peanut butter cups around the edges of the pie, then sprinkle the coarsely chopped peanut butter cups over the entire surface. Work quickly before the ganache hardens.
- Cover the pie with foil and place it back into the freezer for at least 2 hours to set completely.
- Let the pie sit a few minutes at room temperature before slicing for easier cutting.
- Cover and freeze any leftovers.
Notes
This recipe was adapted from Beth The First Year. For best results, ensure cream cheese is fully softened and ganache is cooled before assembly.
Special Equipment Needed
- Pie pan (9-inch)
- Food processor or blender (for crushing Oreos)
- Electric mixer (handheld or stand mixer)
- Small saucepan
- Heatproof mixing bowls
- Spatula and whisk
Nutrition
Nutrition information is approximate and is automatically calculated, so should only be used as a guide.
Calories: 626 kcal
Carbohydrates: 57 g
Protein: 10 g
Fat: 42 g
Saturated Fat: 19 g
Cholesterol: 38 mg
Sodium: 297 mg
Potassium: 430 mg
Fiber: 5 g
Sugar: 37 g
Calcium: 90 mg
Iron: 6 mg
Dessert
American
chocolate peanut butter pie, reeses peanut butter pie, no-bake pie