

Welcome to the delightful world of Dirt Cake – a truly unforgettable no-bake dessert that brings smiles to faces of all ages. This incredibly versatile and easy-to-make treat is a staple in our family, perfect for sprucing up any holiday table, from the vibrant greens of Easter to the spooky fun of Halloween. Its whimsical appearance and creamy, crunchy texture make it an instant hit with both kids and adults, proving that delicious doesn’t have to mean complicated.
Have you ever experienced the joy of creating and devouring a Dirt Cake? Whether you’re a seasoned baker or a complete novice in the kitchen, this recipe is designed for maximum fun and minimal fuss. We especially love preparing it for Easter and Halloween, transforming simple ingredients into themed culinary masterpieces. Get ready to discover your new favorite dessert that’s as entertaining to make as it is to eat!

If the term “Dirt Cake” has you scratching your head, let’s clear the air and introduce you to this imaginative dessert!
What Exactly is a Dirt Cake?
At its heart, Dirt Cake is a wonderfully deceptive dessert that cleverly mimics a patch of earth. Its creamy, rich base is created using a simple combination of instant pudding mix and cold milk, resulting in a smooth and delectable custard. This creamy layer is then generously blanketed with finely crushed chocolate sandwich cookies, famously similar to Oreos. These cookie crumbs are the star of the show, providing the signature “dirt” texture and a satisfying chocolatey crunch that perfectly complements the smooth pudding.
But the true magic of Dirt Cake lies beyond its two main components. It’s a canvas for creativity, inviting you to transform it into a scene straight out of a storybook or a spooky tale. The “dirt” layer sets the stage for a wide array of edible decorations, allowing you to bring your culinary imagination to life. This interactive element is what makes Dirt Cake a perennial favorite for holidays and family gatherings.
The next step is where the real fun begins: adorning your dessert with whimsical elements you’d find nestled in the earth, or perhaps, emerging from it!
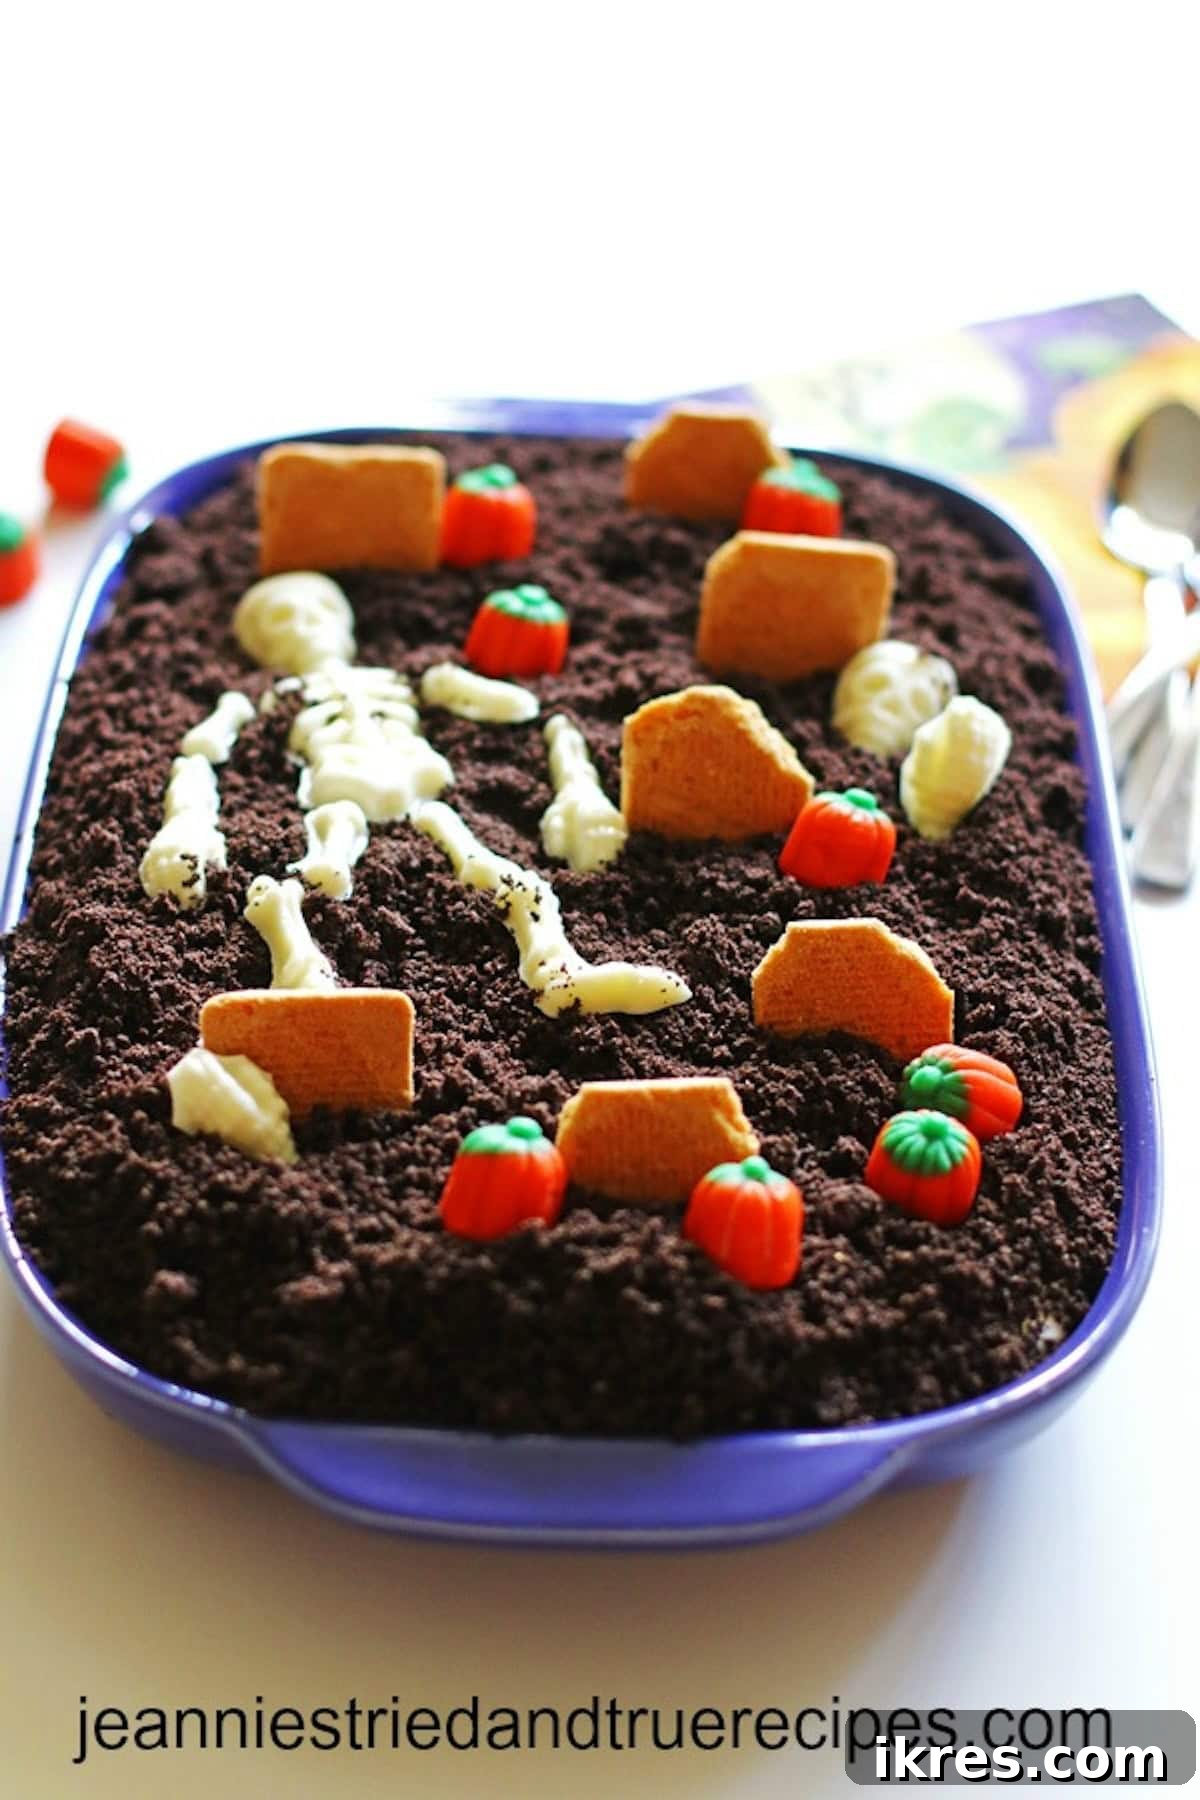
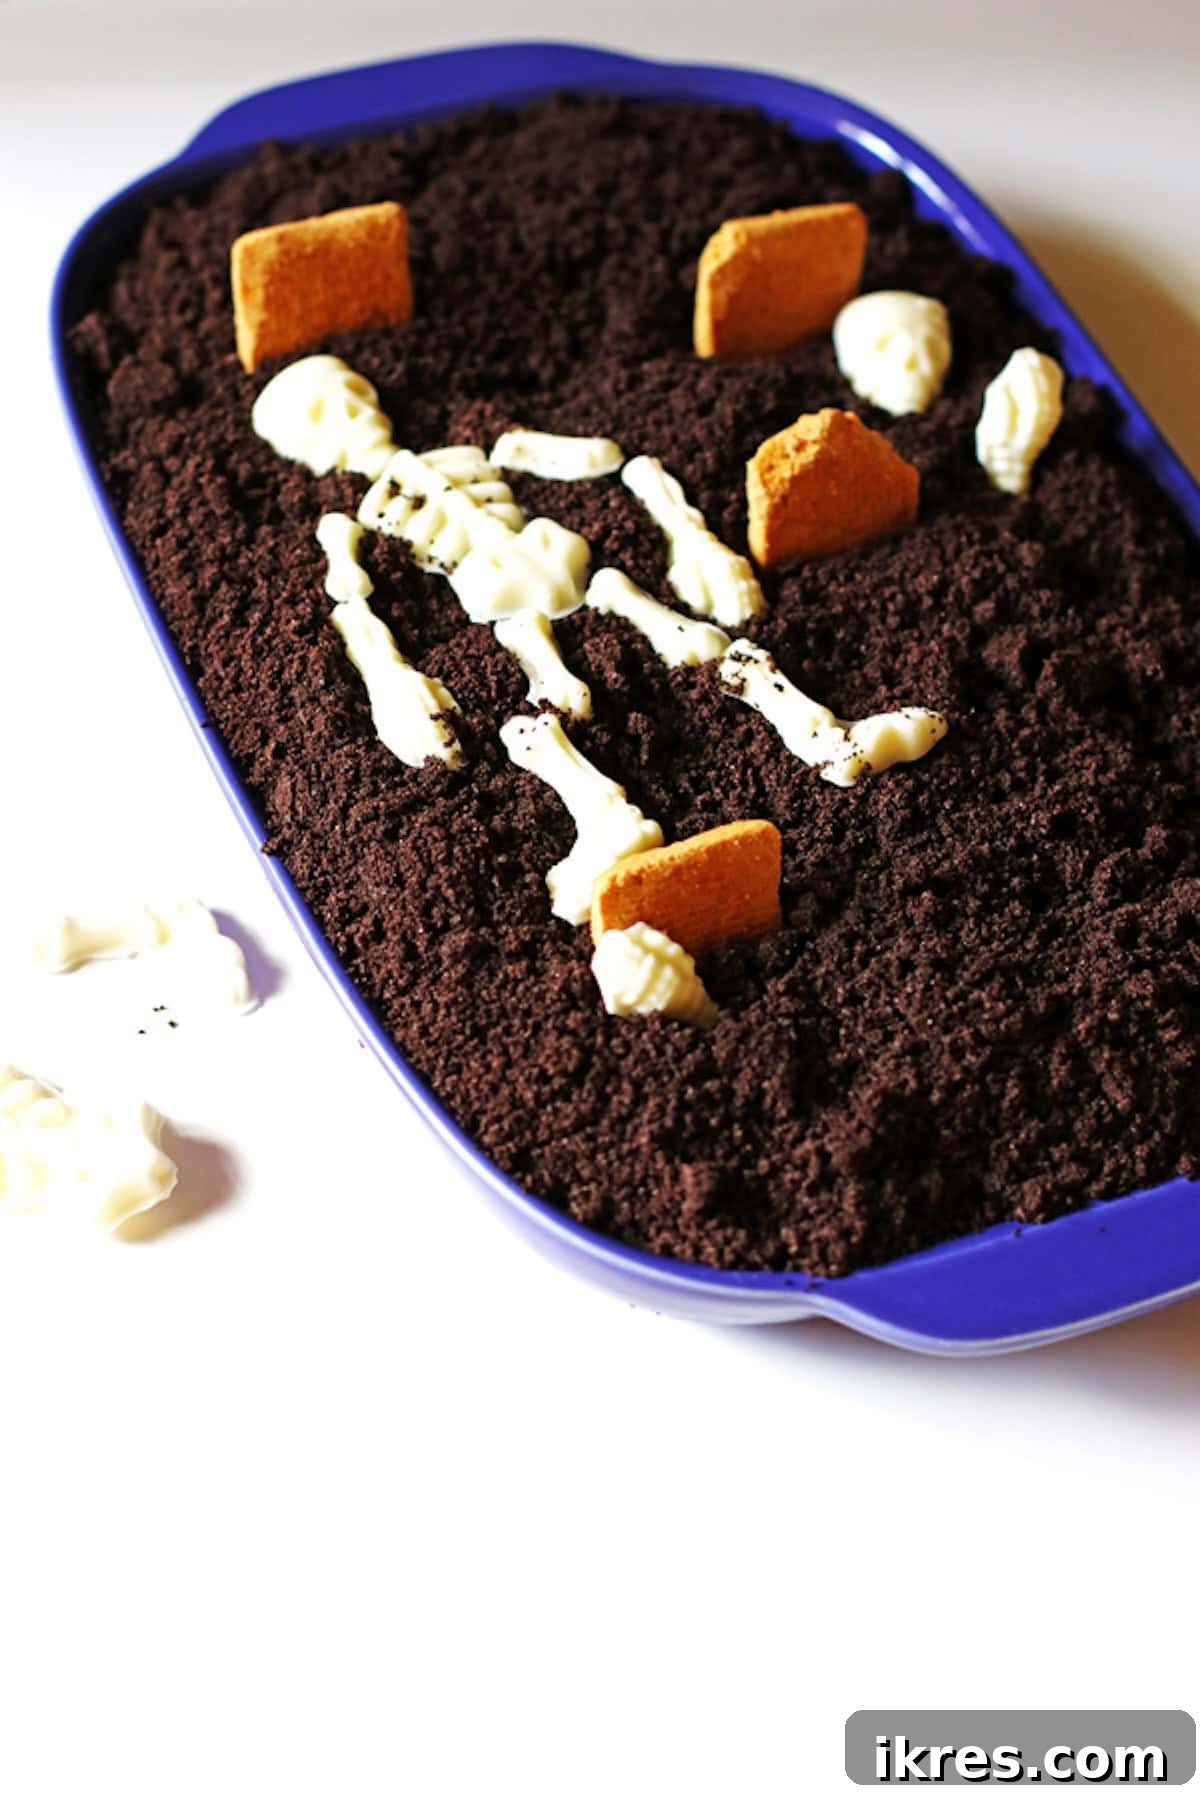
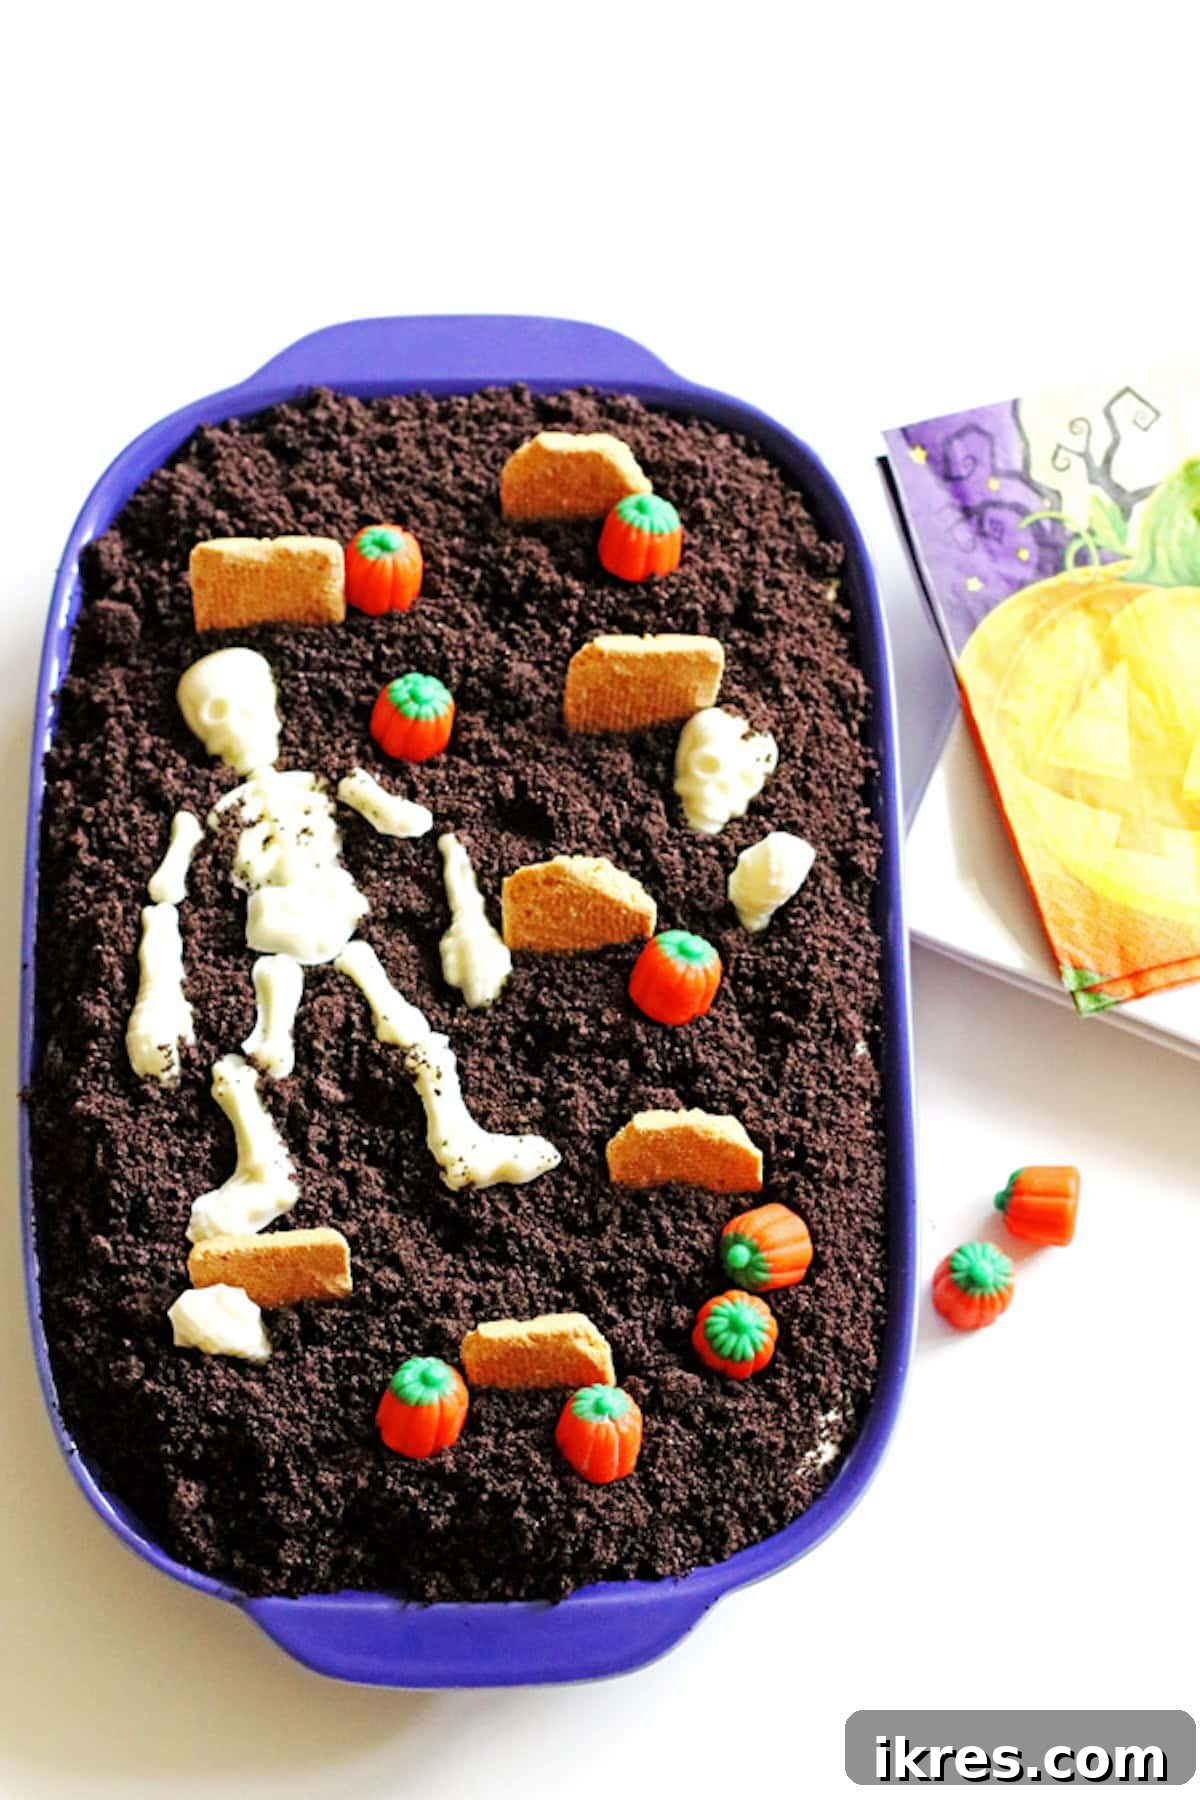
For a thrilling Halloween Dirt Cake, you can conjure up a spooky graveyard scene. Envision edible cookie tombstones rising from the dark “dirt,” surrounded by cheerful candy pumpkins and perhaps even a chilling candy skeleton, making it a delightfully ghoulish centerpiece for your festive spread.
For a bright and cheerful Easter Dirt Cake, imagine a blossoming spring garden. Adorn your “dirt” with adorable bunny Peeps, scattering vibrant candy eggs, and adding a lush layer of shredded coconut colored green to resemble fresh, spring grass. It transforms into an inviting landscape ready for an Easter bunny to explore.
Why This Dirt Cake Recipe Will Be Your Go-To Dessert
Our Dirt Cake recipe isn’t just another dessert; it’s a celebration of simplicity, flavor, and family fun. Here’s why it consistently wins rave reviews and becomes a cherished tradition:
- It is a no-bake dessert, making it an absolute lifesaver when oven space is limited or when you want to avoid heating up your kitchen. This means less time fussing and more time enjoying!
- It is exceptionally kid-friendly, both in its preparation and its appeal. Children are utterly captivated by its playful theme and delicious taste. Plus, involving them in the decorating process is a fantastic way to foster their creativity and get them excited about helping in the kitchen.
- You only need a handful of essential ingredients to create the foundational Dirt Cake. The primary components are just four simple items, with edible decorations being an additional, optional expense depending on how elaborate you want your themed masterpiece to be. This keeps the recipe budget-friendly and accessible.
- It is an incredibly fun and engaging dessert to make. Let your creative juices flow freely as you design and decorate. The hands-on nature of this recipe, particularly the decorating phase, makes for a memorable family activity, allowing everyone to contribute to a shared, delicious project.
- The versatility of Dirt Cake extends far beyond holidays. While it shines brightly for Easter and Halloween, it can be easily adapted for birthdays, garden parties, or any occasion where a unique and tasty dessert is desired. Change the decorations, and you have a brand-new theme!
- This recipe is perfect for last-minute gatherings. With minimal prep and no baking required, you can whip up a batch quickly, allowing you more time to focus on other party preparations or simply relax.
Essential Grocery Shopping List:
Gathering your ingredients for Dirt Cake is a straightforward task. Here’s what you’ll need to create this delightful treat, along with suggestions for festive embellishments:
- Vanilla Instant Pudding: Two 3.4-ounce packages. While vanilla offers a classic contrast to the chocolate cookies, feel free to experiment with other instant pudding flavors like chocolate or butterscotch for a different twist.
- Milk: Four cups of cold milk. We typically use skim milk, but any milk of your choice will work beautifully to create the creamy pudding base.
- Cool Whip: One 8-ounce container, thawed. This adds a light, airy texture to the pudding mixture, making it incredibly luscious.
- Chocolate Sandwich Cookies: One 15-ounce package of Oreo’s or a similar brand. These are crucial for creating the iconic “dirt” layer.
- For Halloween-themed Dirt Cake, your decorative arsenal should include candy pumpkins, square or rectangular cookies (like Vienna Fingers) for crafting tombstones, and white chocolate chips (about ½ cup) if you plan on molding an edible skeleton.
- For an enchanting Easter Dirt Cake, stock up on bunny Peeps, colorful candy eggs (M&M’s work wonderfully), one cup of shredded coconut, and green food coloring to create vibrant grass.
While we specifically delve into decorating ideas for Halloween and Easter, remember that the creative possibilities for this dessert are truly boundless. These two festive themes are just the beginning, offering a glimpse into how easily you can customize your Dirt Cake for any special occasion or personal preference.
Crafting Your Delicious Dirt Cake: A Step-by-Step Guide
Creating this fun and flavorful no-bake dessert is incredibly simple. Follow these steps for a perfect Dirt Cake every time:
Step 1: Prepare the Pudding Base. In a large mixing bowl, whisk together the vanilla instant pudding mix and four cups of cold milk. Continue whisking for about two minutes until the mixture is smooth and begins to thicken. Allow the pudding to sit undisturbed for five minutes to fully set and achieve its creamy consistency.
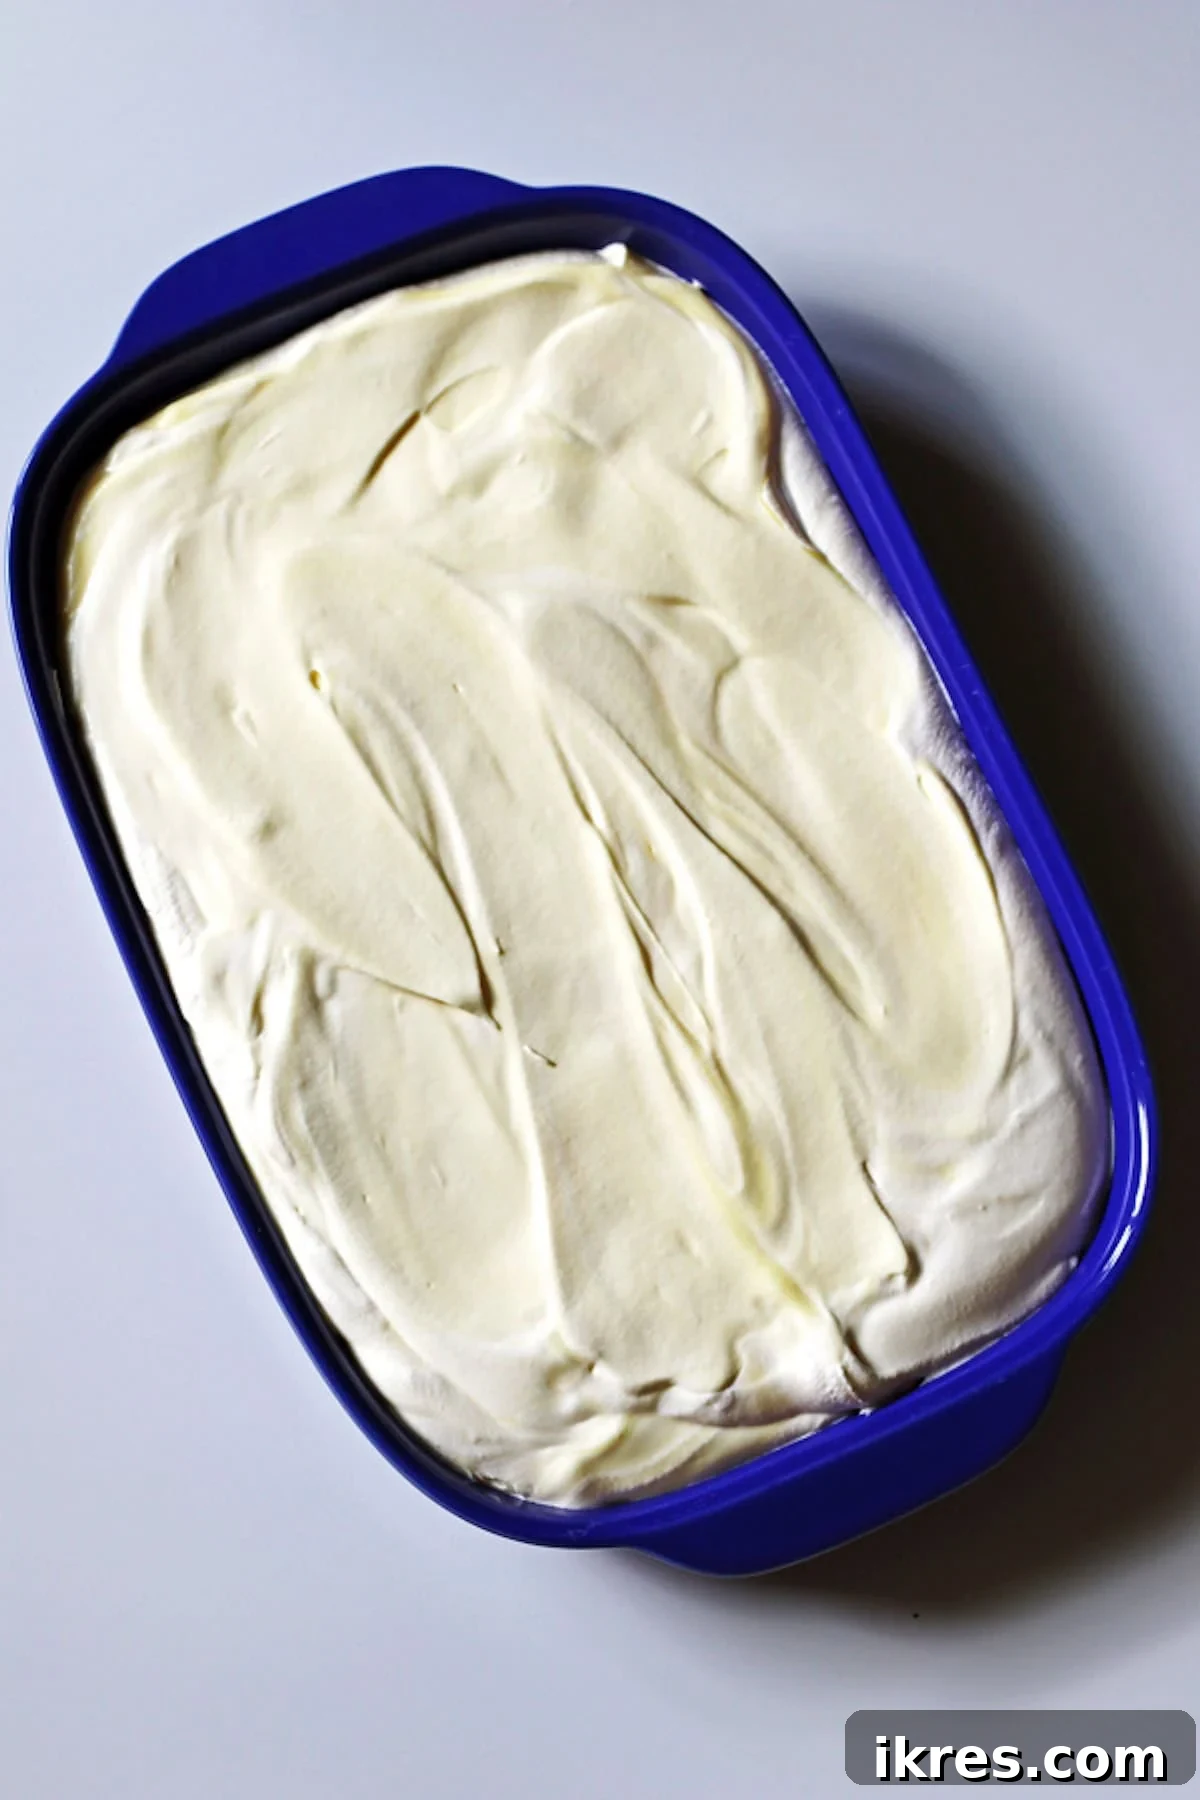
Step 2: Incorporate the Cool Whip. Once the pudding has set, gently fold in the thawed Cool Whip using a large spoon or a spatula. Be careful not to overmix; aim for a light and airy consistency that combines both elements seamlessly.

Step 3: Spread the Pudding Mixture. Carefully scoop the combined pudding and Cool Whip mixture into a 13×9 inch baking pan. Use your spoon or spatula to spread it out evenly across the bottom of the pan, creating a smooth and consistent layer. If a 13×9 inch pan isn’t available, a pan of similar size, such as a lasagna pan or a disposable aluminum baking dish, will work just as well.
Step 4: Prepare the “Dirt” Layer. Next, it’s time to create the iconic chocolate “dirt.” Take your chocolate sandwich cookies and crush them until they resemble fine, dark crumbs. A blender is the quickest and most efficient tool for this, achieving a perfectly fine, soil-like texture. Simply place all the cookies in the blender and pulse until you have uniform crumbs. This step can be done while the pudding is setting to save time.
Recipe Tip for Crushing Cookies
Don’t have a blender? No problem! You can still achieve perfectly crushed cookies. Simply place the entire package of chocolate sandwich cookies into a large, sealed Ziploc bag. Use a rolling pin to roll over the cookies, applying firm pressure, until they break down into fine crumbs. Flip the bag over a few times and continue rolling to ensure all cookies are thoroughly crushed. While a blender offers speed and consistency, the rolling pin method is a great alternative that also lets out a little stress!
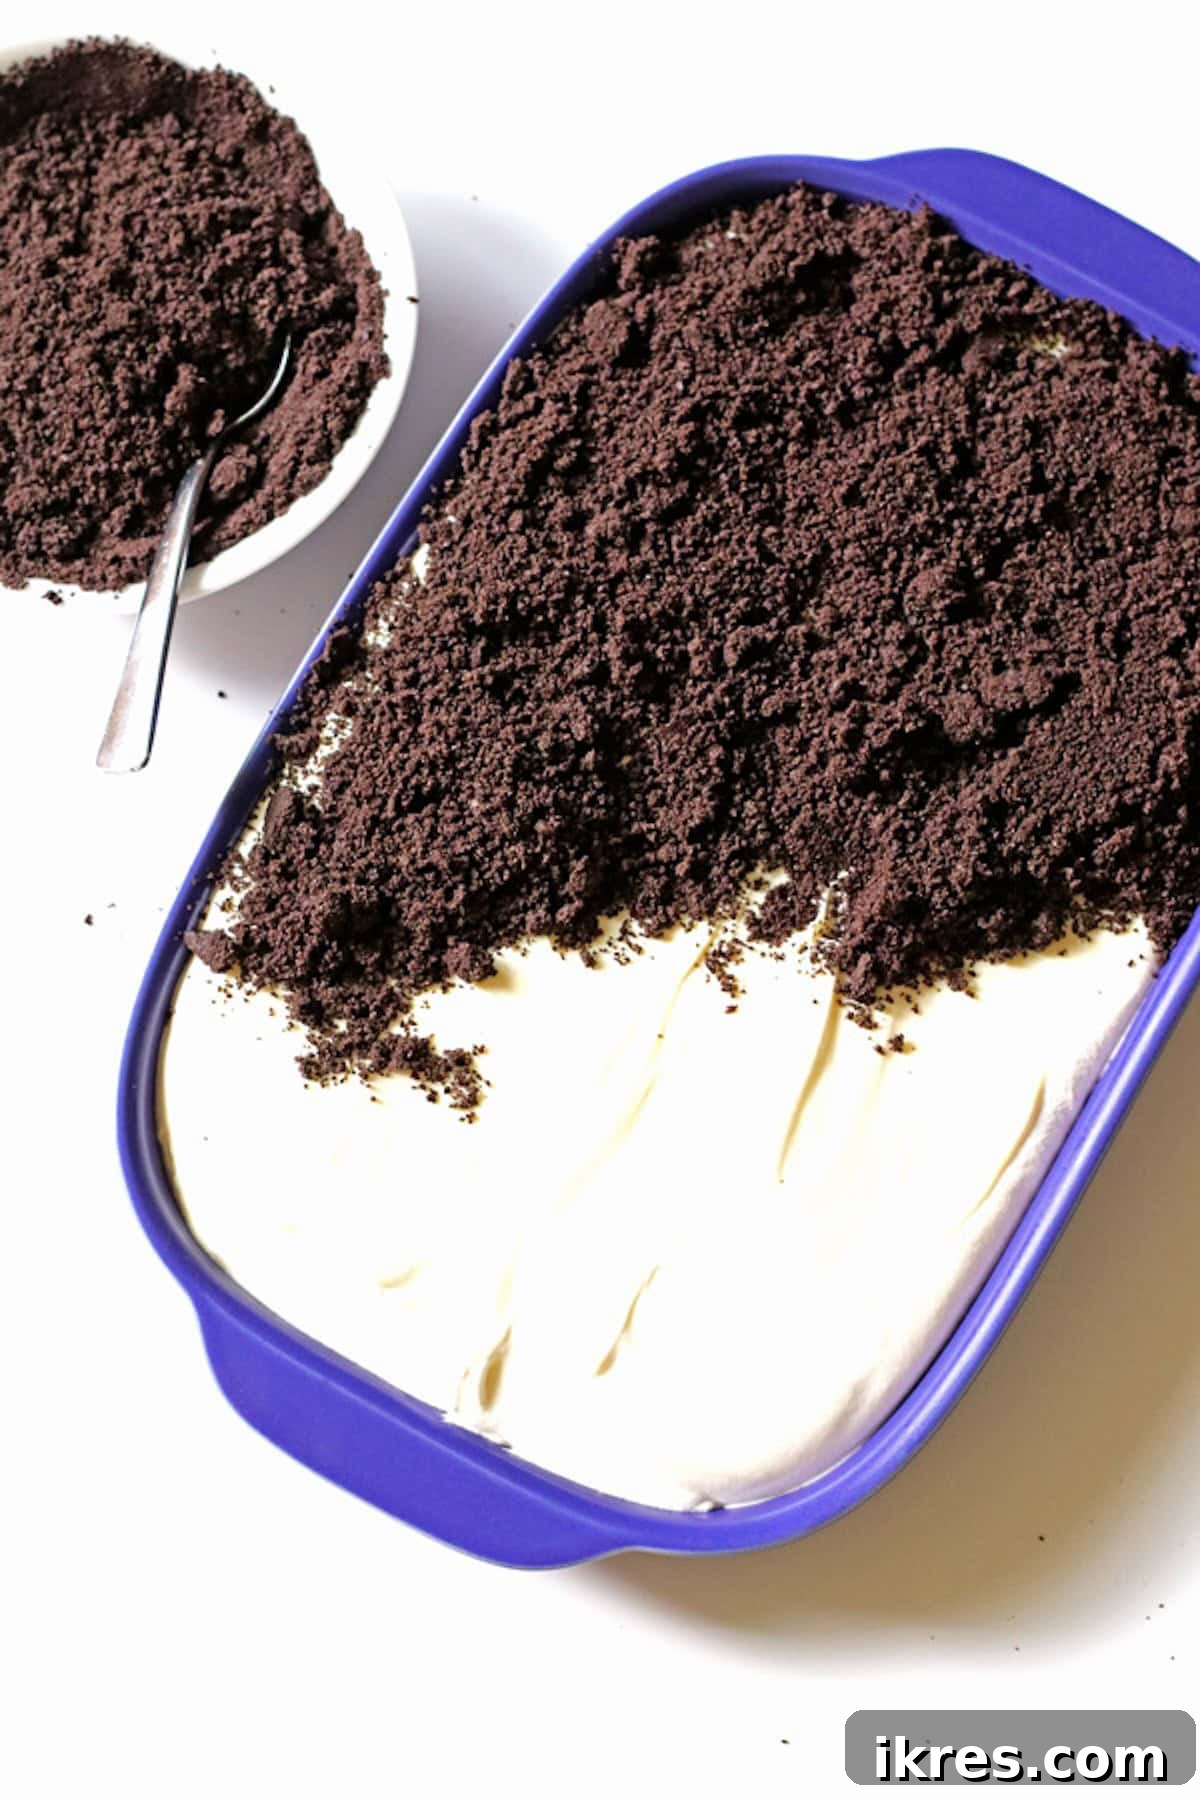
Step 5: Assemble the Dirt Cake. Once your cookies are crushed to perfection, use a spoon to evenly sprinkle the “dirt” over the entire surface of the pudding mixture in the pan. Ensure a generous and uniform layer, completely covering the creamy base. This creates the visual foundation for all your delightful decorations.
Unleash Your Creativity: How to Decorate a Dirt Cake
The moment has arrived for the most enjoyable part of this recipe: decorating your Dirt Cake! This is where your imagination can truly run wild, transforming a simple dessert into a themed spectacle. It’s also an absolutely fantastic activity for kids, encouraging them to get hands-on and involved in the kitchen, making cherished memories together.
You have flexibility with the timing of your decorations. You can choose to decorate the cake immediately after assembly and then place it in the refrigerator to chill until you’re ready to serve. Alternatively, for the freshest look, you can decorate it just before serving. Either way, the result will be a show-stopping dessert!
Spooktacular Halloween Dirt Cake Decorations
Get ready to cast a delicious spell with your Halloween Dirt Cake! This festive rendition is a perennial reader favorite during the Halloween season, and for good reason—it’s eerily easy and delightfully fun to create. Transform your ordinary Dirt Cake into a ghoulish graveyard scene that will thrill your guests.
Crafting a Spooky White Chocolate Skeleton
To add a truly eerie touch, we’ll craft a white chocolate skeleton to emerge from the “dirt.” For this, you’ll need a Halloween-themed candy mold. I find that a half cup of white chocolate chips is typically sufficient to fill most skeleton molds. When selecting molds, the older-school plastic candy molds often work better than newer rubber ones, as rubber molds can sometimes lead to broken bones when unmolding. These plastic molds are often available at craft stores like Hobby Lobby, party supply stores, or online if you have time for shipping.
How to Perfectly Melt White Chocolate Chips
Melting white chocolate chips is simple. Place your white chocolate chips in a microwave-safe dish. Heat them on high for 30 seconds, then stir thoroughly. If they haven’t completely melted into a smooth, creamy consistency, continue heating in additional 15-second increments, stirring well after each interval, until fully melted. Be careful not to overheat, as white chocolate can seize.
Once melted, use a spoon to carefully fill each section of your skeleton candy mold with the liquid white chocolate. Wipe off any excess chocolate from the edges of the mold with a paper towel to ensure clean edges. Then, place the mold in the refrigerator to set, which usually takes about 30 minutes. The candy is ready when it easily pops out of the mold.
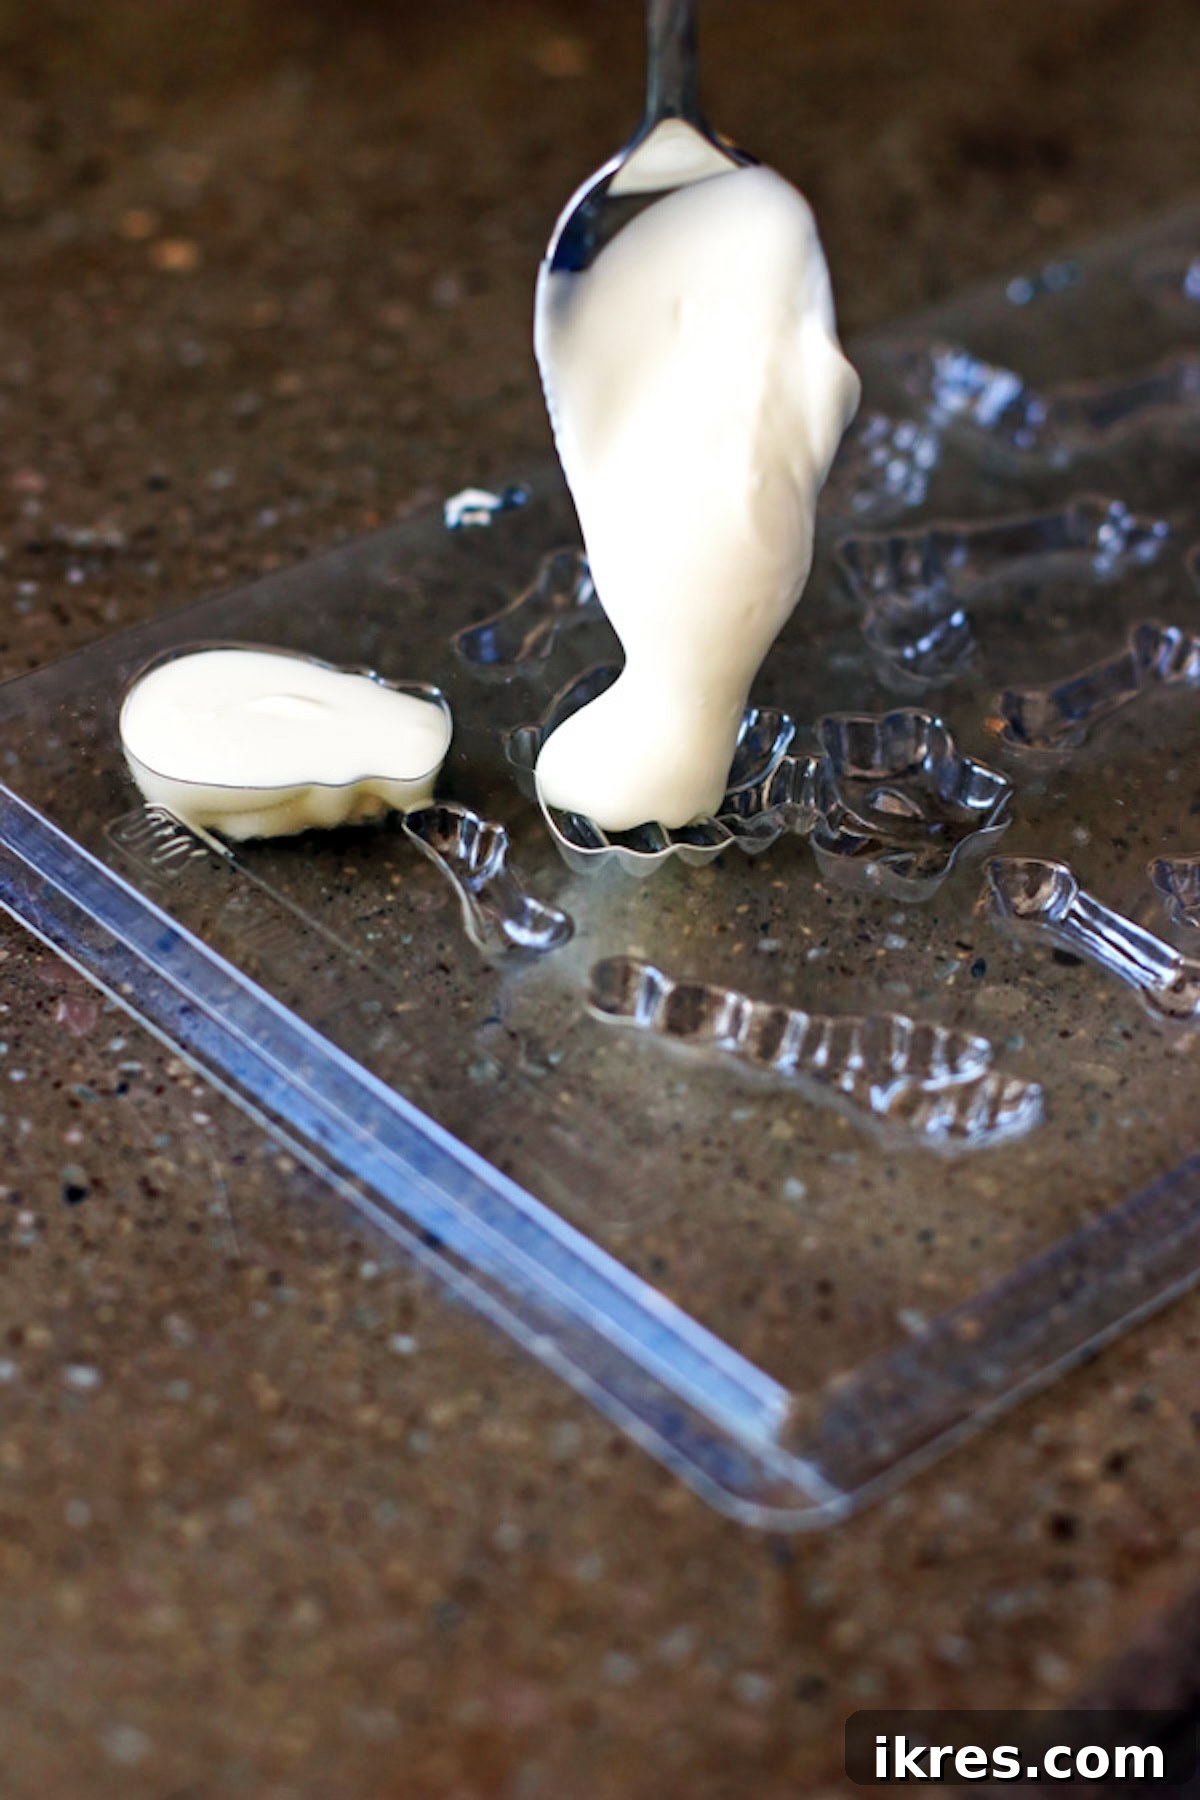
To remove the set candy, gently flip the mold upside down over a clean kitchen counter or table. Hold it close to the surface to prevent the delicate candy pieces from breaking upon impact. You might need to slightly bend or gently tap the mold to encourage the pieces to release. If any pieces are stubborn, return the mold to the refrigerator for another 20-30 minutes, as colder chocolate releases more easily.
Once freed, carefully arrange your white chocolate skeleton pieces onto the Dirt Cake. You can assemble them to form a full skeleton or scatter individual “bones” for a more fragmented, unearthed look. Have fun positioning them to create your desired spooky effect!
Decorating Tip for an Extra Spooky Look
To give your Halloween Dirt Cake an even more spine-chilling appearance, position some of the skeleton pieces partially submerged in the “dirt” and partially exposed, as if they are dramatically emerging from the ground. For an added touch of eerie authenticity, lightly sprinkle a few cookie crumbs over the exposed skeleton parts, making them appear ancient and integrated into the graveyard soil.
Creating Realistic Cookie Tombstones
For the tombstones, select rectangular or square-shaped cookies. Classic varieties like Vienna Fingers work exceptionally well due to their shape and texture, but any similar cookie you find at your local grocery store will be perfect. This is a fantastic task to involve your children in, allowing them to personalize each tombstone.
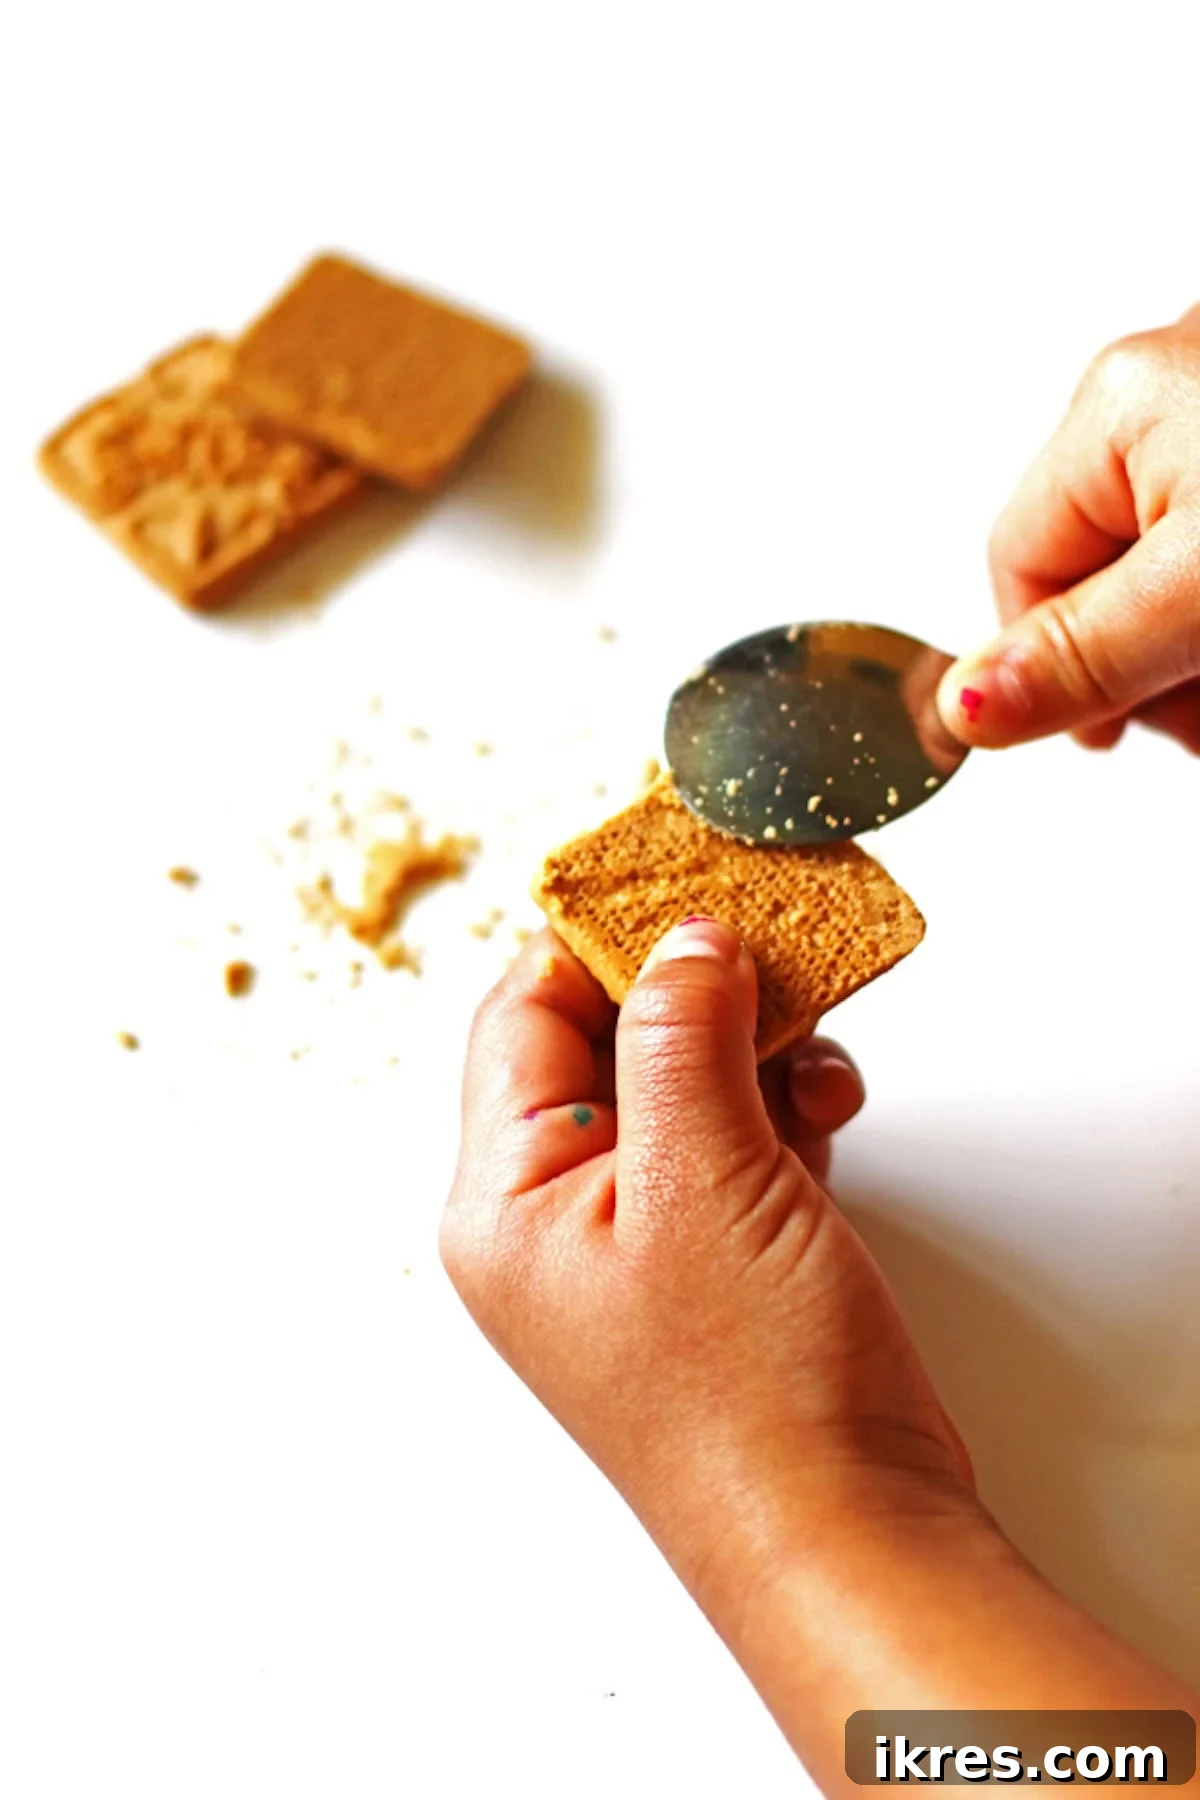
To give the cookies an aged, weathered tombstone look, gently break off a tiny piece from each of the corners. Then, use a spoon to delicately scrape and rough up the edges of the cookies. This simple technique transforms a plain cookie into an ancient-looking monument, adding character to your graveyard scene.
Finally, complete your Halloween masterpiece by adding delightful candy pumpkins or any other edible spooky decorations you fancy. Arrange them strategically among the tombstones and skeleton pieces to create a vibrant and festive Halloween scene. This step is also wonderfully engaging for kids, letting their imaginations run wild as they bring the graveyard to life!
Charming Easter Dirt Cake Decorations
Transforming your Dirt Cake into a cheerful Easter scene is both fun and remarkably simple, resulting in an absolutely adorable holiday dessert! You can have this charming centerpiece ready in as little as thirty minutes, making it ideal for busy spring celebrations. This festive Dirt Cake will add a touch of whimsy and sweetness to your Easter feast, delighting everyone with its vibrant colors and playful theme.
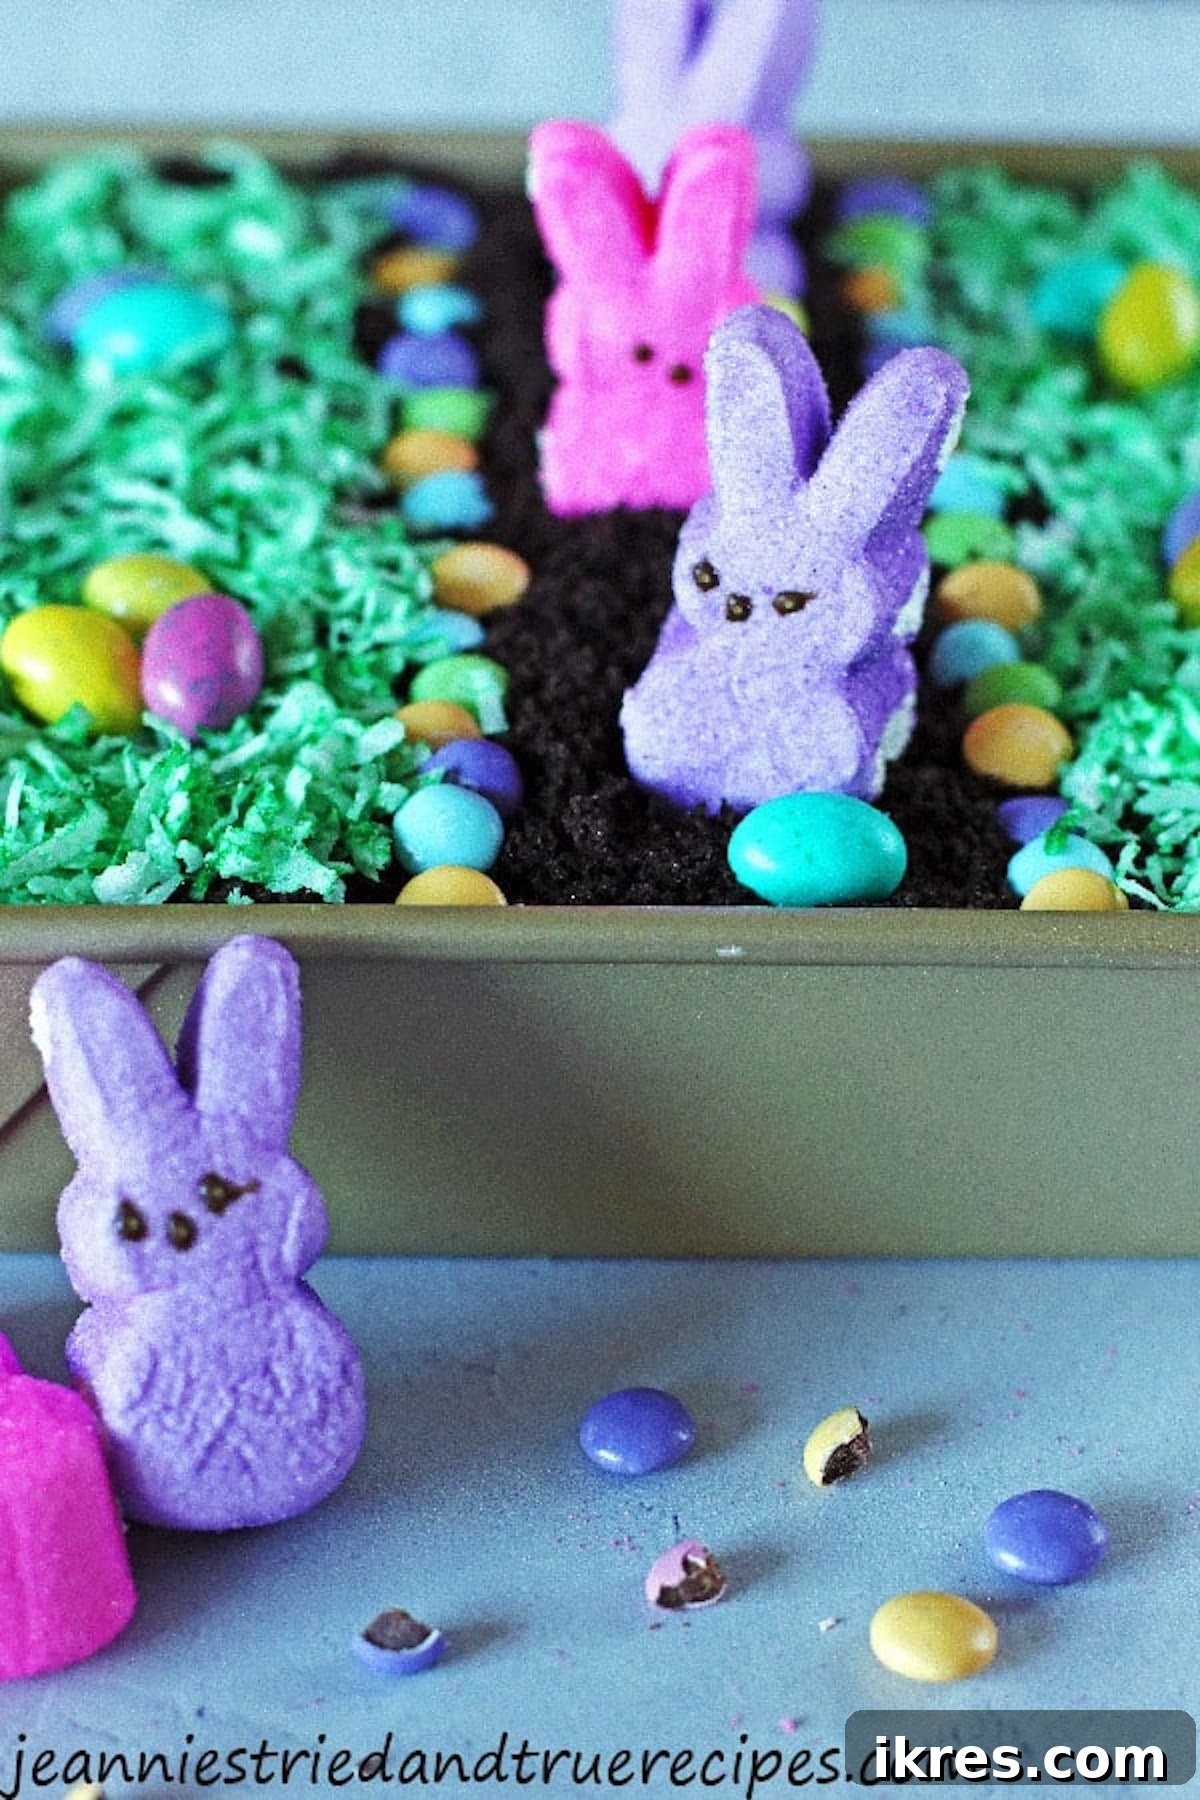
- Creating Lush Green Grass: To bring your Easter garden to life, start by making vibrant green grass. In a bowl, combine about one cup of shredded coconut with 4-5 drops of green food coloring. Mix the ingredients thoroughly with a spoon until all the coconut is evenly coated and transformed into a beautiful shade of green. You can add more food coloring if you desire a deeper, more intense green.
- Designing a Candy Pathway (Optional but Recommended): Before adding your green coconut “grass” to the cake, consider creating an edging for a charming pathway using colorful M&M candies. Arrange the M&M’s in a line or pattern across a section of the cake. This not only adds visual appeal but also helps to contain the coconut and define distinct areas on your edible landscape.
- Adding the Green Coconut: Once your pathway (if using) is in place, gently sprinkle the green shredded coconut over the remaining “dirt” surface. Distribute it evenly to create a convincing grassy field.
- Populating Your Easter Garden: Finally, place cheerful bunny Peeps strategically across your green grass. Scatter a variety of colorful candy eggs, such as jelly beans or chocolate eggs, throughout the scene. And just like that, you have created one adorable, delicious, and utterly festive Easter dessert that’s sure to be a springtime hit!
Handy Recipe Tips for Success
To ensure your Dirt Cake-making experience is as smooth and enjoyable as possible, keep these helpful tips in mind:
- Prepare Decorations in Advance: For stress-free assembly, it’s highly beneficial to prepare your decorations ahead of time. If you’re creating a white chocolate skeleton for Halloween, remember it needs about 30 minutes to set in the refrigerator. Completing this step beforehand allows you to focus solely on the main cake assembly and then the final decorative touches without interruption.
- Precision for Small Skeleton Details: When filling intricate candy molds for your white chocolate skeleton, use a small amount of melted white chocolate on your spoon. This precision helps guide the chocolate into the tiny nooks and crannies of the mold, ensuring perfectly formed bones.
- Optimal Cookie Crushing: For the finest, most realistic “dirt” texture, a blender is your best friend. It quickly pulverizes chocolate sandwich cookies into uniform, fine crumbs. If a blender isn’t available, don’t despair! Place your cookies in a large, sealed Ziploc bag and use a rolling pin to crush them. Remember to flip the bag occasionally to ensure all cookies are thoroughly crushed.
- Proper Storage: Dirt Cake is a perishable dessert due to its dairy components. Any leftovers should be covered tightly and stored in the refrigerator. It will maintain its deliciousness for up to 3-4 days, making it a great dessert to enjoy over several days or to prepare a day in advance for an event.
This charming Dirt Cake recipe is truly a fantastic treat, perfectly suited for the festive energy of Halloween and the cheerful spirit of Easter.
Its irresistible flavor and playful design guarantee that both kids and adults will absolutely adore this dessert! It’s an ideal choice for any party, family gathering, or simply as a special homemade surprise.
Pin this now to find it later!
Pin It
Craving More Festive Holiday Desserts?
If you’ve enjoyed creating and devouring this whimsical Dirt Cake, you’re in for a treat! We have an array of other beloved holiday dessert recipes that are just as fun and simple to prepare, perfect for any seasonal celebration.
Why not try our festive Rice Krispie Easter Eggs, spooky Peanut Butter Spider Cookies for Halloween, charming Thanksgiving Pilgrim Hat Cookies, or our delightful Rice Krispie Treat Christmas Trees? Each recipe is designed to bring joy and deliciousness to your holiday table with ease.
Did you whip up this fantastic recipe? We’d absolutely love to hear from you! Please leave a comment and rating below to share your experience. Your feedback brightens our day!
Pin
Text

Dirt Cake for Easter and Halloween
Jeannie Z
12
30 mins
1 hr
1 hr 30 mins
Ingredients
- 2 packages vanilla instant pudding (3.4 ounce boxes)
- 4 cups cold milk
- 1 8 oz Cool Whip container (thawed)
- 1 package chocolate sandwich cookies like Oreo’s, crushed (15 ounce package)
Decoration Suggestions for Halloween Dirt Cake
- candy pumpkins
- square or rectangular cookies for tombstones
To make candy skeleton
- ½ cup white chocolate chips
Decoration Suggestions for Easter Dirt Cake
- Peeps (bunnies work great)
- candy eggs (M&M’s are a good choice)
- M&M candy (for borders/pathways)
- 1 cup shredded coconut
- green food coloring
Instructions
- In a large bowl, combine the vanilla instant pudding and cold milk. Whisk for two minutes until smooth. Let it sit for five minutes to set.
- While the pudding sets, crush the chocolate sandwich cookies in a blender until they are very fine crumbs. Set them aside.
- Add the thawed Cool Whip to the pudding mixture and gently combine the ingredients with a large spoon or spatula.
- Scoop the pudding mixture into a 13×9 inch pan (or similar size pan) and spread it out evenly.
- Evenly sprinkle the crushed cookies over the pudding layer to create the “dirt.”
- Now for the fun part: decorate the cake as desired. Gently place all your chosen decorations on top of the “dirt” layer.
- Keep the finished Dirt Cake chilled in the refrigerator until you are ready to serve it.
To Make the Skeleton (for Halloween)
- Place ½ cup white chocolate chips in a microwave-safe bowl. Heat them on high for 30 seconds. Stir, and if needed, heat for additional 15-second increments, stirring after each, until the white chocolate is completely melted and creamy.
- Using a spoon, carefully drizzle the melted white chocolate into a skeleton candy mold.
- Once all sections of the candy mold are filled, place it in your refrigerator to set for about 30 minutes. When fully set, the candy will pop out easily.
- Gently place the skeleton pieces on the Dirt Cake, either assembling them as a full skeleton or having them partially emerge from the “dirt.”
To Make the Green Grass (for Easter)
- Combine 1 cup of shredded coconut and 4-5 drops of green food coloring in a bowl. Mix together with a spoon until all the coconut is uniformly green. Add more food coloring if a darker shade is desired.
Notes
Recipe Tips
- It helps to get the decorations ready ahead of time. If you are making the skeleton for Halloween, you’ll want to do that in advance since it takes at least 30 minutes to set.
- When making the candy skeleton, use a small amount of melted white chocolate chips on your spoon for the smaller sections. This helps to get the melted white chocolate into the small areas of the candy mold precisely.
- Use a blender to crush the cookies into fine crumbs for the best “dirt” results. If you don’t have a blender, then place the cookies into a large sealed bag and roll over them with a rolling pin until finely crushed.
- Ensure any leftovers are stored in the refrigerator for up to 3-4 days to maintain freshness.
For the Skeletons:
The older-school plastic candy molds are often preferred for skeletons as they tend to yield more intact pieces than some newer rubber molds. These can sometimes be found in party stores, craft stores, or at Hobby Lobby (which also often carries tombstone-style cookies).
Nutrition information is approximate and is automatically calculated, so should only be used as a guide.
Dessert
American
no bake dessert, dirt cake, Halloween dessert, Easter dessert
Enjoyed this recipe? Leave a comment below!
Frequently Asked Questions
Absolutely! This dessert is a fantastic make-ahead option. You can prepare it the night before or earlier on the day you plan to serve it. Just ensure it’s kept well-chilled in your refrigerator until serving time.
You have two great options for decorating. You can decorate the Dirt Cake right after assembling it and then refrigerate it, allowing the flavors to meld beautifully. Alternatively, for the freshest and most vibrant presentation, you can decorate it just before serving. Both methods work perfectly!
To keep your Dirt Cake fresh and delicious, always store it in the refrigerator. Make sure it’s covered tightly with plastic wrap or in an airtight container to prevent it from drying out or absorbing other odors from the fridge. It will stay good for 3-4 days.
Yes, that’s a wonderful idea and a particularly fun way to serve Dirt Cake! Instead of a large pan, layer the pudding mixture and cookie crumbs into individual clear cups or small Mason jars. Then, decorate each cup individually. This makes for charming and easy-to-serve portions, perfect for parties!
Certainly! While our recipe highlights vanilla pudding for a classic taste that beautifully complements the chocolate cookies, feel free to use your favorite instant pudding flavor. If you’re a chocolate lover, chocolate pudding would be a delicious choice. Experiment to find your preferred combination!
Update Note: This recipe was originally posted in 2018. It was updated in 2021 to include more detailed step-by-step directions, enhanced tips, and fresh new photos to improve your cooking and decorating experience.