
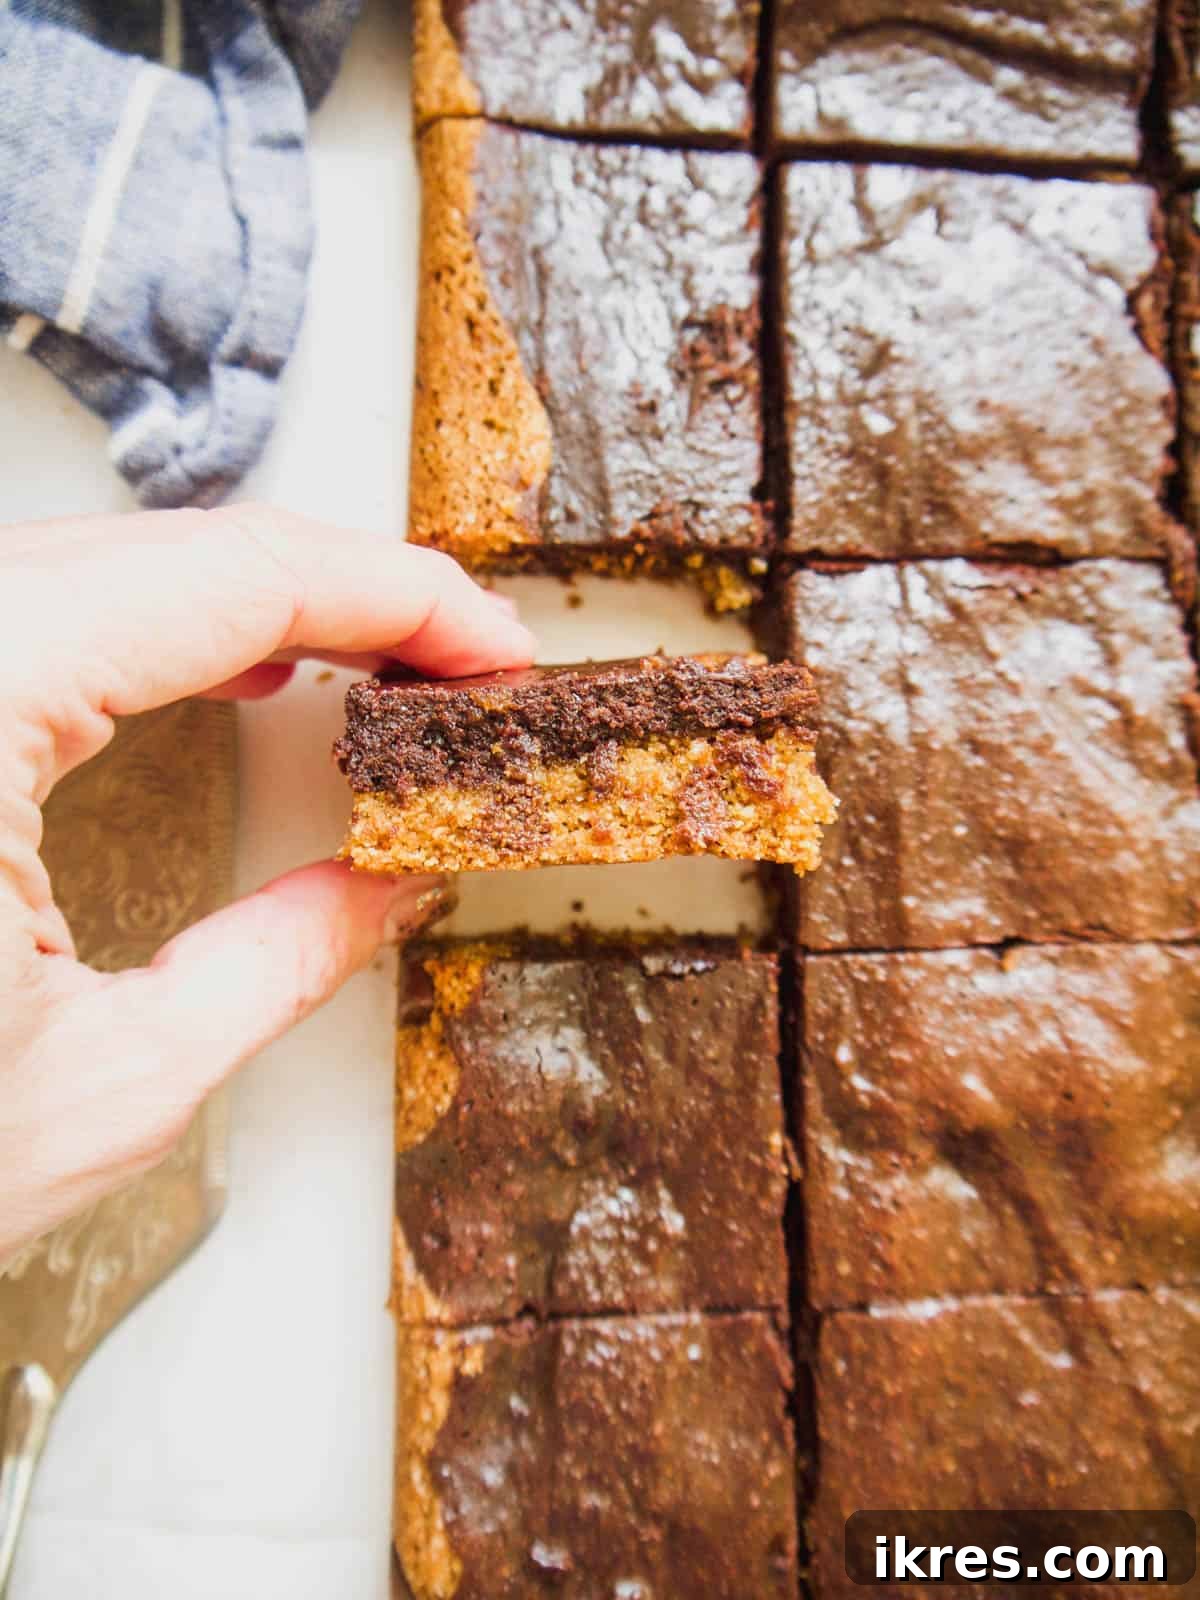
Ultimate Healthy Brookie Recipe: Paleo, Gluten-Free & Dairy-Free Brownie Cookie Bars
Prepare to indulge in the perfect fusion of two classic desserts: the rich, fudgy brownie and the soft, chewy cookie. This innovative **healthy brookie recipe** brings you the best of both worlds in one incredible bar, all while being naturally **Paleo, gluten-free, and dairy-free**. Say goodbye to refined flours and sugars, and hello to a wholesome treat that satisfies every craving.
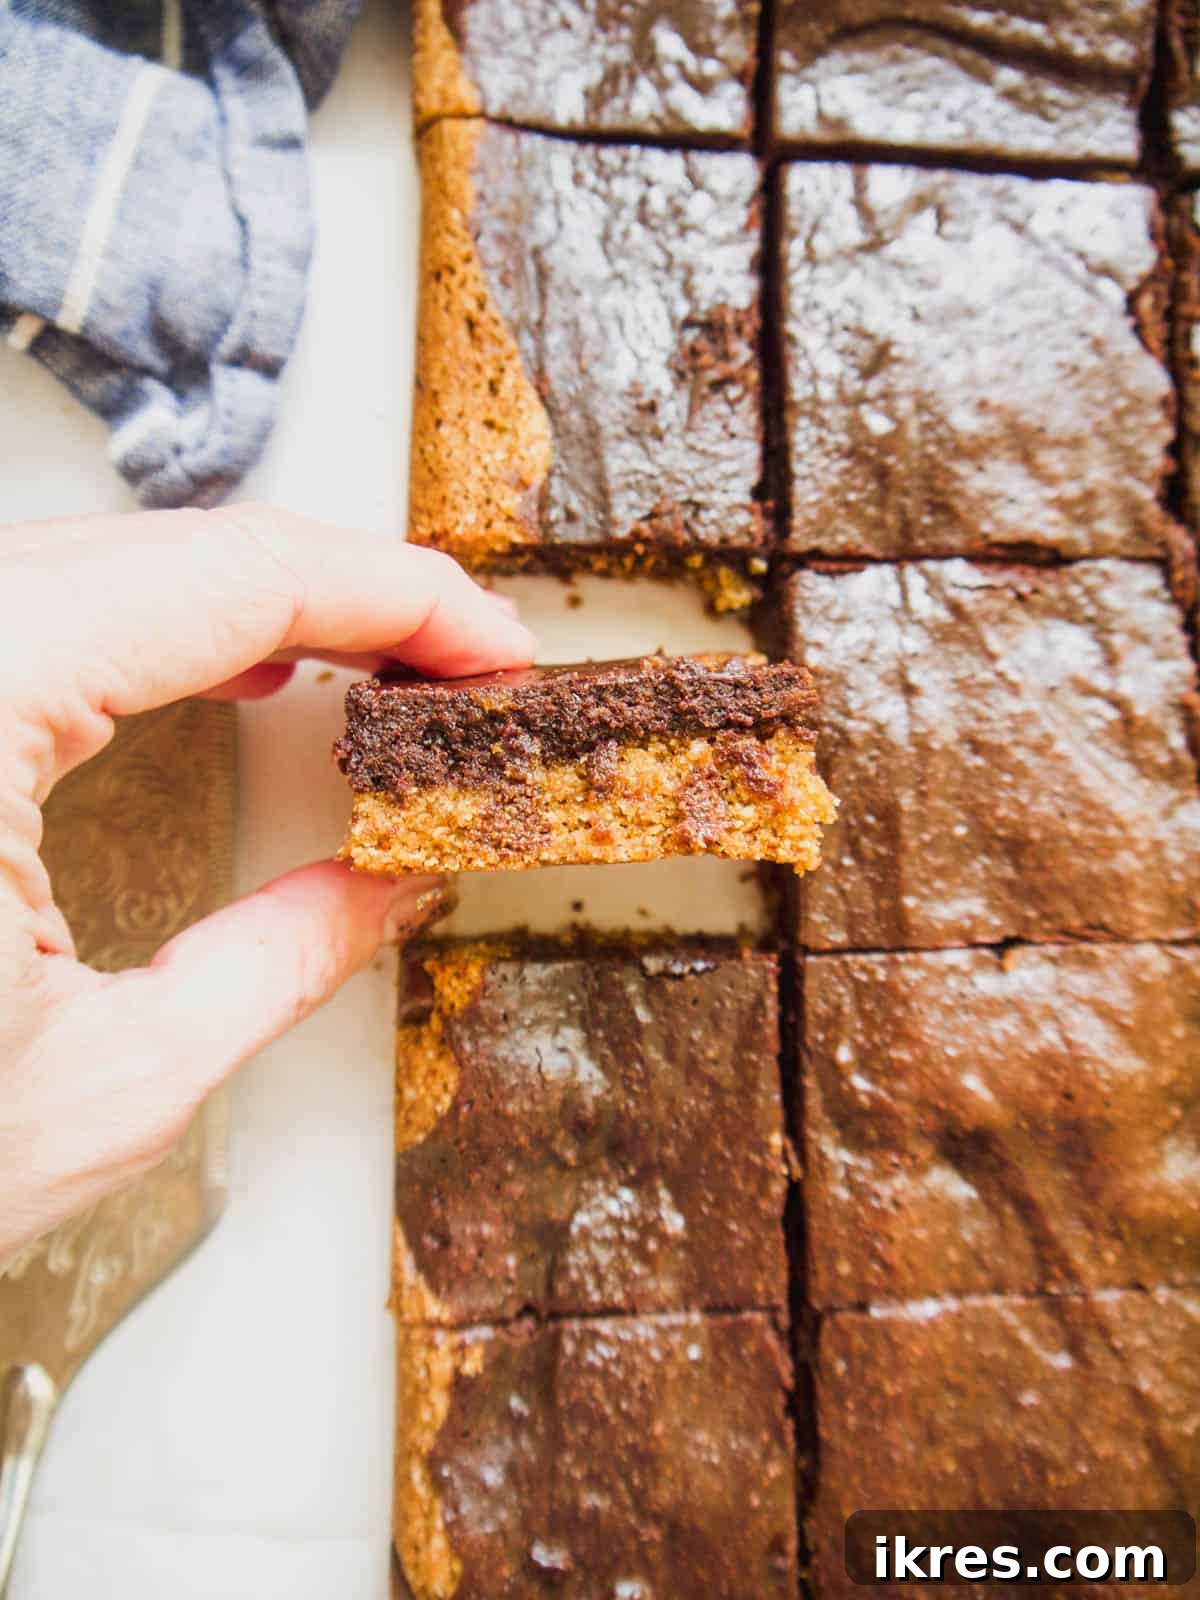
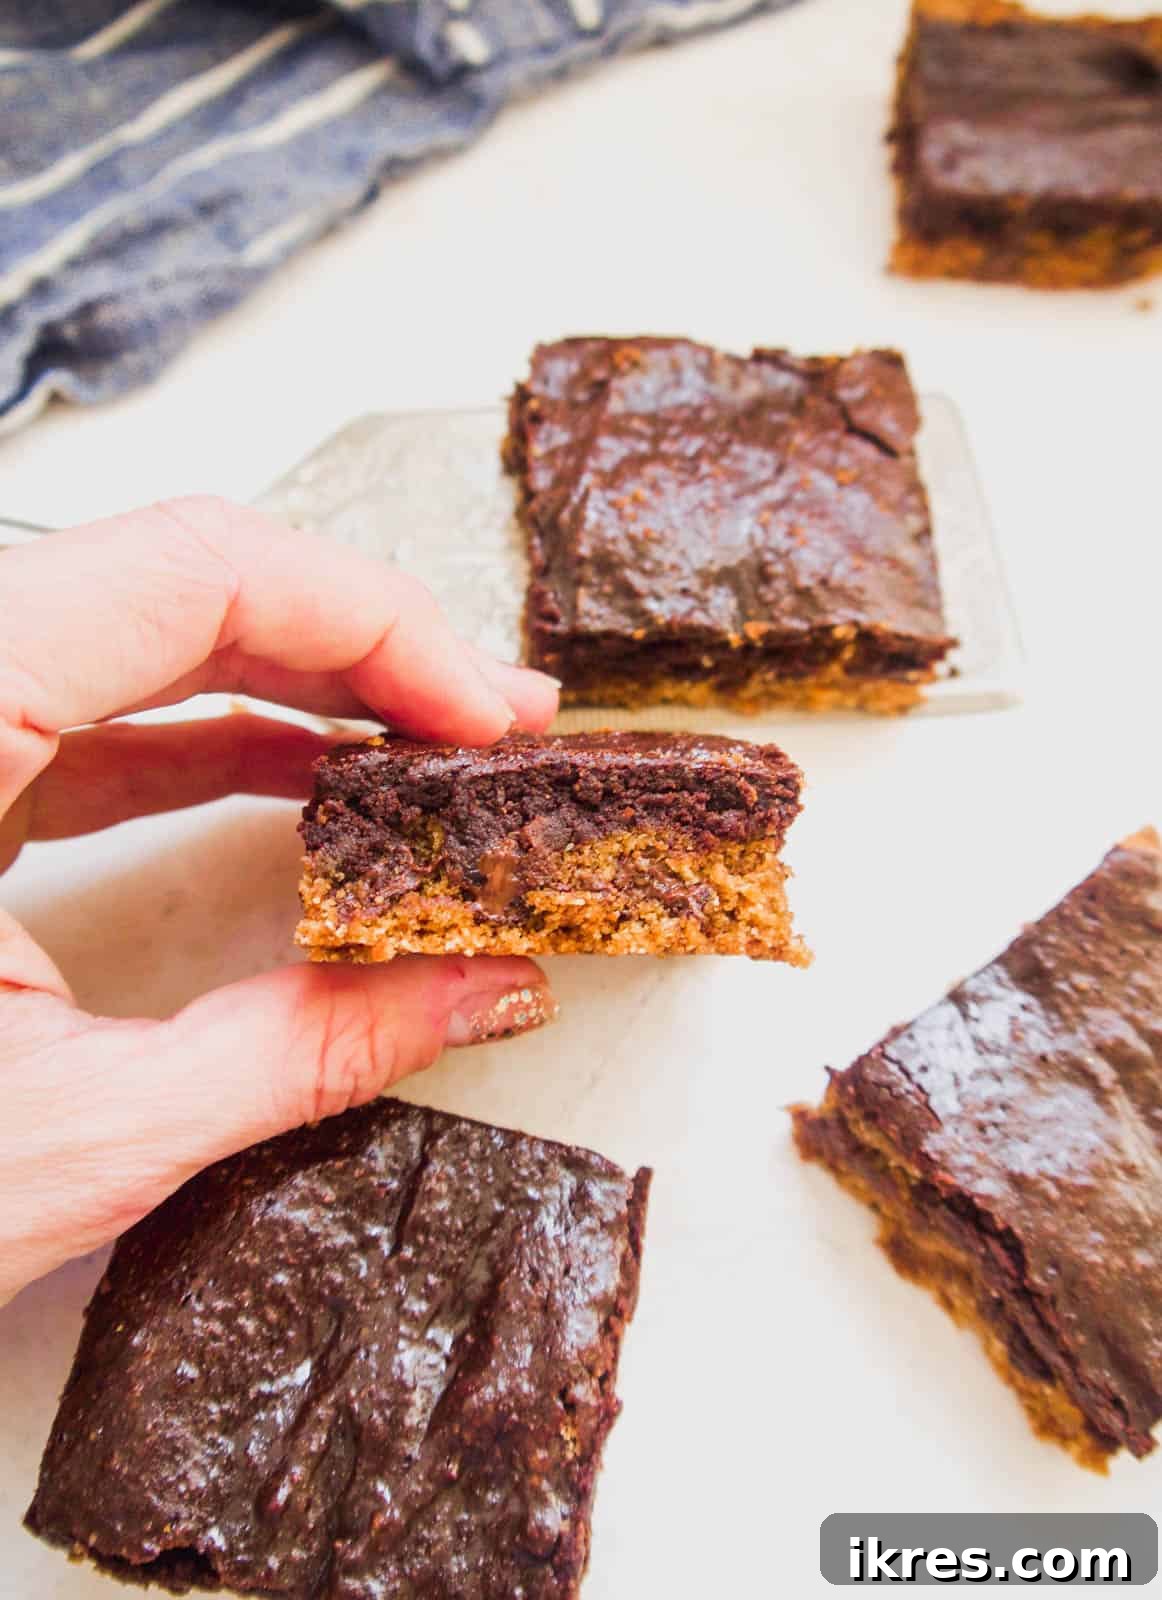
If you’ve never experienced the magic of a brookie, you’re in for an absolute delight! Imagine a luscious layer of your favorite cookie dough, generously topped with a decadent brownie batter. Baked together, they transform into an irresistible dessert bar, delivering a harmonious blend of textures and flavors. Each bite offers the comforting chewiness of a cookie, followed by the deep, chocolatey richness of a brownie. It’s a culinary creation that promises to become your new go-to treat for any occasion, whether it’s a casual snack or a special celebration.
What makes this particular recipe truly exceptional is its commitment to wholesome, dietary-friendly ingredients. We’ve crafted these **Paleo brownie cookie bars** to be completely **gluten-free, dairy-free, refined flour-free, and refined sugar-free**. This means you can enjoy a truly guilt-free indulgence, perfect for those with specific dietary needs or anyone looking to make healthier choices without sacrificing taste. These aren’t just “good for you” brookies; they are genuinely delicious, full-flavored treats that will impress even the most discerning palates with their rich taste and satisfying texture. Get ready to bake a dessert that’s both nourishing and incredibly tasty!
Table of Contents
- Why You’ll Love This Healthy Brookie Recipe
- Essential Ingredients for Your Brookies
- Easy Step-by-Step Baking Guide
- Frequently Asked Questions About Brookies
- More Healthy Dessert Recipes to Explore
- The Full Healthy Brookie Recipe (Brownie Cookie Bars)
Why You’ll Love This Healthy Brookie Recipe
This isn’t just another dessert recipe; it’s a game-changer for anyone who loves rich, satisfying treats but also values wholesome ingredients. Here are several compelling reasons why these **healthy brownie cookie bars** will become a staple in your kitchen:
-
The Ultimate Dessert Hybrid: Half Brownie, Half Cookie!
Why choose between a gooey brownie and a soft, chewy cookie when you can have both? This recipe artfully combines the best characteristics of each, creating a multi-layered masterpiece. The bottom layer features our incredibly popular Paleo Chocolate Chip Cookie Bar recipe, providing a delightful chew and classic cookie flavor. On top, a rich, fudgy brownie layer completes the experience, offering a complexity of texture and taste that’s simply unmatched. It’s a delightful surprise in every bite, promising a perfect blend of gooey and chewy in one harmonious treat.
-
Crafted with Wholesome, Healthier Ingredients
One of the standout features of these brookies is their commitment to health. We’ve meticulously selected ingredients that are not only delicious but also offer nutritional benefits. This means you get to enjoy a decadent dessert without the guilt often associated with traditional baked goods. We prioritize natural sweeteners like coconut sugar, healthy fats such as olive oil, and nutrient-dense alternative flours like almond and tapioca, ensuring every component contributes positively to your well-being. This focus on quality ingredients makes these brookies a smart choice for a healthier lifestyle.
-
Perfect for Gatherings, Parties, and Meal Prep
Whether you’re hosting a potluck, celebrating a birthday, or simply need a crowd-pleasing treat, these brookies are an excellent choice. Their bar format makes them incredibly easy to prepare, serve, and transport. They’re a fantastic conversation starter and a delightful addition to any dessert spread, sure to impress friends and family. Plus, their wholesome nature means you can confidently share them with guests who have various dietary preferences or restrictions. They also make a great treat to prepare at the beginning of the week for guilt-free snacking and easy portion control.
-
Ideal for Dairy-Free, Gluten-Free, and Paleo Lifestyles
For those following specific dietary paths, finding truly delicious and satisfying desserts can be a challenge. This recipe eliminates that hurdle by being inherently **dairy-free, gluten-free, and Paleo-friendly**. We avoid common allergens and inflammatory ingredients such as conventional flour, butter, and refined sugars, ensuring that everyone can enjoy these treats without worry. This makes them a fantastic option for families with diverse dietary needs, allowing everyone to partake in a delightful dessert experience together.
-
Simple & Accessible: Only Requires 10 Core Ingredients!
Despite their sophisticated taste and impressive health credentials, these brookies are surprisingly simple to make. You won’t need an endless list of exotic items. With just 10 core ingredients (plus a few pantry staples for each layer), you can whip up a batch of these extraordinary bars. This simplicity makes the recipe accessible even for novice bakers, proving that healthy and delicious baking doesn’t have to be complicated or time-consuming. You’ll be amazed at how easily these gourmet-level treats come together in your own kitchen.
Essential Ingredients for Your Healthy Brookie Recipe
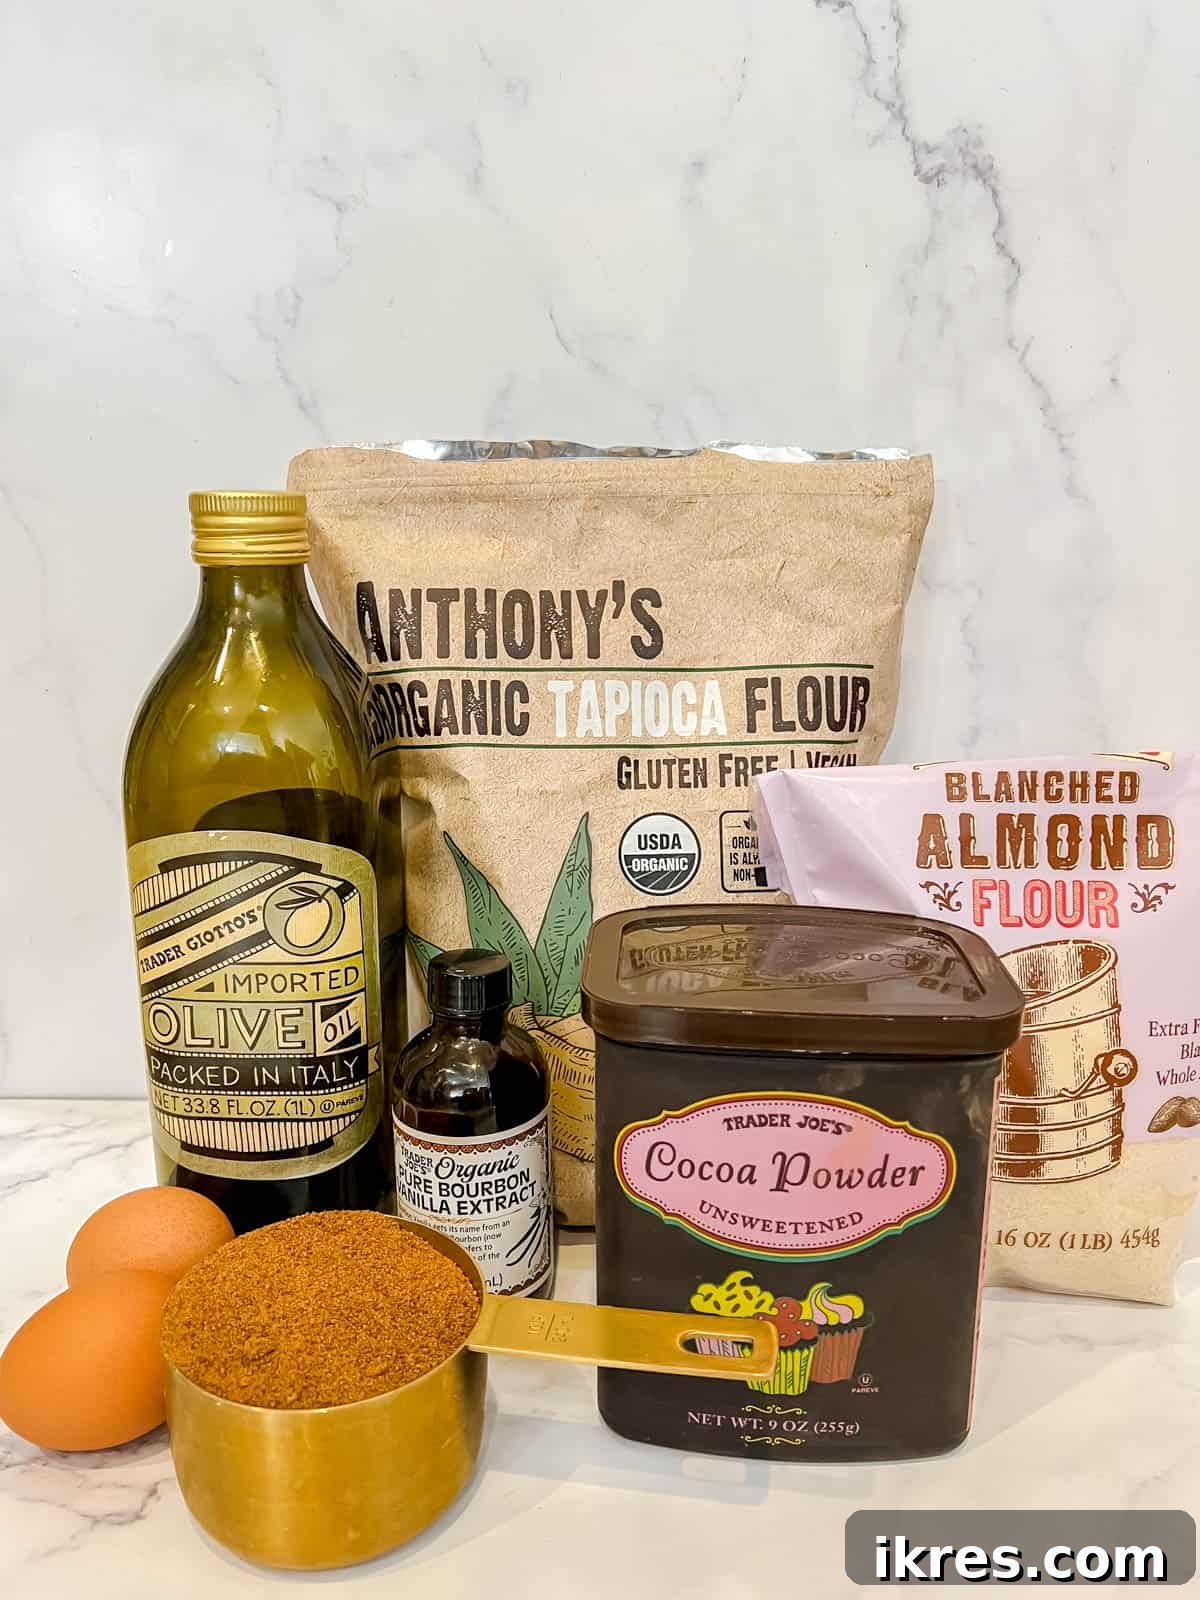
Crafting these delectable **Paleo gluten-free brookies** begins with selecting the right ingredients. Each component plays a crucial role in achieving the perfect texture, flavor, and adherence to our healthy dietary guidelines. Here’s a closer look at what you’ll need, broken down by layer, along with some helpful tips for choosing the best quality products to ensure your brookies turn out perfectly.
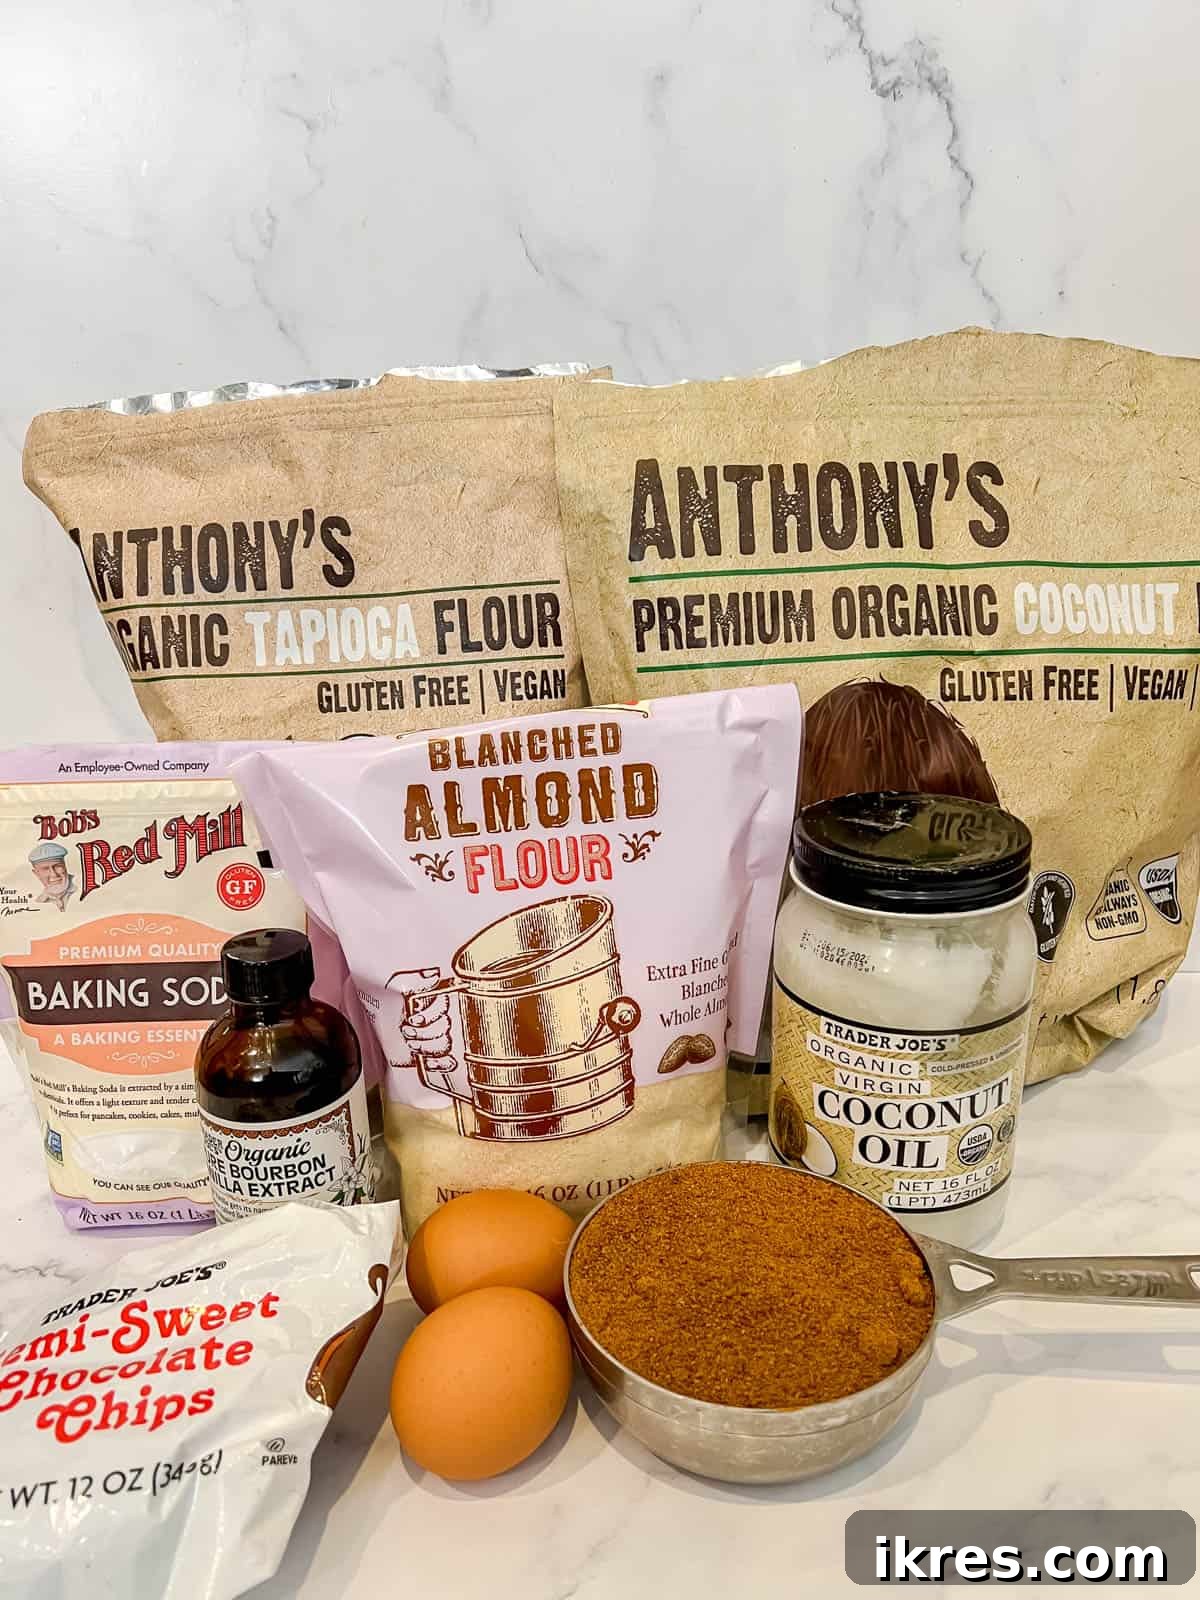
For the Cookie Layer:
- Almond Flour: This is a cornerstone of **Paleo and gluten-free baking**. Always opt for blanched almond flour, which is made from almonds with their skins removed. Its fine, consistent texture is essential for creating a smooth, light cookie base, vastly superior to coarser almond meal. It also provides healthy fats and protein, contributing to a more nutritious treat.
- Tapioca Flour (or Tapioca Starch): A fantastic thickener and binder in gluten-free recipes, tapioca flour contributes to the chewy texture of the cookie layer. It helps lighten the density of other flours and gives a slight crispness to the edges, creating that perfect cookie mouthfeel.
- Coconut Flour: Highly absorbent and rich in fiber, coconut flour is another excellent **gluten-free baking** staple. Use it sparingly, as a little goes a long way. It adds a subtle sweetness and helps create a soft, tender crumb in our cookie layer, balancing the texture of the almond and tapioca flours.
- Baking Soda: A crucial leavening agent that helps the cookie bars rise beautifully, ensuring they are light and airy, rather than dense. It reacts with other ingredients to produce carbon dioxide, creating tiny air bubbles for a tender result.
- Salt: A pinch of salt is vital for balancing the sweetness and enhancing the overall flavor profile of the cookie dough, bringing out the chocolate notes and preventing the cookies from tasting flat.
- Olive Oil: Replacing traditional butter, olive oil provides a healthy monounsaturated fat source and contributes significantly to the moistness and tenderness of the cookie layer. You can also use melted coconut oil or avocado oil for similar results (see FAQs for more on substitutions).
- Coconut Sugar: Our preferred natural sweetener for this **refined sugar-free brookie recipe**. Coconut sugar boasts a lower glycemic index than regular granulated sugar and offers a rich, caramel-like flavor that complements chocolate perfectly. It provides sweetness without the processed nature of white sugar.
- Eggs: Eggs act as a powerful binder, providing essential structure and moisture to the cookie batter. The addition of an extra egg yolk enhances richness and chewiness, making for a more satisfying cookie experience.
- Vanilla Extract: High-quality vanilla extract is indispensable for adding a warm, aromatic depth of flavor that elevates any baked good. It pairs beautifully with chocolate and enhances the overall sweetness.
- Dairy-Free Chocolate Chips: The stars of the cookie layer, providing bursts of chocolatey goodness! We recommend Enjoy Life chocolate chips for their widely available dairy-free and gluten-free properties. For a strict Paleo option, HU chocolate chips are an excellent choice, as they are often sweetened with coconut sugar.
For the Brownie Layer:
- Olive Oil (or Melted Coconut Oil): Similar to the cookie layer, healthy fats are key for a fudgy brownie. Olive oil or melted coconut oil ensures a rich, moist texture without any dairy, making these brownies incredibly tender and decadent.
- Coconut Sugar: Again, coconut sugar provides natural sweetness, keeping the brownie layer **refined sugar-free** and contributing to its deep, molasses-like flavor that pairs wonderfully with cocoa.
- Eggs: Essential for binding the brownie batter and giving it that classic fudgy, chewy texture that everyone loves in a good brownie.
- Vanilla Extract: Enhances the chocolate flavor and adds a touch of warmth and complexity, deepening the overall taste experience of the brownie.
- Almond Flour: Provides structure and body to the brownie without any gluten. Its fine texture helps create a smooth, dense brownie crumb.
- Tapioca Flour: Helps achieve the ideal brownie texture—a slight chewiness with a delicate crumb, preventing the brownies from being too dense or cake-like.
- Unsweetened Cocoa Powder: This is where the rich, intense chocolate flavor comes from. Ensure you use a high-quality unsweetened cocoa powder (not Dutch-processed unless the recipe specifies) for the best taste and color. Always double-check labels to avoid any hidden added sugars.
- Salt: Essential for cutting through the sweetness and intensifying the deep chocolate notes of the brownie, bringing out its full, robust flavor.
For precise measurements and a detailed breakdown of each ingredient, please refer to the complete recipe card provided further down this page. Gathering your ingredients before you begin baking will ensure a smooth and enjoyable process!
Easy Step-by-Step Guide to Baking Healthy Brookie Bars
Creating these delightful **gluten-free brownie cookie bars** is a straightforward process when you follow these clear, step-by-step instructions. We’ve broken it down into manageable parts to ensure your baking experience is enjoyable and results in perfectly baked brookies every time. Follow along closely for the best results!
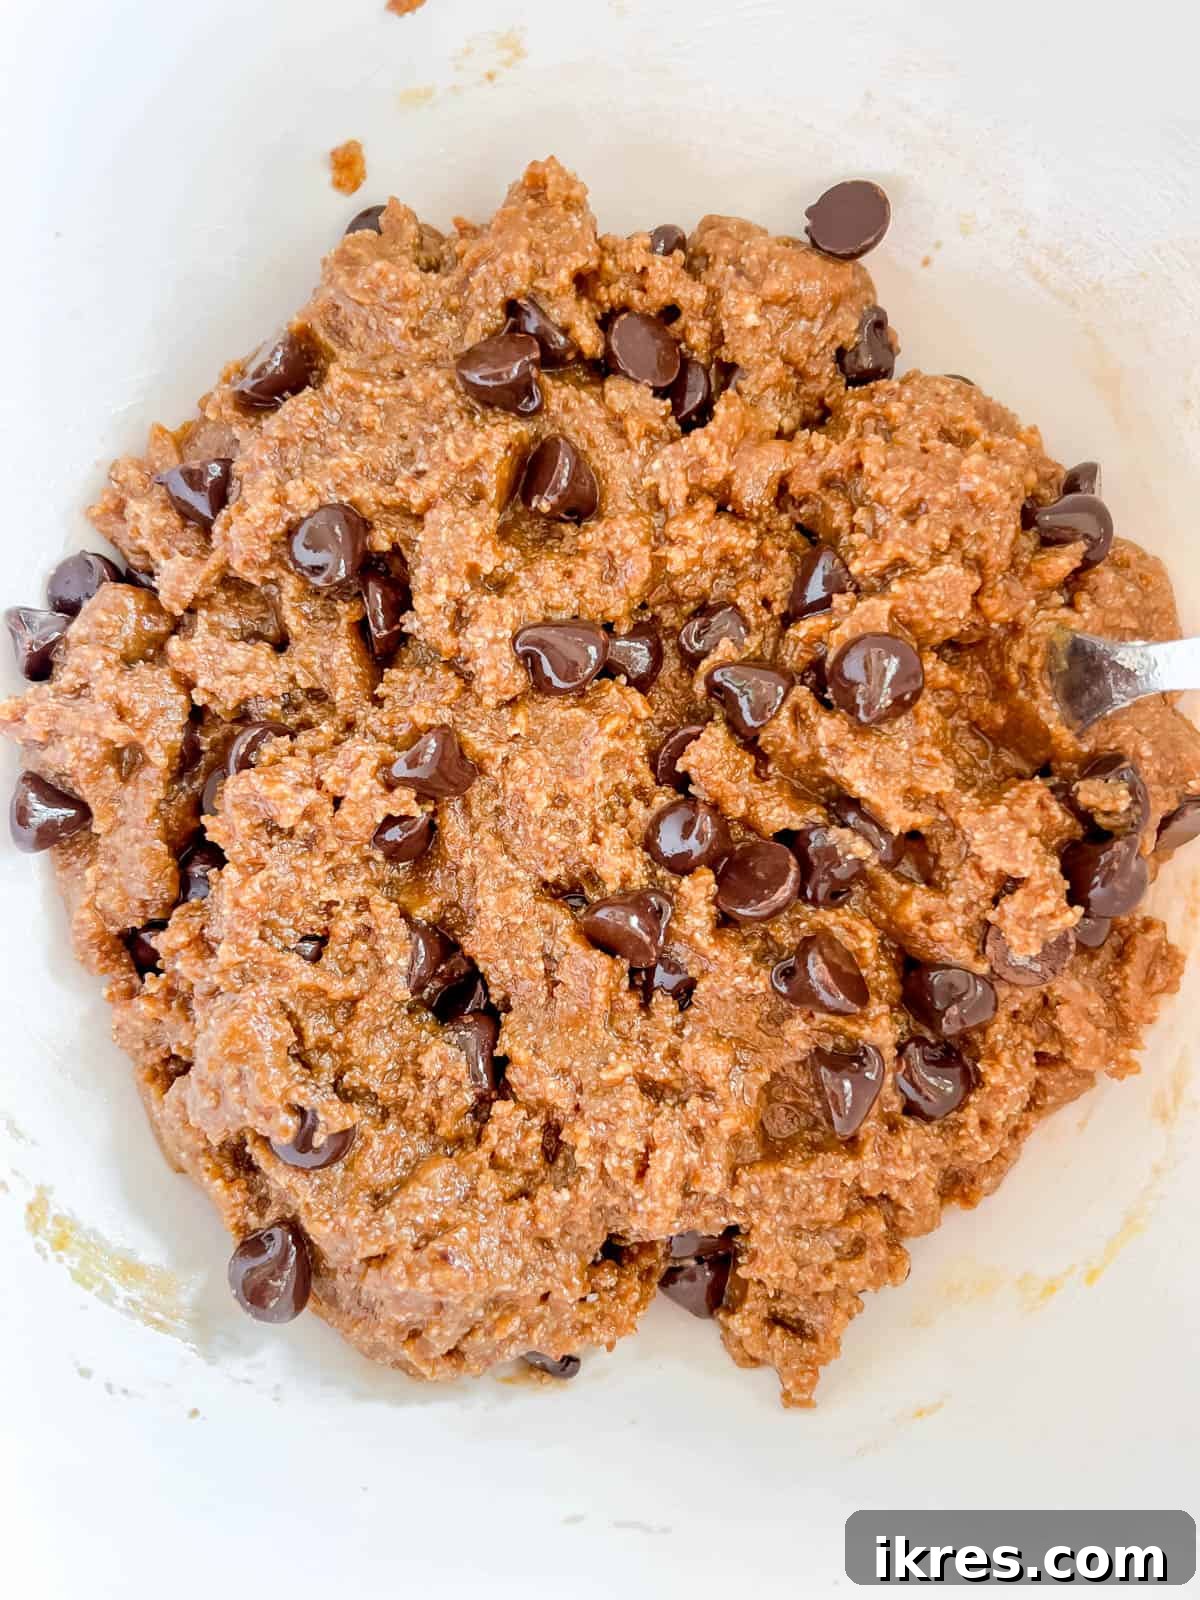
Step 1: Craft the Cookie Layer Batter. Begin by preparing the cookie dough portion of the recipe. In a large bowl, whisk together all the dry ingredients for the cookie layer: almond flour, tapioca flour, coconut flour, baking soda, and salt. In a separate bowl, combine the wet ingredients: olive oil, coconut sugar, egg, egg yolk, and vanilla extract. Gradually add the dry mixture to the wet mixture, mixing until just combined with a fork or spatula. Take care not to overmix to ensure a tender cookie layer. Finally, gently fold in your favorite dairy-free chocolate chips.
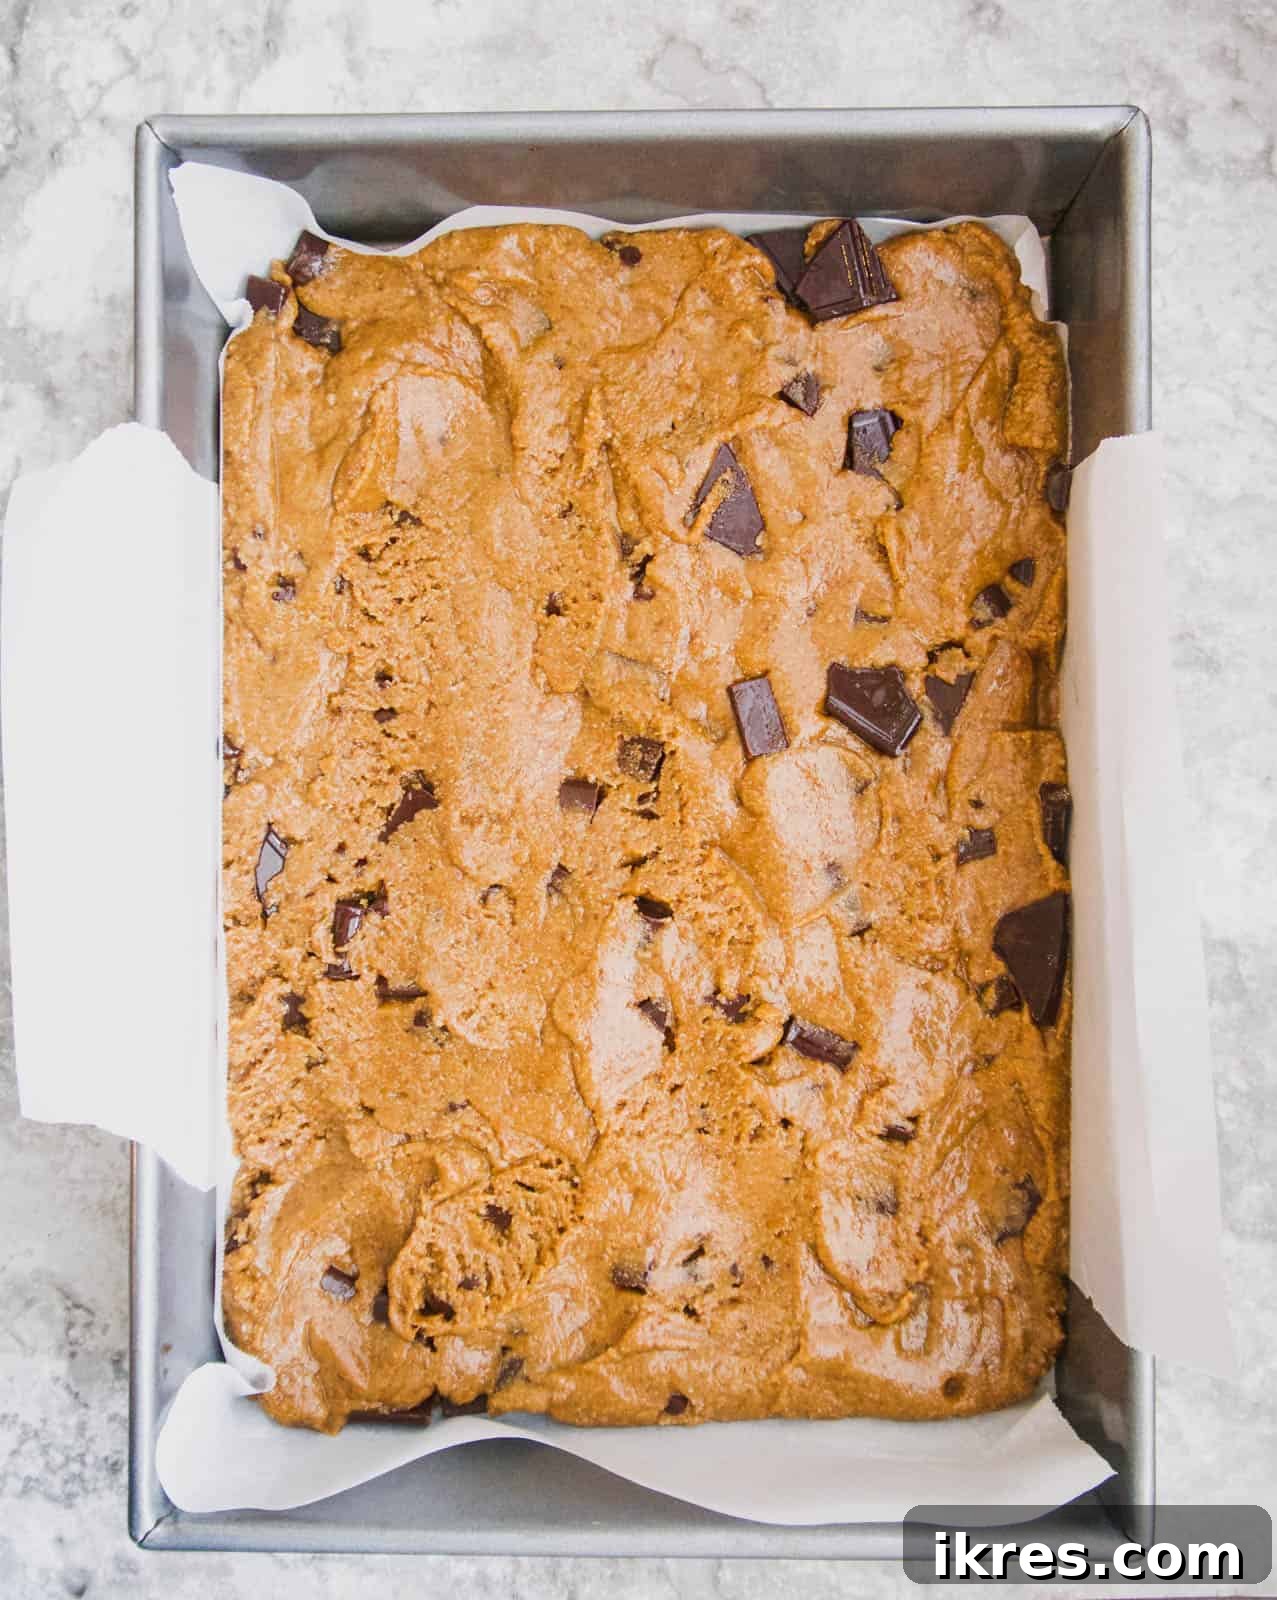
Step 2: Spread the Cookie Dough. Line a 9×13 inch baking pan with parchment paper, ensuring there’s an overhang on the longer sides. This overhang will serve as handles for easy removal of the baked brookies later. Press the prepared cookie dough evenly into the bottom of the pan. You can use your hands (lightly floured if sticky), the back of a spoon, or a rubber spatula to ensure it forms a uniform, compact layer. Don’t worry if the layer appears thin; it will bake up beautifully.
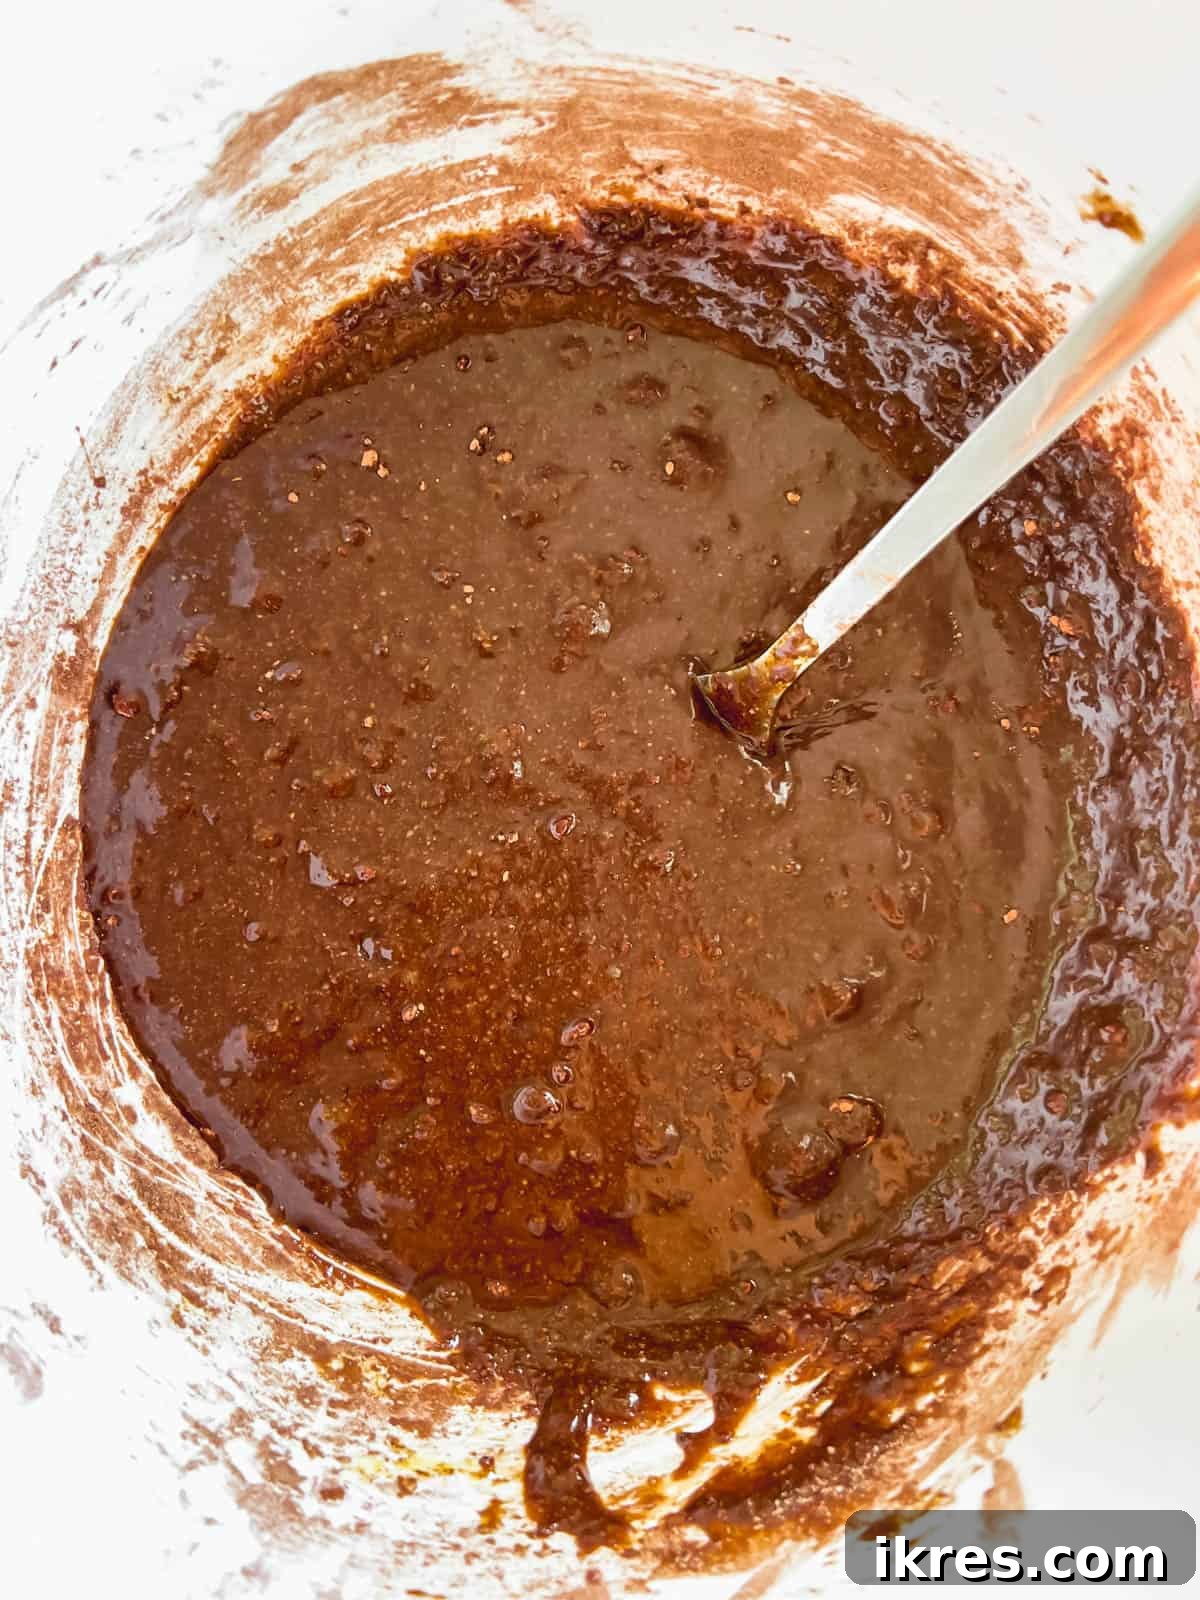
Step 3: Prepare the Brownie Batter. In another large mixing bowl, whisk together the wet ingredients for the brownie layer: olive oil, coconut sugar, eggs, and vanilla extract until smooth and creamy. The mixture should be well emulsified. In a separate bowl, combine the dry ingredients: almond flour, tapioca flour, unsweetened cocoa powder, and salt. Mix these thoroughly with a fork. Gradually add the dry brownie mixture to the wet ingredients, mixing gently until just combined and no streaks of dry flour remain. Again, avoid overmixing to prevent a tough brownie texture.
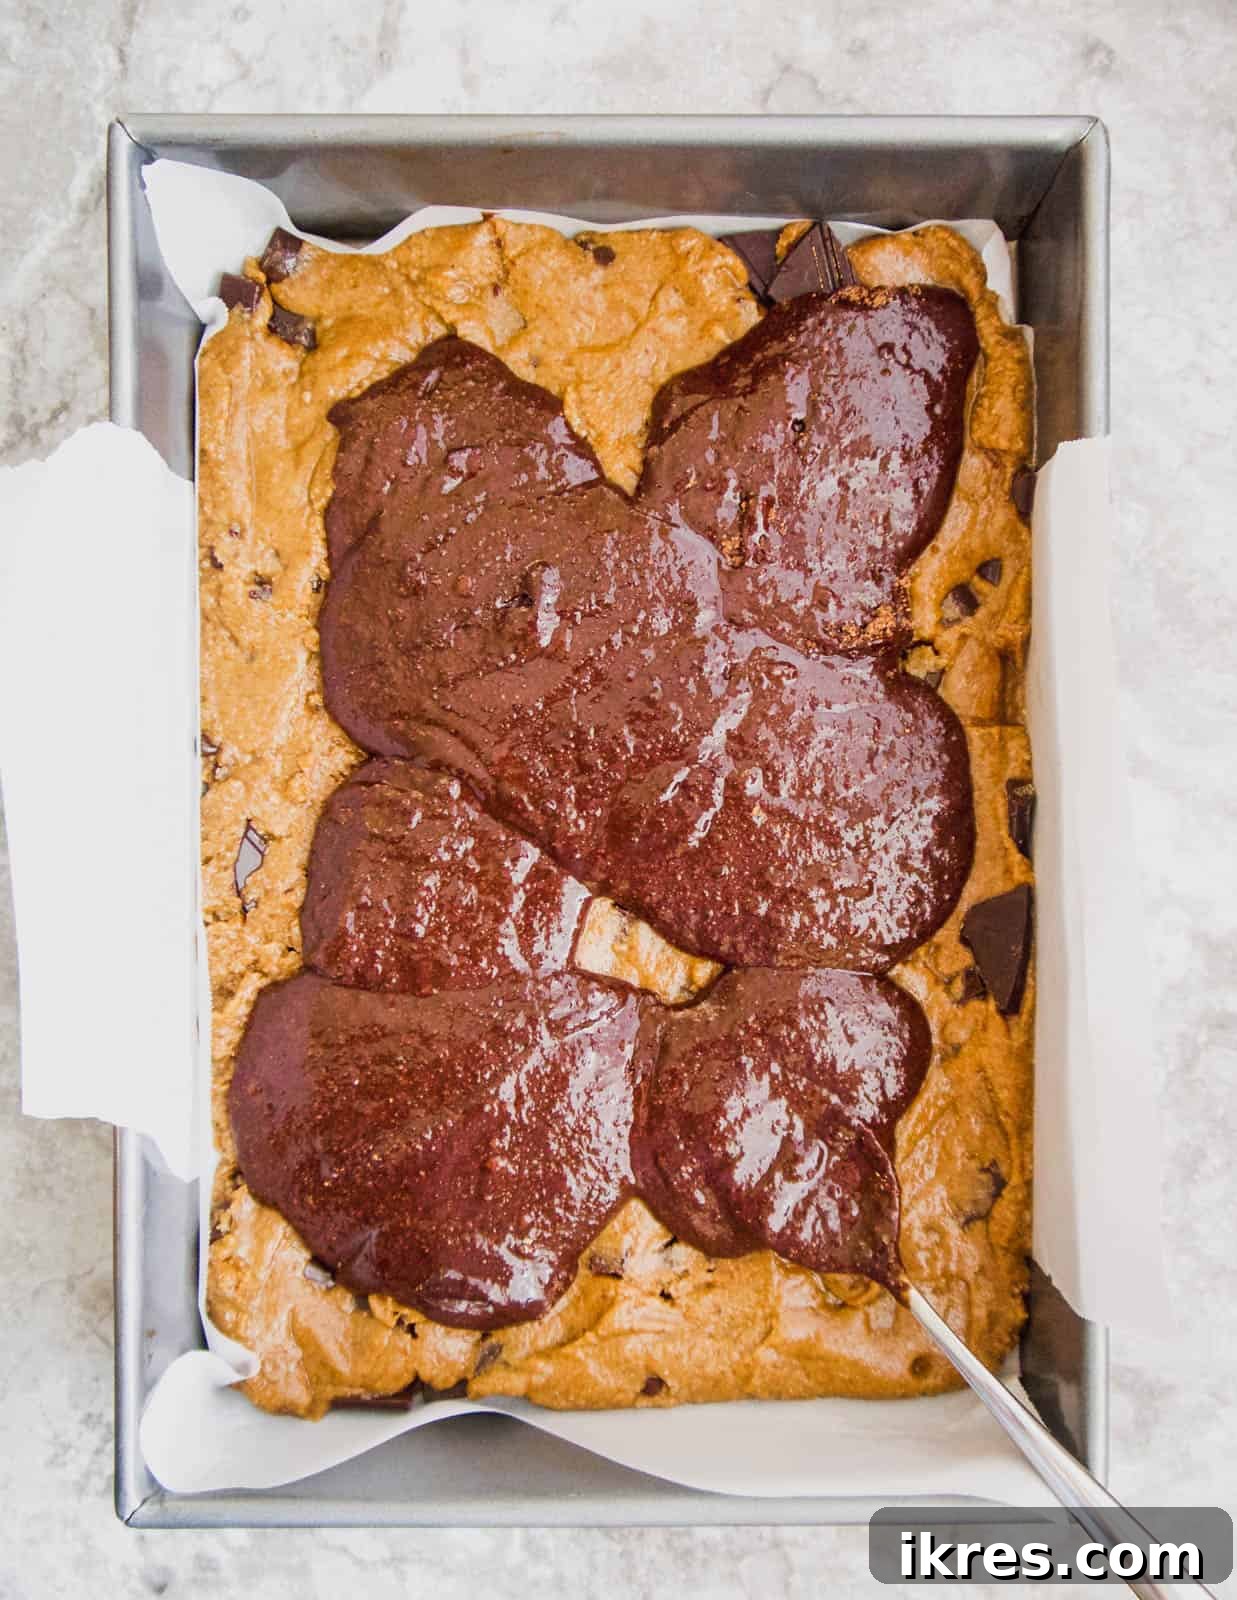
Step 4: Layer the Brownie Batter. Carefully pour or dollop the brownie batter over the pressed cookie dough layer in the baking pan. Work gently and try to distribute the batter as evenly as possible from the start to avoid excessive spreading later. You can use a spoon or a small ice cream scoop to distribute the batter before proceeding to the next step.
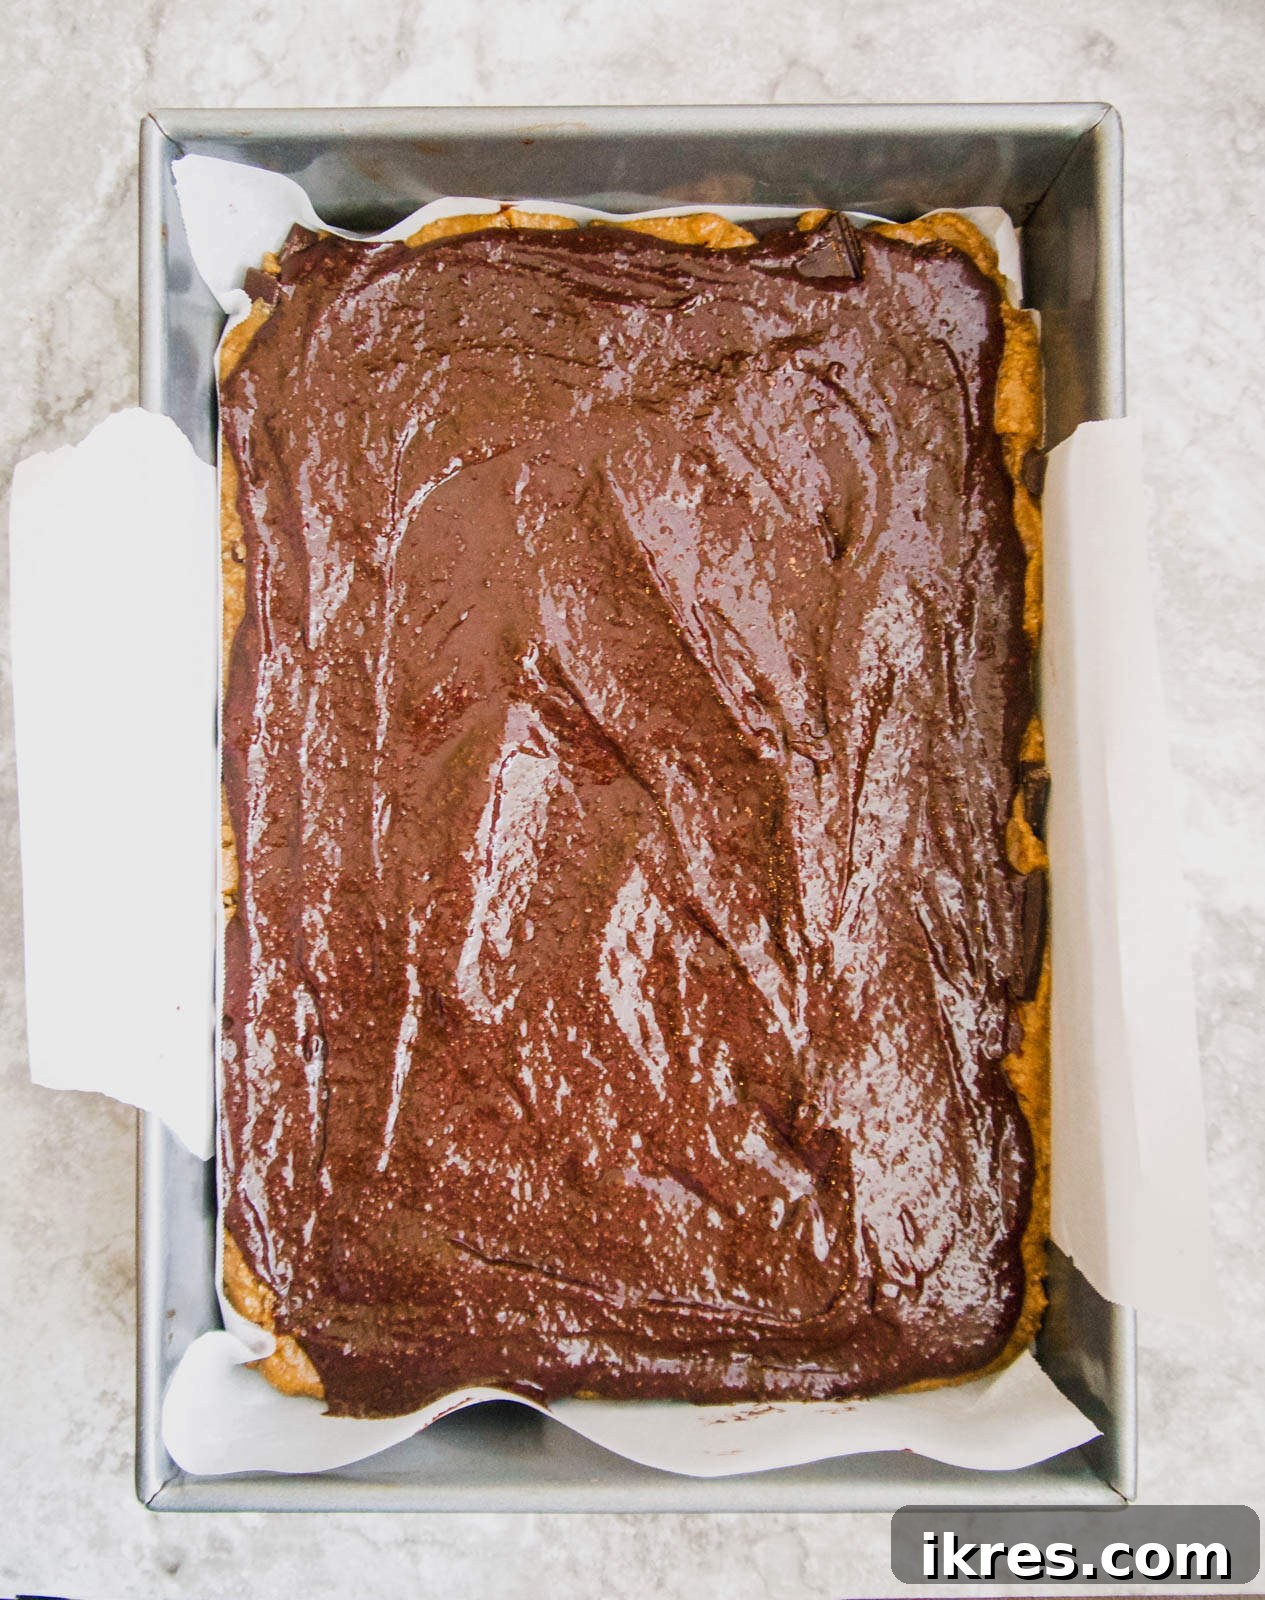
Step 5: Evenly Spread the Brownie Batter. Using a rubber spatula or the back of a spoon, gently spread the brownie batter into an even layer, covering the entire cookie dough base. Take your time to ensure a consistent thickness across the entire pan for even baking and a beautiful presentation. Smooth out the top as much as possible.
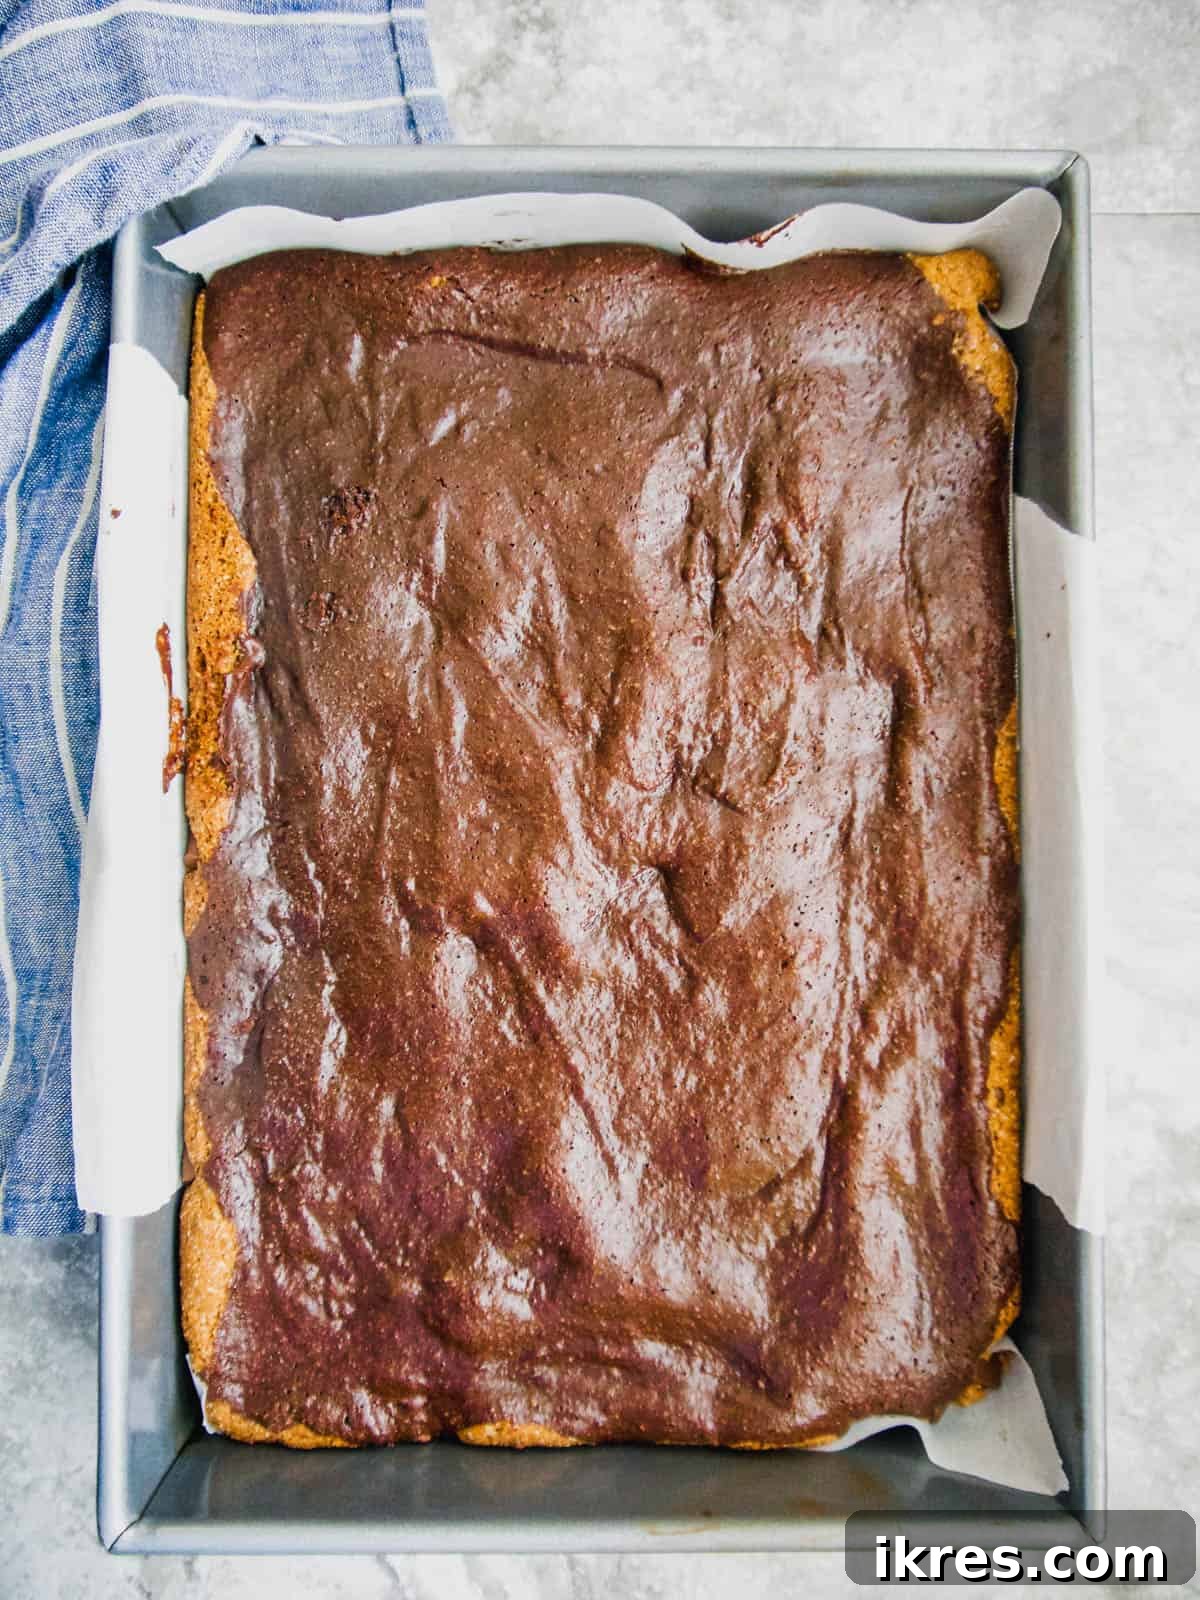
Step 6: Bake Your Brookies to Perfection. Preheat your oven to 350°F (175°C). Once both layers are in the pan and smoothed, transfer the pan to the preheated oven and bake for approximately 22-25 minutes. The edges of the brownie layer should look set, and the center may still appear slightly moist or soft to the touch – this is key for fudgy brownies, so avoid overbaking! A toothpick inserted into the brownie layer might come out with moist crumbs, but not wet batter. The cookie layer should be golden brown at the edges.
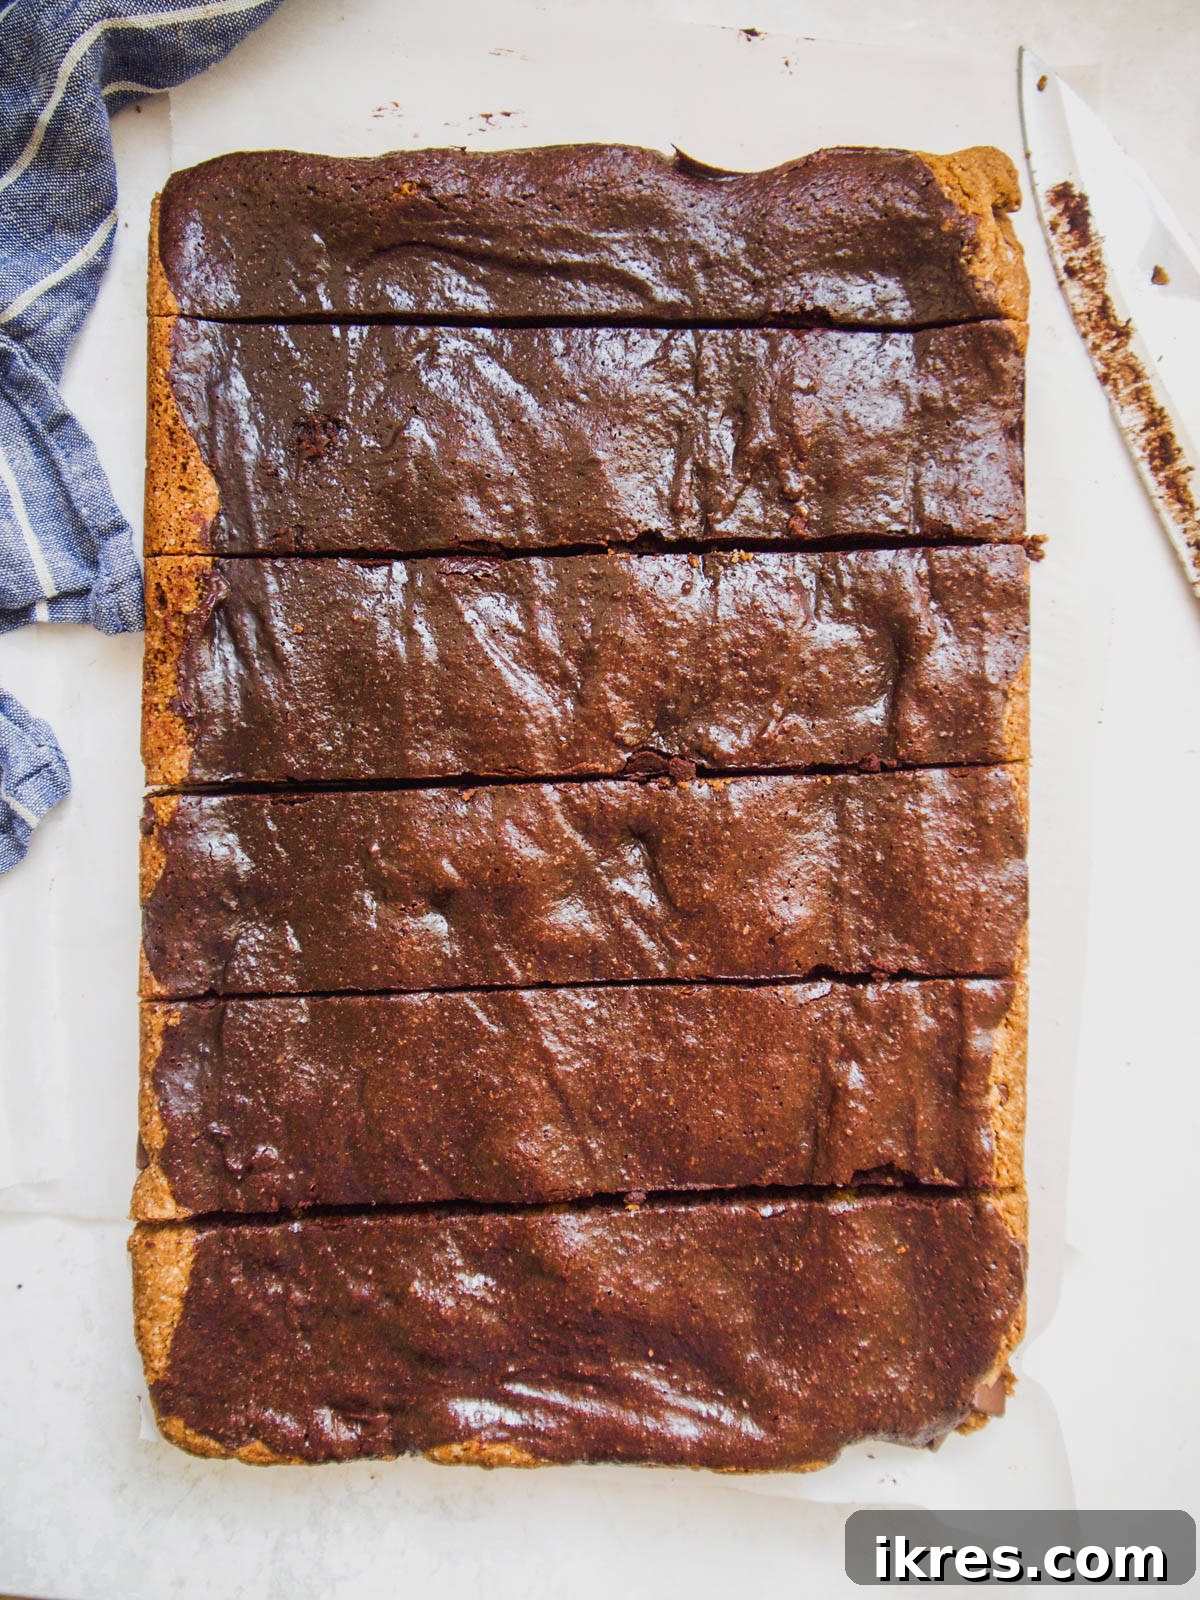
Step 7: Cool Before Cutting. Once baked, remove the pan from the oven and place it on a wire rack to cool completely. This step is crucial! Allowing the **Paleo brownie cookie bars** to cool for at least one hour (or ideally longer, even to room temperature) will help them set properly, making them much easier to cut into clean, neat squares. Warm brookies are prone to crumbling, so patience here will be rewarded with perfectly formed, intact bars.
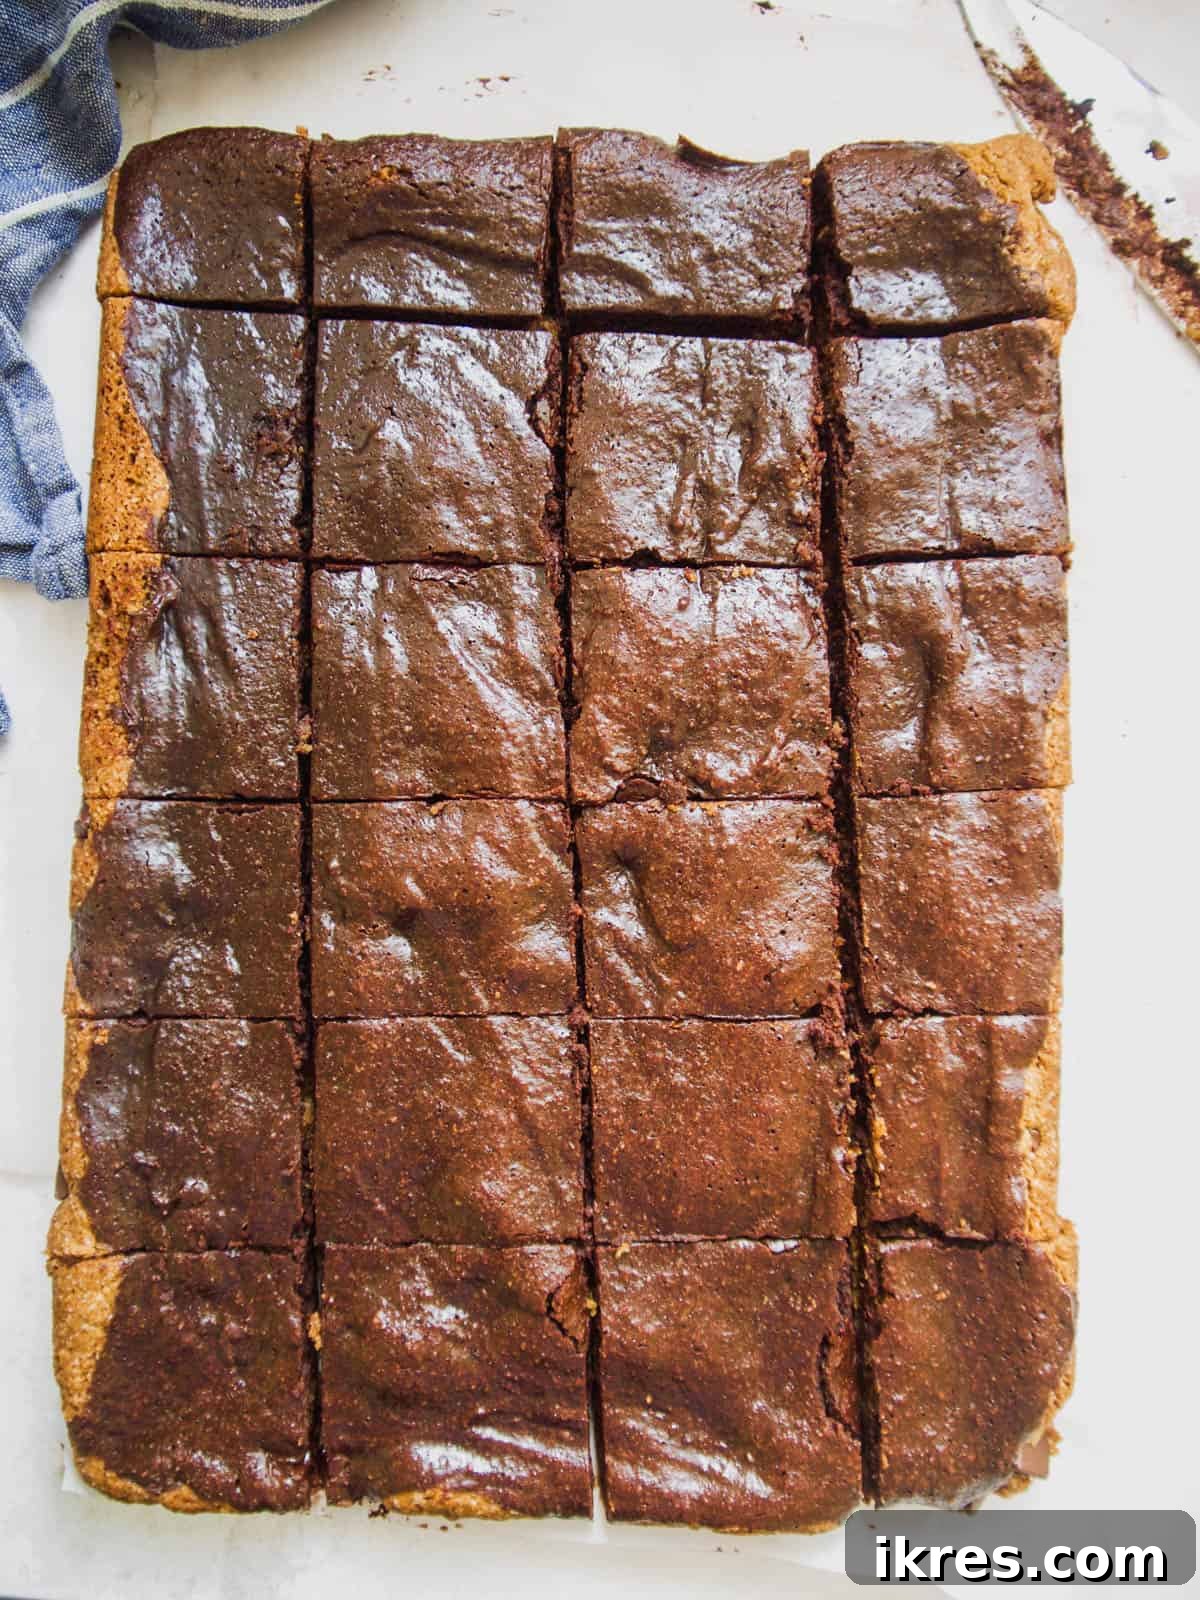
Step 8: Cut and Serve. Once thoroughly cooled, use the parchment paper overhang to carefully lift the entire slab of brookies out of the pan. Place it on a clean cutting board. Using a sharp knife, cut the brookies into desired squares or bars, approximately 24 servings. For extra clean cuts, you can wipe your knife clean between slices. Now, they are ready to be enjoyed! Store any leftovers as directed in the FAQs to maintain their freshness.
Frequently Asked Questions About Healthy Brookies
Have some questions about baking or enjoying your **healthy Paleo brookies**? We’ve got answers to some of the most common inquiries to help you master this delightful recipe:
To keep your brookies deliciously fresh, store them in an airtight container at room temperature for up to 3-4 days. For extended freshness, you can refrigerate them for 6-7 days. If you’re planning to make a larger batch or want to enjoy them over a longer period, these bars freeze exceptionally well! Simply wrap individual bars tightly in plastic wrap and then place them in a freezer-safe bag or container for up to 3 months. Thaw at room temperature for a few hours before enjoying, or gently warm in a microwave for a few seconds for a freshly baked feel.
If you prefer not to use olive oil, excellent alternatives include avocado oil or melted coconut oil. Both are healthy, Paleo-friendly fats that will yield similar moist and tender results. Avocado oil has a very neutral flavor, making it a great choice. When using coconut oil, it’s crucial to melt it first and then measure it in its liquid state to ensure accurate quantities for the recipe’s balance, as solid coconut oil has a different density. Avoid using highly flavored oils like extra virgin olive oil if you prefer a less pronounced taste in your desserts.
Yes, absolutely! While it’s incredibly tempting to dig into warm brookies straight from the oven, allowing them to cool completely (ideally for at least an hour, or even longer until they reach room temperature) is essential for achieving clean, well-defined cuts. Warm brookies are very delicate and crumbly, making them difficult to slice cleanly, and they might fall apart. Cooling allows the fats to re-solidify and the layers to properly set, resulting in perfectly structured bars that hold their shape beautifully. Patience here will be rewarded with perfectly formed, aesthetically pleasing brookies.
Absolutely! This recipe is quite versatile and encourages customization. Feel free to experiment with other Paleo-friendly additions. For the cookie layer, consider adding chopped nuts like walnuts or pecans for extra crunch and healthy fats, or even a sprinkle of flaky sea salt on top before baking for a delightful sweet and salty contrast. For the brownie layer, a handful of extra dairy-free chocolate chips, some finely chopped dried fruit (like dates or figs), or a swirl of dairy-free caramel sauce could be delicious. Just be mindful not to add too much, which could alter the batter consistency or baking time.
The most common reason for dry baked goods, especially brownies, is overbaking. Ovens can vary significantly in temperature, so it’s always best to start checking for doneness at the lower end of the suggested baking time (around 22 minutes). Remember that the center of the brownie layer should look slightly moist, and a toothpick inserted might come out with a few moist crumbs, but not wet batter. Another factor could be inaccurate flour measurements; always scoop and level your flours correctly, or ideally, measure by weight if you have a kitchen scale, as this is the most precise method to avoid adding too much dry ingredient.
Other Healthy & Delicious Dessert Recipes You’ll Love:
If you enjoyed these **Paleo gluten-free brookies**, you’re likely on the hunt for more wholesome treats that don’t compromise on flavor. Here are a few other fantastic dessert recipes that align with a healthy lifestyle, offering both deliciousness and dietary consideration:
- These Buckeye Brownies from My Gluten-free Kitchen look absolutely unreal and are so creatively delicious! They offer a unique twist on a classic, perfect for peanut butter lovers.
- For fans of citrus and chocolate, these Chocolate Orange Fudgy Brownies (Paleo, GF) are an absolute must-try. The vibrant orange zest perfectly complements the rich chocolate for an unforgettable flavor combination.
- Looking for something fruity and sweet? These Strawberry Chocolate Chip Cookies are delish and offer a delightful hint of fresh strawberry flavor, a wonderful seasonal treat.
Did you try this recipe? Please leave me a ⭐ review below! Your feedback helps other bakers discover and enjoy these amazing treats!
5 from 12 votes
Healthy Brookie Recipe (Brownie Cookie Bars)
Dominique
24 bars
25 mins
25 mins
1 hr
1 hr 50 mins
Enjoy sharing this delightful recipe with your loved ones!
Delicious bars that are half cookie and half brownie, all while being naturally Paleo, Gluten-free, dairy-free, refined flour-free, and refined sugar-free. A perfect guilt-free treat for any occasion!
Ingredients
Cookie Layer Ingredients:
- 1 ¼ cup almond flour
- 2/3 cup tapioca flour
- 1/3 cup coconut flour
- 1 tsp baking soda
- 1/2 teaspoon salt
- 3/4 cup olive oil, or melted coconut oil
- 1 cup coconut sugar
- 1 large egg plus 1 large egg yolk
- 2 tsps vanilla extract
- 3/4 cup dairy-free chocolate chips
Brownie Layer Ingredients:
- ½ cup olive oil
- 1 cup coconut sugar
- 2 eggs
- 1 tsp vanilla
- ¾ cup almond flour
- 3 Tbs tapioca flour
- ½ cup unsweetened cocoa powder
- 1/2 tsp salt
Enter your email to receive this recipe and weekly updates:
Instructions
Cookie Layer Instructions:
- Preheat oven to 350°F (175°C). Line a 9 x 13 inch baking pan with parchment paper, leaving an overhang on the longer sides for easy removal. Set aside.
- In a large bowl, add 1 ¼ cup almond flour, 2/3 cup tapioca flour, 1/3 cup coconut flour, 1 tsp baking soda, and ½ tsp salt. Whisk these dry ingredients together until well blended. Set aside.
- In another large bowl, whisk the ¾ cup olive oil and 1 cup coconut sugar together until smooth. Then, add in the large egg and egg yolk, whisking vigorously until the mixture becomes creamy and light in color. Stir in the 2 teaspoons of vanilla extract.
- Pour the combined dry ingredients into the wet ingredients bowl and mix them together with a fork or spatula until just incorporated. Be careful not to overmix. Gently fold in the ¾ cup of dairy-free chocolate chips.
- Carefully transfer the cookie dough batter into the prepared baking pan. Using a rubber spatula or your hands, evenly press and smooth the dough into a uniform layer across the bottom of the pan. This layer will appear thin, but it will rise beautifully during baking.
Brownie Layer Instructions:
- In a clean large mixing bowl, whisk together ½ cup olive oil and 1 cup coconut sugar until smooth. Add the 2 eggs and 1 tsp of vanilla extract, and continue whisking until the mixture is creamy and well combined.
- In a separate medium bowl, combine ¾ cup almond flour, 3 Tbs tapioca flour, ½ cup unsweetened cocoa powder, and ½ tsp salt. Mix these dry ingredients thoroughly with a fork until blended.
- Pour the bowl of dry brownie ingredients into the bowl of wet ingredients and mix until just combined and no dry streaks remain. Avoid overmixing the batter.
- Carefully take large spoonfuls of the brownie batter and gently dollop them over the cookie layer already in the pan. Once all the brownie batter is transferred, use a rubber spatula to gently spread it evenly over the cookie layer, ensuring full coverage without disturbing the bottom layer.
- Bake the brookies for 22-25 minutes in the preheated oven. The top should appear set and slightly firm to the touch, but the center may still look a bit moist. This is perfect for a fudgy texture. Do not overcook, as this can lead to dry brookies.
- Remove the pan from the oven and let it cool completely on a wire rack for at least one hour. This step is crucial for the bars to set properly. Once cooled, use the parchment paper overhang to carefully lift the entire slab of brookies out of the pan. Place on a cutting board and cut into approximately 24 squares or bars.
- Serve and enjoy your homemade healthy brookies!
Notes
- If you opt to use coconut oil instead of olive oil, it’s essential to melt it first. Measure the coconut oil after it has been melted to ensure the correct liquid volume for the recipe.
- For an extra touch of flavor, a sprinkle of flaky sea salt on top of the brownie layer before baking can really enhance the chocolate taste and provide a delightful sweet and savory contrast.
- Ensure your eggs are at room temperature before mixing them into the batters. Room temperature eggs emulsify better with other ingredients, leading to a smoother, more uniform batter and a better final texture.
Nutrition Information (per serving)
Carbohydrates: 23g
Protein: 4g
Fat: 19g
Saturated Fat: 8g
Polyunsaturated Fat: 1g
Monounsaturated Fat: 4g
Trans Fat: 0.002g
Cholesterol: 20mg
Sodium: 180mg
Potassium: 36mg
Fiber: 3g
Sugar: 12g
Vitamin A: 30IU
Calcium: 33mg
Iron: 1mg
Nutrition information is automatically calculated and should be used as an approximation. Individual results may vary based on exact ingredients and preparation methods.
Additional Information
Dessert
American
Tried this recipe? We’d love to see your creations! Mention @perchancetocook or tag #perchancetocook on Instagram!