
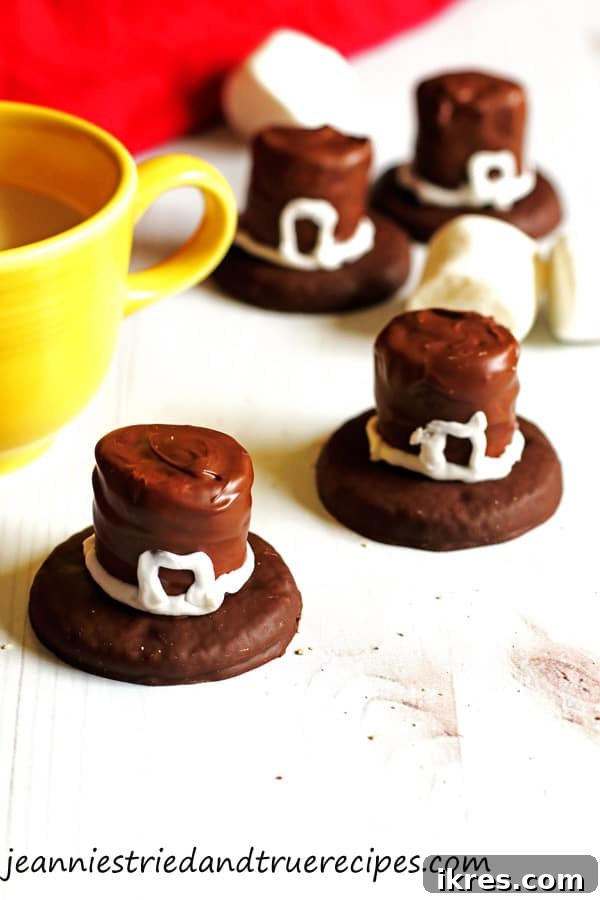
Transform your holiday table with these charming Thanksgiving Pilgrim Hat Cookies! Not only are they incredibly festive and delicious, but they also offer a wonderful opportunity for kids to get involved in the kitchen, creating lasting memories and a truly special dessert.
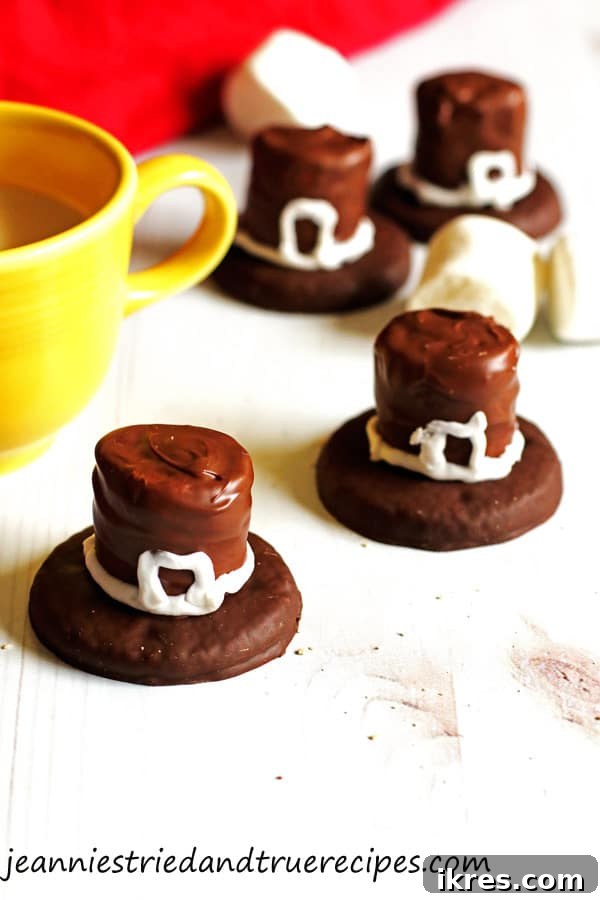
Thanksgiving is a cherished time of year, filled with gratitude, warmth, and the joy of gathering with loved ones. It’s a moment to pause, reflect on our blessings, and create beautiful memories around the dinner table. While the turkey, stuffing, and cranberries often take center stage, the desserts offer a special opportunity to add a touch of whimsy and sweetness to the celebration. And what could be more charming than a plate of adorable Pilgrim Hat Cookies?
These delightful cookies are more than just a treat; they’re a festive statement that perfectly captures the spirit of the holiday. Their iconic design makes them an instant conversation starter and a visual highlight on any dessert spread. Imagine the smiles when your family and guests see these edible hats, especially knowing they were made with love.
Why These Pilgrim Hat Cookies Are a Thanksgiving Essential
Beyond their charming appearance, these Thanksgiving Pilgrim Hat Cookies offer a multitude of reasons to become a new tradition in your home:
- Effortlessly Festive: They instantly elevate your Thanksgiving dessert table with a touch of holiday-themed decoration that’s both unique and delicious. No need for intricate baking skills to achieve a professional-looking result.
- Perfectly Kid-Friendly: This recipe is designed with little helpers in mind. The steps are straightforward and engaging, allowing children to actively participate in making a part of the holiday meal. From dipping marshmallows to adding the final buckle, kids will love contributing and feeling proud of their creations.
- Quick and Easy to Make: With so much to prepare for Thanksgiving, time is often a luxury. These cookies come together surprisingly fast, requiring minimal prep and cook time, leaving you more moments to spend with family and less time in the kitchen.
- Deliciously Simple Ingredients: Using store-bought cookies and marshmallows streamlines the process without sacrificing flavor. The combination of chocolate, marshmallow, and a crisp cookie base is a universally loved treat.
- A Memorable Activity: Beyond the eating, the process of making these cookies can become a cherished family tradition. It’s a wonderful way to bond, laugh, and teach children basic kitchen skills in a fun, pressure-free environment.
So, let’s gather our simple ingredients and embark on a fun, creative journey to make these Thanksgiving Pilgrim Hat Cookies that are sure to be a hit with everyone!
Gather Your Simple Ingredients
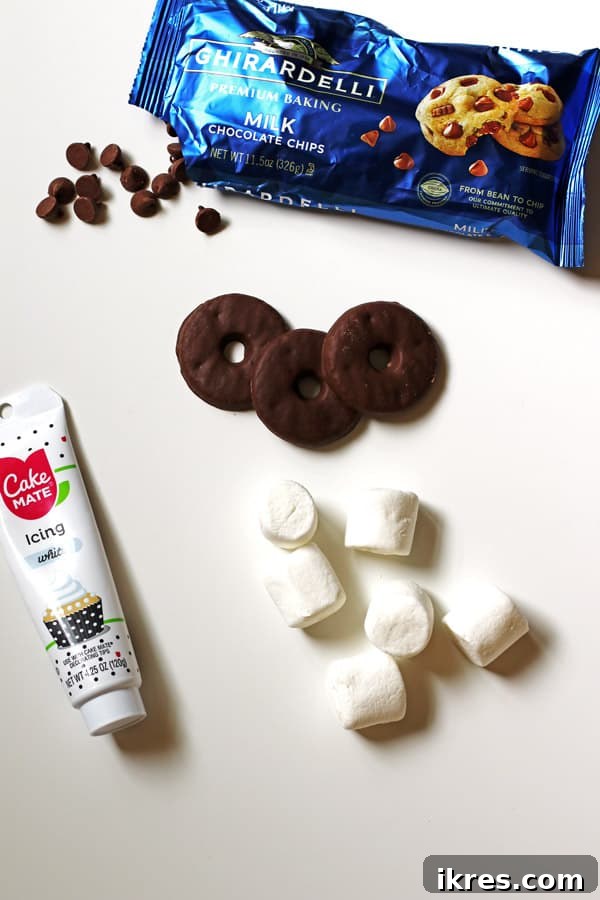
One of the best aspects of this recipe is its simplicity. You won’t need a long list of obscure ingredients. Just a few readily available items will help you create these festive treats. Here’s what you’ll need to get started:
- One (12-ounce) package of Chocolate Chips: Semi-sweet chocolate chips work perfectly, offering a classic flavor. You could also experiment with milk chocolate or dark chocolate for a different taste profile.
- One (10-ounce) package of Large Marshmallows: The bigger the marshmallow, the more substantial your pilgrim hat will be. Ensure they are fresh and soft for easy dipping.
- One (11.5-ounce) package of Keebler Fudge Striped Cookies: These cookies are the ideal base, resembling the brim of a hat. The fudge stripe provides an extra layer of chocolatey goodness.
- Tip: If you can only find fudge striped cookies that are *not* fully dipped in chocolate, simply flip them over so the chocolate-covered side faces up. This ensures a consistent dark “hat brim” for your pilgrim hats.
- One tube of White or Yellow Decorative Frosting: This is for adding the iconic buckle detail. White offers a stark contrast, while yellow gives a golden buckle appearance. You’ll need a frosting tube with a fine tip or a small, round frosting tip attached.
- Tools: A dipping tool, toothpicks, or small skewers will be essential for handling the marshmallows. A frosting tip (if your tube doesn’t have one) will also be needed for the buckle.
Step-by-Step Guide to Making Pilgrim Hat Cookies
Let’s turn these simple ingredients into festive Pilgrim Hat Cookies. Follow these easy steps for a smooth and enjoyable baking experience.
Initial Preparation for Easy Assembly
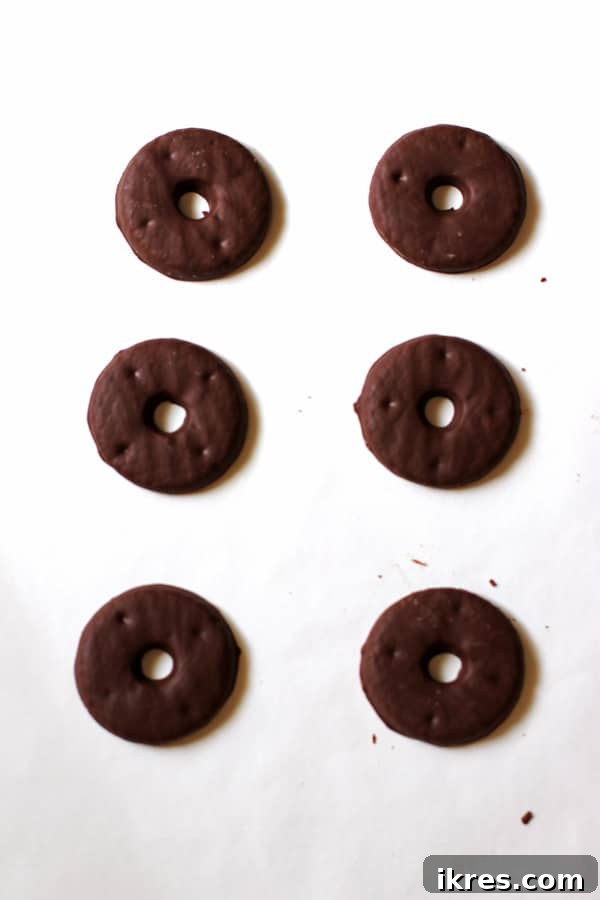
- Prepare Your Baking Sheet: Before you even think about melting chocolate, line a baking sheet with parchment paper or foil. This crucial step ensures easy cleanup and prevents your beautiful cookies from sticking.
- Arrange the Cookie Bases: Place the Keebler Fudge Striped Cookies in a single layer on your prepared baking sheet. Leave a little space between each cookie to prevent them from sticking together once the marshmallows are added. Remember, if your cookies aren’t fully chocolate-dipped, flip them so the chocolate side is facing up.
Melting Chocolate Perfectly
The key to smooth, professional-looking pilgrim hats is properly melted chocolate. Avoid overheating, as this can make the chocolate clumpy and unusable.
Method 1: Microwave Melting (Quickest Option)
- Pour the chocolate chips into a microwave-safe bowl.
- Heat on high for 30 seconds.
- Remove and stir thoroughly. Even if they don’t look melted, stirring helps distribute the heat.
- If not completely smooth, continue heating in 15-second increments, stirring well after each interval, until the chocolate is fully melted and silky smooth.
Method 2: Stovetop Melting (Double Boiler Recommended)
- For best results, use a double boiler or create one by placing a heat-safe bowl over a saucepan of simmering water (ensure the bowl doesn’t touch the water).
- Add the chocolate chips to the bowl.
- Heat on low, stirring continuously, until the chocolate chips are melted and smooth. Stirring prevents scorching and ensures even melting.
Important Note for Both Methods: Always watch your chocolate carefully. Overheated chocolate can seize and become thick and grainy. If it seems to be getting too hot, remove it from the heat and continue stirring to use residual heat to melt the remaining chips. The melted chocolate should be glossy and free of lumps.
Assembling Your Pilgrim Hat Cookies
Now for the fun part – bringing your pilgrim hats to life!
- Prepare Marshmallows for Dipping: Carefully pick up a large marshmallow using a dipping tool, a sturdy toothpick, or a small skewer. Insert the tool into the center of the marshmallow from the top.
- Dip in Melted Chocolate: Dip the marshmallow into the warm, melted chocolate. Swirl it gently until the entire marshmallow is fully coated.
- Remove Excess Chocolate: Lift the marshmallow from the chocolate and gently tap or swirl it against the edge of the bowl to drip off any excess chocolate. You want a smooth, even coating, not a thick, drippy one.
- Tip: If the chocolate seems too thick, a small spoon can help you smooth it around the marshmallow.
- Attach to Cookie Base: Immediately place the chocolate-covered marshmallow onto the center of one of the prepared cookies on the baking sheet. Gently press down on the marshmallow to secure it to the cookie, ensuring good contact.
- Remove Dipping Tool: Carefully remove your dipping tool or toothpick from the marshmallow. If needed, use the back of a spoon to gently hold the marshmallow in place while removing the tool, and then smooth any imperfections on the chocolate.
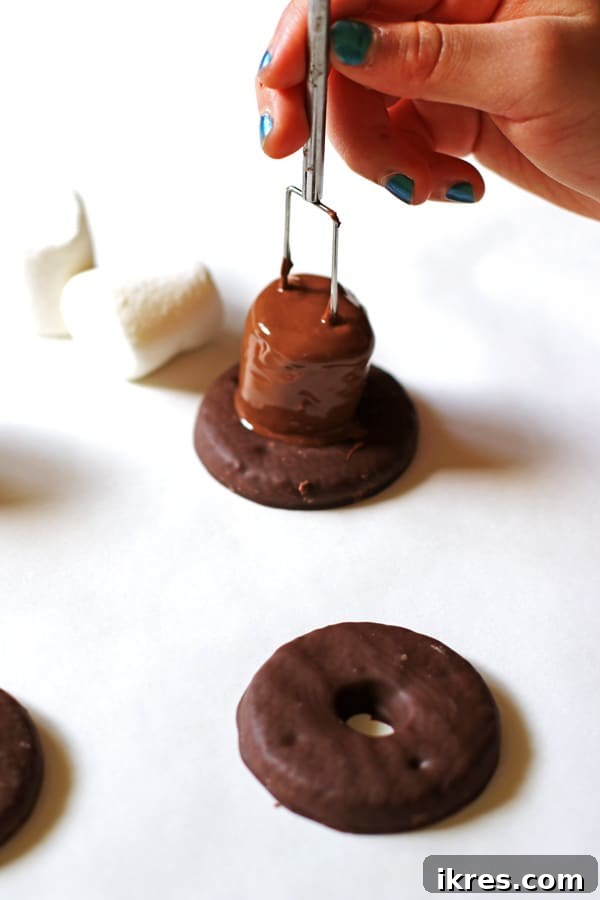
Repeat this process for all your marshmallows and cookies. Once all your “hats” are assembled, your baking sheet will be filled with a delightful array of chocolate-covered marshmallow peaks on cookie bases.
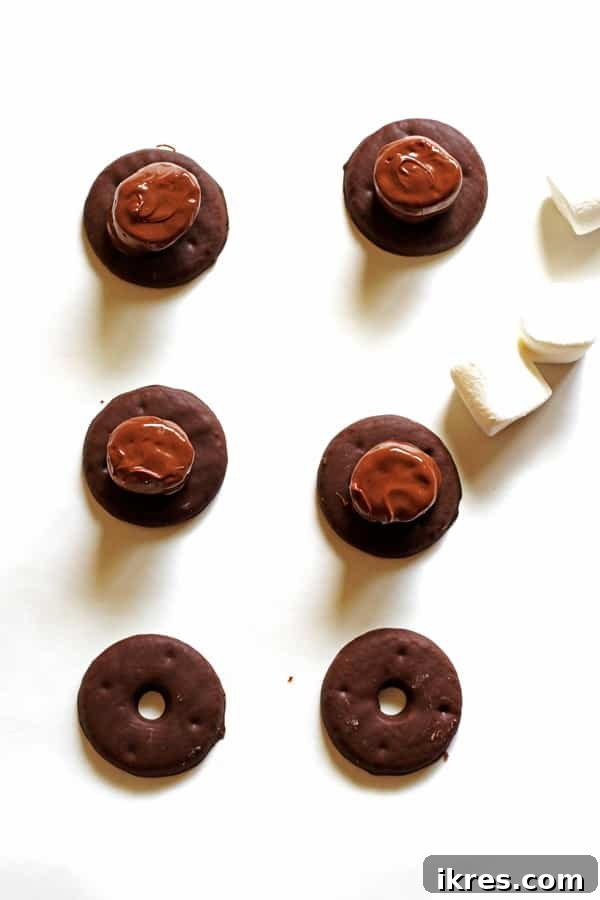
- Chill to Set: Place the baking sheet with the assembled cookies into the refrigerator. Chill for approximately 30 minutes, or until the chocolate has completely set and is firm to the touch. This step is essential to prevent smudging when you add the buckle.
Adding the Iconic Buckle Detail
Once the chocolate has thoroughly set, it’s time for the final, distinctive touch – the pilgrim hat buckle. This is where the decorating frosting comes in.
- Prepare Your Frosting: If your frosting tube has interchangeable tips, choose a small, round tip for precision. If it’s a simple tube, ensure the opening creates a fine line.
- Create the Buckle Band: Gently apply pressure to the frosting tube and draw a thin, continuous line around the circumference of the marshmallow, where it meets the cookie base. This forms the band of the hat.
- Add the Square Buckle: In the front center of the hat, draw a small square shape with the frosting. This represents the iconic buckle. You can make it an open square or fill it in, depending on your preference.
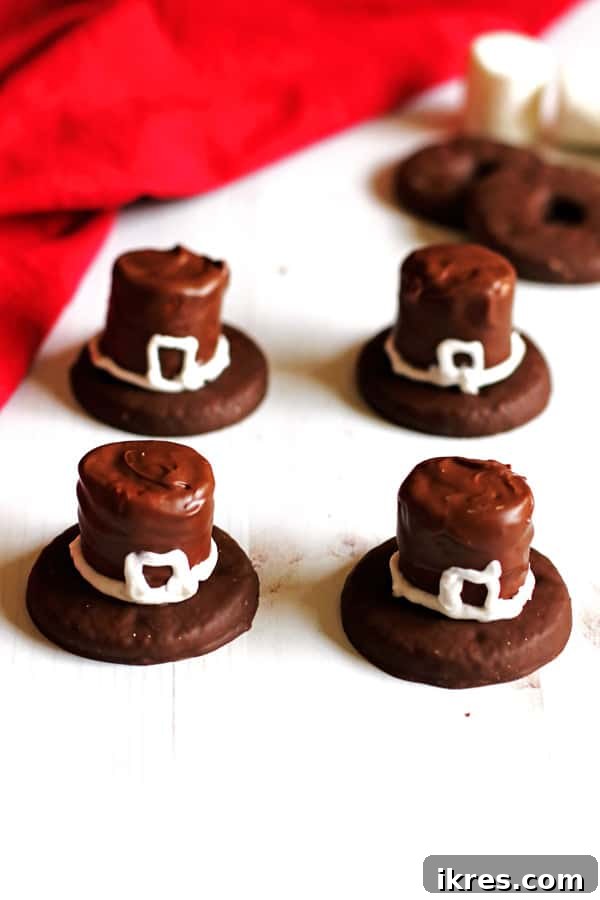
And just like that, your festive Thanksgiving Pilgrim Hat Cookies are complete! These visually appealing and delicious treats are ready to impress your family and friends. Your kids will not only beam with pride for helping to make dessert, but they’ll also cherish the fun memories made in the kitchen.
Creative Variations & Expert Tips for Success
Enhance your Pilgrim Hat Cookies and ensure perfect results every time with these valuable tips and creative ideas.
Recipe Tips:
- Parchment Paper is Your Friend: Always use parchment paper or foil on your baking sheet. It makes cleanup a breeze and ensures your cookies don’t stick once the chocolate sets.
- Dipping Tools: While toothpicks work, a specialized chocolate dipping tool or even a small, sturdy skewer can make the process smoother and cleaner, preventing marshmallows from slipping.
Tips for Melting Chocolate Chips:
Mastering chocolate melting is crucial for these cookies. Here are extra pointers:
- Prevent Overheating: The most common mistake is overheating. Chocolate should be melted gently. Stir frequently, especially when using a microwave, to distribute heat evenly and prevent scorching or seizing.
- Embrace Residual Heat: Often, you can remove the chocolate from heat when a few small lumps still remain. Continue stirring, and the residual heat will usually melt the last bits, resulting in a perfectly smooth and creamy consistency.
- Smooth and Creamy is Key: The ideal melted chocolate is glossy, smooth, and flows easily. If it becomes thick or grainy, it’s likely overheated or had water introduced. Unfortunately, seized chocolate is difficult to salvage for dipping.
- Keep Water Away: Ensure no water comes into contact with your melting chocolate, as even a tiny drop can cause it to seize and become unusable.
Creative Variations:
- Different Cookie Bases: While Keebler Fudge Striped Cookies are classic, feel free to experiment with other flat, round chocolate cookies. Chocolate digestive biscuits or even homemade shortbread could work.
- Chocolate Types: Try milk chocolate for a sweeter hat, or dark chocolate for a richer, more sophisticated flavor. White chocolate could also be used for a contrasting look, though it might be harder to get a deep “hat” color.
- Marshmallow Flavors: If available, flavored marshmallows (like peppermint for a festive twist) could add an unexpected layer of taste.
- Buckle Creativity: Instead of frosting, you could use small yellow or white candies (like mini M&M’s or sprinkles) for the buckle. Edible gold dust applied with a small brush could give a truly elegant buckle.
- Spice It Up: Add a pinch of cinnamon or a tiny dash of pure vanilla extract to your melted chocolate for an extra layer of flavor.
Storage & Make-Ahead Tips:
- Storage: Store the finished Pilgrim Hat Cookies in an airtight container at room temperature for up to 3-5 days. If your home is very warm, storing them in the refrigerator might be better, but bring them to room temperature before serving for optimal taste and texture.
- Make-Ahead: These cookies are perfect for making a day or two in advance, freeing up your time on Thanksgiving Day. Ensure they are fully set and decorated before storing.
Frequently Asked Questions (FAQs)
Here are answers to some common questions you might have about making these Thanksgiving Pilgrim Hat Cookies:
Can I use homemade cookies instead of store-bought?
Absolutely! If you have a favorite chocolate cookie recipe that yields flat, sturdy cookies, feel free to use them. Just ensure they are fully cooled before assembly.
What if my chocolate becomes clumpy?
Clumpy, seized chocolate is usually a result of overheating or getting water into the chocolate. Unfortunately, it’s very difficult to reverse. Your best bet is to start with a fresh batch of chocolate chips. To prevent this, melt slowly and stir constantly, keeping water away from the chocolate.
Can I make these gluten-free?
Yes, you can! Look for gluten-free chocolate-striped cookies or flat gluten-free chocolate biscuits. The marshmallows and chocolate chips are typically gluten-free, but always check labels to be sure.
How far in advance can I make these?
You can make these cookies 2-3 days in advance and store them in an airtight container at room temperature. They hold up very well.
Can kids do all the steps?
Kids can definitely help with most steps! Adult supervision is recommended for melting the chocolate due to heat. Children can easily arrange cookies, dip marshmallows (with a sturdy skewer and adult guidance), and especially enjoy adding the frosting buckles.
What if my marshmallows slide off the cookies?
Ensure the chocolate on the cookie is still slightly warm and tacky when you place the marshmallow, as this helps it adhere. Also, make sure you press down gently but firmly. Chilling them quickly after assembly helps set the chocolate and secure the marshmallow.
More Holiday Recipes to Enjoy
The holiday season is just beginning! If you enjoyed making these Pilgrim Hat Cookies, you’ll love exploring other fun and festive recipes. And you know what holiday is next…Christmas!
Another fun recipe to make with kids are these Rice Krispie Treat Christmas Trees. They are incredibly simple, requiring no baking, and kids absolutely adore decorating and, of course, eating them!
For classic Christmas cookies, a couple of our family favorites include Peanut Butter Kiss Cookies, which are soft, chewy, and topped with a delightful chocolate kiss, and Easy Sugar Cookies, perfect for cutting into festive shapes and decorating with royal icing. Happy Baking!
Stay Connected for More Delicious Ideas!
Follow me on Pinterest and Instagram for all my latest recipes, tips, and culinary inspiration. Don’t miss out on new holiday treats and everyday meal ideas!
I’d love to hear from you! If you make these charming Pilgrim Hat Cookies, please share your experience and how much you liked them by leaving a comment and rating in the section below. Your feedback means a lot! Thanks so much for baking with me!
Thanksgiving Pilgrim Hat Cookies Recipe
These delicious Thanksgiving Cookies that look like pilgrim hats will look so festive at your holiday dinner table! Also, they are perfect for kids to help make!
Author: Jeannie Z
Servings: 24 cookies
Prep Time: 40 mins
Chilling time: 30 mins
Total Time: 1 hr 10 mins
Ingredients
- 1 package of chocolate chips (approx. 12 oz)
- 1 package of large marshmallows (approx. 10 oz)
- 1 package of Keebler Fudge Striped Cookies (approx. 11.5 oz)
- White or yellow decorative frosting (in a tube with a fine tip or with a small round frosting tip)
Instructions
- Cover your baking sheet with parchment paper or foil for easy cleanup.
- Place the Keebler Fudge Striped Cookies in a single layer on the baking sheet. If your cookies are not fully chocolate-dipped, flip them so the chocolate side faces up.
- Melt the chocolate chips using either the microwave or stovetop method (detailed notes below). Ensure the chocolate is smooth and lump-free.
- Insert a dipping tool (or toothpick/skewer) into the top of a marshmallow. Dip and swirl the marshmallow into the melted chocolate until it’s fully covered. Drip off any excess chocolate by tapping against the edge of the bowl.
- Carefully place the chocolate-covered marshmallow onto the center of a cookie. Gently press down to secure it.
- Using a spoon or toothpick to hold the marshmallow in place, gently remove the dipping tool from the marshmallow. Smooth any chocolate on top if needed with the back of a spoon.
- Repeat for all cookies. Once all hats are assembled, place the baking sheet in the refrigerator for about 30 minutes, or until the chocolate has completely set and is firm.
- Once the chocolate is set, remove the hats from the refrigerator. Using the decorative frosting with a small round tip, draw a thin line around the base of the marshmallow (where it meets the cookie) to form the hat band.
- Add a small square to the front center of the hat for the buckle.
Recipe Notes
Melting the chocolate chips:
To melt chocolate chips in the microwave:
Place chocolate chips in a microwave-safe bowl. Heat for 30 seconds, then stir thoroughly. Continue heating in 15-second increments, stirring after each, until the chocolate is completely melted and smooth. Avoid overheating.
To melt chocolate chips on the stovetop:
Pour chocolate chips into a medium-sized pot (preferably using a double boiler setup). Heat on low, stirring often, until the chocolate chips are completely melted and smooth. Do not let water come into contact with the chocolate.
Either way you melt the chocolate chips, make sure you watch them carefully so they don’t overheat. Overheated chocolate gets clumpy and will not work for dipping.
Key Tips for melting chocolate chips:
- Stir often while heating to prevent scorching and ensure even melting.
- Remove from heat when there are still a few small pieces of chocolate remaining; continue stirring to melt them with residual heat.
- The final melted chocolate should be perfectly smooth and creamy.
Nutrition information is approximate and is automatically calculated, so should only be used as a guide.
Course: Dessert
Cuisine: American
Keywords: Thanksgiving dessert, kid friendly desserts, pilgrim hats, holiday cookies, easy Thanksgiving recipe
Update Note: This recipe was originally posted earlier, but was published again in 2020 to include step-by-step directions and new photos, making it even easier for you to create these festive treats!