

This **Paleo pie crust** recipe offers a wonderfully crisp, satisfyingly “buttery” **tart crust** crafted from a harmonious blend of almond flour, tapioca flour, and coconut flour. Designed to be naturally dairy-free, grain-free, and gluten-free, this versatile crust serves as the ideal foundation for an array of culinary creations, from luscious sweet fruit tarts and decadent pies to hearty savory quiches and comforting pot pies. It’s a testament to how delicious allergen-friendly baking can be without compromising on taste or texture.
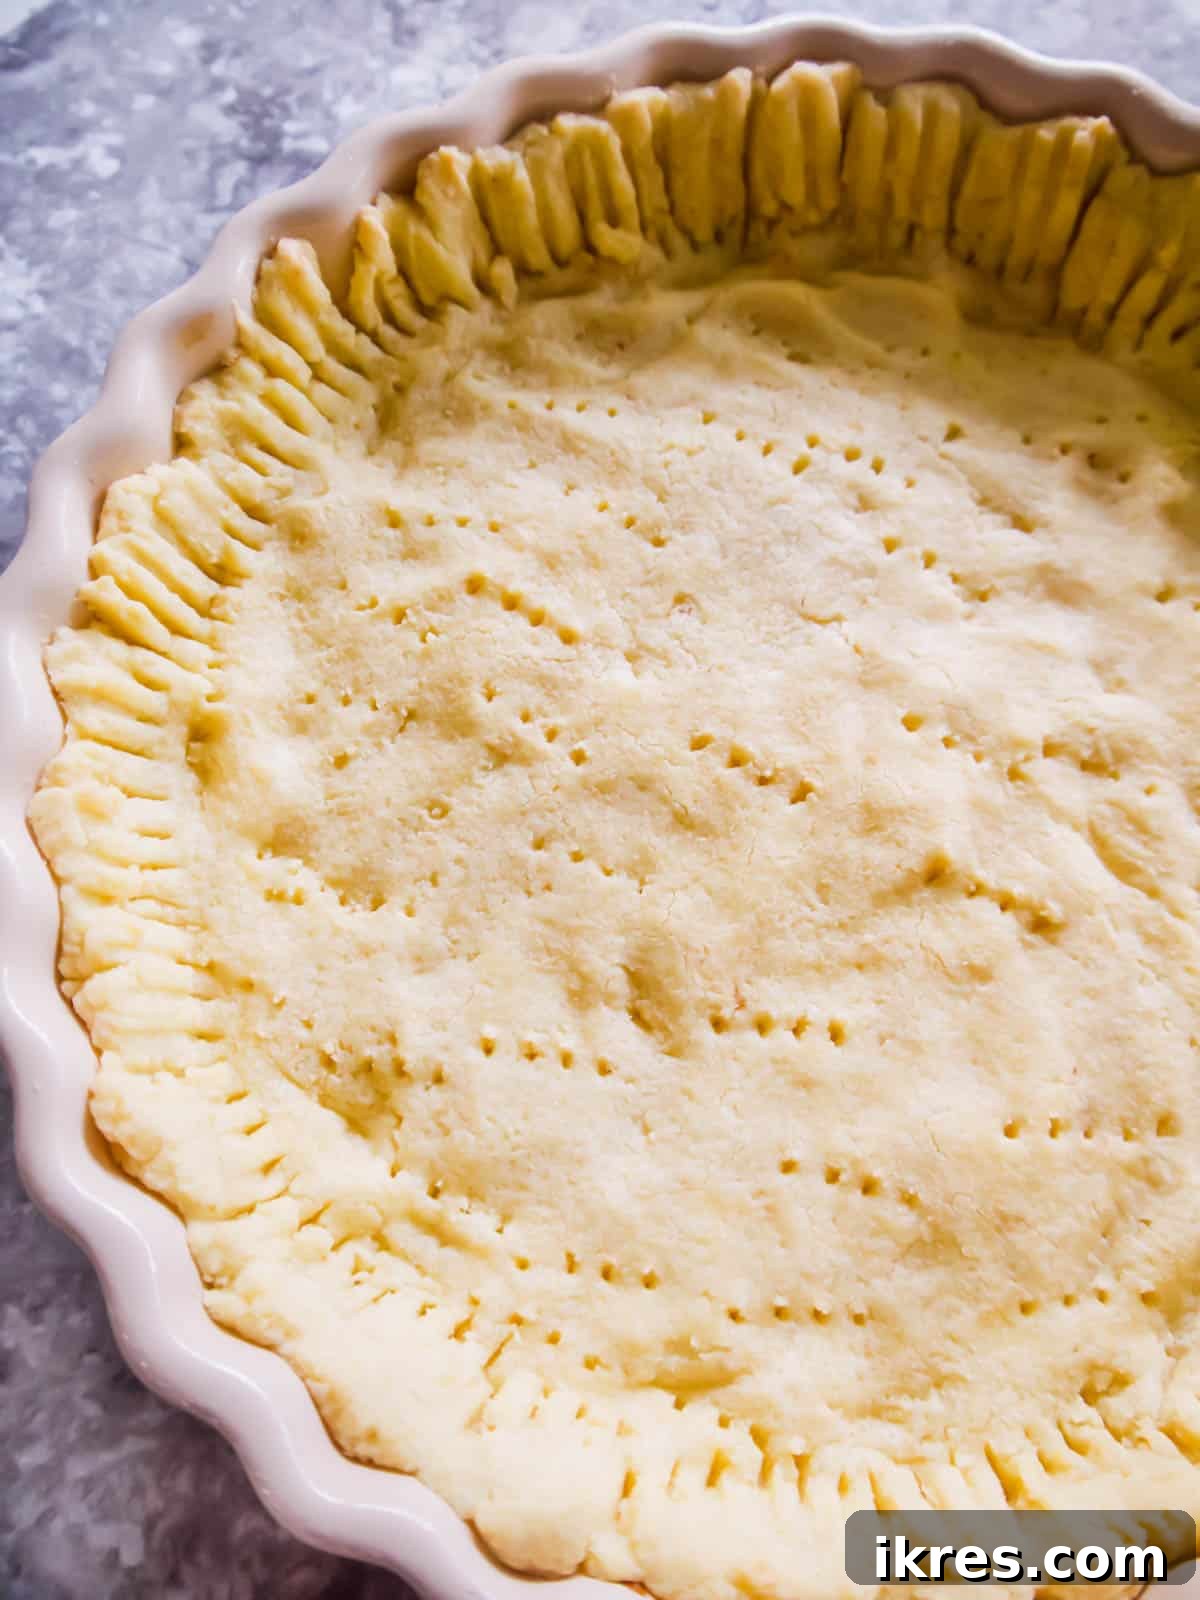
Inspired by a cherished family French tart recipe, this **Paleo tart crust** has been meticulously adapted to accommodate dietary needs without sacrificing its incredible flavor. My mother’s original recipe, a long-standing favorite, served as the perfect blueprint, allowing for dairy-free, grain-free, and gluten-free modifications that have resulted in an equally delicious and even more accessible version. The outcome is a genuinely remarkable crust that everyone can enjoy, regardless of dietary restrictions.
Preparing this exceptional tart or pie crust is surprisingly quick and effortless, largely thanks to the convenience of a food processor. This method brings the dough together in minutes, streamlining your baking process. Its inherent versatility makes it an indispensable component for various dishes, including vibrant fruit tarts, rich custard pies, protein-packed savory egg quiches, and even hearty chicken pot pies. For anyone seeking a reliable, go-to dairy-free and gluten-free tart crust, this recipe consistently delivers, making it one of my absolute favorites.
Table of Contents
- Why This Easy Paleo Pie Crust Recipe Works
- Essential Paleo Pie Crust Ingredients
- Smart Additions & Substitutions for Your Tart Crust
- Step-by-Step Guide to Making Your Paleo Tart Crust
- Creative Ways to Use Your Versatile Gluten-Free Pie Crust
- Easy Paleo Pie Crust and Tart Crust (Gluten-free, Dairy-free) Recipe
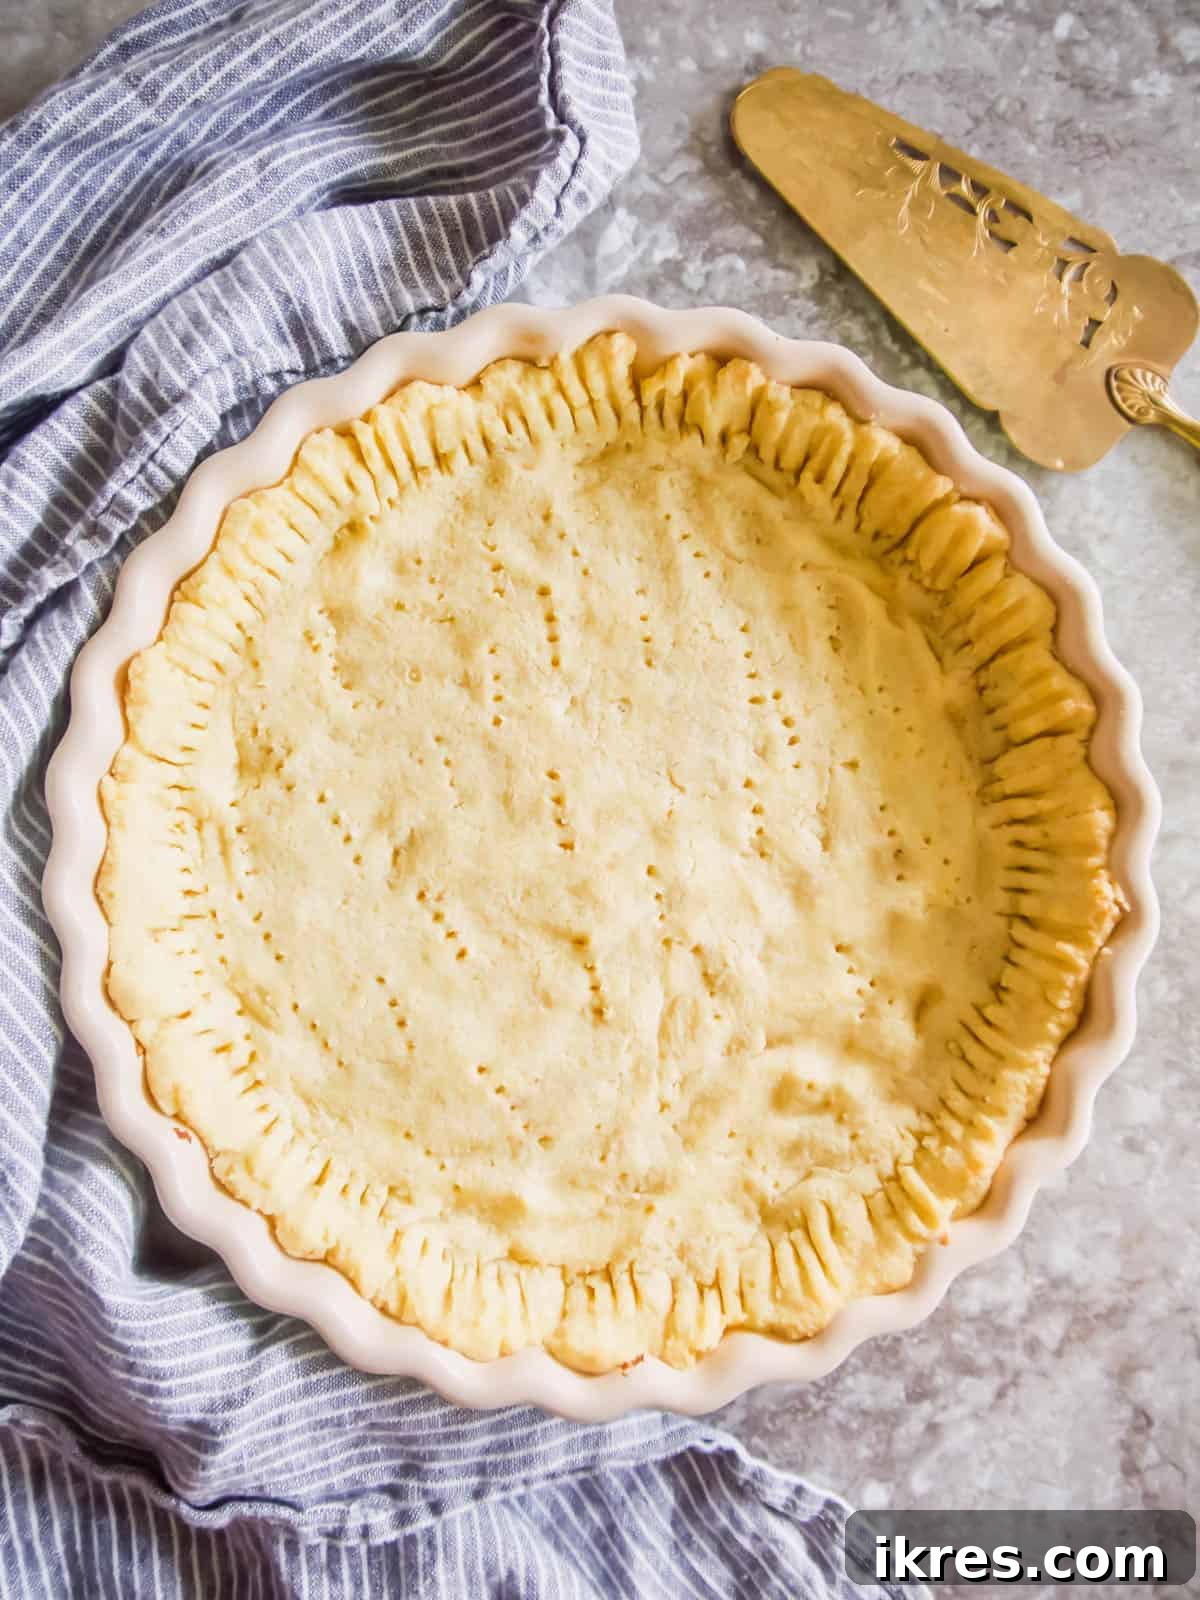
Why This Easy Paleo Pie Crust Recipe Works
This exceptional **Paleo pie crust** recipe stands out for numerous compelling reasons, making it a must-try for any home baker, especially those navigating specific dietary requirements:
- Perfect for Dietary Restrictions: This recipe is a game-changer for individuals adhering to a **dairy-free**, **gluten-free**, or **Paleo diet**, as well as those with grain sensitivities. Finding a pie crust that meets these criteria while still tasting incredible can be challenging, but this recipe effortlessly bridges that gap. It provides a delicious solution without the need for traditional gluten-containing flours or dairy products, making it a fantastic alternative to conventional pie crusts. For another gluten-free option, you might also explore Texanerin’s Gluten-free Pie Crust, which uses a different blend of gluten-free flours.
- Unbelievable Taste and Texture: Despite being a **Paleo, gluten-free, and dairy-free pie crust**, its taste and texture are so remarkably close to traditional pastry that most wouldn’t guess it’s allergen-friendly. It delivers a wonderfully flaky, subtly puffy, and exquisitely crisp finish that truly elevates any pie or tart. The “buttery” richness, achieved without actual butter, adds to its irresistible appeal, providing a satisfying mouthfeel for both sweet and savory fillings.
- Incredibly Versatile: This **almond flour tart crust** is celebrated for its adaptability. It forms a robust and flavorful base for a wide range of dishes. Use it to create a stunning sweet fruit tart, a comforting savory quiche filled with your favorite ingredients, or even a hearty chicken pot pie, providing a delicious and sturdy foundation for all your culinary adventures. Its neutral yet rich flavor profile complements both sweet and savory ingredients beautifully.
- Flexible Baking Options: The ability to either partially bake this crust or bake it fully alongside your chosen recipe offers incredible utility. Pre-baking, or blind baking, is particularly useful for wet fillings (like custards or fruit pies) to prevent a soggy bottom, ensuring a perfectly crisp crust every time. This flexibility makes it suitable for a vast array of recipes, from delicate tarts to robust casseroles, simplifying meal preparation.
- Effortless Preparation: One of the greatest advantages of this **easy Paleo pie crust** is its straightforward preparation. All the ingredients are simply combined in a food processor, taking mere minutes to transform into a workable dough. This minimal hands-on time means less fuss and more time enjoying your delicious, homemade creations. Even novice bakers will find this process incredibly simple and rewarding.
Essential Paleo Pie Crust Ingredients
Crafting the perfect **grain-free pie crust** starts with selecting the right ingredients. Each component in this recipe plays a crucial role in achieving the desired crisp texture, rich flavor, and structural integrity that makes this Paleo tart crust truly special. Here’s a breakdown of what you’ll need:
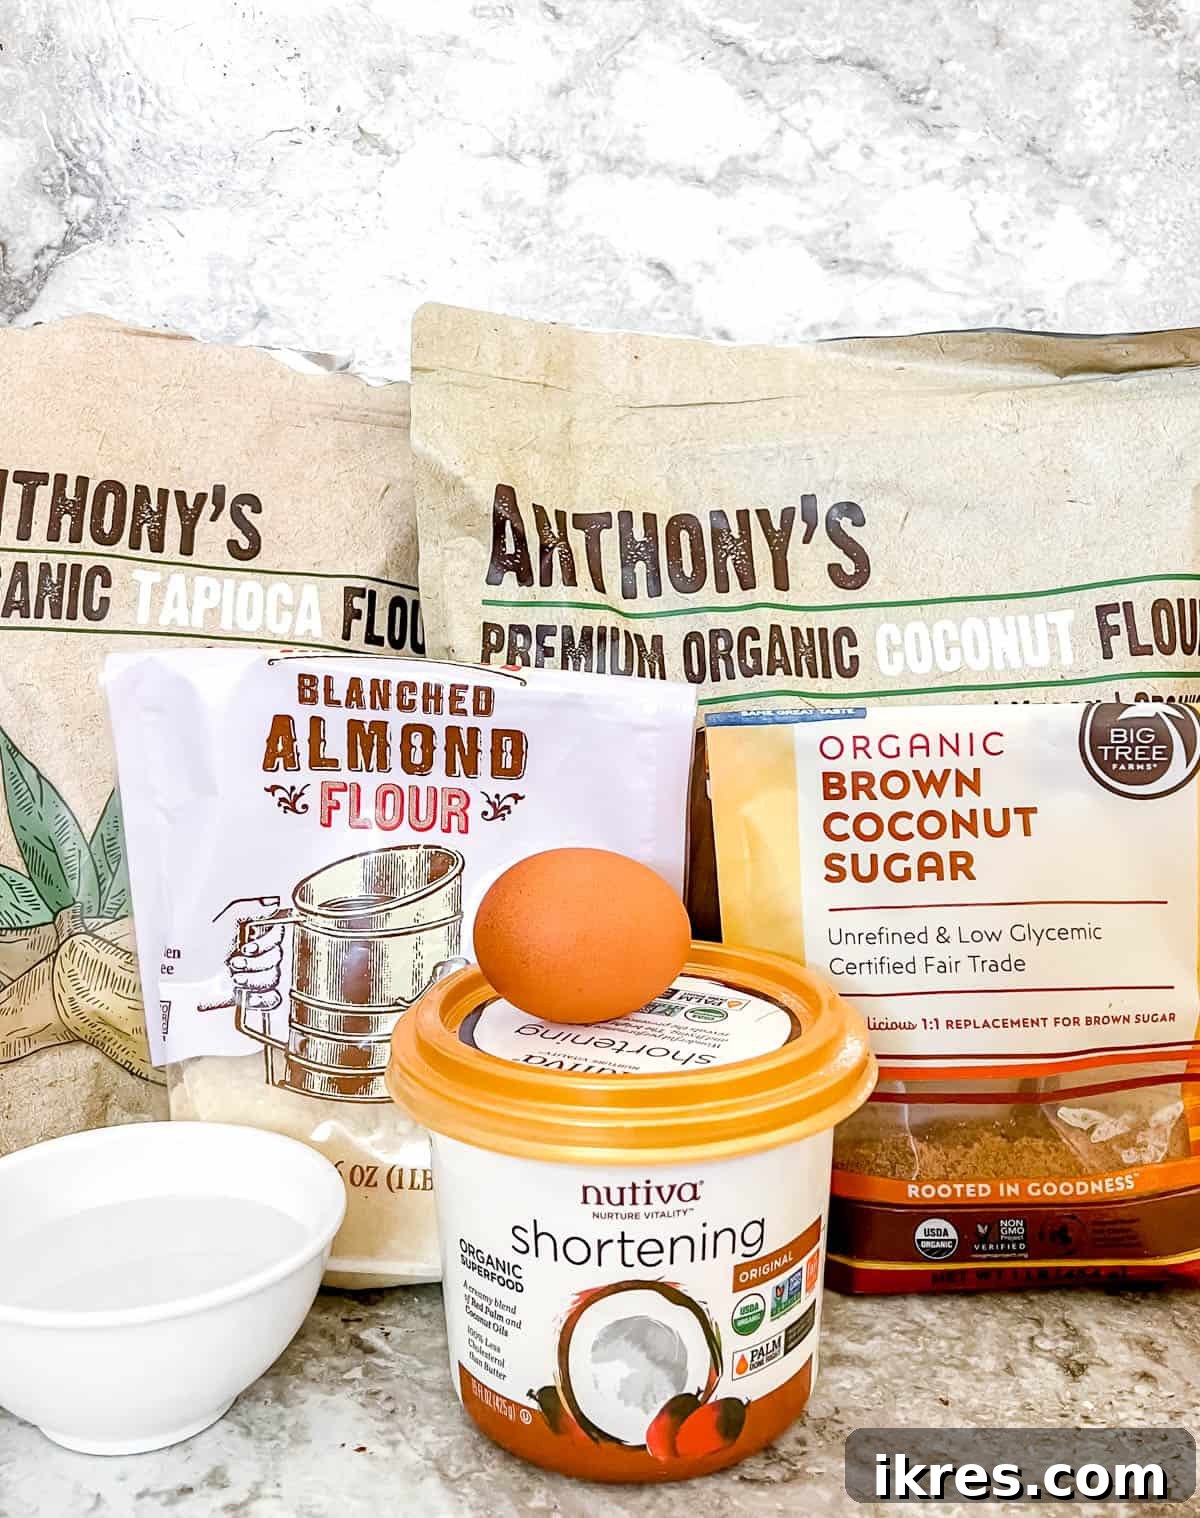
- Almond Flour: The foundation of this **almond flour pie crust**. Using blanched almond flour is highly recommended due to its finer, more uniform texture. This results in a smoother, more refined crust that doesn’t feel gritty. Almond flour provides a rich, nutty flavor and a tender crumb, making it an excellent gluten-free alternative.
- Tapioca Flour: Also known as tapioca starch, this ingredient is vital for the crust’s texture. It contributes to the desired crispness and helps bind the flours together, providing a slight chewiness and preventing the crust from becoming too crumbly.
- Coconut Flour: A powerful absorbent, coconut flour adds a subtle sweetness and helps to firm up the dough. It works in conjunction with tapioca flour to create the perfect structure, ensuring the crust holds its shape while remaining tender. Remember, coconut flour is very absorbent, so precise measurements are important.
- Plant-Based Organic Shortening: This is the secret to achieving that “buttery” richness and flakiness without any dairy. I consistently use Nutiva organic shortening, which is a blend of red palm and coconut oils. Its solid consistency at room temperature mimics butter, creating pockets of steam during baking for a flaky texture. Ensure it’s non-hydrogenated for a healthier option.
- Salt: A small amount of salt is essential to balance the flavors, enhancing both sweet and savory elements in the crust. Any fine-grain salt will work here.
- Coconut Sugar: This natural sweetener provides a hint of gentle sweetness, making the crust ideal for fruit pies and tarts. While it can be omitted for purely savory dishes, I find a touch of coconut sugar often enhances savory profiles too, adding a subtle depth. It’s a great Paleo-friendly sugar alternative.
- Egg: The egg acts as a crucial binder, helping all the ingredients coalesce into a cohesive dough. It contributes to the structure and richness of the crust, ensuring it holds together beautifully when baked.
- Water: Just enough water is needed to bring the dough to the perfect consistency, allowing it to be easily rolled and pressed into the tart pan without being too sticky or too dry. The exact amount can vary slightly depending on the humidity and specific flours used.
For a precise list of quantities and detailed measurements, please refer to the full recipe card provided below.
Smart Additions & Substitutions for Your Tart Crust
While this **gluten-free tart crust** recipe is perfected as is, there are a few simple substitutions you can make based on ingredient availability or dietary preferences, without compromising the final outcome:
- Arrowroot Powder for Tapioca Flour: If tapioca flour is not readily available, **arrowroot powder** makes an excellent substitute. Both are starches that function similarly in baking, providing binding properties and contributing to a crisp texture. You can use arrowroot powder in a 1:1 ratio.
- Maple Sugar for Coconut Sugar: For a slightly different flavor profile or if you prefer another Paleo-friendly sweetener, **maple sugar** can be used in place of coconut sugar. It offers a rich, caramel-like sweetness that complements many fillings beautifully. Use it as a direct substitute in the same quantity.
Step-by-Step Guide to Making Your Paleo Tart Crust
Creating this **easy Paleo pie crust** is a straightforward process, especially with the help of a food processor. Follow these simple steps for a perfect, crisp crust every time:
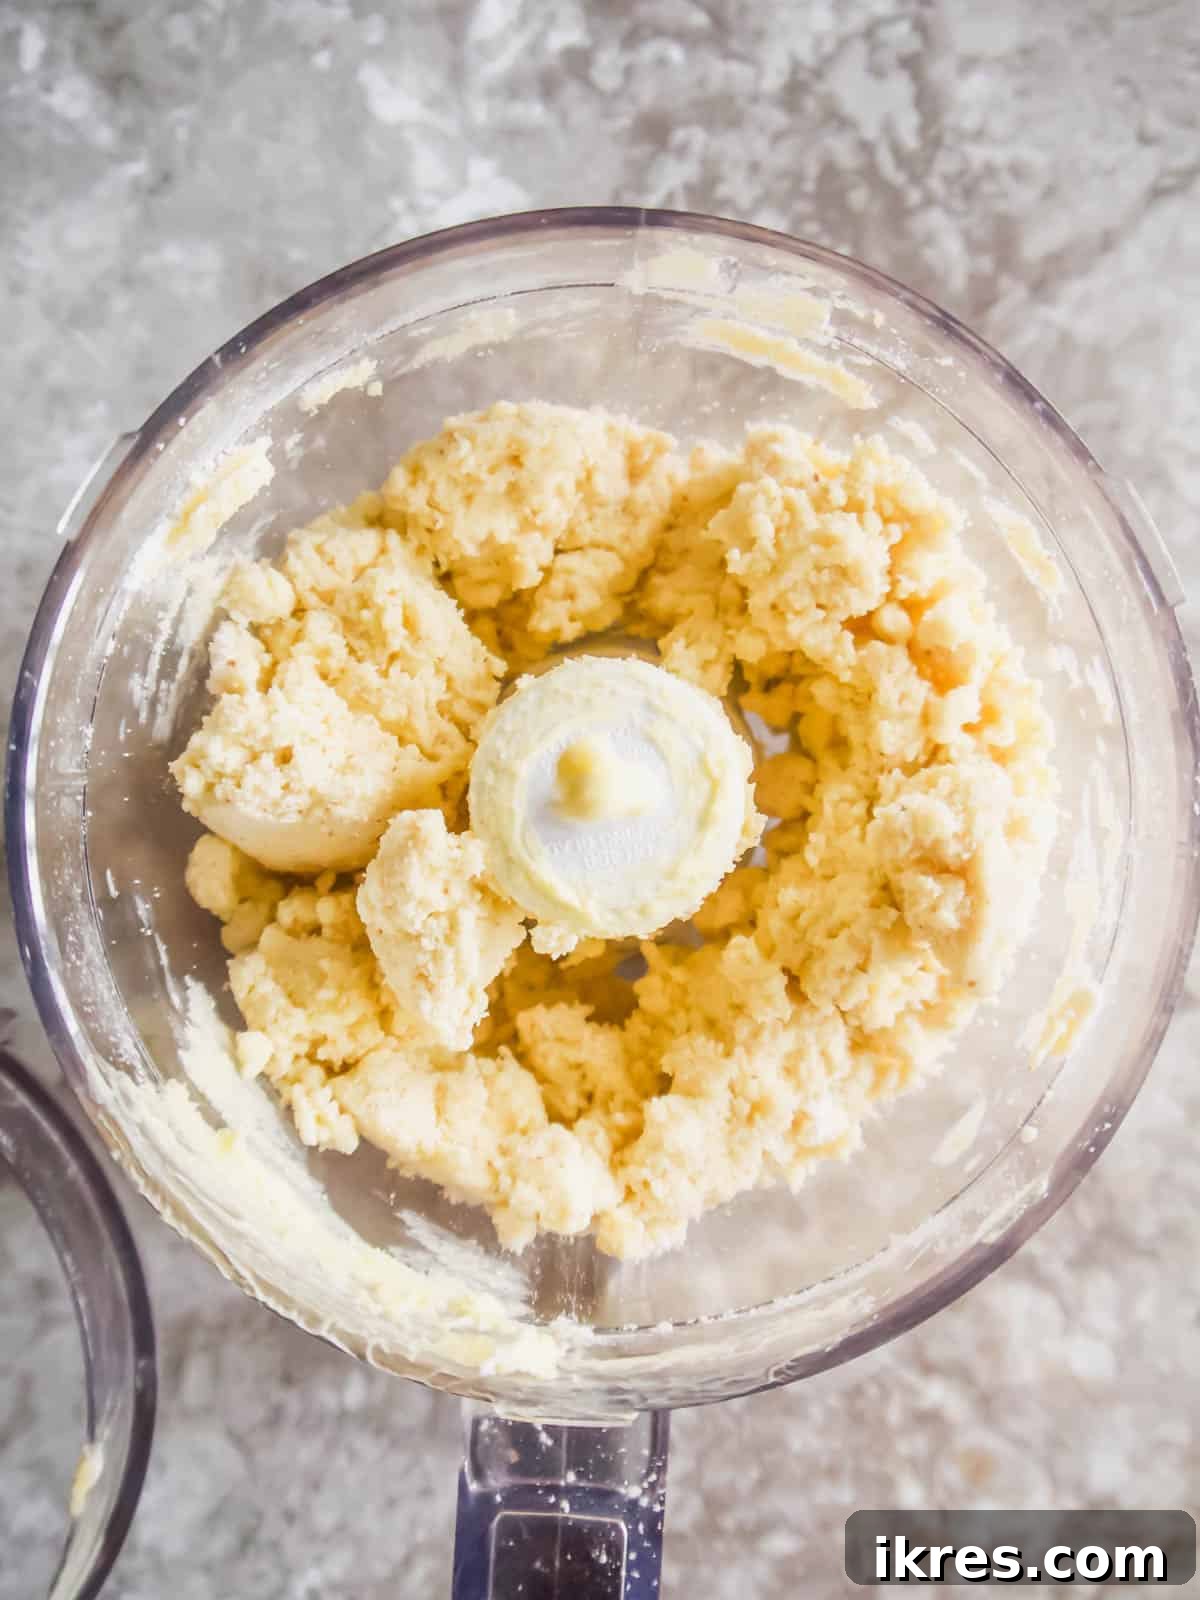
Step 1: Begin by adding your dry ingredients – almond flour, tapioca flour, coconut flour, salt, and coconut sugar – into the food processor. Then, add the room-temperature plant-based organic shortening. Pulse and mix everything until the mixture becomes thick and chunky, resembling coarse crumbs or a sandy texture with larger pieces of shortening distributed throughout. Ensure there are no large lumps of shortening left.
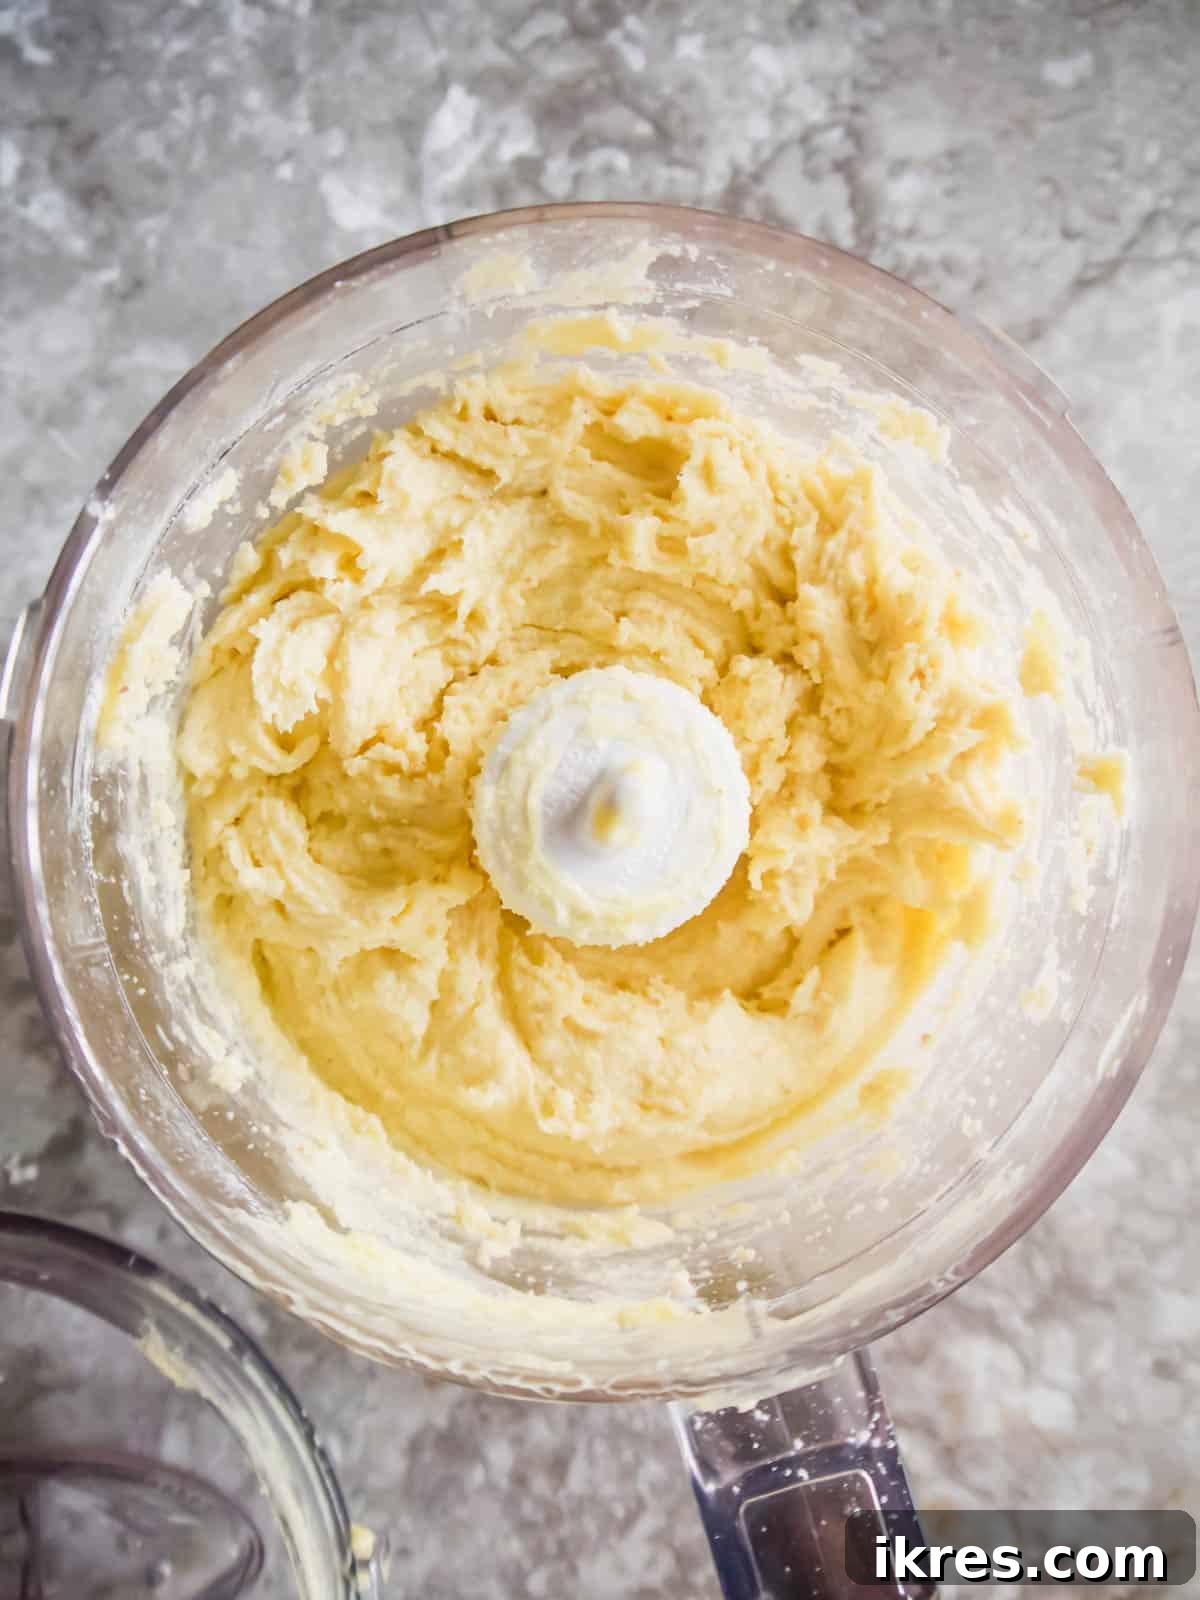
Step 2: With the food processor running, gradually add the water and the egg to the mixture. Continue to process until the dough comes together and takes on a thick, creamy consistency. It should look well-combined and somewhat sticky at this point. Once mixed, turn off the food processor and let the dough stand in the bowl for 5 minutes. This resting time allows the flours, especially coconut flour, to properly hydrate, resulting in a more pliable and less sticky dough.
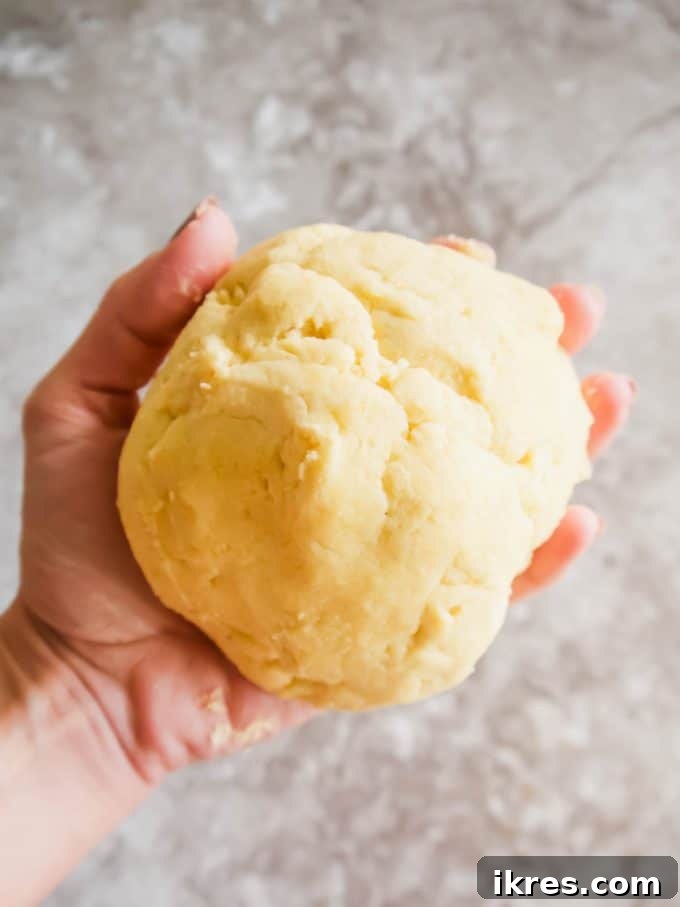
Step 3: Carefully remove the dough from the food processor. It might still appear quite creamy or soft, but don’t worry – it will firm up slightly as you work with it. With lightly wet hands, gently gather the dough and roll it into a cohesive ball. The moisture on your hands will help prevent sticking and make the process much easier. You’ll notice it becomes more manageable as you form it.
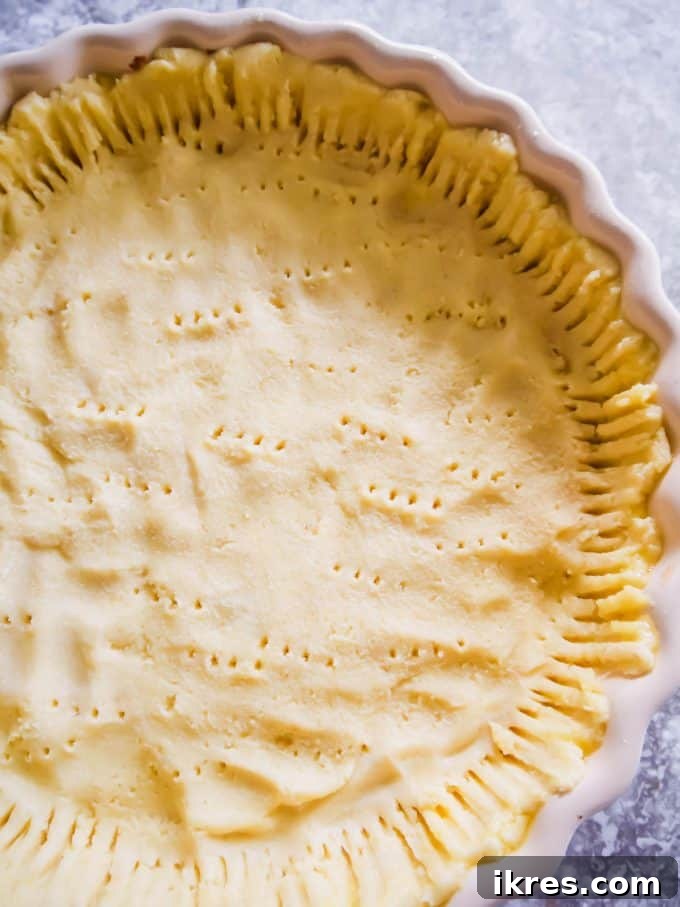
Step 4: Place the dough ball directly into the center of your prepared tart dish. Using your wet fingertips, gently but firmly push the dough outwards from the center, working your way up the sides, until it is evenly spread across the bottom and up the fluted edges of the pan. Pay attention to ensure there are no thin spots or holes in the crust for an even bake. Once the dough is uniformly spread, use a fork to prick small holes all over the bottom of the tart crust. This step, known as docking, prevents the crust from puffing up excessively or bubbling during baking. Additionally, use the fork to gently press the edges of the tart crust firmly against the sides of the mold, ensuring a neat and well-defined shape.

Step 5: Your **Paleo pie crust** is now ready for baking. Depending on your recipe, you may need to pre-bake the crust partially or fully before adding the filling. If your recipe calls for pre-baking, follow the instructions for cooking until barely set (about 12-15 minutes for partial) or until lightly browned (25-30 minutes for a full bake). Alternatively, if your filling bakes for an extended period, you can add your decorations or filling directly and bake everything together.
Creative Ways to Use Your Versatile Gluten-Free Pie Crust
This **versatile Paleo pie crust** is not just for one type of dish; its robust flavor and sturdy texture make it an excellent base for a multitude of sweet and savory recipes. Here are some fantastic ways to incorporate this **dairy-free pie crust** into your cooking:
- In Sweet Fruit Tarts: This crust truly shines when paired with vibrant fruit fillings. Imagine a delicate base topped with seasonal fruits, perhaps nestled on a bed of sweet jam, and baked until the flavors meld into a delicious symphony. Try it with this Paleo Apple Tart or this exquisite Paleo Nectarine Tart. The crisp crust provides the perfect counterpoint to the soft, sweet fruit, creating a dessert that simply melts in your mouth!
- In Savory Quiches: Elevate your breakfast, brunch, or dinner with a wholesome quiche. Simply fill this prepared tart crust with your favorite quiche mixture – be it spinach and feta (dairy-free alternatives, of course!), mushroom and herbs, or even a meaty sausage blend – then bake until golden and set. I absolutely adore using this crust to create my savory and satisfying Paleo Gluten-Free Spinach Bacon Quiche.
- In Hearty Chicken Pot Pie: For a comforting and deeply flavorful meal, this crust is ideal for a chicken pot pie. To create a top and bottom crust, simply double the dough recipe. Use half of the dough to line the bottom of your pie dish, fill it generously with your creamy chicken pot pie mixture, and then top with the remaining dough. Pinch the edges to seal, and bake until the filling is bubbly and the crust is beautifully browned.
- In a Deep Dish Fruit Pie: If you’re a fan of generous fruit fillings, this crust can easily accommodate a deep dish pie. Again, double the dough recipe. Use one half for the bottom crust, piling high your favorite fruit filling (apples, berries, peaches are all excellent choices), and then cover with the second half of the dough for a truly substantial and satisfying dessert.
- Mini Tarts and Hand Pies: For individual servings or on-the-go treats, divide the dough into smaller portions. Press into mini tart molds or roll out and cut into circles for delicious hand pies, perfect for parties or lunchboxes.
Did you try this recipe? Please leave me a ⭐ review below!
Easy Paleo Pie Crust and Tart Crust (Gluten-free, Dairy-free)
A crisp “buttery” tart crust that makes for the perfect base for sweet or savory dishes. Naturally dairy-free and gluten-free.
By: Dominique
Servings: 8
Prep time: 10 mins
Cook time: 30 mins
Total time: 40 mins
Ingredients
- 3/4 cup almond flour
- 1/2 cup tapioca flour
- 3 Tbs coconut flour
- 1/2 cup non-hydrogenated plant-based organic shortening, at room temperature (e.g., Nutiva organic shortening, a mixture of coconut and red palm oil)
- 1/2 tsp salt
- 1 tsp coconut sugar
- 1 egg
- 2 Tbs water
Instructions
- Preheat your oven to 375°F (190°C). Lightly grease a 9.5-inch round tart pan (a Le Creuset tart dish works wonderfully).
- Add the almond flour, tapioca flour, coconut flour, non-hydrogenated plant-based organic shortening, salt, and coconut sugar to a food processor. Process until the mixture is fully integrated, becoming thick and creamy with some larger chunks, resembling coarse crumbs.
- Add 2 tablespoons of water and 1 egg to the food processor. Mix again until the dough is thick and creamy. Let the mixture sit for 5 minutes to allow the flours to hydrate.
- Remove the pie crust mixture from the food processor and gently roll it into a ball with your hands. It may feel a bit creamy, but it will come together. Place the ball in the center of the tart dish and, with slightly wet hands to prevent sticking, gently push and spread it evenly across the bottom and up the sides of the pan. Ensure there are no holes in the crust.
- Using a fork, poke small holes all around the bottom of the pie crust. This helps prevent bubbling during baking. Also, use the fork to gently press the edges of the pie crust into the fluted sides of the tart dish for a neat finish.
- Bake the crust as needed for your recipe. For a partially baked crust (blind bake), cook for about 12-15 minutes until barely set. For a fully baked crust, bake for 25-30 minutes, or until lightly browned and crisp.
Notes
- Instead of tapioca flour, you can use arrowroot powder as a 1:1 substitute.
- Instead of coconut sugar, you can use maple sugar for a similar natural sweetness.
Nutrition
Nutrition information is automatically calculated, so should only be used as an approximation.
- Calories: 218 kcal
- Carbohydrates: 11 g
- Protein: 3 g
- Fat: 19 g
- Saturated Fat: 4 g
- Polyunsaturated Fat: 4 g
- Monounsaturated Fat: 5 g
- Trans Fat: 2 g
- Cholesterol: 20 mg
- Sodium: 160 mg
- Potassium: 9 mg
- Fiber: 2 g
- Sugar: 1 g
- Vitamin A: 30 IU
- Calcium: 25 mg
- Iron: 1 mg
Additional Info
Course: Dessert
Cuisine: French
Tried this recipe?
Mention @perchancetocook or tag #perchancetocook!