
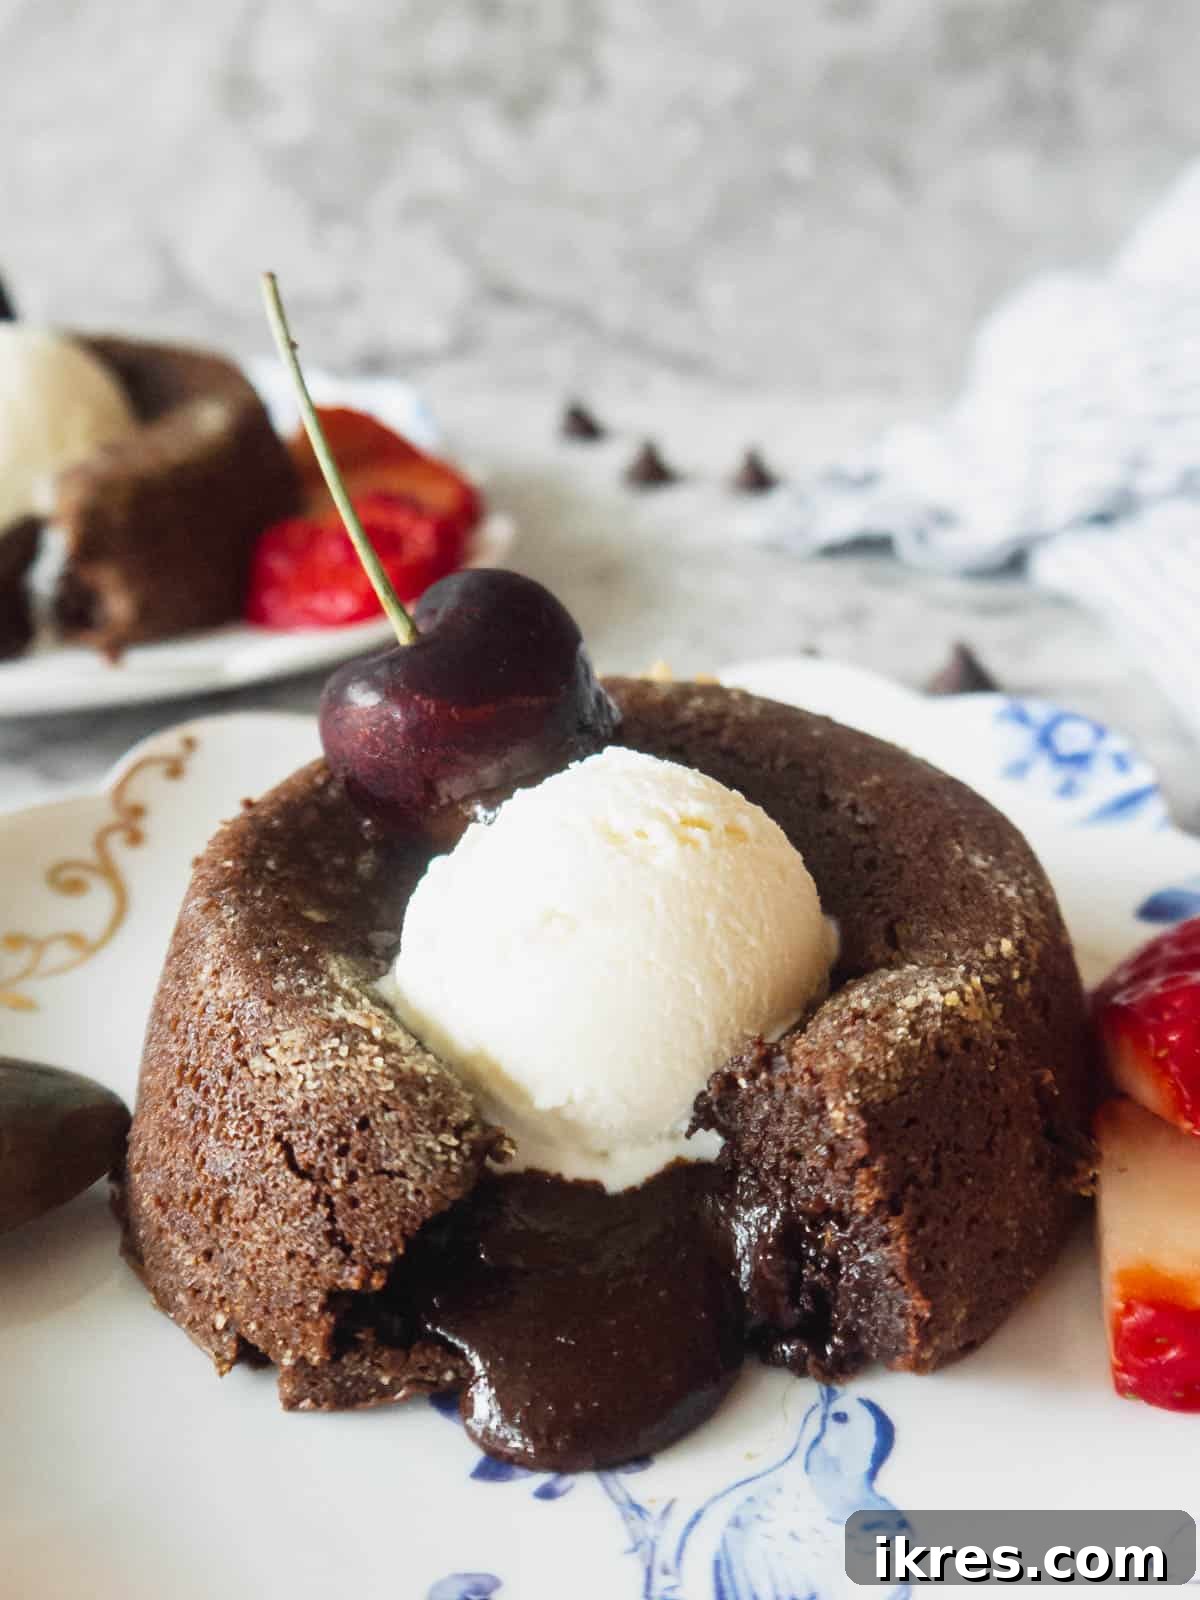
These Molten Chocolate Lava Cakes are an exquisite blend of rich, dark chocolate and a luxuriously melted, ooey-gooey center. Crafted for the true chocolate connoisseur, these decadent cakes are not only a feast for the senses but also surprisingly simple to prepare, requiring less than 25 minutes from start to finish. They promise to be the perfect dessert to elevate any special occasion or simply satisfy a sudden chocolate craving.
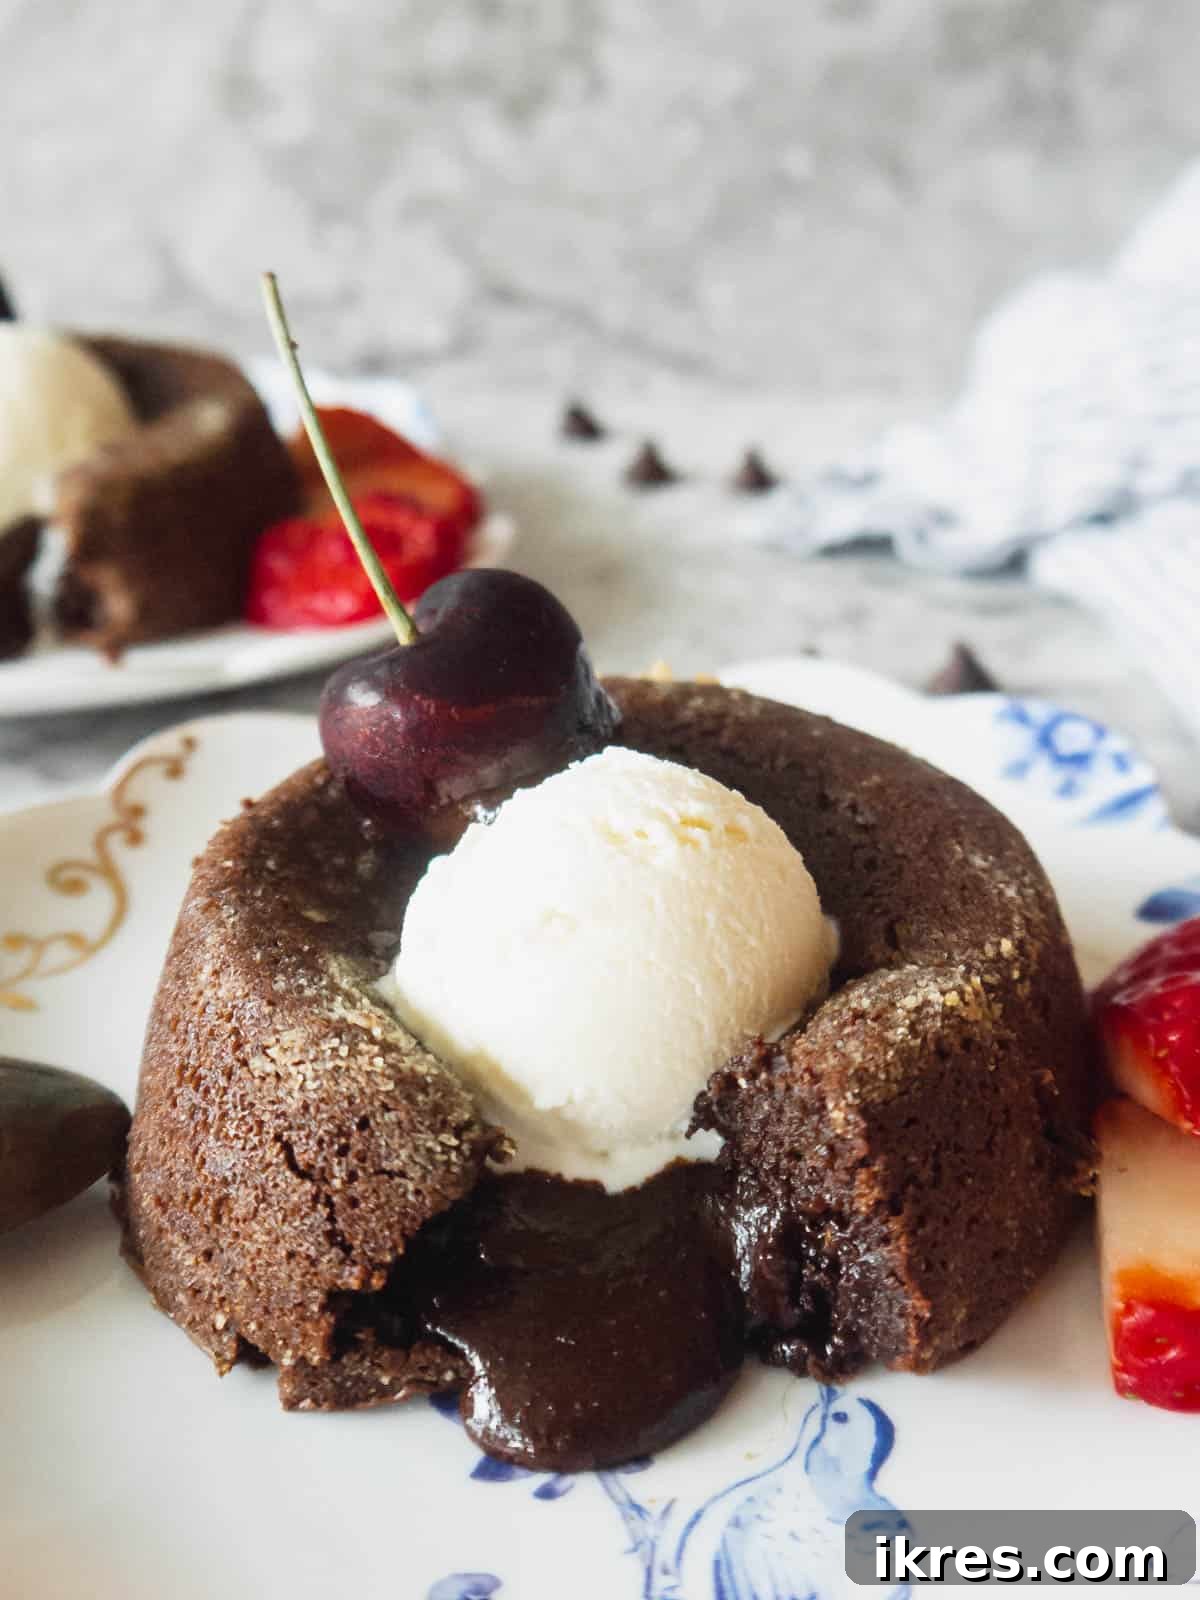
Prepare to fall in love with these exceptional gluten-free chocolate lava cakes. Unlike traditional recipes, ours embraces a healthier approach without compromising on flavor or that signature molten core. By utilizing wholesome ingredients like finely milled almond flour and natural maple syrup, we’ve created a dessert that tastes every bit as indulgent as its classic counterpart. The subtle yet impactful hint of espresso powder acts as a secret ingredient, intensifying the chocolate’s deep notes and adding an extra layer of complexity to each bite.
With just 7 simple ingredients and a mere 25 minutes, you can conjure up this melty, irresistible chocolate marvel. The magic happens swiftly, making it an ideal choice for a spontaneous treat or a last-minute dessert. For the ultimate chocolate experience, we highly recommend serving these warm lava cakes with a scoop of your favorite ice cream, allowing the cold creaminess to beautifully complement the warm, flowing chocolate.
This recipe is perfectly scaled to serve two, making it an intimate and special dessert to share. If you’re a fan of single-serving delights, be sure to explore our other delightful creations like the gluten-free chocolate chip cookie in a mug or the cozy pumpkin chocolate chip cookie in a mug.
Table of Contents
- Why This Recipe Works
- Essential Recipe Ingredients
- Additions & Clever Substitutions
- Effortless Step-by-Step Instructions
- Baking Tips for Perfect Lava Cakes Every Time
- Storage and Make-Ahead Options
- Common Recipe FAQs
- Other Healthy Desserts You’ll Love
- Gluten-Free & Dairy-Free Molten Chocolate Lava Cake Recipe Card
Why This Recipe Works: A Healthier Take on a Classic
This isn’t just another lava cake recipe; it’s a thoughtful re-imagining that prioritizes both indulgence and well-being. Here’s why these molten chocolate lava cakes will become your new go-to:
- They are made with healthier ingredients: We consciously opted for wholesome alternatives like nutrient-rich almond flour, naturally sweet maple syrup, and heart-healthy olive oil. This approach allows you to savor every rich spoonful without the guilt often associated with decadent desserts.
- They cater to specific dietary needs, being completely dairy-free, gluten-free, grain-free, and enthusiastically Paleo-friendly. This makes them accessible to a wider audience, ensuring that everyone can enjoy this luscious treat regardless of dietary restrictions.
- They come together remarkably quickly. In less than 30 minutes, from mixing to serving, these delightful cakes are ready to be enjoyed. This speed makes them ideal for spontaneous cravings, weeknight indulgences, or when you need an impressive dessert in a pinch without spending hours in the kitchen.
- It is a perfect small-batch recipe that serves 2. This thoughtful portioning prevents waste and makes it an excellent choice for a romantic dessert for two, or a controlled indulgence for one (with a generous serving!). No need to worry about leftovers or excessive portions.
- The inclusion of espresso powder is a game-changer. It doesn’t make the cake taste like coffee, but rather deepens and amplifies the complex flavor profile of the chocolate. This subtle enhancement creates the most intensely chocolatey and utterly satisfying lava cake experience you can imagine.
Essential Recipe Ingredients for Your Molten Chocolate Lava Cakes
Crafting these extraordinary lava cakes requires a curated selection of ingredients, each playing a vital role in achieving the perfect taste and texture. Here’s a closer look at what you’ll need:
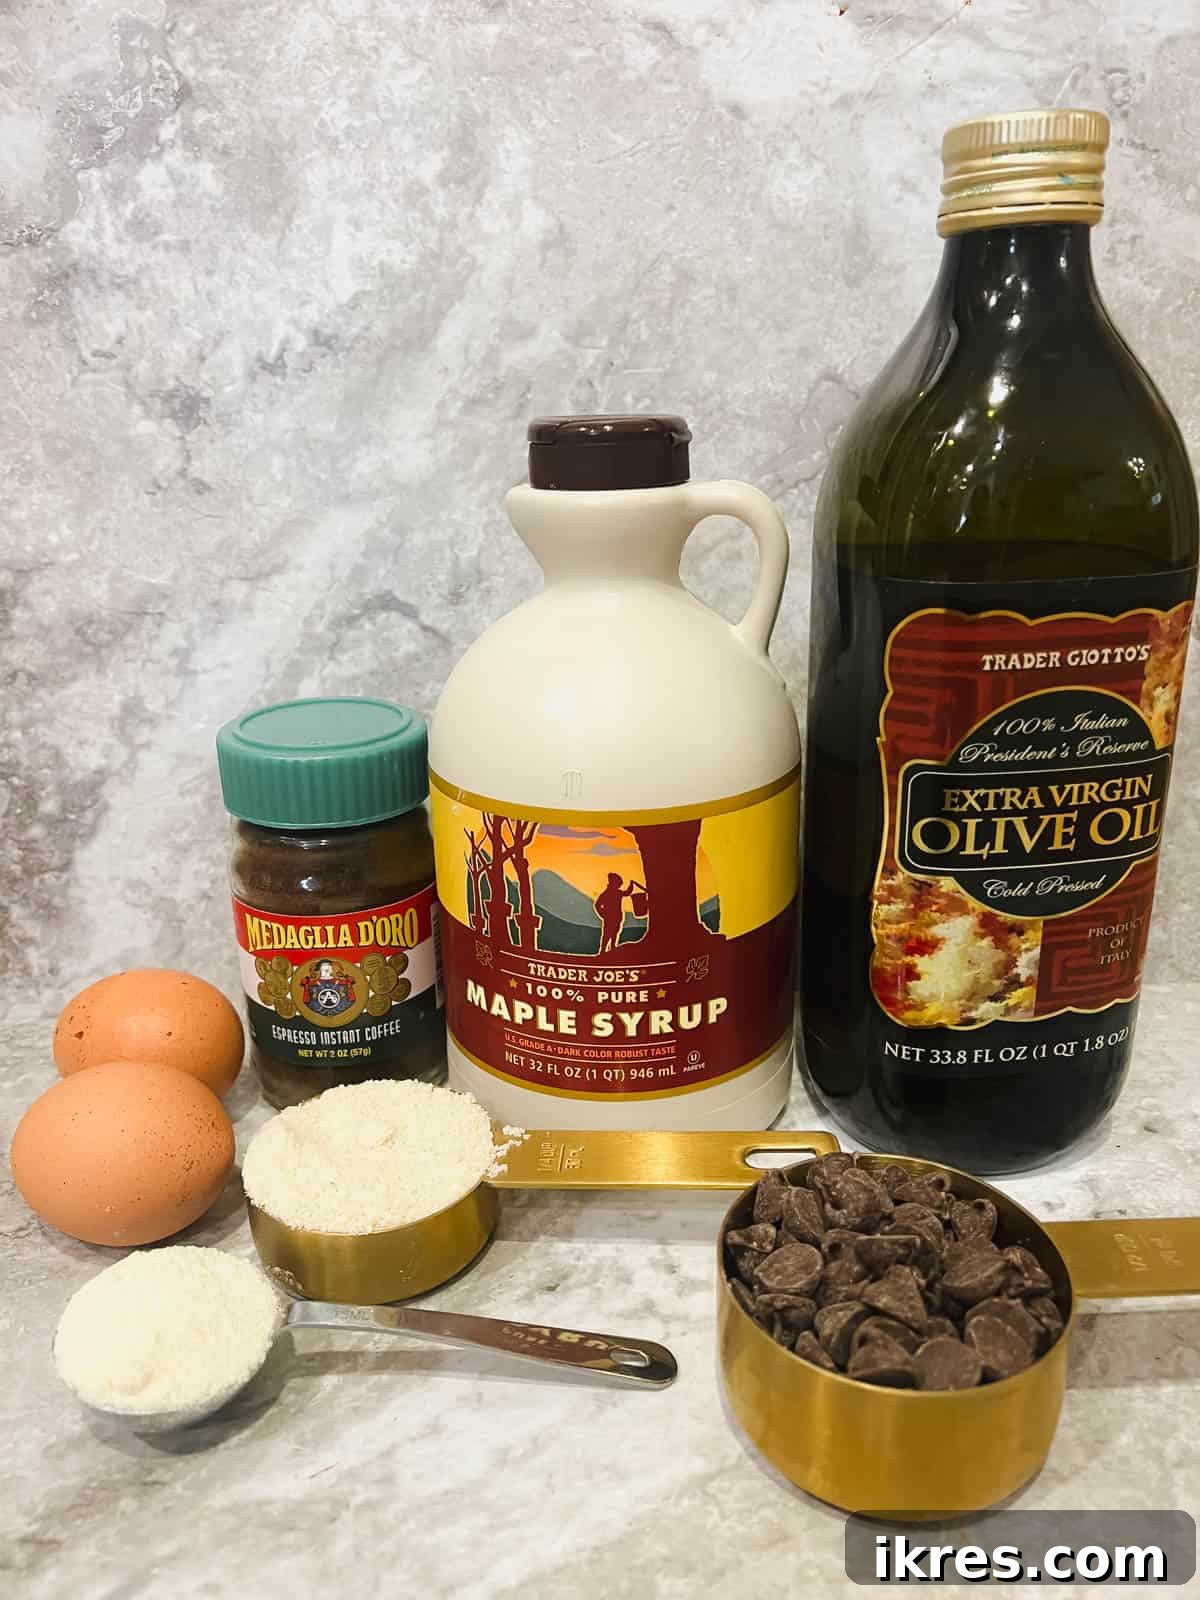
- Olive Oil: Opt for a good quality extra virgin olive oil. Its mild, fruity notes beautifully complement the chocolate, adding moisture and richness without imparting an overwhelming olive flavor. It’s a healthier fat alternative to butter often found in traditional recipes.
- Maple Syrup: Insist on pure maple syrup. Avoid any varieties cut with corn syrup or artificial sweeteners, as these will compromise both the flavor and the “healthier” aspect of this recipe. Maple syrup provides a wonderful depth of sweetness and a delicate caramel note.
- Dairy-Free Chocolate Chips: The quality of your chocolate makes all the difference here. You can use any type of chocolate chips that align with your dietary needs – whether that’s dairy-free for a vegan or allergy-friendly option, Paleo-compliant chocolate, or even regular high-quality dark chocolate if dairy isn’t a concern. Choose a brand that melts smoothly.
- Eggs: You’ll need one whole egg and an additional egg yolk. The whole egg provides structure, while the extra yolk contributes to the rich, custardy texture of the molten center, ensuring it stays beautifully liquid and luxurious.
- Almond Flour: Blanched almond flour is essential for baking here. It’s naturally gluten-free and grain-free, offering a fine texture that results in a tender, moist cake. It also adds a subtle nutty flavor that pairs wonderfully with chocolate.
- Coconut Flour: A small amount of coconut flour plays a crucial role in absorbing excess moisture and contributing to the overall delicate texture of the cake. It helps achieve the perfect balance, ensuring the cake holds its shape while maintaining a soft crumb around the lava center.
- Instant Espresso: This is a key flavor enhancer. Make sure to use *instant* espresso powder or instant coffee granules. Ground coffee or ground espresso will not dissolve properly and will result in a grainy, unpleasant texture. Instant espresso simply dissolves into the batter, deepening the chocolate flavor without necessarily making the cake taste overtly like coffee.
- Pinch of Salt: A small amount of salt is vital to balance the sweetness and enhance all the other flavors, particularly the chocolate.
For precise measurements and detailed instructions, please refer to the complete recipe card provided below.
Additions & Clever Substitutions for Your Molten Chocolate Lava Cakes
This recipe is quite adaptable, allowing for a few smart adjustments to suit your pantry or taste preferences:
- Instead of olive oil: While olive oil offers a unique flavor and health benefits, you can easily substitute it with other healthy fats like melted coconut oil (ensure it’s completely melted for even distribution) or a neutral-flavored avocado oil. Both will work beautifully to provide the necessary moisture and richness.
- Instead of maple syrup: Pure honey can be used as a direct 1:1 substitute for maple syrup. Keep in mind that honey has a distinct flavor profile, which will subtly alter the overall taste of the lava cake, adding its own floral sweetness.
- Espresso flavor intensity: The instant espresso powder is truly optional, though highly recommended for its ability to deepen chocolate notes. If you prefer to omit it entirely, your cakes will still be delicious. For a milder coffee hint, use just 1 teaspoon of instant espresso or instant coffee. If you want to lean into that mocha-like richness, stick with the recommended 2 teaspoons. Remember, always use *instant* varieties for best results.
Effortless Step-by-Step Instructions for Your Molten Chocolate Lava Cakes
Creating these divine molten chocolate lava cakes is simpler than you might think. Follow these clear steps to achieve perfect results every time.
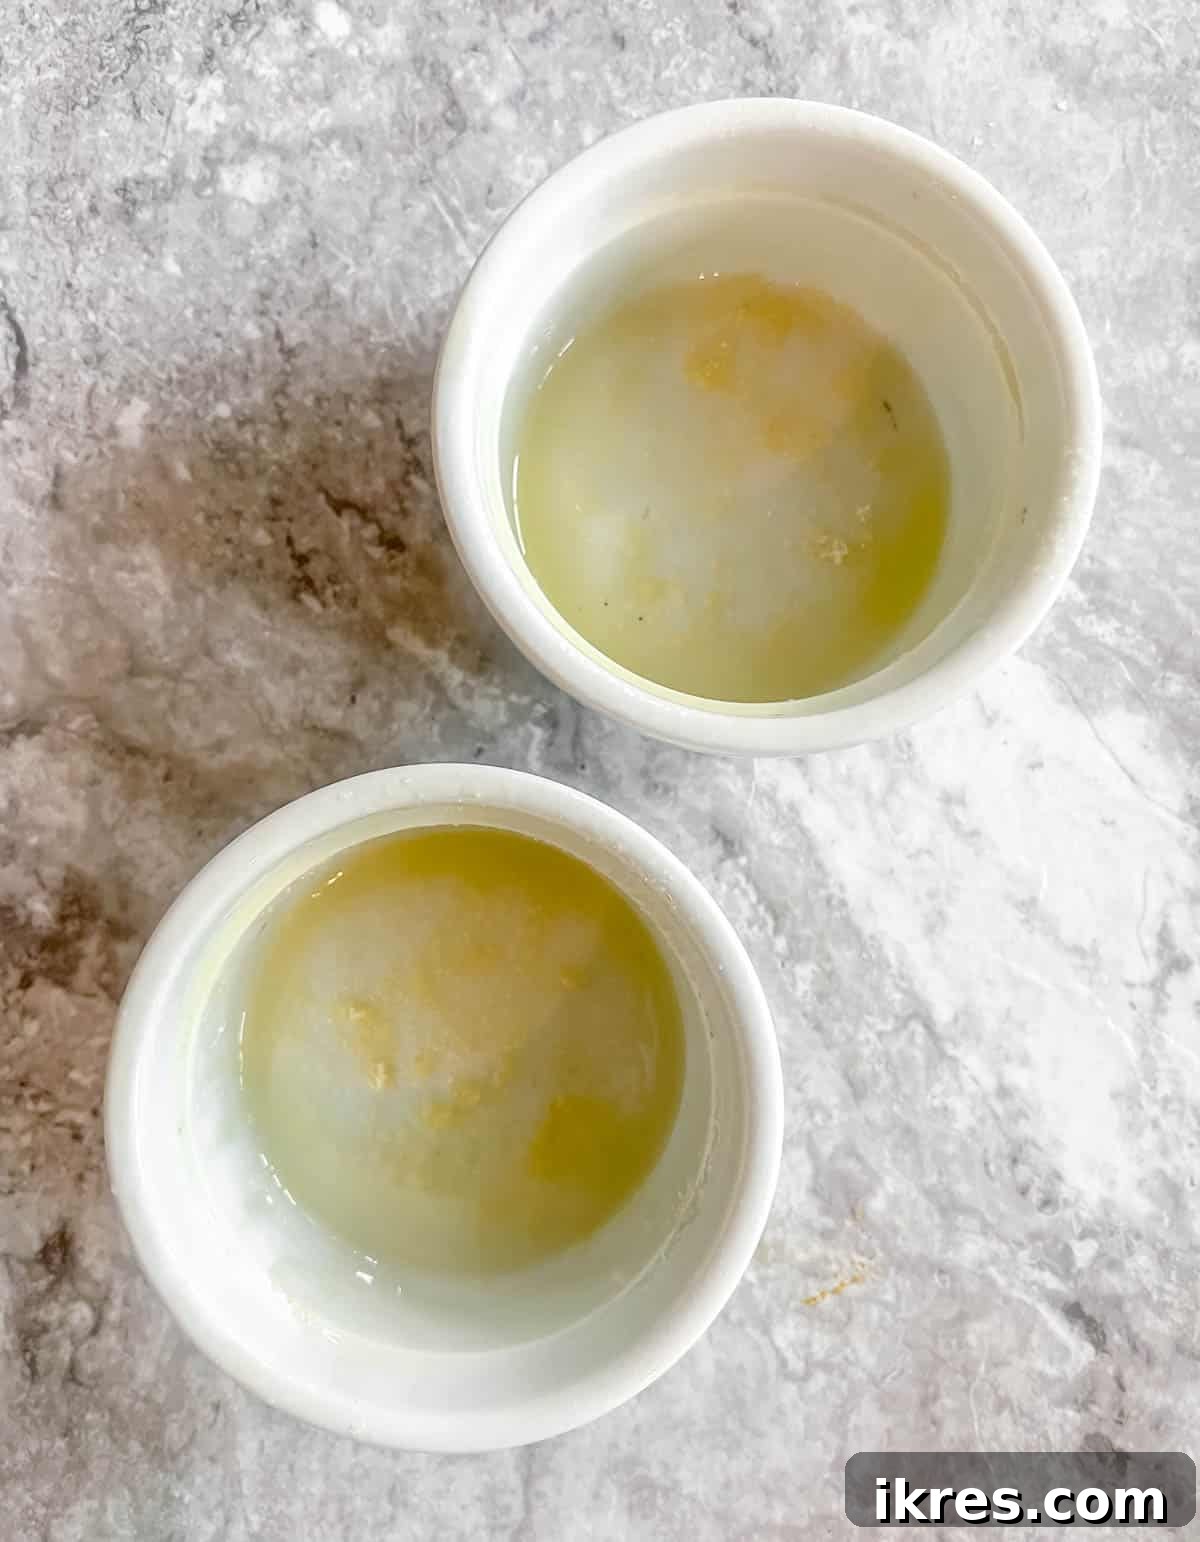
Step 1: Prepare the Ramekins. Begin by preheating your oven to 400°F (200°C). Then, generously grease two standard ramekins (about 6-ounce capacity). You can use cooking spray or a brush with olive oil. The key is to thoroughly coat the entire interior surface, ensuring no cake sticks. For extra insurance, sprinkle a light layer of coconut flour onto the greased bottoms and sides, tapping out any excess. This creates a non-stick barrier crucial for easy unmolding.
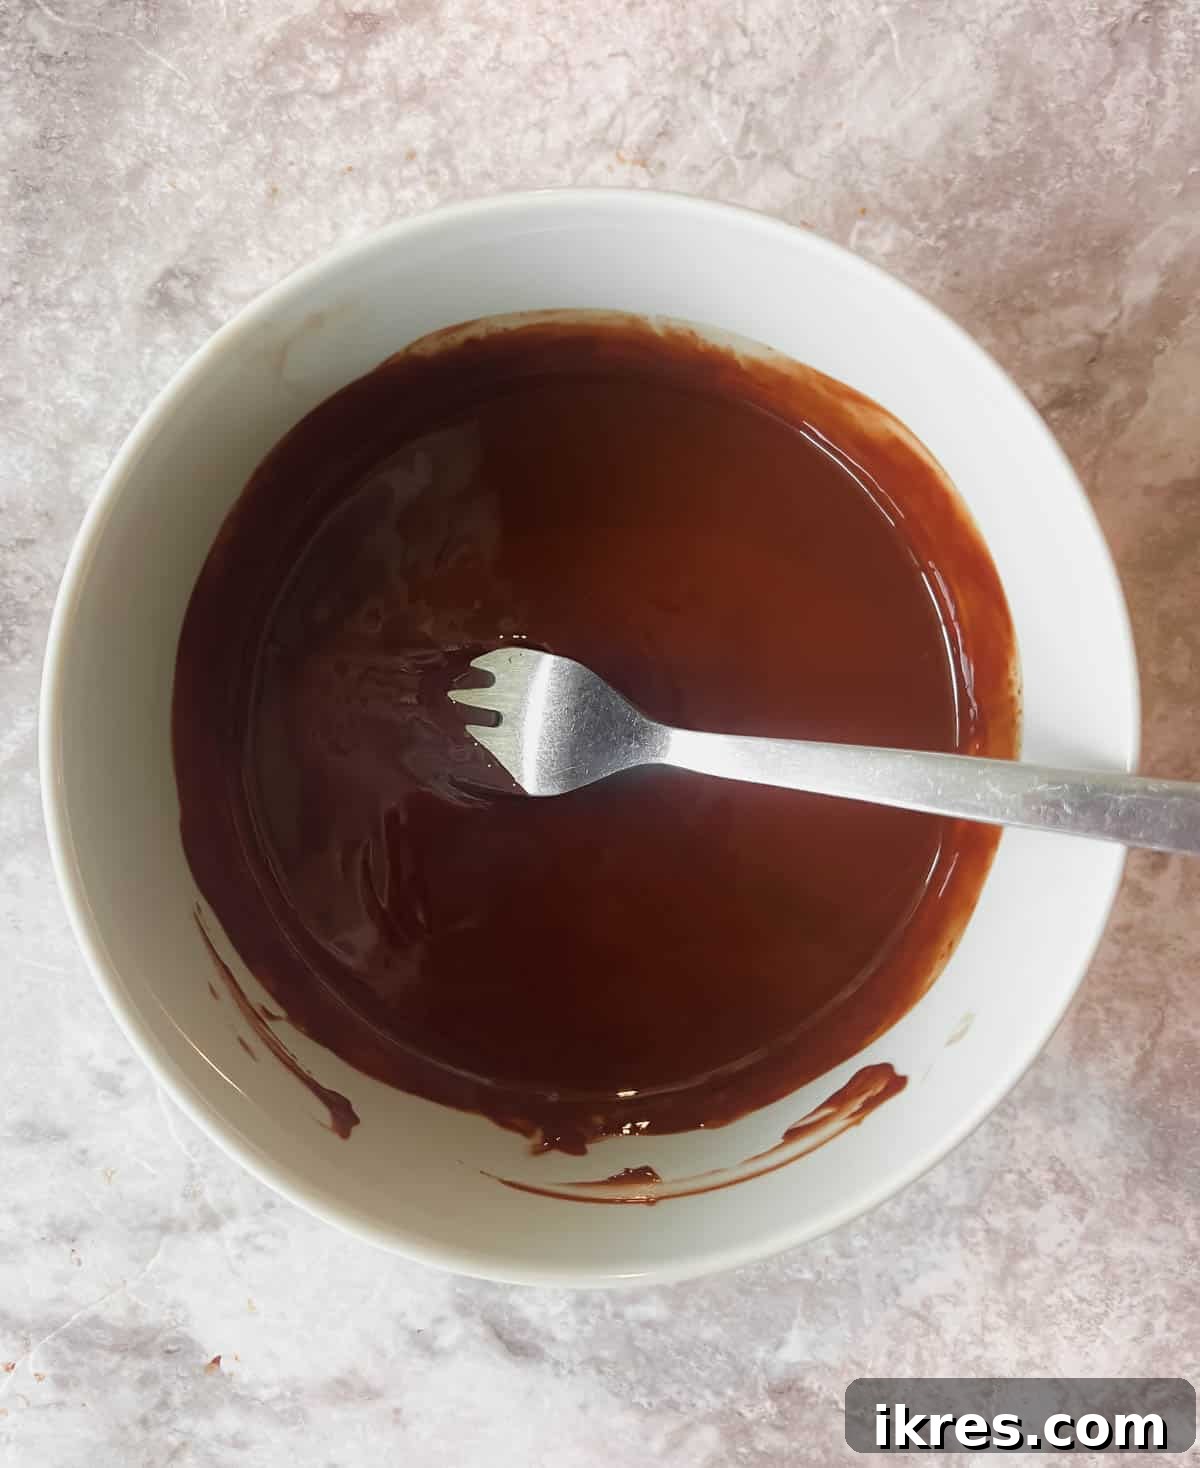
Step 2: Melt Chocolate and Oil. In a microwave-safe bowl, combine your chosen chocolate chips with the olive oil. Microwave the mixture in short 30-second intervals, stirring thoroughly with a fork or spatula after each interval. Continue this process until the chocolate is completely melted and the mixture is smooth and glossy, with no lumps remaining. Be careful not to overheat the chocolate, as it can seize.
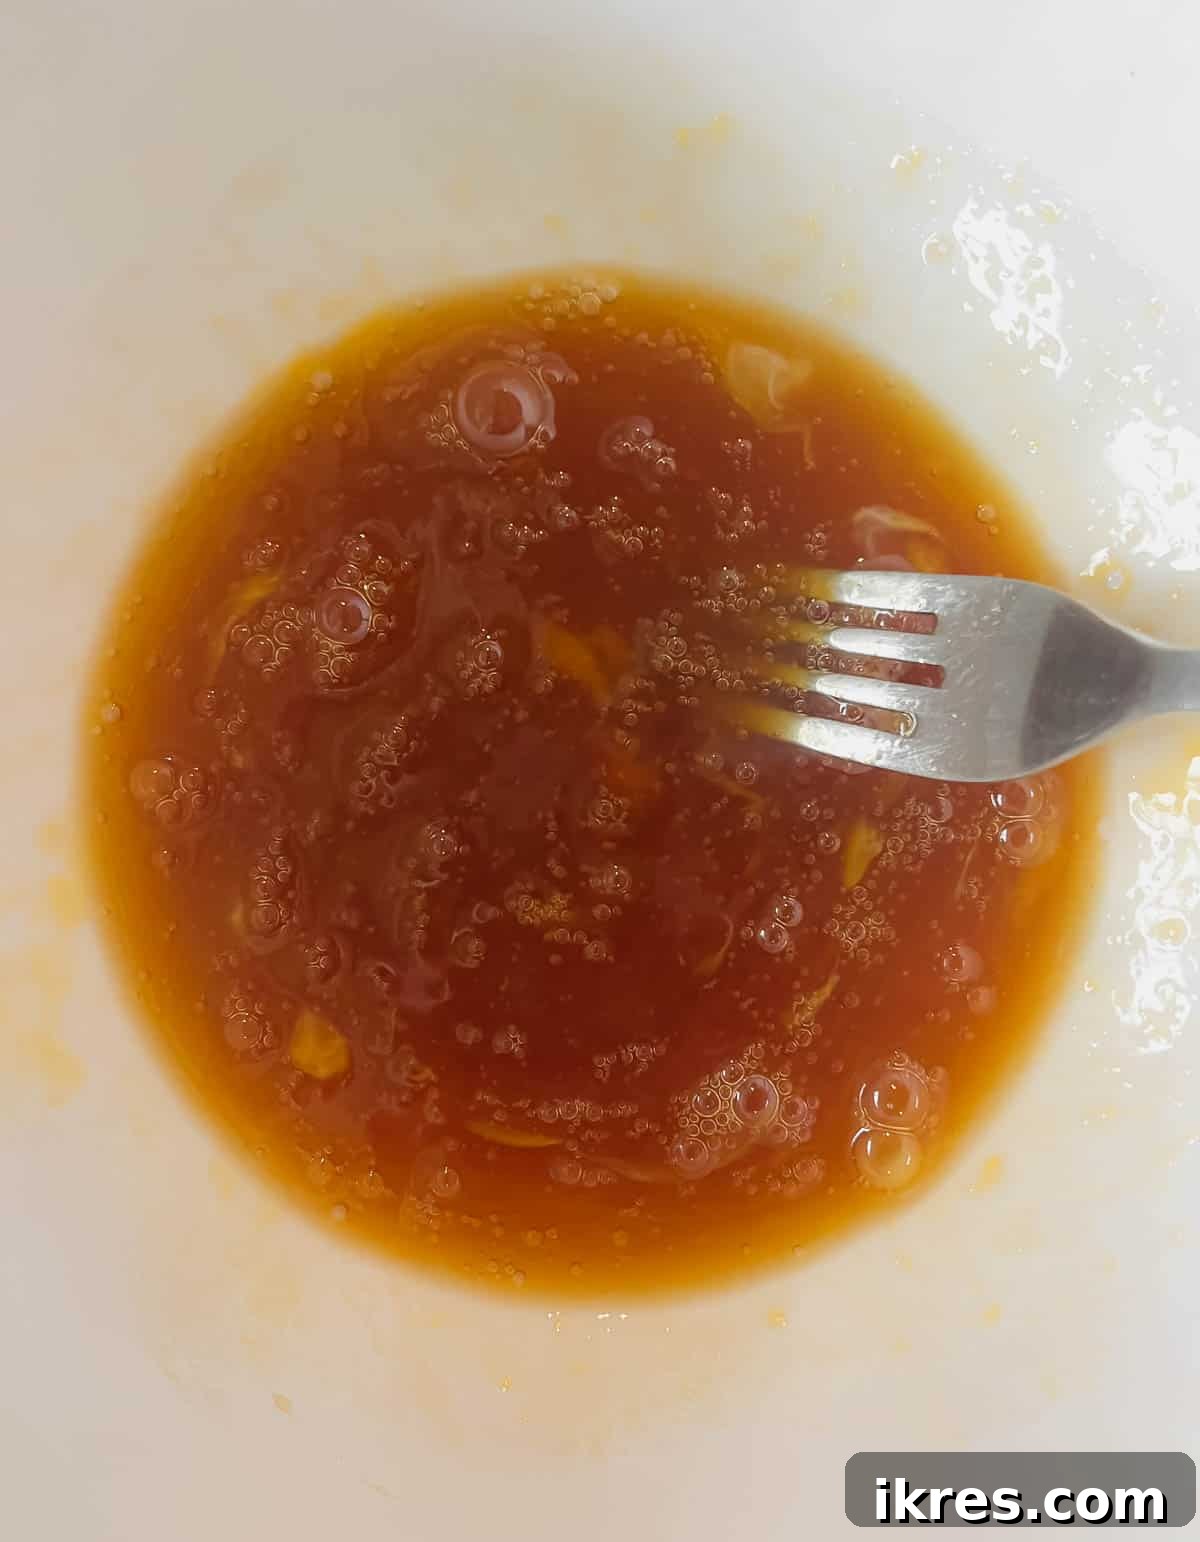
Step 3: Whisk Eggs and Maple Syrup. In a separate, medium-sized mixing bowl, whisk together the whole egg, the extra egg yolk, and the maple syrup. Whisk vigorously for about 1-2 minutes until the mixture lightens slightly in color and thickens a bit. This aeration helps create a tender cake texture.

Step 4: Incorporate Melted Chocolate. Gently pour the cooled (but still liquid) melted chocolate and oil mixture into the egg and maple syrup mixture. Whisk everything together until it is fully combined and smooth. Be sure to scrape down the sides of the bowl to ensure all ingredients are well incorporated.
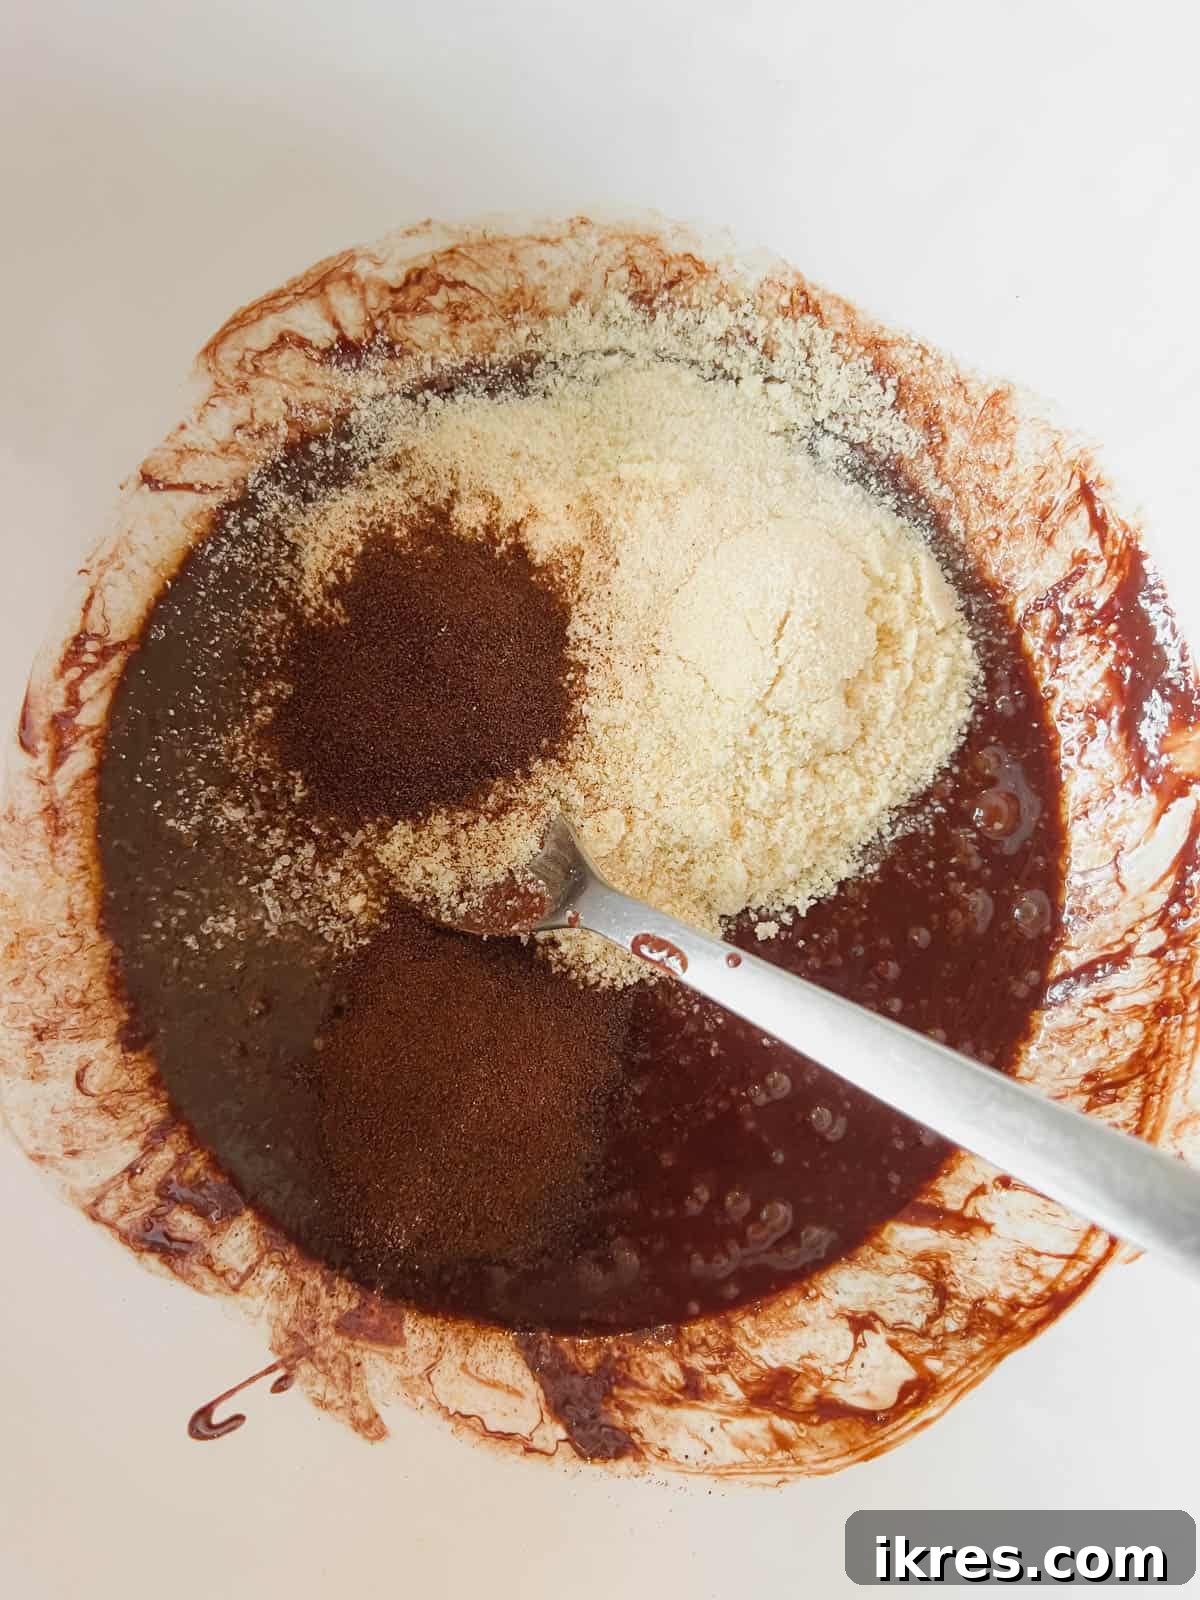
Step 5: Add Dry Ingredients. To the wet chocolate mixture, add the almond flour, coconut flour, a pinch of salt, and the instant espresso powder. Whisk thoroughly until all the dry ingredients are just combined and no streaks of flour remain. Be careful not to overmix the batter, as this can lead to a tougher cake.
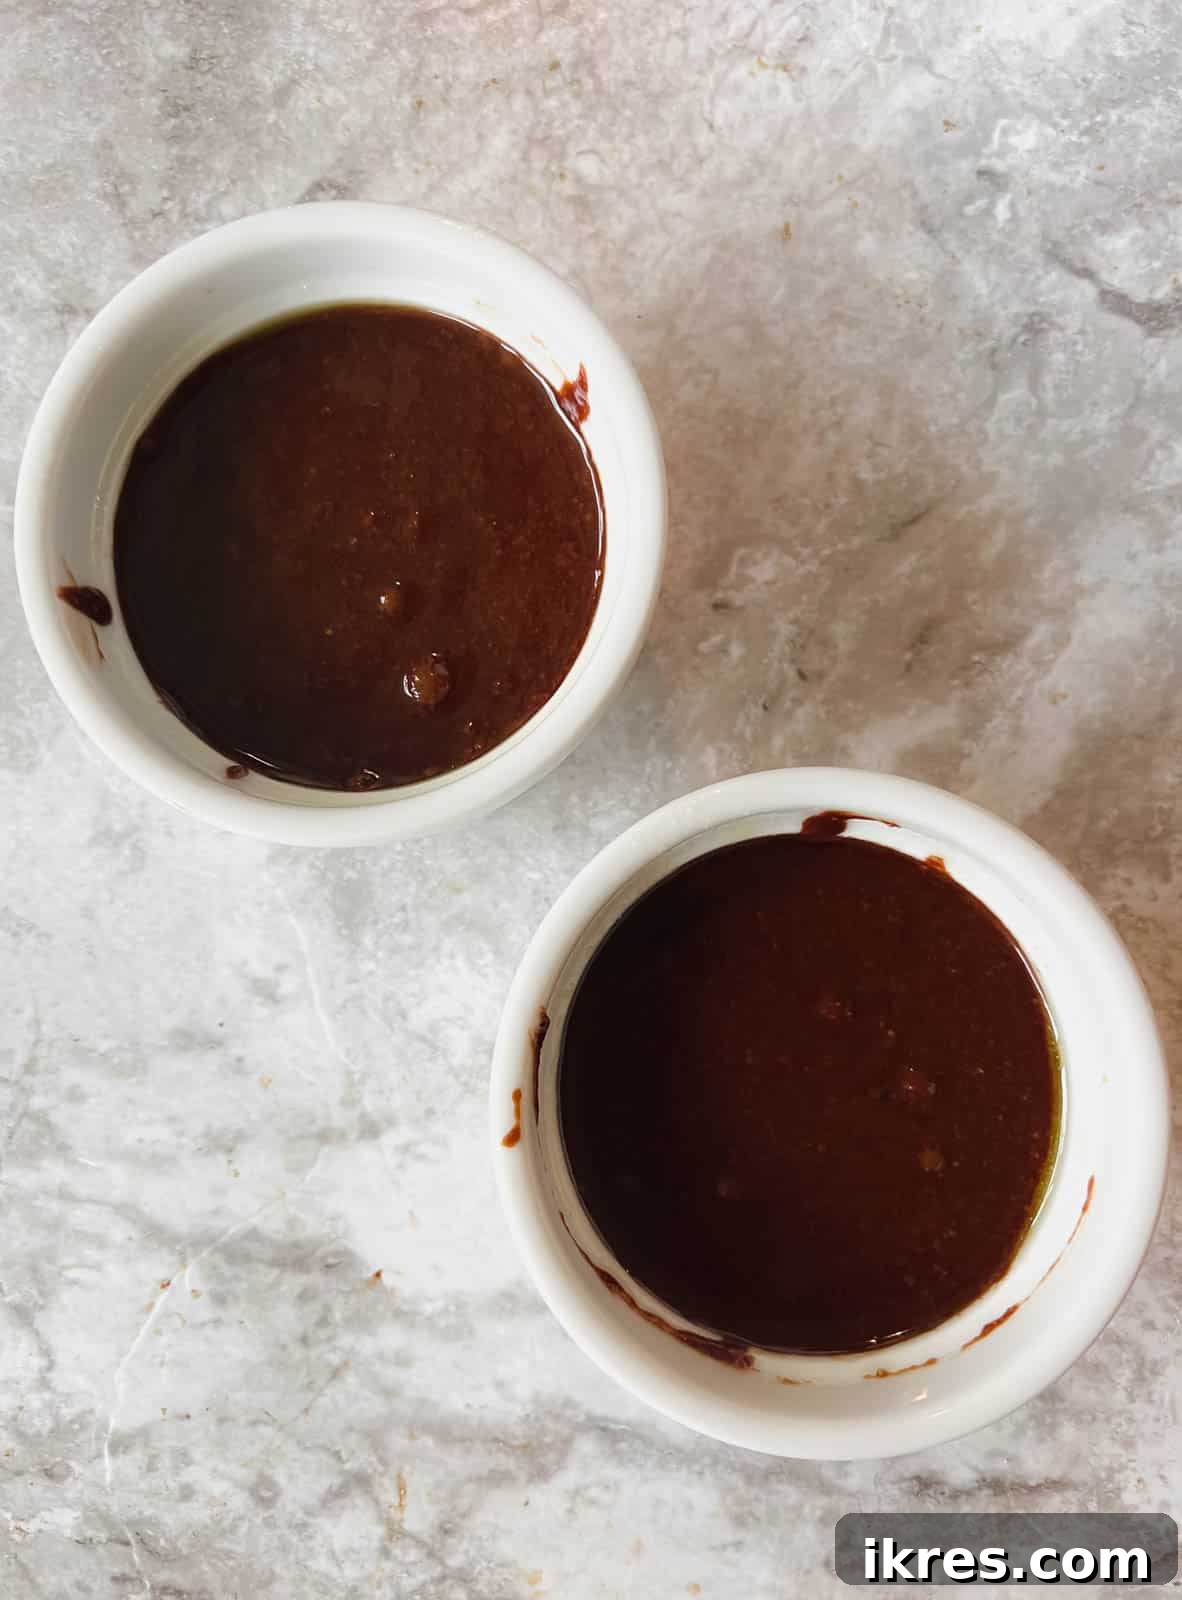
Step 6: Fill Ramekins. Carefully divide the smooth chocolate batter evenly between the two prepared ramekins. You want them to be about two-thirds full to allow for some rising during baking. A spatula works well to ensure an even distribution.
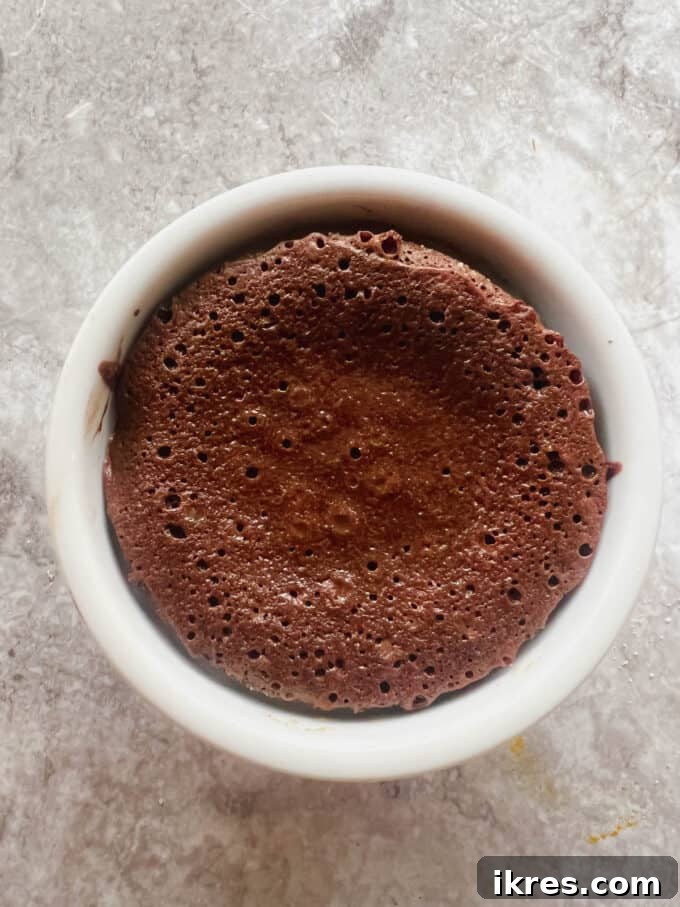
Step 7: Bake to Perfection. Place the filled ramekins onto a baking sheet (to catch any potential overflow and for easier handling) and bake in the preheated oven for 13-15 minutes. The baking time is crucial for the molten center! Do NOT overbake, or you’ll lose that glorious lava effect. The edges should look set and slightly puffed, while the center will still appear soft and somewhat uncooked. To test for doneness, carefully insert a wooden toothpick into the *edge* of one cake; it should come out clean. The center, however, should still feel jiggly.
If they look uncooked in the center, that’s exactly what you want for a true lava cake. The heat retained will continue to cook the cake slightly even after removing it from the oven, so trust the process.
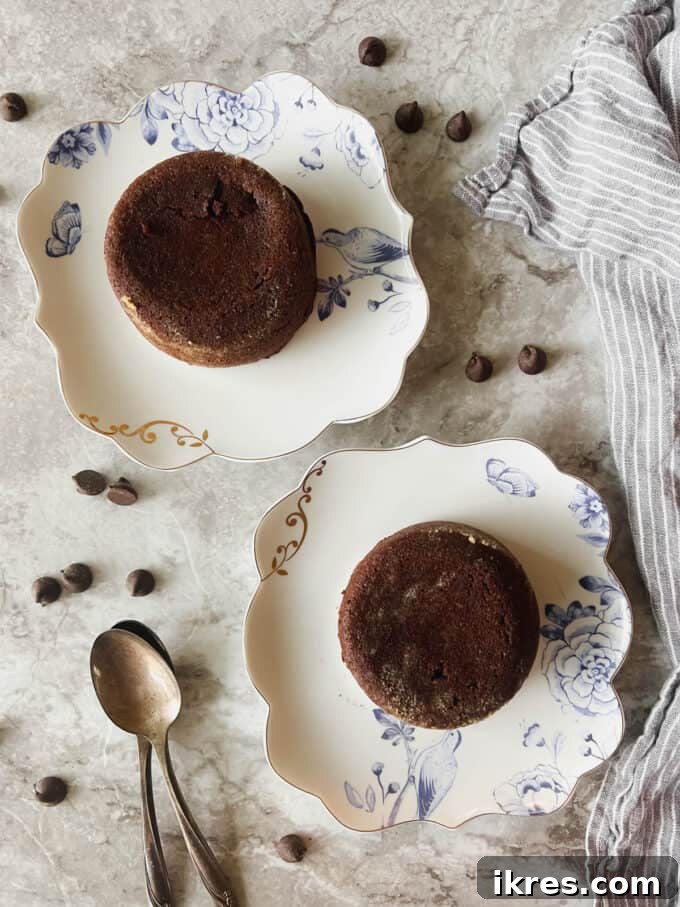
Step 8: Unmold and Serve Immediately. Once baked, carefully remove the ramekins from the oven. Let them cool for only 1-2 minutes—just enough to handle, but not so long that the residual heat cooks the center solid. Using oven mitts, run a thin knife along the entire inner edge of each ramekin to loosen the cake. Place a serving plate upside down on top of the ramekin, then quickly and confidently flip both over. Gently lift the ramekin; the cake should slide out perfectly, revealing its majestic molten core. If it resists, a slight wiggle or gentle pull on one edge with the knife should help.
Serve these molten chocolate lava cakes warm, immediately after unmolding, for the ultimate experience!
Baking Tips for Perfect Lava Cakes Every Time
Achieving that iconic molten center requires a bit of precision. Here are some extra tips to ensure your gluten-free lava cakes turn out perfectly:
- Don’t Overmix the Batter: Once you add the dry ingredients, mix just until combined. Overmixing can develop gluten-like structures even in gluten-free flours, leading to a tougher cake.
- Grease Ramekins Generously: This step cannot be stressed enough. A thoroughly greased and floured (with coconut flour) ramekin is key to ensuring your cakes unmold beautifully without sticking.
- Watch Your Oven: Ovens can vary widely in temperature. The 13-15 minute baking time is a guideline. Start checking at 13 minutes. If your oven tends to run hot, you might even need to pull them out a minute or two earlier.
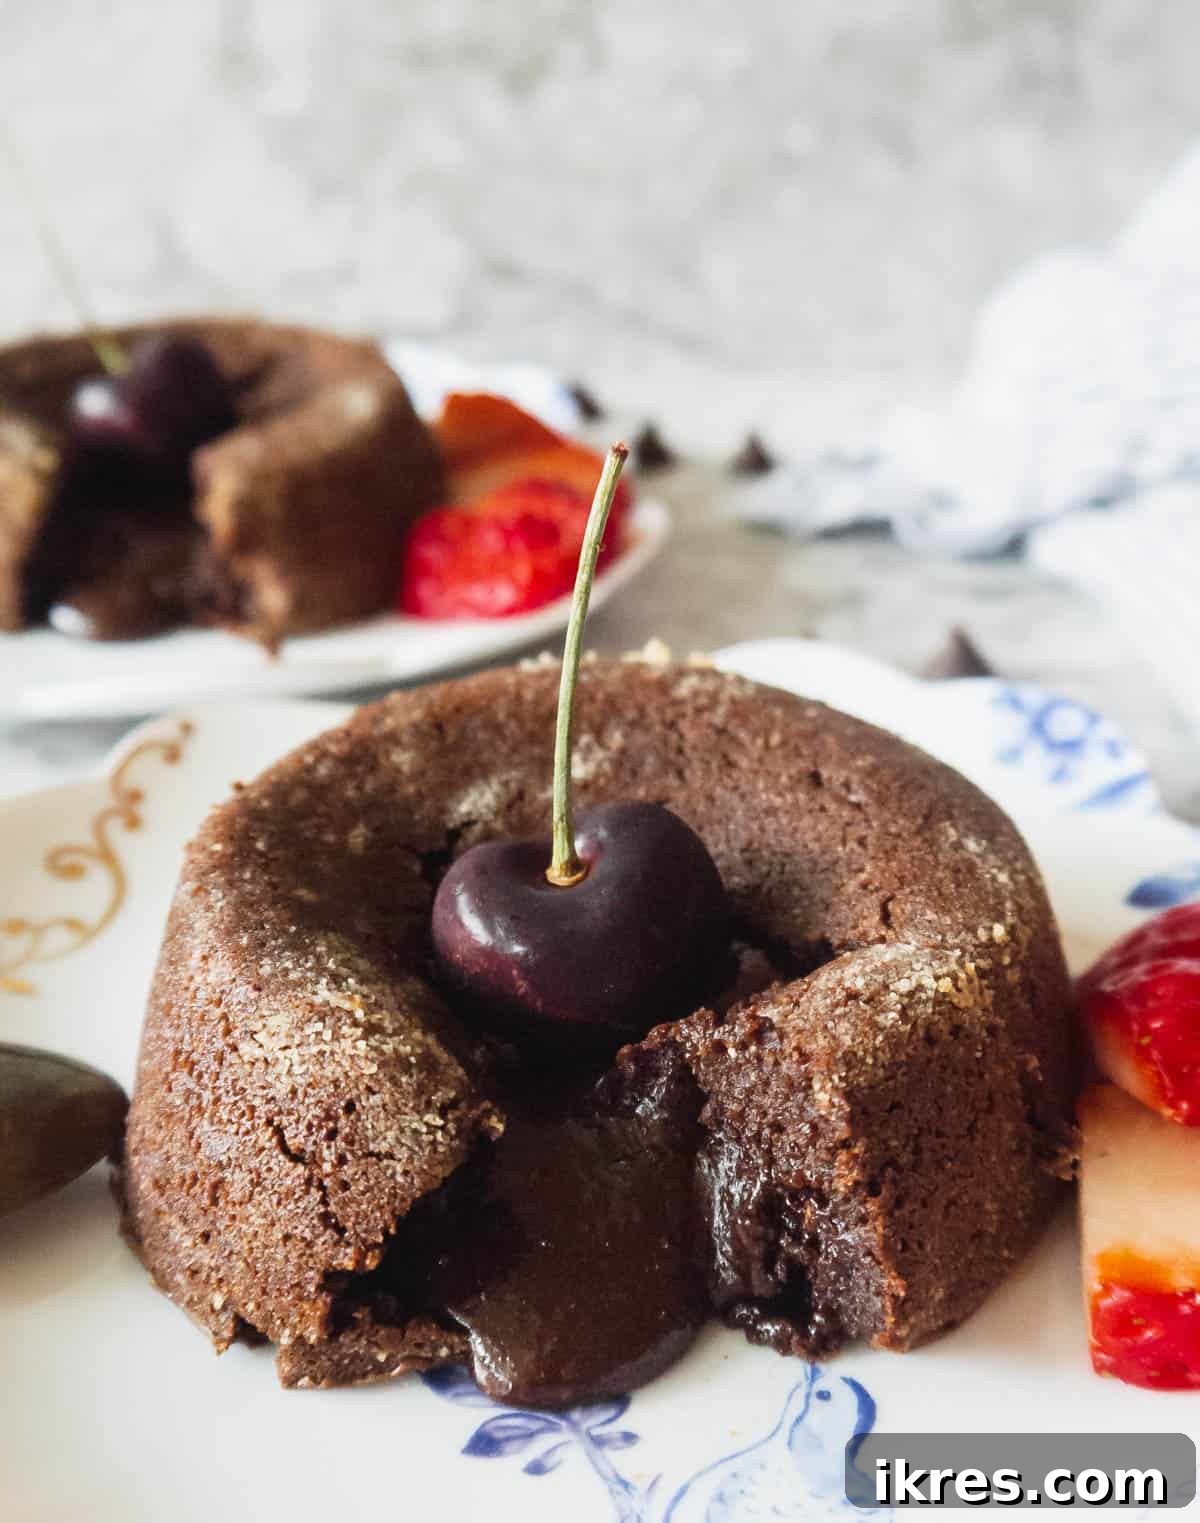
- The Jiggly Center Test: The most reliable indicator for a perfect lava cake is a firm, puffed edge and a noticeably jiggly center. When you gently shake the ramekin, the middle should still wobble. This signals that the interior is still molten.
- Cool Briefly: Only let the cakes cool for 1-2 minutes in the ramekins. Any longer, and the residual heat will continue to cook the center, solidifying your “lava.”
- Unmold Quickly and Confidently: Have your serving plates ready. A swift flip is better than a hesitant one to ensure the cake comes out in one piece.
- Serve Immediately: Lava cakes are best enjoyed piping hot, right after unmolding. The contrast of the warm, liquid center and the slightly firmer cake exterior is what makes them so special.
Storage and Make-Ahead Options
While these molten chocolate lava cakes are undoubtedly best enjoyed fresh and warm, there are a few ways to prepare them in advance or store leftovers:
- Make-Ahead Batter: You can prepare the batter up to 24 hours in advance. Store it covered in the refrigerator. When ready to bake, let the batter sit at room temperature for about 15-20 minutes to take the chill off, then divide into ramekins and bake as directed. You might need an extra minute or two of baking time if the batter is still quite cold.
- Baked Lava Cakes (Leftovers): If you happen to have any leftover baked cakes (without toppings), store them in an airtight container in the refrigerator for up to 2-3 days.
- Reheating: To reheat, place the cake (in its ramekin if still there, or on an oven-safe plate) in a preheated oven at 350°F (175°C) for about 5-8 minutes, or until warmed through and the center is gooey again. Alternatively, you can microwave it for 20-40 seconds, being careful not to overcook.
- Freezing: Unbaked lava cake batter can be frozen in greased ramekins (covered tightly with plastic wrap and foil) for up to 1 month. Thaw overnight in the refrigerator before baking, or bake directly from frozen, adding about 10-15 minutes to the baking time. Baked cakes can also be frozen and reheated, but the texture might be slightly less perfect than fresh.
Common Recipe FAQs About Molten Chocolate Lava Cakes
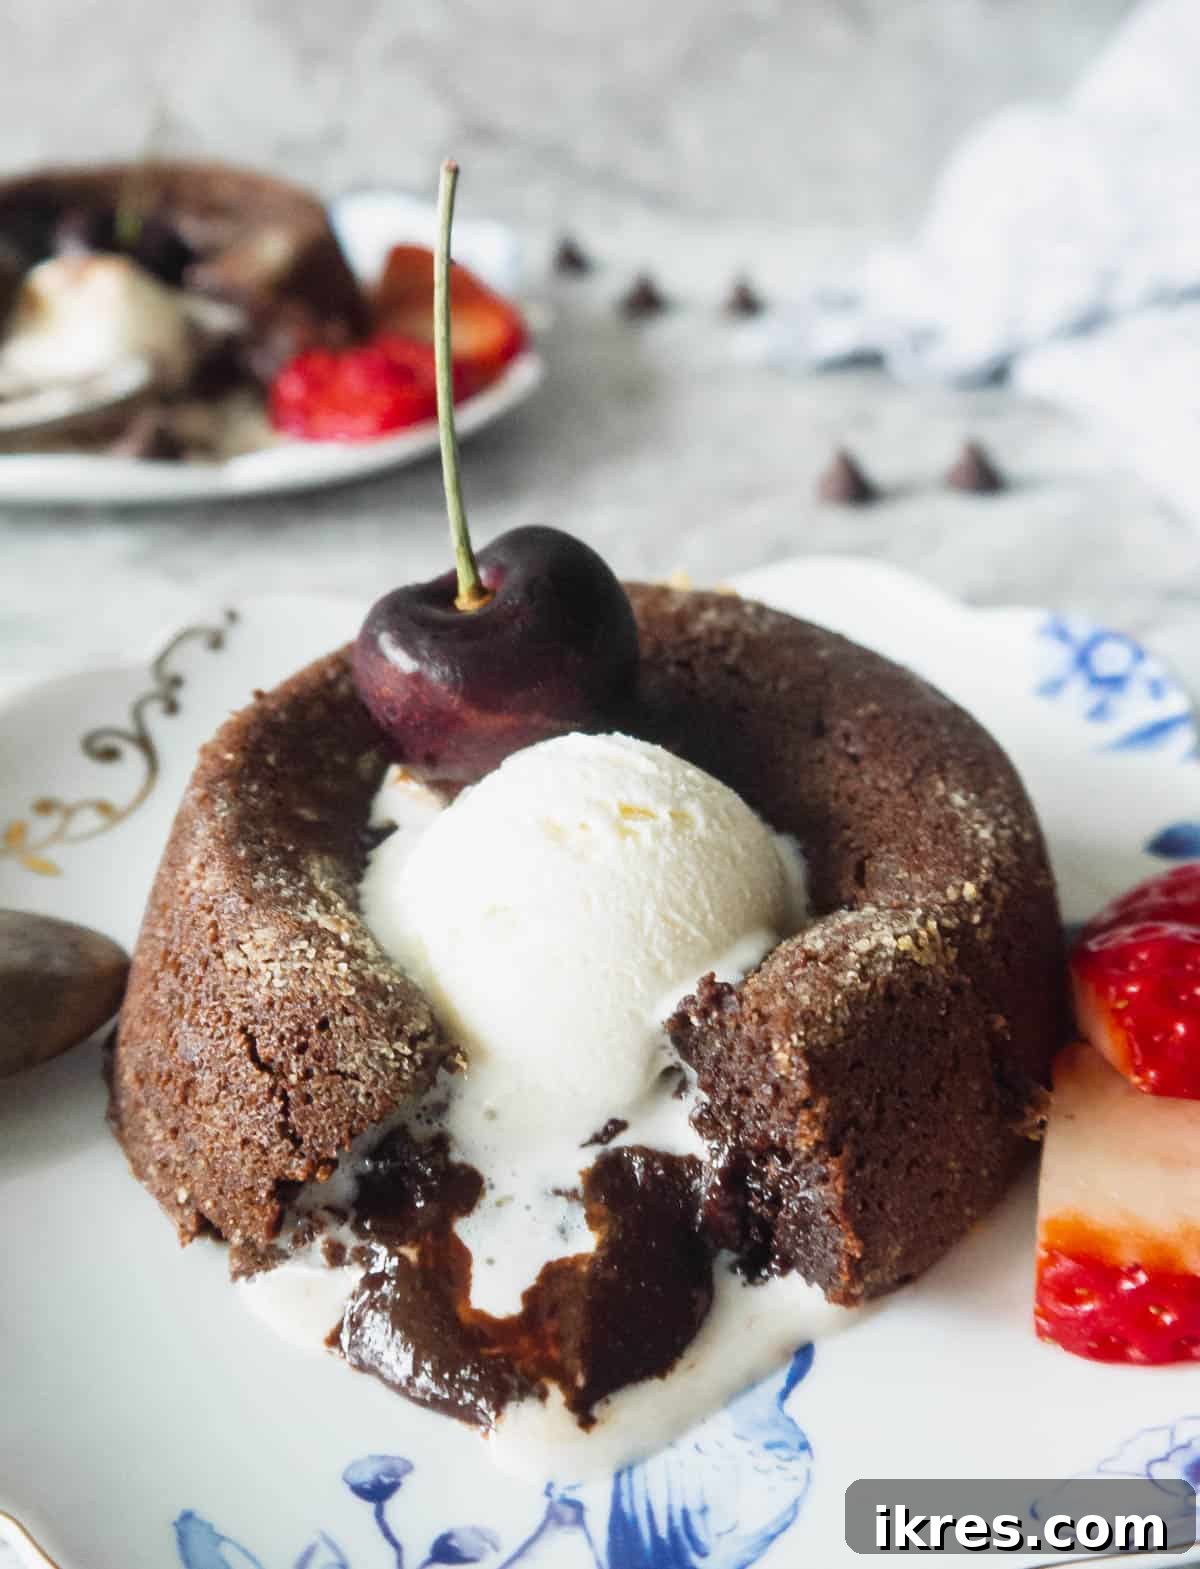
These molten lava cakes are truly transformed with the right accompaniments! They taste incredibly delicious with a scoop of classic vanilla ice cream (or your favorite non-dairy alternative), a scattering of fresh berries (like raspberries or strawberries), or a dollop of fluffy whipped cream. The contrast of warm cake and cool topping is simply divine.
This is a common issue if the ramekin wasn’t sufficiently greased! The key is to be very generous with your oil or cooking spray, coating every inch of the interior. For extra assurance, sprinkle a small amount of coconut flour on the bottom and sides of the greased ramekins, tapping out the excess. This creates a thin, non-stick barrier that helps the cake release effortlessly.
Absolutely NOT! You must only use *instant* espresso powder or instant coffee granules. Regular ground espresso or coffee will not dissolve into the batter and will result in an unpleasantly grainy texture, ruining the smooth consistency of the cake. Instant varieties dissolve seamlessly, allowing the flavor to infuse without textural interference.
If instant espresso is unavailable, instant coffee granules are an excellent substitute and will provide a similar flavor-enhancing effect. Alternatively, you can omit it completely if you prefer a pure chocolate flavor, though the espresso truly elevates the chocolate notes.
For those following a Paleo diet, look for chocolate brands that are minimally processed and free from dairy, soy lecithin, and refined sugars. Brands like HU Chocolate are often a popular choice, as they typically fit these criteria and are made with simple, wholesome ingredients.
While ramekins are ideal for their depth and heat retention, you could potentially use a well-greased muffin tin. However, you’ll need to significantly adjust baking times. Muffin tins are shallower, so the cakes will cook much faster, likely between 8-12 minutes. Watch them very carefully to ensure the edges are set and the center remains molten.
This is almost always a result of overbaking. The goal is a delicate balance: firm edges and a liquid center. Ovens vary, so it’s crucial to pay close attention during the last few minutes of baking. Your oven might run hotter, or your ramekins might be slightly smaller, causing them to cook faster. Next time, try reducing the baking time by 1-2 minutes and test at the earlier end of the suggested range.
Other Healthy Desserts You’ll Love:
If you’re a fan of healthier indulgences, explore these other fantastic dessert recipes:
- This Keto Flourless Chocolate Cake by Cassidy’s Craveable Creations offers a rich, dense chocolate experience with a perfect texture.
- These Healthy Almond Flour Brownies are wonderfully fluffy yet fudgy, and incredibly satisfying.
- For an ultimate chewy and gooey experience, try these Almond Flour Egg Yolk Chocolate Chip Cookie Bars.
- This creamy and dreamy Mocha Milkshake by Food Doodles is bursting with delightful coffee and chocolate flavors.
- And of course, for more molten goodness, this Paleo Molten Lava Cake is always a hit, especially when served with a scoop of ice cream on top!
Did you try this recipe? Please leave me a ⭐ review below! Your feedback helps other bakers!
Rating: 5 out of 5 stars (based on 3 votes)
Molten Chocolate Lava Cake (Gluten-free, Dairy-free)
By: Dominique
Servings: 2
Prep Time: 5 mins
Cook Time: 13 mins
Total Time: 18 mins
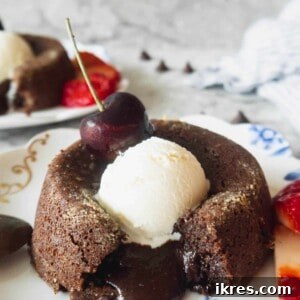
These gluten-free lava cakes are bursting with dense chocolate flavor, beautifully enhanced by a subtle hint of espresso.
Ingredients
- 2 Tablespoons olive oil
- 1/4 cup maple syrup (pure)
- 1/2 cup chocolate chips (use any kind that fits your needs – dairy-free, Paleo, or regular)
- 1 egg
- 1 egg yolk
- Pinch of salt
- 4 Tablespoons almond flour (blanched)
- 2 teaspoons coconut flour (Nutiva is a good choice for price and quality)
- 2 teaspoons instant espresso (or instant coffee)
Instructions
- Preheat your oven to 400 degrees F (200°C).
- Generously grease two ramekins (6-ounce capacity). Use an olive oil spray or brush to ensure the entire surface is covered. Sprinkle a little bit of coconut flour onto the bottom of the greased ramekins, tapping to coat and shaking out any excess. This helps prevent sticking.
- In a microwave-safe bowl, combine the chocolate chips and olive oil. Microwave in 30-second intervals, stirring with a fork after each, until the chocolate is completely melted and smooth.
- In a separate bowl, whisk together the egg, egg yolk, and maple syrup until the mixture thickens slightly and lightens in color (about 1-2 minutes). Then, add the melted chocolate and oil mixture to this bowl and whisk until fully combined.
- Add the salt, almond flour, coconut flour, and instant espresso powder to the bowl. Whisk until everything is just blended and no dry streaks remain. Avoid overmixing.
- Divide the batter evenly between the two prepared ramekins, filling each about two-thirds full.
- Place the ramekins on a baking sheet and bake for 13-15 minutes. It’s crucial not to overbake; the edges should be set and slightly puffed, but the center should still look soft and slightly uncooked/jiggly. To test, insert a wooden toothpick into the *edge* of the cake – it should come out clean. The center should still wobble.
- Remove the ramekins from the oven and let them cool for just 1-2 minutes. Do not cool for too long, as the residual heat will continue to cook the inside.
- Using oven mitts, carefully run a thin knife along all the edges of each ramekin to loosen the cake. Place a serving plate upside-down on top of the ramekin, then quickly flip both over. Gently lift the ramekin. If the cake doesn’t easily slide onto the plate, gently pull down on one of the edges with the knife to assist.
- Serve immediately while warm. Top with your favorite ice cream, fresh fruit, or whipped cream for the ultimate decadent experience. Enjoy!
Notes
- Oil Substitution: Instead of olive oil, you can use melted coconut oil or avocado oil.
- Sweetener Substitution: Instead of maple syrup, you can use honey.
- Espresso Flavor: If you don’t want to taste espresso at all, reduce the amount of instant espresso to 1 teaspoon or omit it. If you want a noticeable but not overpowering espresso flavor, add the full 2 teaspoons. Remember to use *instant* espresso or coffee.
Nutrition
Per Serving:
- Calories: 616 kcal
- Carbohydrates: 61g
- Protein: 11g
- Fat: 41g
- Saturated Fat: 23g
- Polyunsaturated Fat: 1g
- Monounsaturated Fat: 3g
- Trans Fat: 0.01g
- Cholesterol: 179mg
- Sodium: 69mg
- Potassium: 166mg
- Fiber: 6g
- Sugar: 46g
- Vitamin A: 249 IU
- Calcium: 157mg
- Iron: 5mg
Nutrition information is automatically calculated and should only be used as an approximation.
Additional Info
Course: Dessert
Cuisine: American
Tried this recipe?
Mention @perchancetocook or tag #perchancetocook on Instagram! We love seeing your creations!