
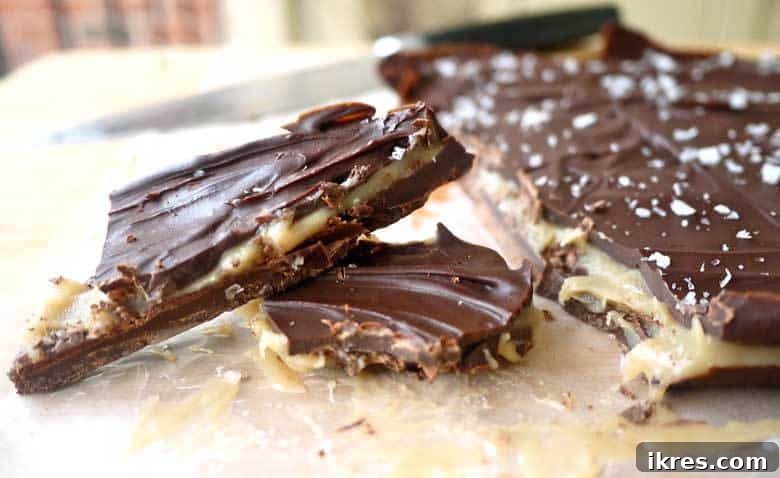
Indulge Guilt-Free: The Ultimate Salted Caramel Paleo Bark (Gluten-Free & Dairy-Free!)
Are you searching for a dessert that’s not only incredibly delicious but also aligns with your health goals? Perhaps a sweet treat that requires no baking, is effortless to make, and perfect for gifting on special occasions like Valentine’s Day or just because? Look no further!
This Salted Caramel Paleo Bark is an absolute game-changer. It’s rich, decadent, and delivers that perfect sweet-and-salty combination, all while being completely paleo, gluten-free, and dairy-free. Prepare to fall in love with your new favorite no-bake delight!
Why This Salted Caramel Paleo Bark is a Must-Try
Imagine sinking your teeth into layers of smooth, rich chocolate enveloping a luscious, gooey caramel center, all finished with a delicate sprinkle of sea salt. This isn’t just any chocolate bark; it’s a masterpiece of flavor and texture, designed for those who want to enjoy dessert without compromise. The best part? It’s surprisingly simple to create!
A Healthier Indulgence
Many traditional desserts are loaded with refined sugars, dairy, and gluten, which can cause digestive issues or simply not align with specific dietary needs. Our Salted Caramel Paleo Bark offers a fantastic alternative. By using wholesome ingredients, we ensure that this treat is:
- Paleo-Friendly: Made with ingredients that are naturally gluten-free and dairy-free, avoiding grains, legumes, and refined sugars.
- Gluten-Free: Perfect for those with celiac disease or gluten sensitivities, ensuring everyone can enjoy a decadent dessert.
- Dairy-Free: Ideal for individuals with lactose intolerance or dairy allergies, offering a creamy texture without any dairy products.
- No-Bake: Save time and keep your kitchen cool! This recipe requires minimal active cooking and mostly relies on chilling.
This bark proves that “healthy” doesn’t have to mean “boring” or “flavorless.” It’s an ooey-gooey, chocolatey dream come true that satisfies your sweet tooth in the most delightful way.
Essential Ingredients for Your Paleo Bark
Creating this magnificent bark starts with a few key, high-quality ingredients. Choosing the right components ensures both delicious flavor and adherence to paleo principles.
- Enjoy Life Chocolate Chips: These are a fantastic choice because they are free from dairy, soy, and nuts, making them widely accessible for various dietary restrictions. They melt beautifully and provide that rich, deep chocolate flavor crucial for any good bark. If you can’t find Enjoy Life, look for other brands that specify being dairy-free, soy-free, and paleo-friendly.
- Coconut Oil: This versatile oil is essential for helping the chocolate melt smoothly and harden properly, contributing to the bark’s desirable snap. Ensure you use virgin coconut oil for the best flavor and quality.
- Paleo Caramel Sauce: This is the heart of the “salted caramel” experience. While the recipe is no-bake, you will need to prepare your Paleo Caramel Sauce in advance. This might add a bit of prep time, but trust us, the homemade, rich flavor is absolutely worth the effort. You can find many excellent paleo caramel sauce recipes online if you don’t already have a favorite. Its decadent, buttery notes are what elevate this bark from good to extraordinary.
- Sea Salt: A generous sprinkle of sea salt is not just for garnish; it enhances the complex flavors of the chocolate and caramel, creating that iconic sweet-and-salty balance. Flaky sea salt is preferred for its texture and visual appeal.
Step-by-Step Guide to Crafting Your Paleo Bark
The beauty of this recipe lies in its simplicity. With just a few steps, you’ll have a stunning and delicious dessert ready to enjoy or share.
Preparation is Key
- Line Your Pan: Start by covering an 8×8 inch pan with wax paper. This crucial step prevents sticking and allows for easy removal of the finished bark. Make sure the wax paper extends slightly over the edges to create “handles” for lifting.
Creating the First Chocolate Layer
- Melt the Chocolate Base: In a microwave-safe bowl, combine 1 ½ cups of Enjoy Life chocolate chips with 2 teaspoons of melted coconut oil. Stir until the chocolate chips have a slightly “wet” appearance.
- Microwave with Care: Heat the mixture in the microwave in 30-second intervals. After each interval, remove the bowl and stir thoroughly with a spatula. Continue this process until the chocolate is completely melted and smooth. For most microwaves, this usually takes about 1 minute total, but it can vary. The goal is a silky, lump-free chocolate mixture.
- Pour and Chill: Carefully pour the melted chocolate into your prepared pan. Gently tilt the pan from side to side to ensure the chocolate is evenly distributed, forming a uniform base layer. Place the pan in the refrigerator for 30 minutes, or until the chocolate is firm to the touch. This step is essential for creating a solid foundation for your caramel.
Adding the Irresistible Caramel Layer
- Apply Paleo Caramel: Once your chocolate base is hard, remove the pan from the fridge. Pour your pre-made Paleo Caramel Sauce directly onto the hardened chocolate layer. Use the back of a spoon or gently tilt the pan to spread the caramel evenly. The amount of caramel is entirely up to your preference – I recommend starting with ½ cup and adding up to ⅔ cup for extra indulgence. Return the pan to the refrigerator for another 30 minutes to allow the caramel to set.
The Final Chocolate Top and Sea Salt Finish
- Prepare the Top Chocolate Layer: While the caramel chills, repeat the melting process for your second chocolate layer. Combine 1 cup of Enjoy Life chocolate chips with 1 teaspoon of melted coconut oil in a microwave-safe bowl. Heat in 30-second intervals, stirring after each, until smooth. It’s important to ensure this chocolate isn’t too hot, as excessive heat could melt the caramel layer below. Let it cool slightly if needed.
- Pour and Even Out: Remove the pan from the refrigerator. Pour the slightly cooled, melted chocolate over the set caramel layer. Tilt the pan gently to create an even, smooth top.
- Sprinkle with Sea Salt: Immediately after pouring the top chocolate layer, generously sprinkle sea salt to taste over the entire surface. The salt will adhere to the warm chocolate, creating that perfect contrast.
- Final Chill: Place the pan back into the refrigerator for at least one hour, or even overnight. The longer it chills, the firmer and easier it will be to break.
Breaking and Enjoying Your Bark
- Remove and Break: Once fully chilled, take the bark out of the fridge. Gently peel off the wax paper. Using a sharp knife, apply pressure to a corner of the bark and break it into irregular pieces. This step is surprisingly satisfying and can even be a fun stress-reliever! Ensure both chocolate layers break cleanly.
- Enjoy: Your healthier, decadent Salted Caramel Paleo Bark is now ready to be savored!
Tips for Paleo Bark Perfection
- Don’t Rush the Chill: Allowing each layer adequate time to chill and harden is crucial for clean layers and a firm bark. Rushing this step can lead to messy, melting layers.
- Quality Ingredients Matter: Since this recipe has few ingredients, the quality of each really shines through. Invest in good quality dairy-free chocolate chips and a delicious paleo caramel sauce.
- Caramel Consistency: Your paleo caramel sauce should be thick enough to spread but not so thick that it’s unmanageable. If it’s too firm, gently warm it slightly to make it more pourable.
- Temperature Control for Chocolate: When melting your chocolate, avoid overheating it. Overheated chocolate can become grainy or seize. Low and slow is the key, especially when using the microwave.
- Even Layers: Take a moment to evenly spread each layer. This ensures a beautiful presentation and a consistent bite in every piece.
Serving and Gifting This Delicious Bark
One of the best qualities of this Salted Caramel Paleo Bark is its versatility. It’s not just a fantastic dessert for your own enjoyment; it also makes an incredible gift or a convenient treat for gatherings.
- Perfect for Parties: This bark travels well and doesn’t require refrigeration during transport for short periods, making it an ideal potluck contribution or a dessert to bring to a friend’s house.
- Thoughtful Gifts: Wrap individual pieces or small assortments in pretty cellophane bags tied with ribbon. It’s a heartfelt, homemade present for birthdays, holidays, or just to show appreciation. Imagine presenting this on Valentine’s Day – it’s far more personal and unique than store-bought chocolates.
- Everyday Treat: Keep a stash in your fridge for a quick, healthier indulgence whenever a craving strikes. It pairs wonderfully with a cup of coffee or as an after-dinner sweet.
- Surprise Dessert: Delight a loved one with this unexpected, decadent surprise. It’s sure to bring a smile to their face!
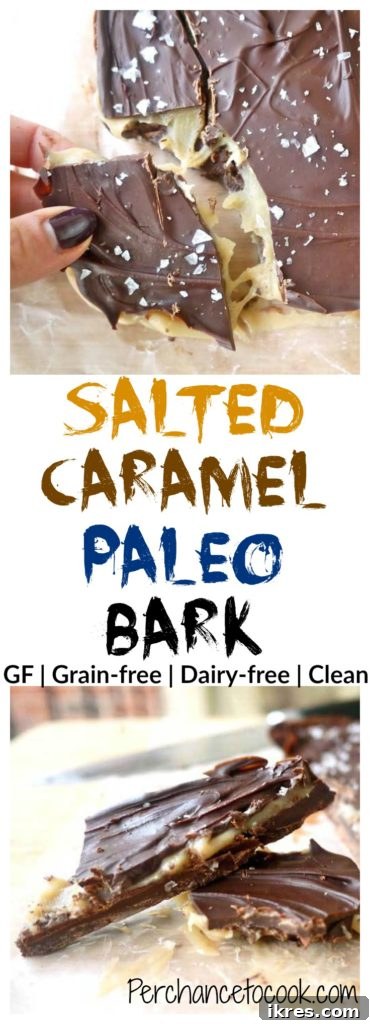
Storage Information
To keep your Salted Caramel Paleo Bark fresh and delicious, store it in an airtight container in the refrigerator. It will last for up to 1-2 weeks. You can also freeze it for longer storage (up to 1-2 months); just make sure to thaw it in the refrigerator before serving.
Recipe Card: Salted Caramel Paleo Bark (GF, Dairy-Free)
Rating: 5 out of 5 stars (based on 2 votes)
Salted Caramel Paleo Bark (GF, dairy-free)
By: Dominique
Servings: 6
Prep Time: 2 hours 10 mins
Total Time: 2 hours 10 mins
Share by Email
Print Recipe
An easy, delicious, and healthier dessert that’s great to enjoy or give as gifts.
Ingredients
- 1 1/2 cup + 1 cup Enjoy Life Chocolate Chips, divided (note: you’ll need more than one bag)
- 2 tsp + 1 tsp coconut oil, melted and divided
- 1/2-2/3 cup Paleo Caramel Sauce (it depends on how much caramel you want, I originally put in 1/4 cup and then I added 1/3 cup on top of that)
- a sprinkle of sea salt
Instructions
- Cover an 8 x 8 inch pan with wax paper.
- Put 1 1/2 cup of Enjoy Life chocolate chips into a plastic microwave-proof bowl. Add 2 tsp of melted coconut oil on top of the chocolate chips and mix until all of the chocolate has a “wet” look.
- Heat in the microwave for 30 seconds, remove and mix with a spatula. Heat again for 30 seconds, remove and mix with a spatula. Repeat until all the chocolate is melted and smooth. Usually 1 minute is enough for me.
- Pour the melted chocolate into the wax paper covered pan and even the chocolate out. I tilted the pan from side to side, until the chocolate was evenly distributed. Then put the pan into the refrigerator for 30 minutes, or until the chocolate is hard.
- Remove the pan from the fridge, pour the Paleo Caramel Sauce on top of the hardened chocolate layer, even it out with the back of a spoon and by tilting the pan from side to side. Then, put the pan back into the fridge for 30 minutes.
- While the pan is in the fridge, put 1 cup of Enjoy Life Chocolate Chips into a plastic microwave-proof bowl. Add 1 tsp of melted coconut oil on top of the chocolate chips and and mix until all of the chocolate has a “wet” look.
- Heat in the microwave for 30 seconds, remove and mix with a spatula. Heat again for 30 seconds, remove and mix with a spatula. Repeat until all the chocolate is melted and smooth. If the chocolate is too hot, let it cool a bit before putting it on top of the caramel.
- Remove the pan from the fridge, and pour the final melted chocolate layer on top of the caramel layer. Even it out by tilting the pan from side to side.
- Sprinkle sea salt to taste on top of the final melted chocolate layer and the put the whole thing into the refrigerator for an hour or more (you can leave it in there for longer if you want too, up to overnight).
- Remove the bark from the fridge, peel the wax paper off of the bark, and then, using a knife, put pressure on a corner of the bark and break it into pieces. Make sure that the bark has broken through both layers of the chocolate.
- Enjoy!
Nutrition
Calories: 415kcal | Carbohydrates: 58g | Fat: 25g | Saturated Fat: 17g | Polyunsaturated Fat: 0.04g | Monounsaturated Fat: 0.1g | Sodium: 40mg | Potassium: 0.002mg | Fiber: 5g | Calcium: 0.03mg | Iron: 4mg
Nutrition information is automatically calculated, so should only be used as an approximation.
Additional Info
Course: Dessert
Cuisine: American
Tried this recipe?
Mention @perchancetocook or tag #perchancetocook!