
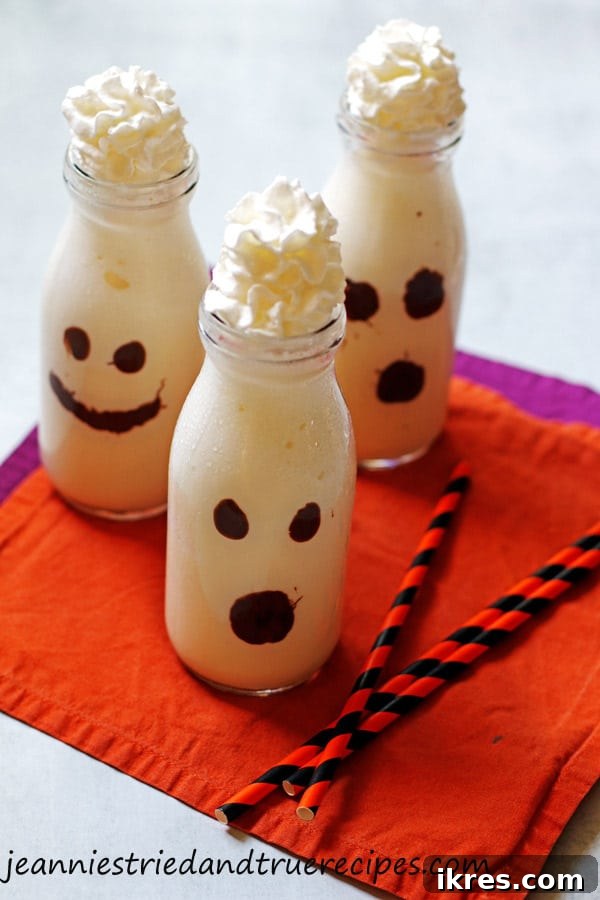
Welcome to the enchanting world of Halloween treats, where spooky meets sweet in the most delightful way! These homemade Halloween Ghost Milkshakes are not just a beverage; they’re an experience, meticulously crafted to bring joy and a touch of friendly fright to your festive celebrations. Imagine a creamy, classic vanilla milkshake transformed into an adorable ghostly figure, complete with playful chocolate chip eyes and a charming smile. This recipe is designed to be incredibly easy and utterly delicious, making it the perfect activity for kids and a beloved treat for the whole family.
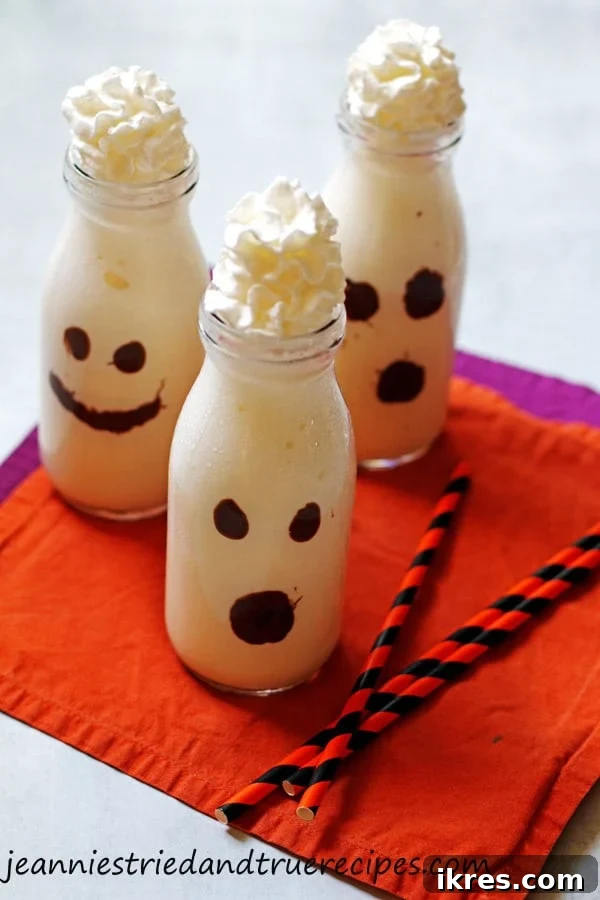
There’s something uniquely magical about involving children in the kitchen, especially when it comes to creating holiday-themed treats. These ghostly vanilla milkshakes are an absolute hit with the younger crowd, and for good reason! Not only do children absolutely adore sipping on the rich, creamy goodness, but they also find immense joy in the hands-on process of bringing these spooky characters to life. The simple act of drawing faces on the glasses with melted chocolate ignites their creativity and makes them feel like little culinary artists. Whether they prefer their ghosts to be goofy, friendly, or a tad bit mischievous, each child gets to personalize their very own Halloween masterpiece.
My daughter recently insisted on making her own, and watching her meticulously “paint” the chocolate faces was just as heartwarming as seeing her enjoy the final product. It’s truly a fantastic way to bond over a fun activity that culminates in a delicious reward. The anticipation of seeing the chocolate set, then pouring in the smooth, cold milkshake, followed by the crowning swirl of whipped cream, builds excitement that’s palpable. It’s these cherished moments that make holiday traditions so special, and these milkshakes are sure to become a cherished part of your family’s Halloween festivities.
Beyond being a fun project, the core of this recipe is a perfectly executed, classic creamy vanilla milkshake. It’s rich, velvety, and sweet, providing the ideal canvas for our ghostly decorations. This makes them incredibly versatile – suitable for a cozy Halloween movie night at home, a bustling costume party, or a delightful refreshment to re-energize after a long evening of trick-or-treating. Their charming appearance makes them a focal point, drawing smiles and appreciative murmurs from both kids and adults alike.
Why These Ghost Milkshakes Are a Must-Try Halloween Treat
Halloween is a time for costumes, candy, and unforgettable treats. While elaborate desserts have their place, sometimes the simplest ideas yield the most memorable results. Our easy Halloween milkshakes offer a blend of nostalgia, creativity, and pure deliciousness. Here’s why they stand out as the ultimate Halloween beverage:
- Kid-Friendly & Engaging: The ghost face decorating is a low-stress, high-fun activity for kids of all ages. It encourages creativity and builds anticipation for the final drink.
- Simple Ingredients: You won’t need a pantry full of exotic items. Basic dairy staples and chocolate chips are all it takes.
- Quick to Prepare: Aside from the chilling time for the chocolate, the actual milkshake assembly is super fast, making it ideal for impromptu gatherings or busy Halloween evenings.
- Versatile: While we stick to vanilla for a classic “ghostly” look, the base milkshake can be adapted with other flavors or additions.
- Perfect for Any Occasion: From a small family gathering to a large Halloween party, these milkshakes are a crowd-plepleaser.
- Irresistibly Delicious: At its heart, it’s a wonderfully creamy and satisfying vanilla milkshake that everyone loves.
Essential Grocery Shopping List for Your Spooky Sips
Gathering your ingredients for these adorable spooky milkshakes is incredibly straightforward. Most of these items are probably already in your fridge or easily found at any grocery store. For the best results and the most authentic ghost experience, make sure to pick up these key components:
- Premium Vanilla Ice Cream: The foundation of any great milkshake. Choose a good quality vanilla ice cream for the richest, creamiest flavor. The better the ice cream, the better your milkshake will taste!
- Cold Milk: We typically use skim milk for a slightly lighter texture, but any milk will work beautifully. Whole milk will yield an even creamier, thicker milkshake, while almond or oat milk can be used for dairy-free alternatives (adjusting for sweetness if needed).
- Semisweet Chocolate Chips: These are crucial for crafting the ghostly faces. Semisweet melts smoothly and provides a nice contrast to the sweet vanilla. You’ll only need a small amount.
- Whipped Cream: A generous topping of whipped cream transforms the milkshake into a truly ethereal ghost figure. Canned whipped cream (like Reddi-Wip) is convenient, but freshly made whipped cream adds an extra touch of gourmet elegance.
In addition to the ingredients, you will definitely need clear glasses for this recipe. Clear glasses are essential to showcase your adorable chocolate ghost faces! We find that 8-10 ounce glasses are ideal, as they are the perfect size for serving individual portions and allowing enough space for both the milkshake and the whipped cream topping. Taller, slender glasses tend to work best for the visual effect.
Crafting Your Delightful Halloween Ghost Milkshakes: A Step-by-Step Guide
Step 1: Bringing Your Ghost Faces to Life (The Fun Part!)
The first and arguably most enchanting step is to personalize your clear glasses with charming ghost faces. This is where you can let your imagination run wild! Will your ghosts be friendly and smiling, or perhaps a little bit silly? The choice is entirely yours, and this creative freedom is what makes this treat so special for kids. Gather your family around the kitchen counter and get ready for some artistic fun!
- **Melt the Chocolate:** Place your semisweet chocolate chips in a microwave-safe bowl. Heat them in the microwave on high for 30 seconds. After the initial heating, remove the bowl and stir the chocolate thoroughly. If the chocolate chips haven’t completely melted into a smooth, creamy consistency, return them to the microwave for additional 15-second intervals, stirring well after each one, until you achieve perfectly melted chocolate. Be careful not to overheat, as chocolate can seize and become unusable. Alternatively, you can use a double boiler for a more controlled melting process.
- **Prepare Your Canvas:** Line up your clean, clear glasses on a stable surface, such as your kitchen counter or dining table. Ensure they are dry before you begin decorating.
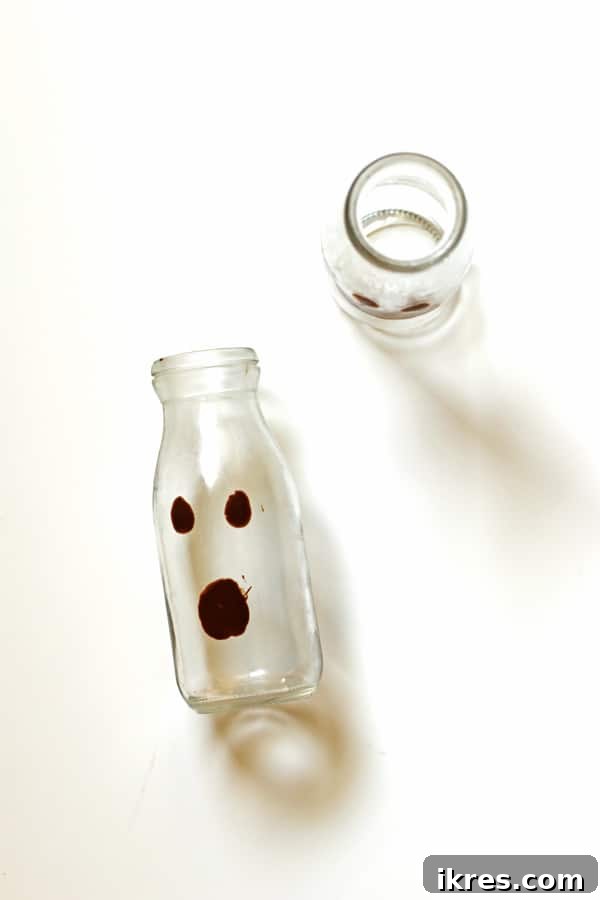
- **Decorate the Faces:** Here’s the secret to those perfect ghost faces: use the end of a spoon handle or a clean, small paintbrush to “paint” the melted chocolate onto the interior surface of the glasses. Dip the very tip of your chosen tool into the melted chocolate. Remember, a little goes a long way! Use a small amount of chocolate for each feature – eyes, nose, and a simple mouth. Applying too much chocolate at once can make the design messy and less distinct, so start with small dabs and build up if needed. Experiment with different shapes for eyes (simple dots, ovals, or even triangles) and mouths (straight lines, wavy lines, or small “o” shapes) to give each ghost a unique personality.
- **Set the Faces:** Once you’ve completed decorating all your ghost faces, carefully place the glasses into the refrigerator. This chilling period is crucial for the chocolate to set firmly, which typically takes about 30 minutes. Setting the chocolate prevents it from smudging or melting into the milkshake when you pour it in.
- **Check for Readiness:** How do you know if the chocolate is perfectly set? Gently touch one of the chocolate faces with the tip of a clean spoon or your finger. If it feels firm and doesn’t budge or smudge, your glasses are ready for the next step! If it’s still soft, give it a few more minutes in the fridge.
Step 2: Blending the Perfect Vanilla Milkshake
While your ghost faces are chilling, you can prepare the delicious vanilla milkshake base. This is a straightforward process that yields a thick, luscious, and wonderfully creamy drink.
- **Combine Ingredients:** Place the scoops of vanilla ice cream into your blender. Add the milk. For an extra touch of vanilla flavor, you can also add a tiny splash of pure vanilla extract (about ¼ teaspoon), though this is optional.
- **Blend to Perfection:** Secure the blender lid and blend the ingredients until they are thoroughly mixed and smooth. You’re aiming for a consistency that is thick enough to hold its shape but still pourable. It should be a satisfyingly viscous liquid, not too runny.
- **Adjust Consistency (Optional):**
- **For a Thinner Milkshake:** If your milkshake appears too thick and isn’t pouring easily, add a little more milk, one tablespoon at a time, and blend briefly after each addition. Be cautious not to add too much at once, as it can quickly become too thin.
- **For a Thicker Milkshake:** If you prefer an even richer, thicker consistency, add another small scoop of vanilla ice cream. Blend again until the desired thickness is achieved. The perfect milkshake consistency is a matter of personal preference, so feel free to adjust until it’s just right for you!
Step 3: Assembling Your Adorable Ghosts
Now for the grand finale! With your chocolate faces set and your milkshake perfectly blended, it’s time to bring your Halloween Ghost Milkshakes to life.
- **Pour the Milkshake:** Carefully retrieve your decorated glasses from the refrigerator. Pour the freshly blended vanilla milkshake into each glass. Make sure to leave about one inch of space from the top of the glass. This crucial gap is reserved for the fluffy whipped cream, which will form the “head” of your ghost.
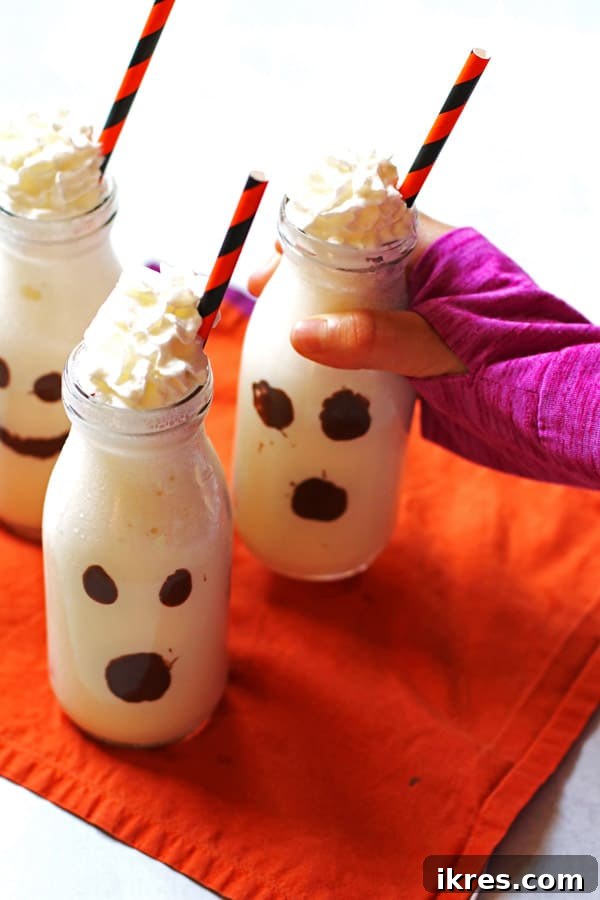
- **Add the Whipped Cream:** Take your can of whipped cream (or a piping bag if using homemade) and generously swirl a few times over the top of each milkshake. Create a tall, billowy peak that cascades slightly over the edges of the glass, mimicking a ghostly shape. The white whipped cream against the chocolate eyes creates that iconic ghost appearance.
- **Final Touches & Serve:** For an extra festive touch, you can sprinkle a few Halloween-themed sprinkles or some chocolate shavings on top of the whipped cream, but they are perfectly delightful as is. Serve these charming ghostly Halloween treats immediately to enjoy them at their creamiest and coldest. The contrast between the cold milkshake, the sweet whipped cream, and the subtle crunch of the chocolate faces is simply irresistible!
Top Tips for Your Best Halloween Milkshake Experience
Achieving the perfect Halloween Ghost Milkshake is simple, but a few expert tips can elevate your creation from good to absolutely amazing. Keep these pointers in mind for a consistently delicious and visually appealing treat:
- Consistency Control is Key: As mentioned in the instructions, don’t be afraid to adjust the consistency. If it’s too thick, add milk sparingly, a tablespoon at a time, until it’s pourable. If you desire a thicker, more spoonable milkshake, add a little extra ice cream. This control ensures everyone gets their ideal milkshake texture.
- Portion Sizes Vary: This recipe typically yields about 4.5 cups of milkshake. The exact number of servings you get will depend entirely on the size of the clear glasses you choose. Smaller glasses are perfect for younger children or as a lighter dessert, while larger glasses are ideal for bigger appetites or for adult servings.
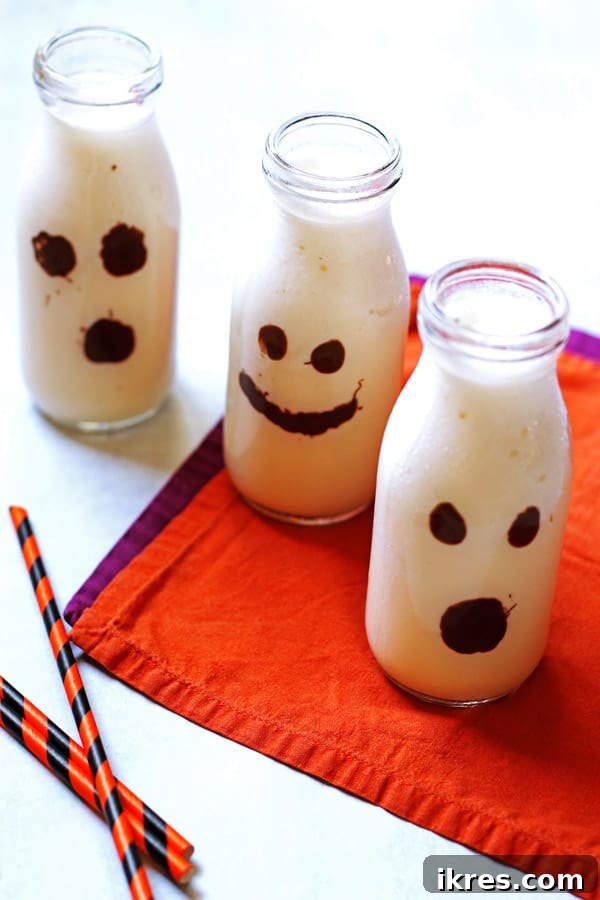
- Precision with Chocolate: When making the ghost faces, less is truly more. Dip the very tip of your spoon handle into the melted chocolate. Using small dabs for each eye and mouth ensures crisp, clean lines and prevents the chocolate from running or becoming too thick on the glass. This maintains the delicate and charming ghost aesthetic.
- Pre-chill Glasses: For an extra cold treat and to help keep your milkshake from melting too quickly, consider chilling your decorated glasses in the freezer for about 10-15 minutes just before pouring the milkshake.
- Experiment with Flavors: While vanilla is classic for ghosts, don’t hesitate to experiment! A touch of mint extract in the milkshake, or a swirl of strawberry syrup at the bottom of the glass before pouring, can add a delightful twist. Just remember that other flavors might alter the “ghostly” appearance.
- Garnish creatively: Beyond whipped cream, consider edible googly eyes (secured with a tiny dab of chocolate on the whipped cream), chocolate sprinkles, or even a mini chocolate chip “mouth” on the whipped cream itself for added character.
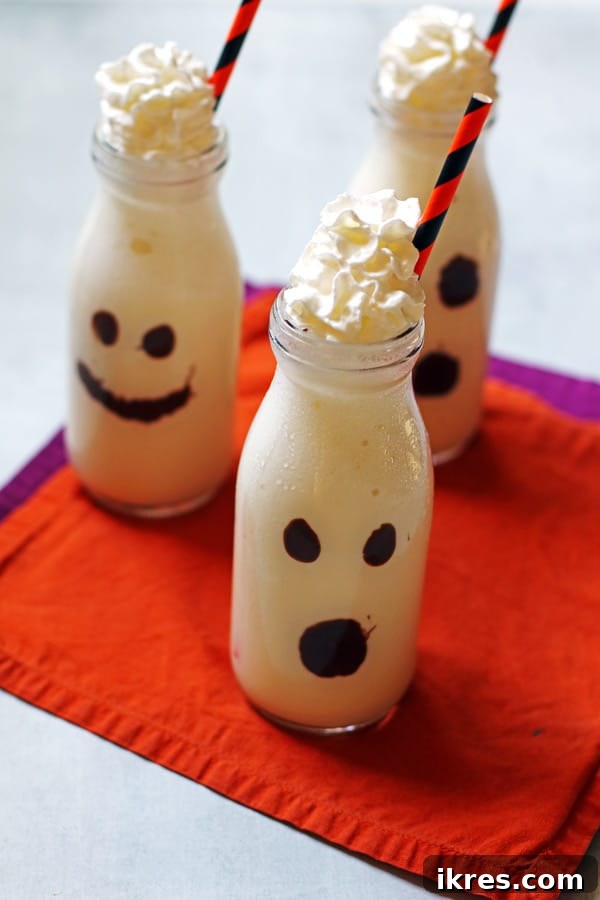
These ghost milkshakes are more than just a dessert; they’re a fun activity, a festive decoration, and a delicious treat all rolled into one! They make for a wonderfully unique and memorable addition to any Halloween celebration. Imagine the delight on your children’s faces when they come home from a successful trick-or-treating adventure to be greeted with these charming, cold, and creamy refreshments. It’s the perfect way to cap off an evening of spooky fun.
In our household, Halloween is a beloved holiday. We go all out, decking our home inside and out with festive decorations. My kids eagerly anticipate staying home to hand out candy, often adding a touch of their own playful scares to trick-or-treaters. The only thing we ever truly hope for is good weather on Halloween night – where we live, it’s a toss-up between snow, rain, or a pleasantly warm evening! Regardless of the weather, these milkshakes are guaranteed to bring warmth and cheer to your home.
Looking for more enchanting Halloween recipes to complete your festive spread? You might enjoy these other spooktacular ideas:
- Halloween Witch Hat Calzones: A savory and fun meal idea for before the candy feast.
- Peanut Butter Spider Cookies: Cute and creepy cookies that are always a hit.
- Halloween Dirt Cake: A classic dessert with a spooky twist, perfect for parties.
Wishing you a safe, happy, and deliciously spooky Halloween filled with laughter and wonderful memories!
Halloween Ghost Milkshakes
30
30
1
Ingredients
- 3 cups vanilla ice cream
- 1 ¾ cups milk (skim milk recommended)
- ¼ cup semisweet chocolate chips
- whipped cream (we use Reddi Whip for convenience)
Instructions
To make the ghost faces:
-
Place ¼ cup of chocolate chips in a microwave-safe dish. Heat on high for 30 seconds and stir. If needed, heat for an additional 15 seconds, stirring after each increment, until the chocolate is smooth and creamy.
-
Using the end of a spoon handle, dip into the melted chocolate and draw small ghost faces (eyes, mouth) onto the interior of your clear glasses. Use a small amount of chocolate for each feature.
-
Place the decorated glasses in the refrigerator for about 30 minutes to allow the chocolate to set completely.
To make the milkshake:
-
Place 3 cups of vanilla ice cream and 1 ¾ cups of milk into your blender. Blend until all ingredients are thoroughly mixed and the milkshake is smooth and thick.
-
Pour the blended milkshake into the decorated glasses, leaving approximately one inch of space from the top of each glass for the whipped cream.
-
Top each milkshake with a generous swirl of whipped cream, forming the “head” of the ghost.
-
Serve your Halloween Ghost Milkshakes immediately and enjoy!
Notes
This recipe yields approximately 4.5 cups of milkshake. The number of servings will depend on the size of the glasses you use.
Remember to use only a small amount of melted chocolate for drawing the eyes, nose, and mouth to ensure clean, distinct ghost faces.
Nutrition information is approximate and is automatically calculated, so should only be used as a guide.
Dessert, Beverage
American
ghost milkshake, halloween milkshake, vanilla milkshake, kid-friendly halloween, easy halloween dessert