
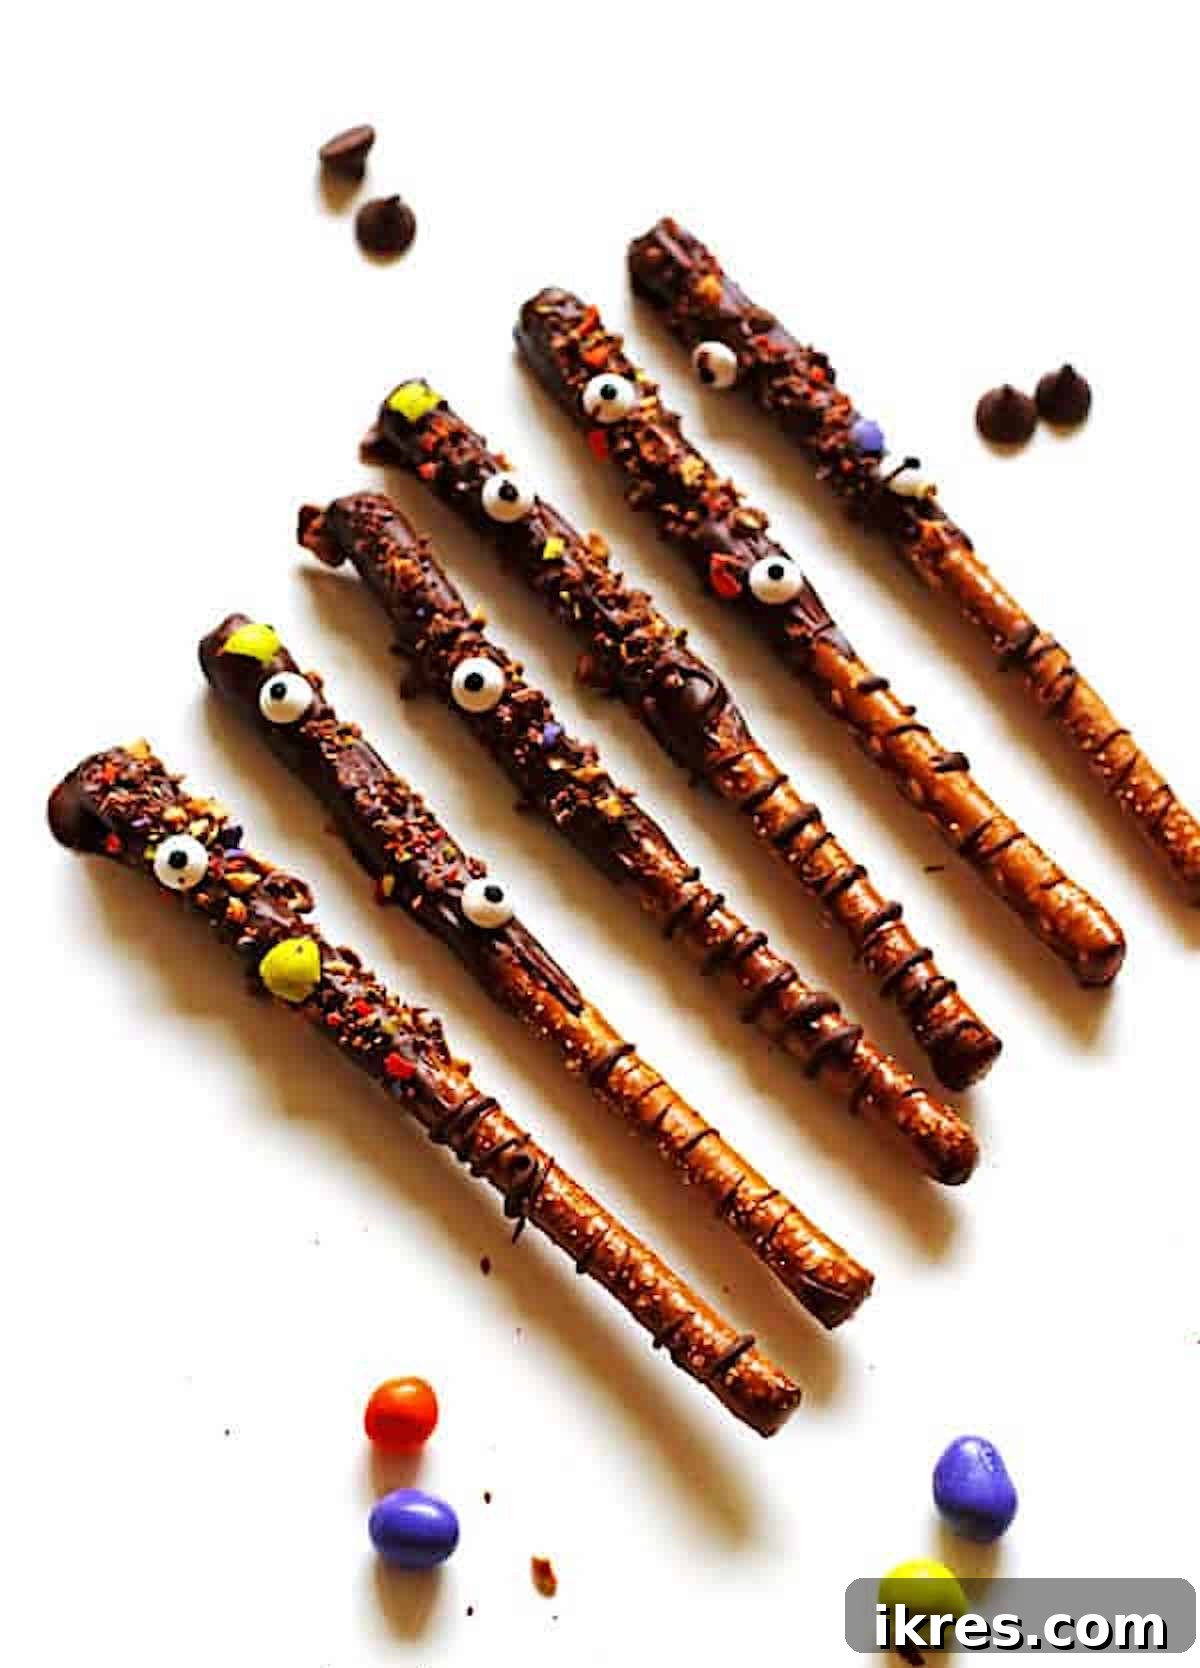
Indulge in the perfect harmony of sweet and salty with these irresistible Chocolate Covered Pretzel Rods. This delightful treat is incredibly easy to make, fun for all ages, and an excellent way to transform leftover Halloween candy or celebrate any special occasion!
Quick to assemble and a joy to decorate, homemade Chocolate Covered Pretzel Rods are a fantastic project for families. Kids especially love dipping, sprinkling, and creating their own edible masterpieces. Whether you’re looking for a simple dessert, a party favor, or a festive holiday treat, these chocolate-dipped pretzels are always a crowd-pleaser.
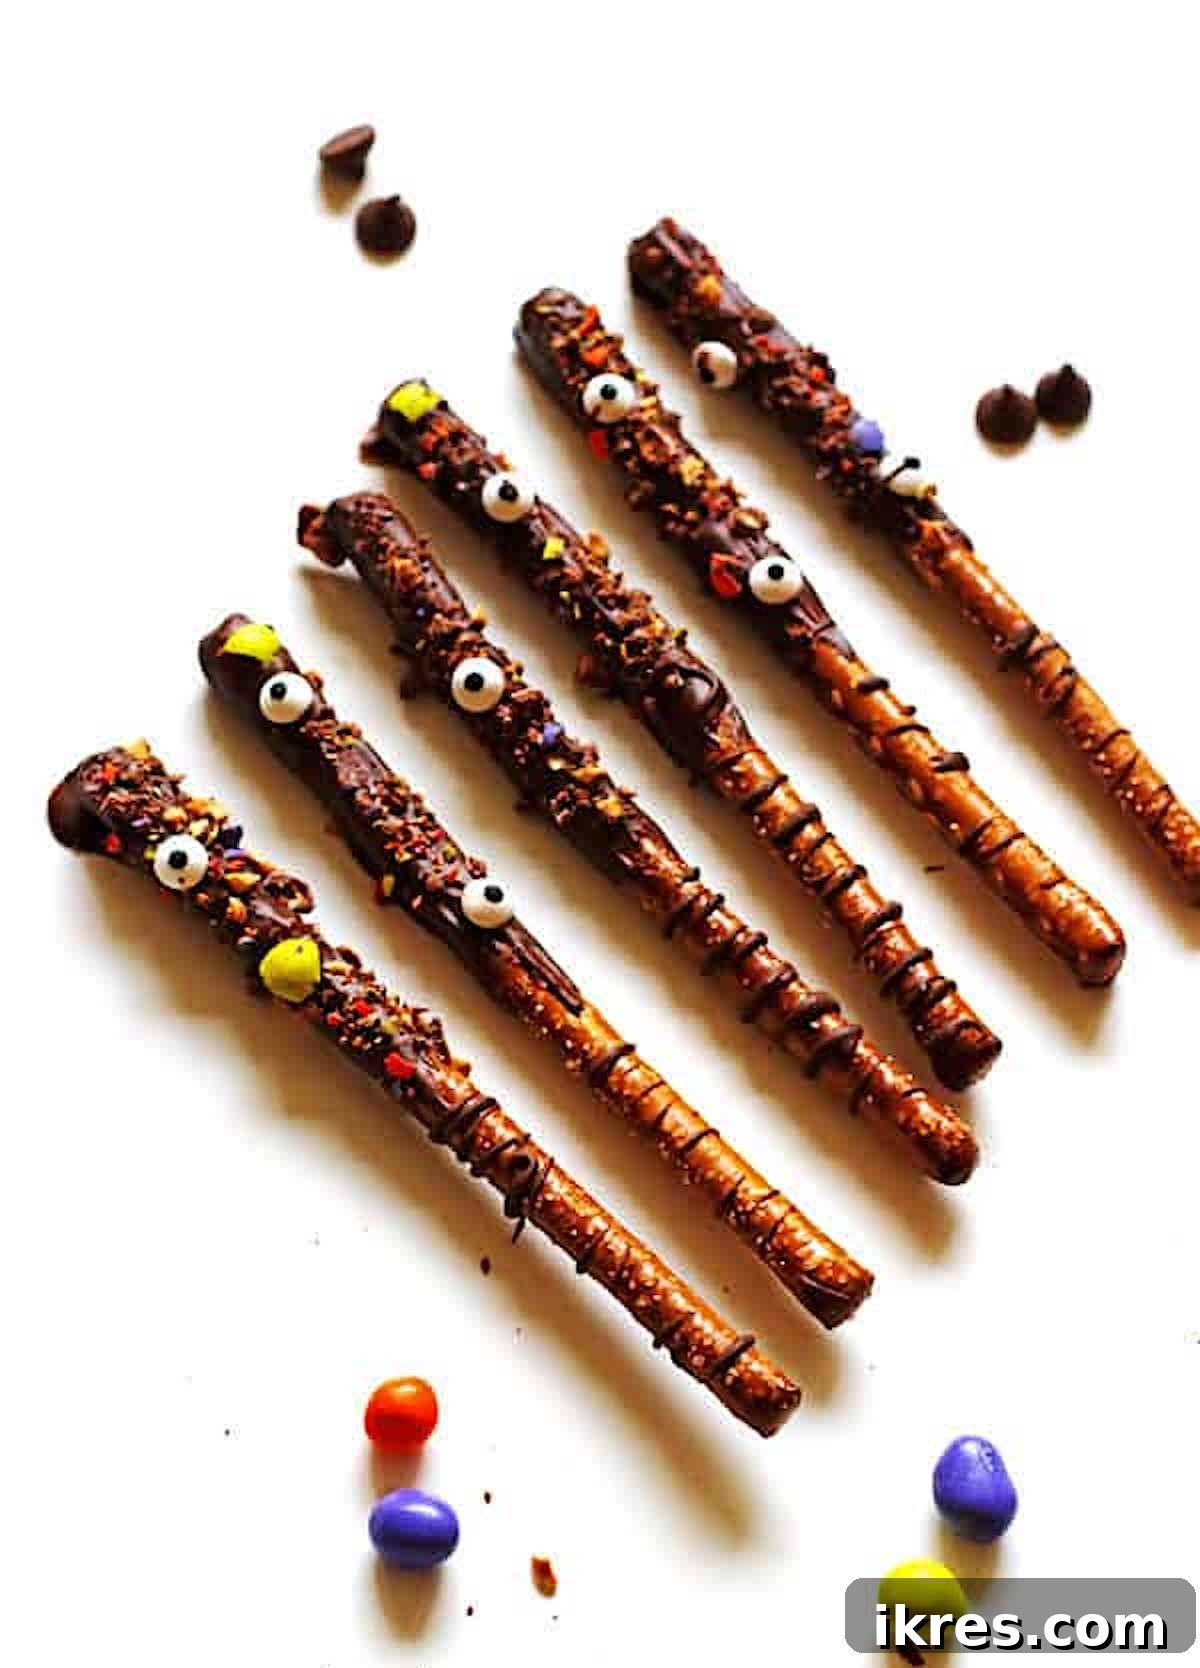
Why You’ll Love Making Chocolate Covered Pretzel Rods
There’s something uniquely satisfying about the combination of crisp, salty pretzels and rich, sweet chocolate. This recipe elevates that classic pairing by making it incredibly simple and customizable. Here are a few reasons why these treats will become a staple in your kitchen:
- Effortlessly Easy: With minimal ingredients and straightforward steps, even novice bakers can achieve impressive results.
- Kid-Friendly Fun: It’s a fantastic activity to do with children, allowing them to express their creativity with toppings.
- Versatile for Any Occasion: While perfect for Halloween with leftover candy, these rods can be decorated for Christmas, Valentine’s Day, birthdays, or just as an everyday snack.
- Perfect for Gifting: Beautifully packaged, they make thoughtful homemade gifts for friends, teachers, or hosts.
- Customizable Flavors: Experiment with different types of chocolate and an endless array of toppings to suit any preference.
Many households, like ours, often find themselves with an abundance of Halloween candy after trick-or-treating or perhaps from over-purchasing. This Chocolate Covered Pretzel Rods recipe offers a delicious and practical solution to utilize that extra candy. Of course, you don’t have to wait for Halloween; they can be made any time of year. Add some candy eyes, and they instantly become delightfully spooky!
Essential Ingredients for Your Delicious Pretzel Rods
Creating these delightful pretzel rods requires just a few key components. Choosing the right ingredients will ensure your treats are both beautiful and delicious.
- Pretzel Rods: The foundation of our treat. Ensure you pick full-size pretzel rods, not the smaller pretzel sticks, as the rods provide a much better surface for dipping and decorating.
- Chocolate for Dipping: The quality of your chocolate makes a big difference.
- Recommended: Baker’s Semi-Sweet Chocolate Bar. I prefer using baking bars because they tend to melt smoother and maintain a thinner, more dippable consistency for longer, giving you more time to work.
- Alternatives: Semi-sweet chocolate chips, white chocolate chips, dark chocolate, or milk chocolate chips can all be used. If using chips, you might consider adding a spoonful of coconut oil to help achieve a smoother, thinner consistency and prevent premature hardening.
- Candy for Decorating: This is where the fun begins!
- Best Options: M&M’s, Reese’s Pieces, Butterfingers, Heath Bars, or any variety of sprinkles work wonderfully. Candies with a firm texture that crush easily are ideal.
- For Halloween: Enhance the spooky theme with candy eyes and sprinkles in traditional Halloween colors like purple, orange, green, and black.
Why Choose Baking Bars Over Chocolate Chips?
While chocolate chips are convenient, baking bars (like Baker’s) offer several advantages for dipping:
- Superior Consistency: Baking bars melt down to a thinner, smoother consistency, which coats the pretzels more evenly and elegantly.
- Slower Hardening: They don’t set as quickly as chocolate chips, providing a longer working window to dip and decorate your pretzel rods without rushing.
Pretzel Rods vs. Pretzel Sticks: What’s the Difference?
For this recipe, it’s crucial to use full-size pretzel rods. Their longer length and sturdier build make them perfect for holding onto while dipping and provide ample surface area for creative decoration. Small pretzel sticks are too delicate and don’t offer the same visual impact or ease of handling.
Step-by-Step Guide: How to Make Chocolate Covered Pretzel Rods
Making chocolate-covered pretzel rods is a straightforward process, perfect for a quick snack or elaborate holiday treats. Follow these steps for perfect results every time.
1. Prepare Your Toppings and Workspace
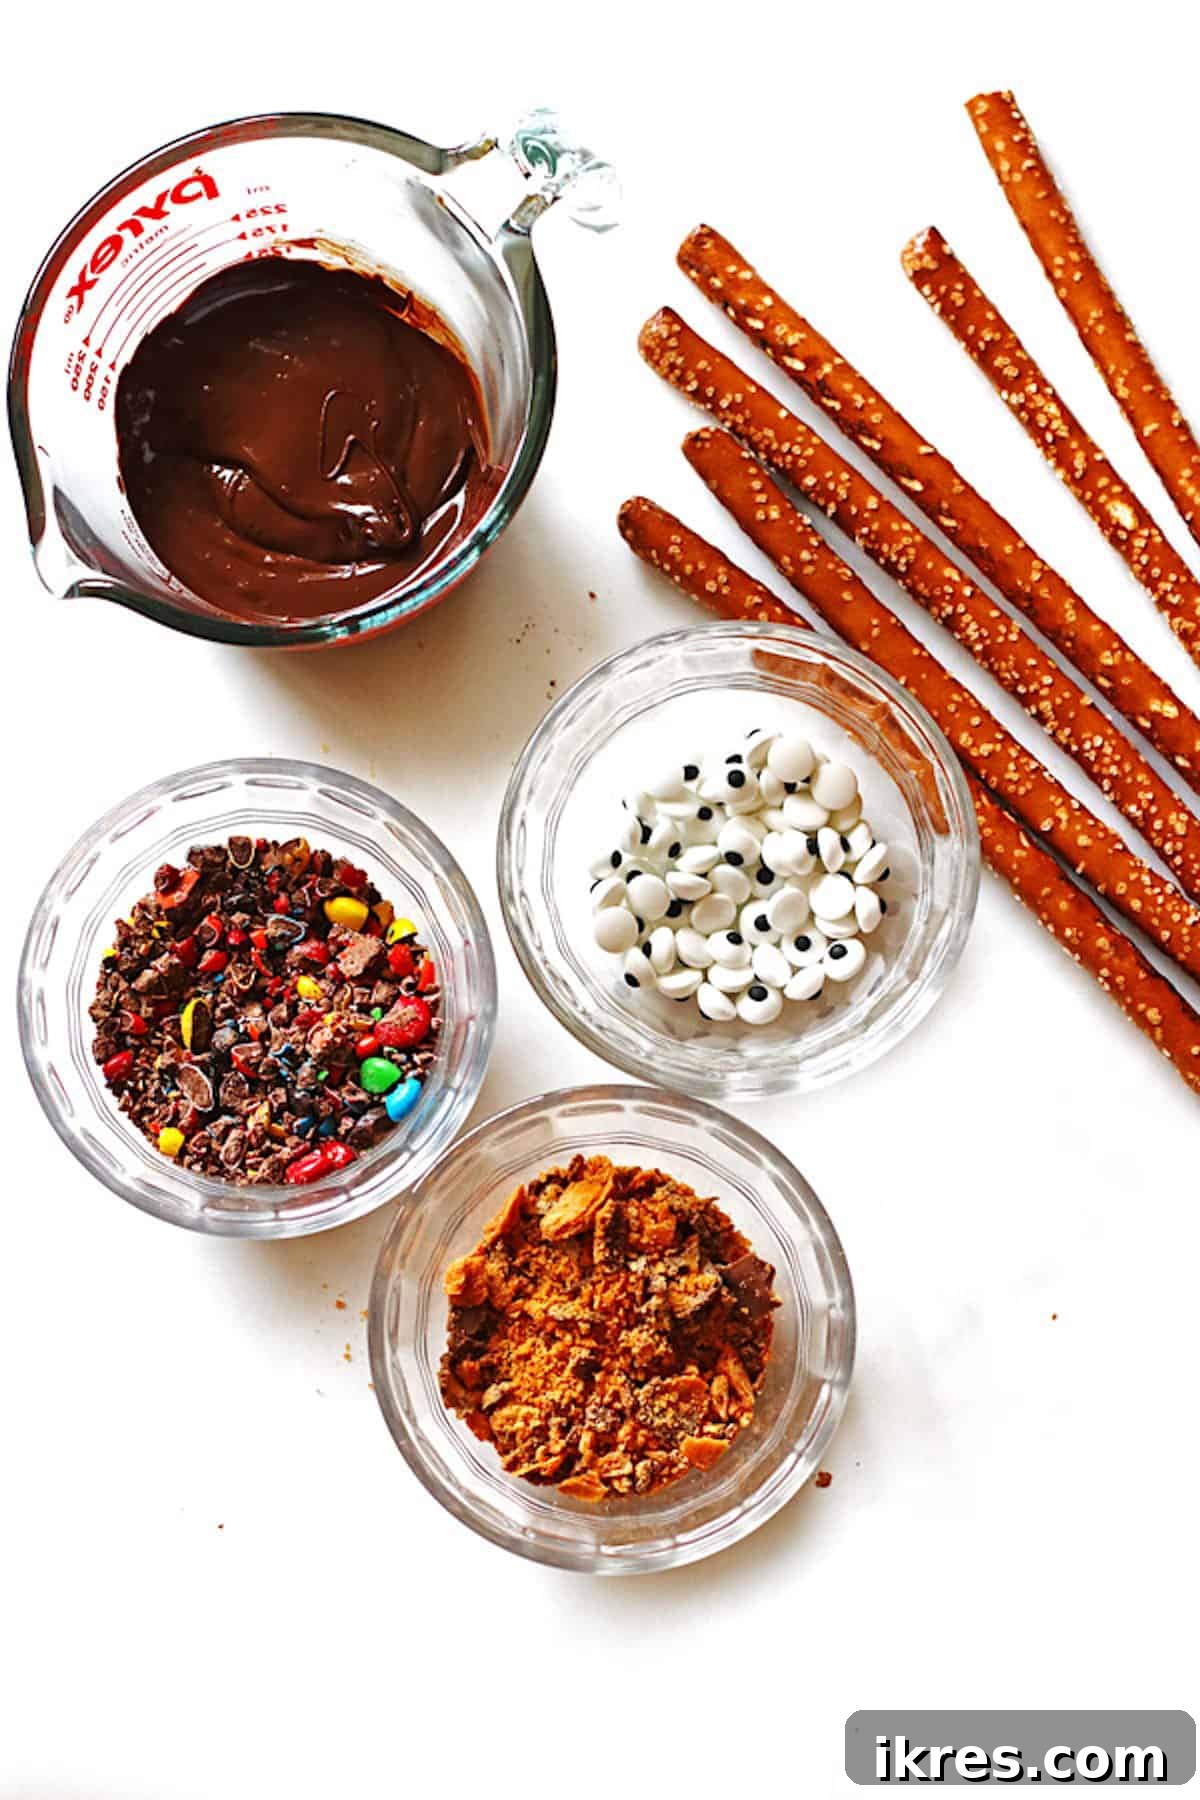
Timing is everything! Before you even think about melting chocolate, prepare all your toppings. Chocolate begins to set quickly, so having your crushed candies and sprinkles ready to go will ensure they adhere perfectly.
- Crushing Candy: Place your chosen candies in a sturdy plastic bag or between sheets of parchment paper. Use the back of a ladle, a large spoon, or a rolling pin to gently crush them into coarsely chopped pieces. Avoid using a food processor or blender, as these can make the candy too fine or even turn it into a paste. The goal is to have small, varied pieces that offer texture.
- Set Up Your Station: Cover a baking sheet with parchment paper. This will be where your finished pretzel rods rest. It’s also a great idea to cover your immediate work area with parchment paper to catch any stray chocolate drips or candy pieces, making cleanup a breeze.
2. Melting Your Chocolate to Perfection
A perfectly melted chocolate is key to beautifully coated pretzel rods. You have a couple of options:
Microwave Method (Quick & Easy)
- Break your chocolate bar into smaller pieces or place chocolate chips into a microwave-safe bowl.
- Heat the chocolate for 30 seconds on medium power.
- Remove and stir thoroughly. Stirring helps distribute the heat and prevents burning.
- If not fully melted and smooth, continue heating in 15-second increments, stirring well after each interval, until the chocolate is completely smooth and free of lumps. Be careful not to overheat, as chocolate can scorch easily.
Double Boiler Method (More Control)
- Fill a saucepan with about an inch or two of water and bring it to a simmer.
- Place a heat-safe bowl (glass or metal) over the saucepan, ensuring the bottom of the bowl does not touch the water.
- Add your chocolate to the bowl. The steam from the simmering water will gently and evenly melt the chocolate.
- Stir continuously until the chocolate is completely smooth and glossy. This method offers more control and reduces the risk of burning.
Pro Tip for Chocolate Chips: If using chocolate chips, add about a teaspoon of coconut oil or vegetable shortening to the melting chocolate. This helps thin the chocolate and keeps it liquid for a longer period, making dipping much easier.
Once melted, pour the chocolate into a tall, narrow dipping dish. A Pyrex glass measuring cup or a sturdy coffee mug works perfectly, as its depth allows you to submerge more of the pretzel rod with less chocolate.
3. Dipping and Decorating Your Pretzels
Now for the fun part! Get ready to transform plain pretzels into dazzling treats.
- Dip the Pretzel Rod: Hold a pretzel rod by one end and carefully dip it into the melted chocolate. You can tilt your dipping container slightly to get more coverage. Twist the pretzel rod as you dip to ensure an even coating.
- Remove Excess Chocolate: Lift the pretzel rod from the chocolate. Gently tap it against the side of the container or your wrist to allow any excess chocolate to drip off. You want a smooth, thin layer of chocolate, not a thick, clumpy one. If needed, use the back of a spoon to spread the chocolate evenly or remove excess.
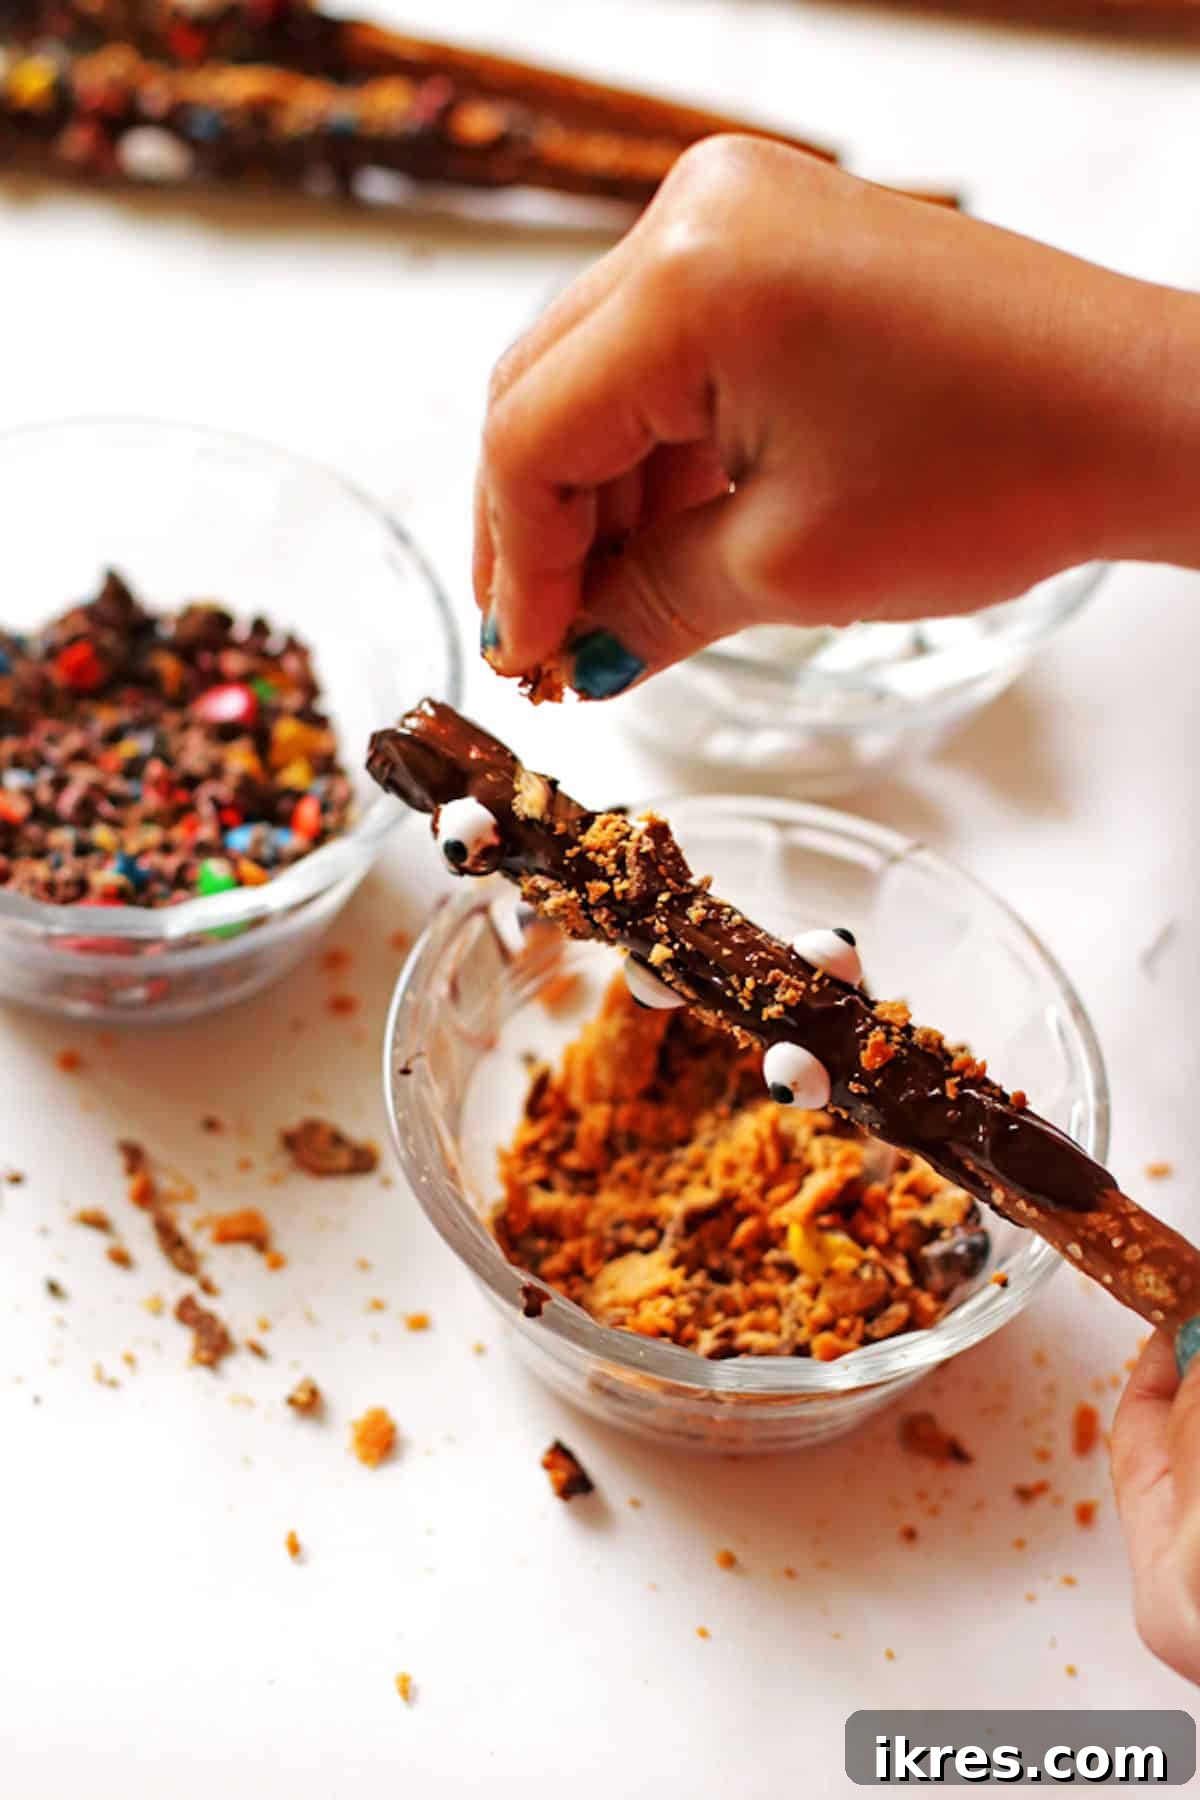
- Apply Toppings: While the chocolate is still wet, hold the chocolate-covered pretzel rod over your parchment-lined workspace. Liberally sprinkle your crushed candies, sprinkles, or other toppings over the melted chocolate. Rotate the pretzel rod to cover all sides. If using candy eyes, gently press them onto the chocolate before it sets.
4. Setting and Optional Drizzles
- Chill to Set: Carefully place the decorated pretzel rods onto your parchment-lined baking sheet. Transfer the baking sheet to the refrigerator and chill for approximately one hour, or until the chocolate is completely set and firm.
- Add a Drizzle (Optional): For an extra touch of elegance, once your primary chocolate layer is set, melt a different color of chocolate (e.g., white chocolate over dark chocolate). Pour the melted chocolate into a piping bag or a small Ziploc bag with a corner snipped off. Drizzle decorative patterns over the cooled pretzel rods. Allow the drizzle to set in the refrigerator for another 15-20 minutes.
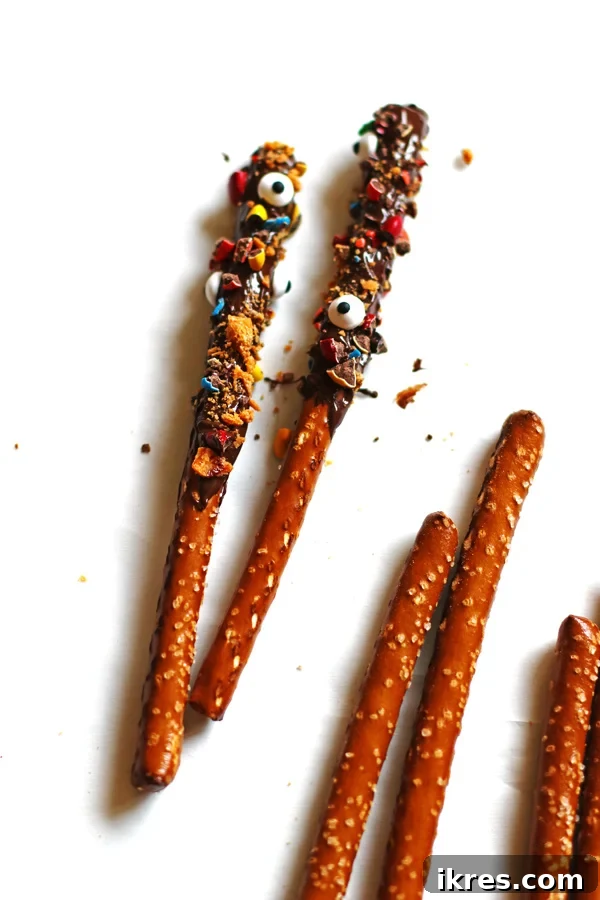
If you’re a fan of the classic sweet and salty combination, these chocolate-covered pretzels will quickly become a favorite. The delightful crunch of the salty pretzel rod, encased in smooth, decadent chocolate, is simply irresistible!
Expert Tips and Tricks for the Best Chocolate Dipped Pretzel Rods
Achieving bakery-quality chocolate-covered pretzel rods at home is easy with a few insider tips:
- Prioritize Preparation: Always crush your candies and set up your workspace with parchment paper *before* melting the chocolate. This ensures you can work quickly while the chocolate is perfectly dippable.
- Coarsely Crush Candies: Aim for a coarse chop on your candies. Pieces that are too fine tend to disappear into the chocolate, while larger chunks provide a satisfying crunch and visual appeal. A rolling pin or the back of a spoon works best for this.
- Choose the Right Candies: M&M’s, Reese’s Pieces, Heath Bars, and Butterfinger bars are excellent choices. Avoid sticky candies like those with caramel, as they are difficult to crush and will create a messy coating.
- Master Chocolate Consistency: If using chocolate chips, a tiny bit of coconut oil (about 1 teaspoon per 4 ounces of chocolate) will significantly improve the chocolate’s consistency, making it thinner and easier to work with, and keeping it liquid for longer.
- Use a Deep, Narrow Container: A tall measuring cup or mug is ideal for melting and dipping chocolate. It allows you to coat more of the pretzel rod without needing excessive amounts of chocolate.
- Tap Off Excess Chocolate: Don’t skip this step! Tapping the pretzel rod gently ensures a thin, even coat of chocolate and prevents pooling at the bottom, which can make them look less professional.
- Work in Batches (If Needed): If you’re making a large quantity, or if your kitchen is warm, consider working with smaller batches of melted chocolate to prevent it from hardening too quickly.
- Easy Cleanup: Parchment paper is your best friend! Line your baking sheets and cover your work surface to make cleanup incredibly easy. Just gather the paper and toss.
How to Store Chocolate Pretzel Rods
Once your chocolate-covered pretzel rods have completely set, store them in an airtight container at room temperature. This helps maintain their crispness and prevents the chocolate from blooming (developing a grayish film). They will stay fresh and delicious for up to 1-2 weeks.
Customizing Your Pretzel Rods for Any Holiday
The beauty of this recipe lies in its adaptability. You can easily transform these treats to match any holiday or theme!
- Christmas Pretzel Rods: Dip in white chocolate and decorate with festive red and green sprinkles, crushed peppermint candies, or a drizzle of contrasting dark chocolate. These make charming gifts when tied in cellophane bags with a ribbon, offering a delightful alternative to traditional holiday cookies.
- Halloween Pretzel Rods: Go wild with candy eyes, black and orange sprinkles, purple and green sprinkles, and crushed Halloween-themed candies. Create “mummy” pretzels by drizzling white chocolate in strips over dark chocolate-covered rods.
- Valentine’s Day Pretzels: Use pink or red candy melts, sprinkle with heart-shaped sprinkles, or drizzle with white chocolate for a romantic touch.
- Easter Pretzels: Opt for pastel-colored candy melts, colorful sprinkles, and sprinkle with crushed mini-chocolate eggs.
- Birthday Party Favors: Match the sprinkles and chocolate colors to your party theme for personalized and fun treats.
Frequently Asked Questions (FAQs) About Chocolate Covered Pretzel Rods
How long do chocolate-covered pretzel rods last?
When stored properly in an airtight container at room temperature, chocolate-covered pretzel rods can last for 1 to 2 weeks. For best freshness, consume them within the first week.
Can I use any type of chocolate?
Yes, you can use milk, dark, white chocolate, or even colored candy melts. Baking bars or high-quality chocolate chips are recommended for the best texture and melting consistency. If using chocolate chips, remember the tip about adding a small amount of coconut oil for smoother dipping.
What if my chocolate becomes too thick or seizes?
If your chocolate is too thick for dipping, you can stir in a small amount of coconut oil or vegetable shortening (1/2 to 1 teaspoon at a time) until it reaches the desired consistency. If your chocolate seizes (becomes thick, lumpy, and unworkable), it likely came into contact with water. Unfortunately, seized chocolate is very difficult to salvage for dipping, so it’s best to start with a fresh batch, ensuring no water gets into your chocolate.
Can I make these gluten-free or vegan?
Absolutely! Simply use gluten-free pretzel rods and ensure your chocolate and toppings are certified gluten-free. For a vegan option, choose vegan-friendly pretzel rods and dairy-free chocolate (often labeled as “dark chocolate” with no milk solids) and vegan toppings.
What’s the best way to package them for gifts?
For gifting, once the chocolate is fully set, place individual pretzel rods into clear cellophane bags. Tie the bags with decorative ribbons, or group several together in a festive box layered with parchment paper.
Recipe: Delicious Chocolate Covered Pretzel Rods
Chocolate Covered Pretzel Rods
A delightful sweet and salty treat, perfect for any holiday or just a fun family activity.
Ingredients
- 4 ounces Baker’s Semi-Sweet Chocolate Bar (or preferred chocolate type)
- Approximately 16 Pretzel Rods
- Assorted Candies, coarsely crushed (e.g., M&M’s, Butterfingers, Reese’s Pieces, Heath Bars)
- Candy Eyes (optional, for Halloween or fun designs)
- Sprinkles (optional, for various holiday themes)
- 1 teaspoon Coconut Oil (optional, if using chocolate chips for smoother consistency)
Instructions
- Coarsely crush your chosen candies using the back of a large spoon, a ladle, or a rolling pin in a plastic bag. Place each crushed candy type into separate small bowls and set aside.
- Line a baking pan and your workspace with parchment paper or foil for easy cleanup. Set aside.
- Melt the chocolate: Break the chocolate bar into pieces (or use chips) and place it in a microwave-safe dish. Heat for 30 seconds, then stir. Continue heating in 15-second intervals, stirring well after each, until the chocolate is completely melted and smooth. Alternatively, use a double boiler for gentle melting.
- Pour the melted chocolate into a tall, narrow container like a Pyrex measuring cup or a coffee mug.
- Dip the pretzel rods into the chocolate, covering about two-thirds of the rod. Twist the pretzel to ensure full coverage and gently tap off any excess chocolate. If needed, use the back of a spoon to spread chocolate further down the rod.
- While holding the chocolate-covered end over your prepped workspace, sprinkle the crushed candy pieces generously over the melted chocolate. Rotate the pretzel rod to coat all sides evenly. If using edible candy eyes, gently press them onto the chocolate at this stage.
- Place the decorated pretzel rods onto the prepared parchment-lined baking pan.
- Chill the pretzel rods in the refrigerator for at least one hour, or until the chocolate is completely set and firm.
- Once set, store the chocolate-covered pretzel rods in an airtight container at room temperature.
Notes
- Suggested candies include M&M’s, Reese’s Pieces, Heath Bars, and Butterfinger bars. Avoid sticky, caramel-based candies as they don’t crush well.
- Always prepare your toppings before melting chocolate to ensure they stick while the chocolate is still wet.
- Using parchment paper on your baking sheet and work area makes cleanup exceptionally easy.
Looking for More Delicious and Fun Recipes?
If you enjoyed making these sweet and salty treats, you might love exploring other fun recipes for holidays or everyday indulgence. Try my Halloween Dirt Cake for another spooky dessert, or whip up a batch of Candy Corn Snack Mix for a festive munch. For something savory and themed, our Halloween Witch Hat Calzones are a hit!
Another beloved sweet and salty, kid-friendly snack in our home is Dark Chocolate Pretzel Granola Bars. They make an excellent after-school treat or a quick grab-and-go breakfast option. Happy baking!