

These incredibly easy chocolate mousse balls are a delightful no-bake treat crafted from just three simple ingredients: creamy Cool Whip, rich Hershey’s chocolate, and classic Nilla Wafers. Perfect for any occasion, they make for a wonderful dessert or an irresistible party treat that everyone will adore!

Easy No-Bake Chocolate Mousse Balls: A 3-Ingredient Recipe for Any Occasion
Prepare to fall in love with the simplest, most decadent dessert you’ll ever make: our legendary chocolate mousse balls! These delightful morsels are essentially luscious chocolate mousse, rolled into perfect spheres and coated in a crunchy blanket of crushed Nilla Wafers. They’re not just good; they’re an absolute sensation, especially cherished during the bustling holiday season when time for elaborate baking is often scarce.
Year after year, this recipe proves to be a crowd-pleaser, earning rave reviews and countless requests. It holds a special place in my heart, too, as it was passed down from my wonderful old babysitter, Mrs. Marge. Her wisdom in the kitchen gifted us this unbelievably easy yet utterly unforgettable chocolate treat, and now I’m thrilled to share her secret with you!
Why These 3-Ingredient Chocolate Mousse Balls Are a Must-Try
- Effortlessly Simple: You literally only need three readily available ingredients to bring these delectable treats to life. No complex baking skills or fancy equipment required!
- Irresistibly Delicious: With a creamy, melt-in-your-mouth interior and a delicate cookie crumb exterior, these balls offer a textural and flavor experience that’s truly satisfying.
- Gourmet Taste, Minimal Effort: They deliver the rich, sophisticated taste of chocolate mousse truffles, but without the fuss and extensive time commitment. The crushed Nilla Wafers add a unique, comforting twist.
- Perfect for Festivities: Whether it’s for Christmas, New Year’s, a birthday party, or just a cozy family gathering, these mousse balls are guaranteed to be a hit. Their make-ahead nature makes them ideal for entertaining.
- No-Bake Wonder: Forget turning on the oven! This recipe keeps your kitchen cool, making it perfect for year-round enjoyment, especially during warmer months.
The Legendary Origin of Our Chocolate Mousse Balls
Every truly great recipe has a story, and these chocolate mousse balls are no exception. The magic behind this simple yet legendary dessert comes from Mrs. Marge, my childhood babysitter. She was one of those incredible people who always had a comforting word, a warm smile, and, most importantly, the best homemade treats. I remember countless afternoons at her house, the air filled with the aroma of freshly baked cookies or, in this case, the anticipation of her famous “mousse balls.”
Mrs. Marge wasn’t a gourmet chef, but she possessed an innate ability to create pure joy with minimal fuss. Her philosophy was that desserts should be both delicious and accessible. This recipe perfectly embodies that spirit. She taught me that sometimes, the simplest combinations yield the most extraordinary results. These chocolate mousse balls were a staple at every family gathering, school bake sale, and holiday celebration, always disappearing in a flash. While I’ve refined the process slightly over the years, the heart of Mrs. Marge’s original recipe remains, and I’m eternally grateful for this sweet legacy.
Essential Ingredients for Your No-Bake Delight
The beauty of this recipe lies in its simplicity, requiring just three core ingredients. But choosing the right quality and understanding their role is key to achieving that perfect mousse-like texture and rich flavor.
- Hershey’s Chocolate: For this specific recipe, 16 ounces of classic Hershey’s chocolate is essential. While I often opt for higher-end baking chocolates for other desserts, Hershey’s milk chocolate bars provide a unique, nostalgic sweetness and melt beautifully to create the ideal base for these mousse balls. It’s the same type of chocolate that makes s’mores so uniquely satisfying, bringing a familiar, comforting flavor profile that pairs perfectly with the other ingredients. You can use standard Hershey’s milk chocolate bars or even baking chocolate bars from Hershey’s.
- Cool Whip: This whipped topping is the secret to the incredibly light, airy, and stable mousse texture. An 8-ounce tub of thawed Cool Whip provides the necessary lightness and creaminess without the fuss of whipping fresh cream. Ensure it’s fully thawed in the refrigerator before use; a frozen or partially frozen tub won’t blend properly.
- Nilla Wafers: These iconic vanilla wafers are transformed into a delightful crumb coating. Their subtle vanilla flavor and crispy texture provide a wonderful contrast to the rich chocolate mousse. You’ll need about 1 cup of finely crushed wafers, which typically comes from about half of an 11-ounce box.
Step-by-Step Guide to Crafting Perfect Chocolate Mousse Balls
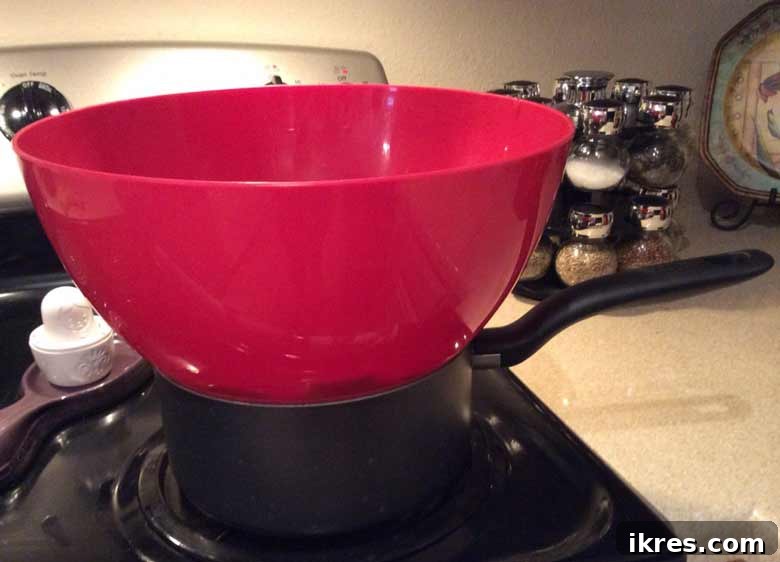
Step 1: Gently Melt the Chocolate to Perfection
Your first crucial step is to melt 16 ounces of Hershey’s chocolate. For the best results and to achieve that silky-smooth texture, I highly recommend using a double boiler method. Place your chocolate in a heatproof bowl and set it over a pot of gently simmering water, ensuring the bottom of the bowl does not touch the water. Stir the chocolate frequently until it’s entirely melted and smooth. While microwaving might seem faster, it can easily burn the chocolate or cause it to seize, leading to a grainy or lumpy texture that we want to avoid for these delicate mousse balls. The double boiler offers controlled, even heating.
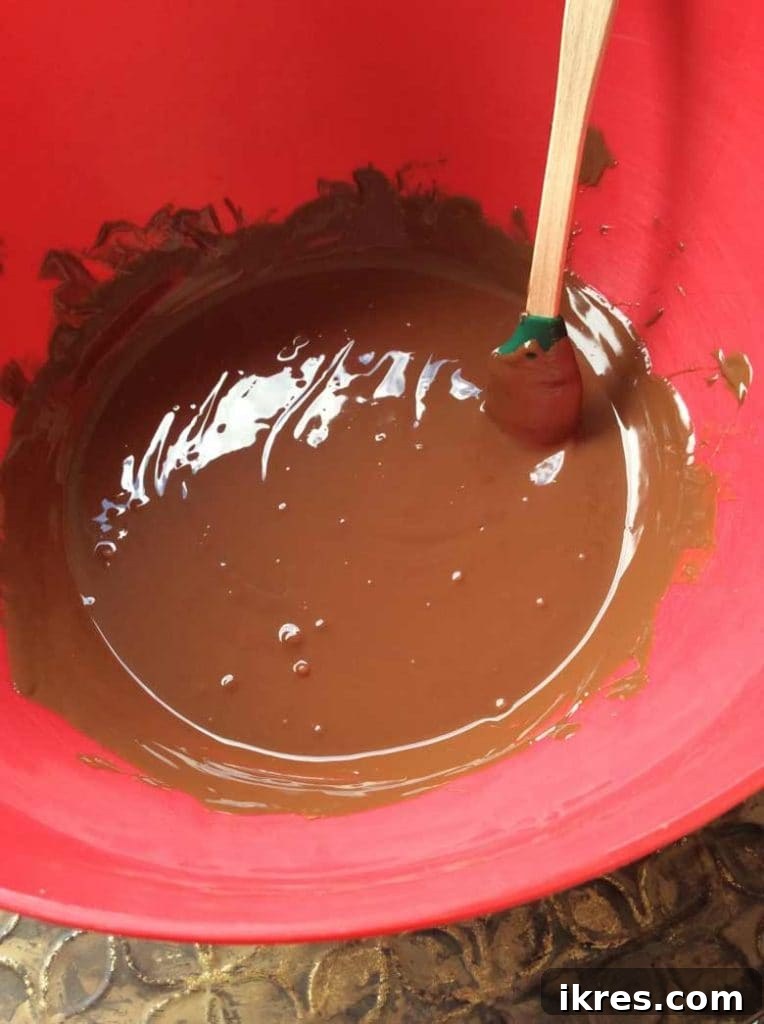
Step 2: Crucial Cooling for Optimal Mousse Texture
Once your chocolate is perfectly melted, this next step is absolutely vital for the success of your mousse balls. Allow the melted chocolate to cool completely to room temperature. This means not just the chocolate itself, but also the bowl it’s in should feel cool to the touch. If the chocolate is still warm or hot when combined with the Cool Whip, it will cause the Cool Whip to melt and the chocolate to harden prematurely, resulting in a grainy texture and losing that signature light and airy mousse consistency. Patience here will be greatly rewarded!
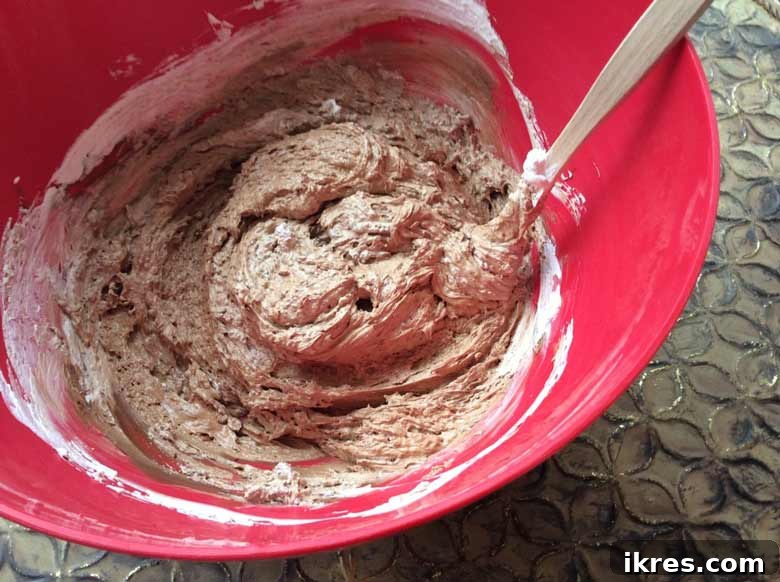
Step 3: Blending the Mousse Base to Perfection
Now that your melted chocolate is at room temperature, it’s time to create the mousse. Gently fold one 8-ounce tub of thawed Cool Whip into the cooled chocolate. Mix slowly and thoroughly until the two ingredients are completely combined and the mixture is thick, smooth, and uniformly chocolate-colored. Avoid overmixing, as this can deflate the Cool Whip. Once combined, transfer the mixture to the refrigerator for a minimum of 30 minutes. This chilling period is crucial; it allows the mousse base to firm up, making it much easier to roll into perfect balls later without excessive stickiness.
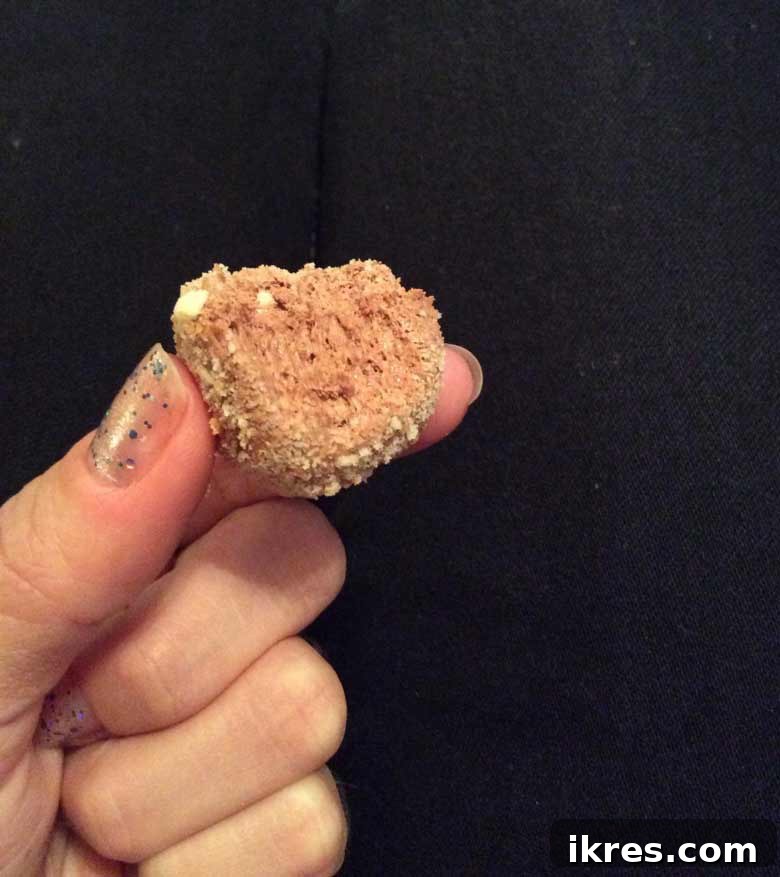
Step 4: Preparing the Crumb Coating & Forming the Balls
While your mousse is chilling, prepare your Nilla Wafer coating. Crush approximately half of an 11-ounce box of Nilla Wafers (which should yield about 1 cup of crumbs) in a food processor until they form fine, even crumbs. If you don’t have a food processor, you can place the wafers in a sealed plastic bag and crush them with a rolling pin or even a hammer for a more rustic texture. Once the mousse mixture has hardened in the refrigerator, take about 1 tablespoon of the mixture and quickly roll it between your palms to form a smooth ball. Immediately dunk the ball into the Nilla Wafer crumbs, turning it until it’s fully covered. Place the coated mousse ball onto a clean plate and repeat this process until all the chocolate mousse mixture is used up.
Step 5: Final Chill and Enjoy!
For the ultimate enjoyment and firmest texture, refrigerate your finished chocolate mousse balls for at least another 30 minutes. This final chill allows the chocolate coating to fully set and enhances the delightful melt-in-your-mouth experience. After chilling, they are ready to serve and impress! Prepare for them to disappear quickly!
Pro Tips for Flawless Chocolate Mousse Balls Every Time
- Temperature is Everything: As emphasized in the instructions, ensure your Cool Whip is completely thawed and the melted chocolate is thoroughly cooled to room temperature. This is the single most critical step for achieving the light, airy “mousse” texture you’re after. Any warmth from the chocolate will cause a separation or a grainy, hard consistency.
- Mastering the Roll: Rolling the mousse balls can indeed be a bit messy, as the warmth from your hands can start to melt the chocolate mousse. To make the process smoother and less sticky, have a bowl of cold water nearby. Wash your hands frequently during the rolling process (every 5-10 balls) to keep them cool and clean. Alternatively, a small cookie scoop or portioning scoop can help create uniform balls with less direct hand contact.
- Uniformity is Key: For a professional presentation, use a small cookie scoop (about 1 tablespoon in size) to portion out the mousse mixture. This ensures all your mousse balls are roughly the same size, which is visually appealing and helps them chill evenly.
- Plan for a Crowd: These chocolate mousse balls are notorious for vanishing quickly! If you’re bringing them to a party, potluck, or any gathering, seriously consider doubling (or even tripling) the recipe. You’ll be glad you did when everyone is asking for seconds.
- Get Creative with Coatings: While Nilla Wafers are classic, feel free to experiment! Try finely chopped nuts (pecans, walnuts), shredded coconut, cocoa powder, rainbow sprinkles, or even a drizzle of white chocolate after they’ve set for added flair.
Creative Variations & Serving Suggestions
While the classic 3-ingredient chocolate mousse ball is a masterpiece on its own, don’t hesitate to get creative and customize them to your liking! The base recipe is incredibly versatile.
Exciting Variations:
- Dark Chocolate Delight: For a richer, less sweet flavor, substitute Hershey’s milk chocolate with dark chocolate baking bars. Adjust to your preferred cacao percentage.
- Mint Chocolate Magic: Add a few drops of peppermint extract (start with ¼ teaspoon and add more to taste) to the melted chocolate before mixing with the Cool Whip for a refreshing twist.
- Espresso Kick: Stir in ½ teaspoon of instant espresso powder or finely ground coffee to the melted chocolate to enhance its depth and intensity.
- Tropical Twist: Roll the finished balls in toasted shredded coconut for a delightful texture and flavor contrast.
- Nutty Crunch: Instead of Nilla Wafers, try finely crushed pecans, walnuts, or even pistachios for a sophisticated coating.
- Holiday Cheer: Incorporate festive sprinkles or finely crushed candy canes (peppermint flavor) into the coating during the holiday season.
Elegant Serving Suggestions:
- Arrange them artfully on a platter with fresh berries for a pop of color.
- Serve them in mini paper cupcake liners or truffle cups for an elegant presentation that also makes them easy to pick up.
- Offer them alongside a cup of coffee or a glass of dessert wine for a sophisticated after-dinner treat.
- Stack them pyramid-style for a visually stunning centerpiece at your dessert table.
Storage and Make-Ahead Advice
These chocolate mousse balls are not only easy to make but also incredibly convenient for make-ahead planning, especially for parties or busy holiday seasons. Proper storage ensures they remain fresh and delicious.
- Refrigeration: Store the finished chocolate mousse balls in an airtight container in the refrigerator for up to 5-7 days. Layer them with parchment paper between layers to prevent sticking.
- Freezing: For longer storage, these mousse balls freeze beautifully. Place them in a single layer on a baking sheet and freeze until firm (about 1-2 hours). Once firm, transfer them to an airtight, freezer-safe container or a resealable freezer bag. They can be stored in the freezer for up to 1-2 months.
- Thawing: When ready to enjoy from the freezer, simply transfer the desired number of mousse balls to the refrigerator and let them thaw for a few hours, or at room temperature for about 30 minutes, before serving.
- Make-Ahead Tips: You can prepare the chocolate mousse base (Steps 1-3) up to 2 days in advance and keep it covered in the refrigerator. When you’re ready to serve, simply pull it out, roll the balls, coat them, and chill again. This makes them an ideal dessert for entertaining, as most of the work can be done beforehand!
Frequently Asked Questions (FAQs)
- Can I use real whipped cream instead of Cool Whip?
- While you can use real whipped cream, it’s generally not recommended for this specific recipe if you want to achieve the exact “mousse ball” texture and stability. Cool Whip is a stabilized whipped topping that holds its shape much better when mixed with chocolate and withstands handling and chilling without deflating or weeping. Real whipped cream tends to be less stable and can make the mixture too soft for rolling, or become watery over time.
- Can I use a different type of chocolate?
- Yes, you can experiment with different chocolates! While Hershey’s milk chocolate provides a unique sweetness that is part of the original recipe’s charm, you can certainly use semi-sweet, dark chocolate, or even white chocolate. Just ensure it’s a good quality baking chocolate that melts smoothly. Keep in mind that different chocolates may alter the sweetness and richness of the final product.
- How do I make the mousse balls perfectly round?
- The key to perfectly round balls is to work quickly when rolling them, as the warmth from your hands can start to melt the mixture. Using a small cookie scoop to portion the mousse helps achieve uniform sizes. If the mixture becomes too soft, pop it back into the refrigerator for 10-15 minutes to firm up again before continuing. Washing your hands with cold water periodically also helps.
- How long do these chocolate mousse balls last?
- When stored in an airtight container in the refrigerator, these mousse balls will stay fresh and delicious for 5-7 days. As mentioned above, they can also be frozen for up to 1-2 months.
- Can I skip the chilling steps?
- No, the chilling steps are essential! The initial chill allows the mousse mixture to firm up enough to be rolled into balls, and the final chill helps the coating set and ensures the mousse balls hold their shape and texture properly. Patience during chilling is crucial for success.
More Irresistible Chocolate Truffle Recipes You May Enjoy
If you love the concept of these easy chocolate mousse balls and are looking to explore other delightful variations, I have a few more recipes you might find intriguing, catering to different dietary needs:
- If you are looking for a healthier, dairy-free version of these indulgent mousse balls, then you must try my Dairy-Free Chocolate Mousse Balls (Gluten-free). They offer all the flavor with a thoughtful twist!
- For those following a Paleo lifestyle, I haven’t forgotten you! Check out my delicious Paleo Chocolate Mousse Balls, designed to be both satisfying and compliant.
Did you try this amazing recipe? We’d love to hear from you! Please share your thoughts and experiences in the comments below.
Chocolate Mousse Balls Recipe Card

These easy chocolate mousse balls are made from Cool Whip, Hershey’s chocolate, and Nilla Wafers. They make for a wonderful dessert or party treat with minimal effort!
- By: Dominique
- Yields: 60 mousse balls
- Prep time: 1 hour (includes cooling and initial chill)
- Total time: 1 hour 30 minutes (includes final chill)
Ingredients
- 1 (8-ounce) tub Cool Whip, thawed
- 1 cup crushed Nilla Wafers (approximately 1/2 of an 11-ounce box)
- 16 ounces Hershey’s Chocolate (bars or baking chocolate)
Instructions
- Ensure Cool Whip is fully thawed in the refrigerator.
- Melt 16 ounces of Hershey’s chocolate in a heatproof bowl set over a pot of simmering water (double boiler method) until smooth.
- Allow the melted chocolate to cool completely to room temperature. This step is critical; the bowl should feel cool to the touch.
- Gently fold the thawed Cool Whip into the cooled melted chocolate until fully mixed and smooth. Do not overmix.
- Refrigerate the chocolate mousse mixture for 30 minutes to firm up.
- While chilling, crush Nilla Wafers in a food processor or a plastic bag with a rolling pin until you have 1 cup of fine crumbs.
- Once the mousse mixture has hardened, scoop 1 tablespoon of the mixture and quickly roll it between your hands to form a ball.
- Immediately roll the chocolate ball in the Nilla Wafer crumbs until thoroughly coated.
- Place the coated mousse ball on a plate and repeat with the remaining mixture until all mousse is used.
- Refrigerate the finished mousse balls for at least another 30 minutes to set before serving.
- Enjoy your delicious 3-ingredient chocolate mousse balls!
Notes
- For the best “mousse” texture, always ensure your Cool Whip is thawed and melted chocolate is cooled to room temperature before combining.
- Rolling can be messy due to body heat. Wash hands frequently with cold water or use a small cookie scoop to minimize stickiness.
- This recipe yields approximately 60 mousse balls. Consider doubling for parties!
Nutrition (Approximate)
Nutrition information is automatically calculated and should only be used as an approximation.
- Serving: 1 ball
- Calories: 64 kcal
- Carbohydrates: 7.3g
- Protein: 0.7g
- Fat: 3.6g
Additional Info
- Course: Dessert
- Cuisine: American
Tried this recipe?
Share your creations on social media! Mention @perchancetocook or tag #perchancetocook!