
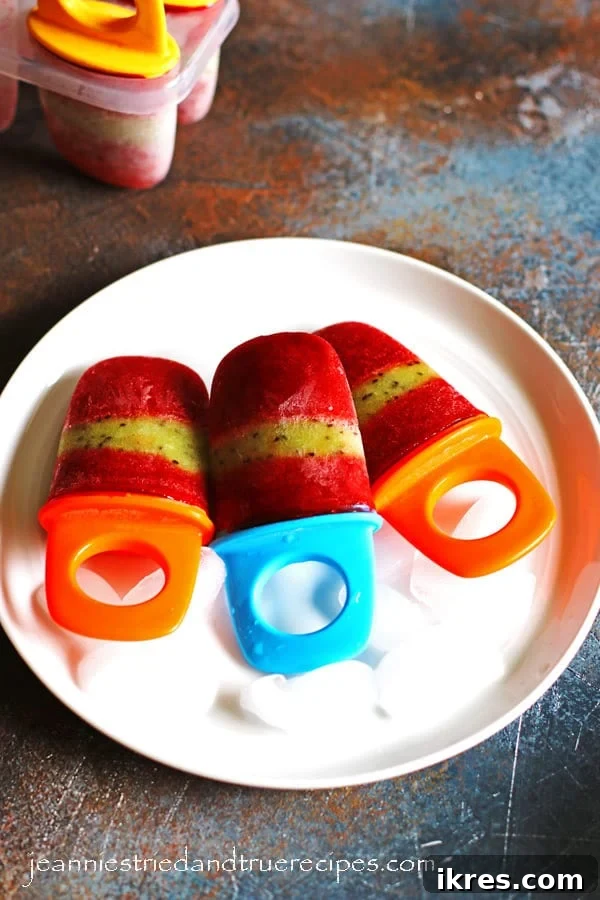
Welcome to your ultimate guide for crafting the most delectable and refreshing homemade Fruit Popsicles, perfect for those warm, sun-drenched days! These vibrant frozen treats are a delightful fusion of two of nature’s most complementary fruits: sweet, juicy strawberries and tangy, bright kiwi. Not only are they incredibly delicious and a fantastic way to cool down, but they’re also packed with goodness, making them a smart choice for a healthy snack or dessert.
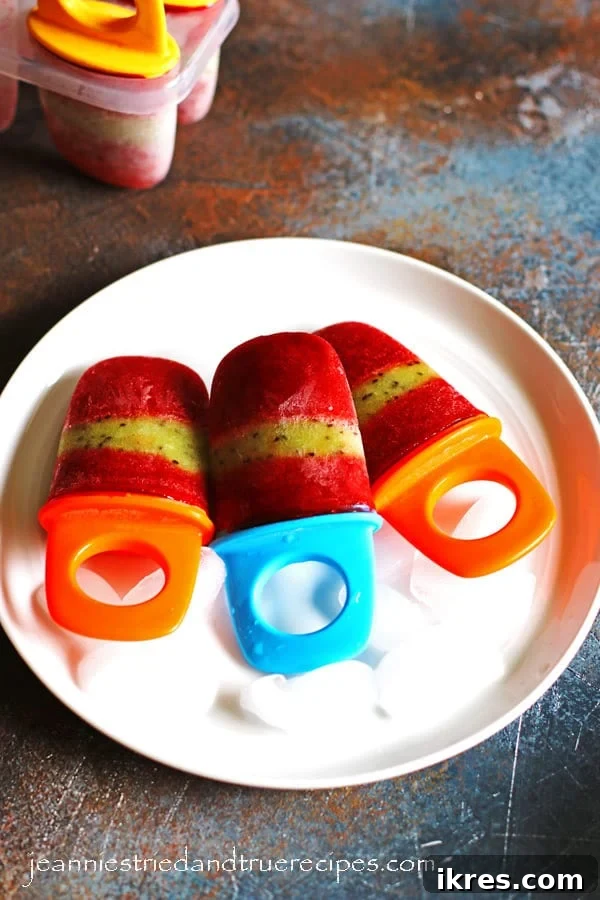
Imagine serving these beautiful, layered popsicles at your next pool party, barbecue, or simply enjoying them as a guilt-free indulgence on a lazy afternoon. They are a universal crowd-pleaser, appealing to both adults and children alike. What makes these Strawberry Kiwi Popsicles truly special is their simplicity and the purity of their ingredients. Unlike many store-bought alternatives that hide artificial flavors, colors, and excessive sugars, our homemade version allows you complete control over what goes into your family’s treats.
The Powerhouse Fruits: Why Strawberries and Kiwis Reign Supreme
The magic of these popsicles starts with their star ingredients. Strawberries and kiwis aren’t just a perfect flavor pairing; they’re also nutritional powerhouses that contribute significantly to a healthy diet. Combining them in a refreshing popsicle makes healthy eating irresistibly fun.
The Wonderful World of Strawberries
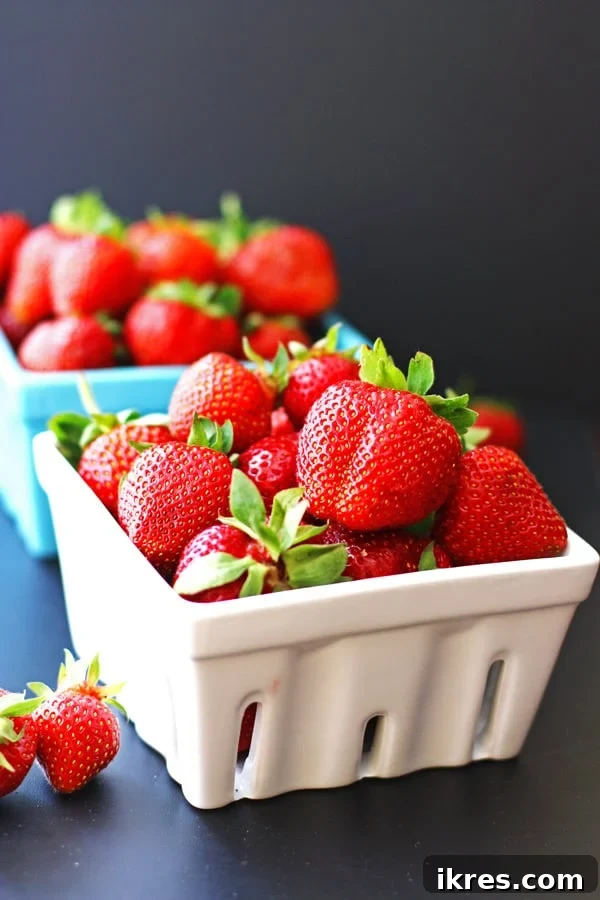
Strawberries are more than just a sweet, ruby-red delight. They are an excellent source of Vitamin C, a crucial antioxidant that supports immune health and skin vitality. Beyond Vitamin C, these berries also provide a good amount of potassium, which is important for maintaining healthy blood pressure, and are loaded with other potent antioxidants. Their natural sweetness and vibrant color make them a fantastic base for any fruit-based treat, lending a familiar and comforting flavor that most people adore. When pureed, they create a smooth, luscious texture that’s ideal for freezing into popsicles.
The Zesty Goodness of Kiwi
Often overlooked, kiwis are small but mighty fruits. They are a fantastic source of dietary fiber, which aids digestion and promotes gut health. Like strawberries, kiwis are incredibly rich in Vitamin C, often containing even more per serving than an orange! They also offer a healthy dose of Vitamin E, another powerful antioxidant, and potassium. The unique tartness of kiwi provides a perfect counterpoint to the sweetness of strawberries, creating a balanced and complex flavor profile that keeps you coming back for more. Their vivid green hue also adds a stunning visual contrast, especially when layered.
The Sweet Inspiration: A Family’s Summer Creation
This delightful recipe actually began with a simple conversation during a summer walk with my daughter. We were brainstorming new flavors after having thoroughly enjoyed making our Blueberry Lemon Popsicles. The idea of combining strawberries and kiwis immediately sparked my interest, envisioning a blend of their complementary flavors. However, it was my daughter who added the brilliant touch of artistry.
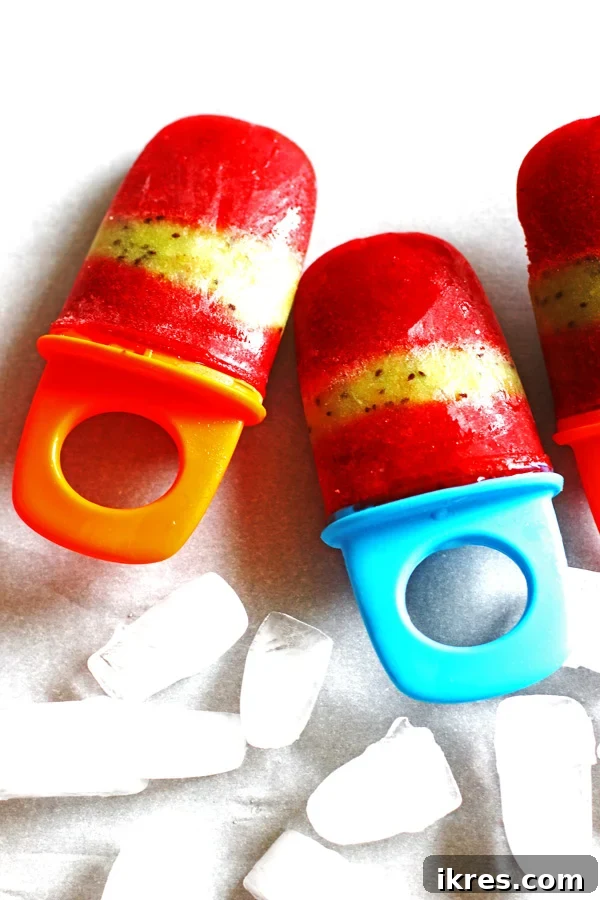
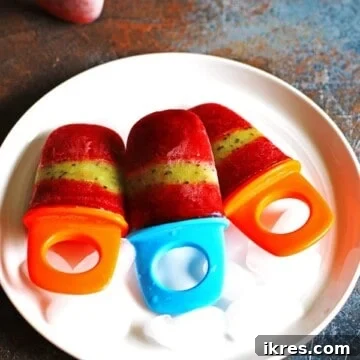
She not only loved the flavor combination but also suggested creating visually appealing layers – strawberry, then kiwi, and finishing with another strawberry layer. This simple idea transformed our ordinary popsicle plan into a fun, festive project. While it might take a little extra time and patience to achieve these beautiful stripes, the joy and excitement it brings, especially to kids, are absolutely worth it. It’s more than just a recipe; it’s an opportunity for a creative summer activity, making delicious memories together with your little ones or grandchildren.
Why Homemade Popsicles Are Unquestionably Superior
If you’ve ever debated between buying popsicles from the store or making them at home, let us help you settle the argument. Homemade always wins, and here’s why:
- Pure & Simple Ingredients: Our fruit popsicles are crafted with just three core ingredients – fresh strawberries, ripe kiwis, and a touch of sugar. This is a stark contrast to most commercially produced popsicles, which often contain a long list of artificial colors, flavors, high-fructose corn syrup, and preservatives. When you make them yourself, you know exactly what’s going into your body.
- Controlled Sweetness: This recipe calls for just a small amount of added sugar, allowing the natural sweetness of the fruits to shine. You have the flexibility to adjust the sugar content to your preference or even omit it entirely if your fruits are exceptionally sweet. This level of control is simply impossible with store-bought options, which are often laden with unnecessary sugars.
- A Rewarding Family Activity: Beyond the delicious outcome, making homemade popsicles is an incredibly fun and engaging summer project. It’s an activity that brings families together, creating wonderful memories with kids, grandchildren, or friends. It’s a hands-on way to teach about healthy eating and the simple pleasures of creating something from scratch.
- Complete Transparency: The peace of mind that comes from knowing every single ingredient in your food is invaluable. You can confidently serve these to your loved ones, assured of their wholesome content and freshness.
How to Craft These Vibrant Strawberry Kiwi Popsicles: A Step-by-Step Guide
Creating these beautiful and delicious layered popsicles is a straightforward process, but paying attention to each step ensures the best results. Here’s how to bring this refreshing treat to life:
Gathering and Preparing Your Fresh Fruits
Start by selecting the freshest, ripest strawberries and kiwis you can find. Ripe fruit will provide the best flavor and natural sweetness, reducing the need for additional sugar.
Begin with the strawberries: Wash them thoroughly under cool running water. Gently pat them dry with a paper towel or let them air dry completely, as excess water can dilute the puree. Once dry, carefully remove the green stems. Slice the strawberries into smaller pieces, which will make blending easier. Measure out two cups of these sliced strawberries, ensuring you have the right quantity for optimal flavor and consistency.
Next, prepare your kiwis: Wash them and pat them dry. For kiwis, the easiest way to prepare them is to cut them in half crosswise. Then, using a spoon, gently scoop out the bright green flesh, leaving behind the fuzzy brown skin, which should be discarded. The skin, while edible, can be tough and detract from the smooth texture of the popsicle.
Pureeing for a Silky Smooth Base
For efficient blending, we highly recommend using a blender with separate compartments, like a Ninja Master Prep Blender, allowing you to prepare each fruit puree without mixing flavors or colors. If you only have one blender, simply wash it thoroughly between pureeing the strawberries and kiwis to maintain distinct colors and flavors.
Place your measured two cups of sliced strawberries and 2 tablespoons of granulated sugar into the blender. Puree until the mixture is completely smooth, with no large pieces of strawberry remaining. This might take a minute or two, depending on your blender. Once smooth, set the strawberry puree aside in a separate bowl or a pitcher with a spout for easy pouring.
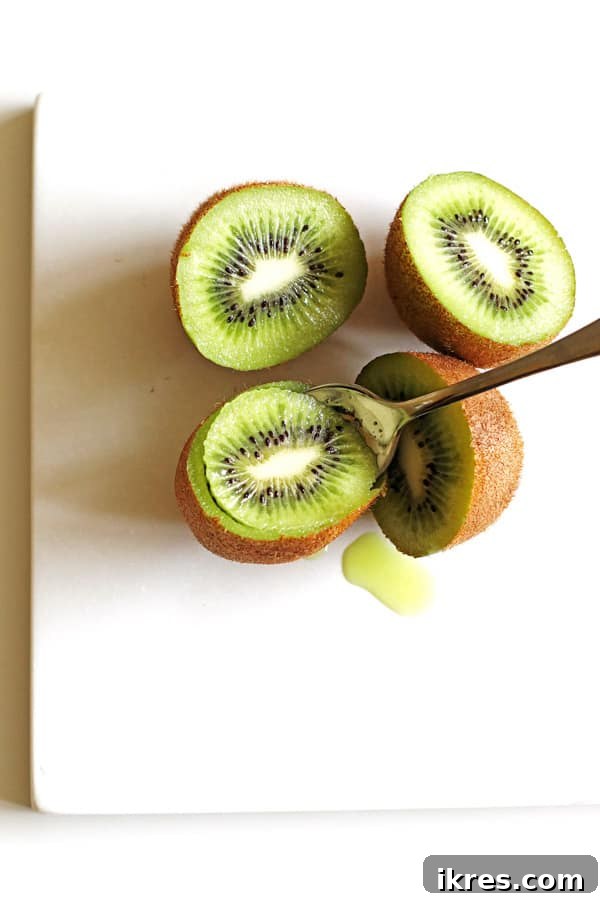
Now, for the kiwi puree: Place the scooped-out kiwi flesh and 1 tablespoon of granulated sugar into your clean blender. Puree until smooth, ensuring there are no large chunks of kiwi. The vibrant green color should be consistent throughout. Set this aside as well.
Layering for a Stunning Visual Effect
This is where the artistry of these popsicles comes into play, creating those beautiful, distinct layers that make them so appealing.
First, take your popsicle molds. Carefully pour the strawberry puree into each mold, filling it to just below the halfway point. Precision here helps achieve even layers. Once filled, place the popsicle molds into the freezer for approximately 30 minutes. It’s crucial to ensure they are placed perfectly straight in the freezer to prevent the layers from tilting or mixing. This initial freeze allows the first strawberry layer to firm up enough to support the next layer.
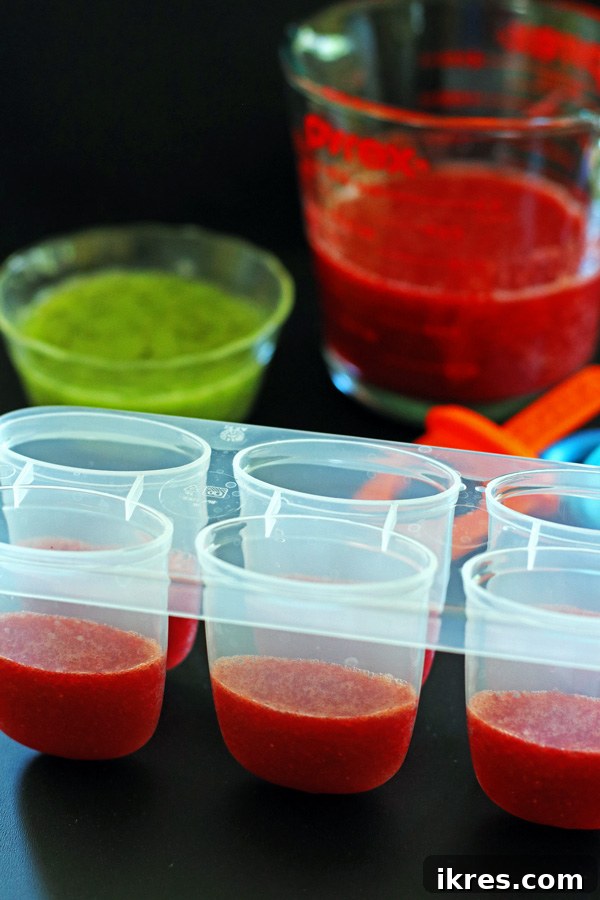
After the initial freeze, remove the molds from the freezer. Now, it’s time for the kiwi layer. Gently pour the kiwi puree over the set strawberry layer. Aim for a stripe that is about half an inch to one inch thick, creating a clear green band across the middle. Return the molds to the freezer for another 20-30 minutes, again ensuring they are kept perfectly straight. This second freezing step solidifies the kiwi layer, preparing it for the final strawberry topping.
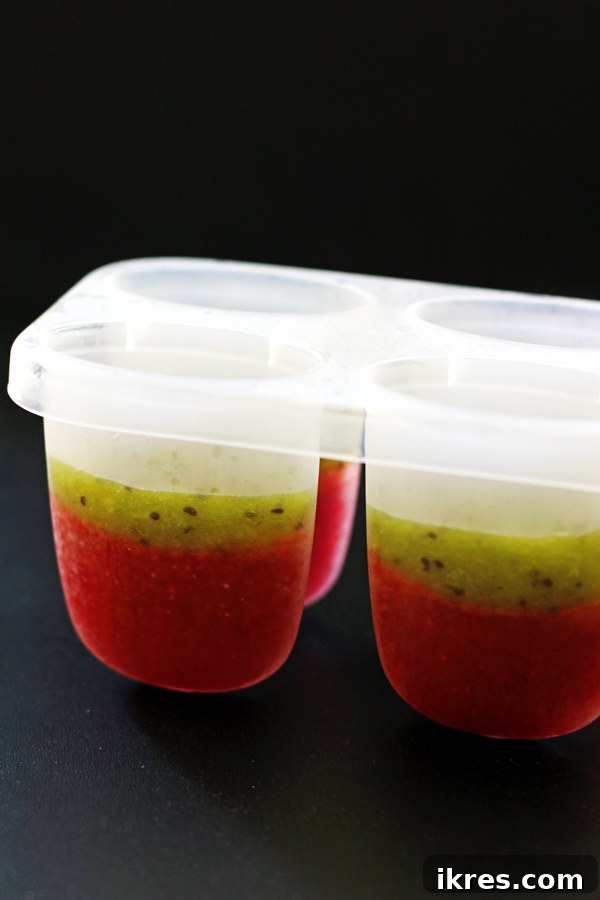
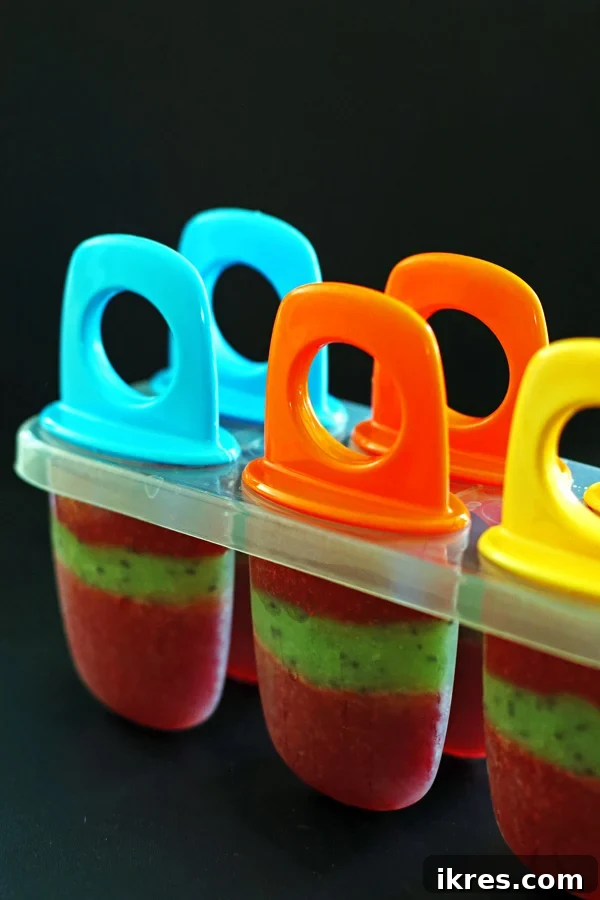
Finally, remove the molds from the freezer for the last time. Carefully fill the remainder of each popsicle mold to the top line with the remaining strawberry puree. Place the popsicle stick covers (or individual sticks if your mold allows) firmly on top. Return the molds to the freezer for their final, long freeze – typically 4-6 hours, or even overnight, to ensure they are completely solid and perfectly set. This extensive freezing time guarantees a firm, enjoyable popsicle that won’t melt too quickly.
Making the Most of Your Puree and Customizing Sweetness
What to Do with Extra Puree
It’s not uncommon to have a little extra fruit puree left over after filling your molds, depending on their size. Don’t let it go to waste! You have a couple of delicious options. You can pour any remaining puree into another set of popsicle molds if you have them, or get creative by using small plastic cups. If using plastic cups, remember to add your popsicle sticks about halfway through the freezing time, once the puree has started to firm up enough to hold the sticks upright. Another fantastic option, and a little bonus for the diligent popsicle maker, is to simply drink the extra puree straight from the glass – a refreshing, healthy fruit juice treat!
Adjusting for Your Perfect Sweetness
Our recipe includes a small amount of added granulated sugar to enhance the natural flavors of the fruits. We experimented with a no-sugar version initially, but found that for our palate, a touch of sweetness really made the fruit flavors pop. However, sweetness is a matter of personal preference, and it can also depend on the ripeness of your fruit. If your strawberries and kiwis are exceptionally sweet, you might consider reducing the sugar or omitting it entirely. Conversely, if you prefer a sweeter treat, feel free to add a little more sugar to your puree. Always taste your purees before freezing and adjust to your liking.
Recipe Yield
The number of popsicles this recipe yields will vary depending on the specific size and capacity of your popsicle molds. For reference, the molds used in this recipe and featured in the photos hold approximately ¼ cup each. With these molds, we were able to fill all six, with just a small amount of extra puree remaining, which was perfect for an additional mini popsicle or a quick sip.
More Popsicle Making Tips for Success
Effortless Popsicle Release
Getting your beautifully frozen popsicles out of their molds can sometimes be a bit tricky. The simplest and most effective trick is to run hot water over the outside of the mold for about 10-15 seconds. This gently loosens the frozen treat from the mold, allowing you to pull the popsicles out smoothly and intact, without breaking the stick or leaving half the popsicle behind.
Smart Storage for Future Enjoyment
Once your popsicles are fully frozen and released from their molds, if you have any extras, it’s essential to store them properly to maintain their freshness and prevent freezer burn. Wrap each popsicle individually in plastic wrap or place them in an airtight freezer bag or container. This will keep them tasting great and ready for when your next craving for a delicious, healthy homemade popsicle strikes.
Advanced Recipe Tips for Perfect Layers and Prep
- Preventing Color Blend: As mentioned, using separate blender containers for each fruit (strawberry and kiwi) is ideal. This ensures that the distinct, vibrant colors of each fruit remain separate, resulting in those beautiful, crisp layers. If you’re working with a single blender, a thorough wash between pureeing the strawberries and the kiwis is a must.
- Streamlined Pouring: To minimize spills and make the layering process even easier, pour your purees into a Pyrex measuring container or a pitcher that has a spout. The spout allows for controlled pouring, which is especially helpful when creating thin, precise layers and prevents unnecessary mess to clean up.
- Choosing the Best Fruit: Always opt for ripe, in-season fruit. Ripe strawberries will be bright red and fragrant, while ripe kiwis will yield slightly to gentle pressure. The quality of your fruit directly impacts the flavor of your popsicles, so don’t compromise on freshness.
- Creative Variations: Feel free to experiment! You can add a tiny squeeze of lime juice to the kiwi layer for extra zest, or a few fresh mint leaves to either puree for a refreshing twist. Consider alternating layers with other fruits like blueberries or mango for different color combinations and flavor profiles.
We truly hope you and your family enjoy these delightful Strawberry Kiwi Fruit Popsicles as much as we do! If you give this recipe a try, we’d love to hear about your experience. Please share your thoughts by leaving a comment and rating below. Thank you!
Pin
Text
Fruit Popsicles
Ingredients
- 2 cups strawberries sliced
- 2 kiwis
- 3 tablespoons granulated sugar divided
Instructions
-
Wash strawberries and discard stems. Slice them and measure out two cups.
-
Place the strawberries and two tablespoons of sugar in your blender and puree. Set aside.2 cups strawberries, 3 tablespoons granulated sugar
-
Slice the kiwi in half and scoop out the green part of the kiwi with a spoon. Puree the kiwi with one tablespoon of sugar.2 kiwis, 3 tablespoons granulated sugar
-
Pour in strawberry puree to just below the half point of your popsicle mold. Place the puree in the freezer for 30 minutes. Make sure it is placed in the freezer straight.
-
Then pour in the kiwi puree so it makes a nice stripe across (about a half inch to one inch). Place back into the freezer for 20-30 minutes. Again, make sure it is in there straight.
-
Finally, fill the popsicle molds to the top line with more of the strawberry puree. Place the top of the mold on and freeze them for 4-6 hours.
-
Freeze any unused popsicles.
Notes
How many popsciles you get will depend on the size of your popsicle mold. The one I used for this recipe and in these photos measures about 1/4 cup. I did have a little extra so we made a couple more using another popsicle mold that we had.
If you have any extra popsicles, put them back in the freezer until next time you are craving a delicious and healthy homemade popsicle.
Special Equipment Needeed
-
popsicle molds with handles
Nutrition information is approximate and is automatically calculated, so should only be used as a guide.
Update Note: This recipe was originally posted in 2018, but was published again in 2019 to include step by step directions and new photos.