
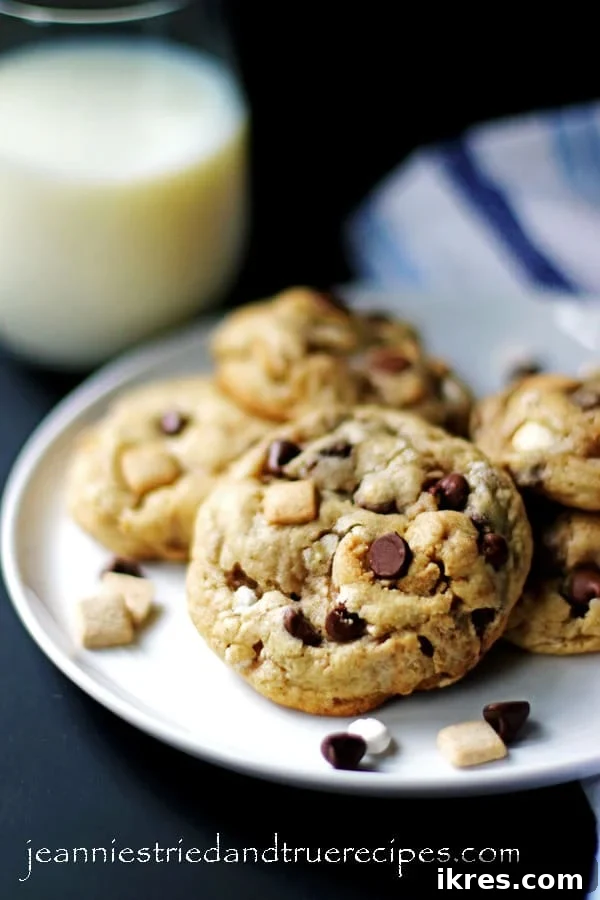
Imagine the warm, gooey delight of a classic s’more, perfectly reimagined into a colossal, soft-baked cookie. These Jumbo S’mores Cookies are precisely what you’re seeking when that irresistible craving for toasted marshmallows, melted chocolate, and crisp graham crackers strikes. Each cookie is a masterpiece of flavor and generous size, making them truly unforgettable.
Experience the Iconic S’mores – Now in a Perfect Cookie Form!
There’s something undeniably magical about s’mores. The crackling campfire, the perfectly toasted marshmallow melting into rich chocolate, all sandwiched between two wholesome graham crackers. It’s more than just a dessert; it’s a nostalgic experience, a quintessential summer treat that brings smiles to faces of all ages. While the tradition of making s’mores over an open flame is cherished, sometimes you crave that specific blend of textures and tastes without the need for a campfire, or perhaps, in the comfort of your kitchen, any time of year. That’s where these incredible Jumbo S’mores Cookies come into play, capturing all the essence of your favorite campfire treat in a convenient, shareable form.
These aren’t just any cookies; they are designed to be substantial, allowing for a generous distribution of melty chocolate, soft marshmallows, and crunchy graham cracker pieces in every single bite. Their impressive size means more deliciousness to savor, making them perfect for satisfying even the most intense dessert cravings. Forget the fuss of sticks and flames; these cookies deliver the ultimate s’mores experience straight from your oven.
The Inspiration Behind These Irresistible Jumbo S’mores Cookies
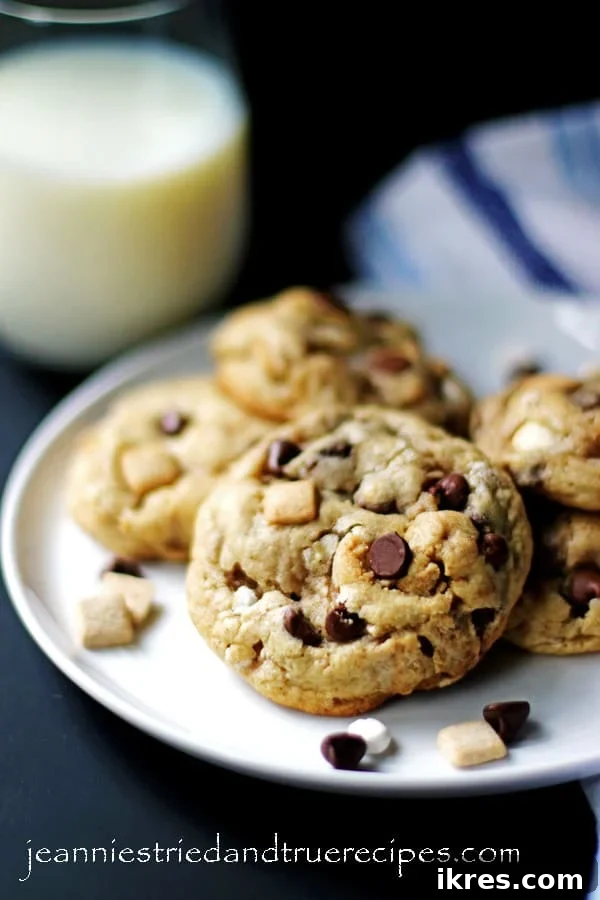
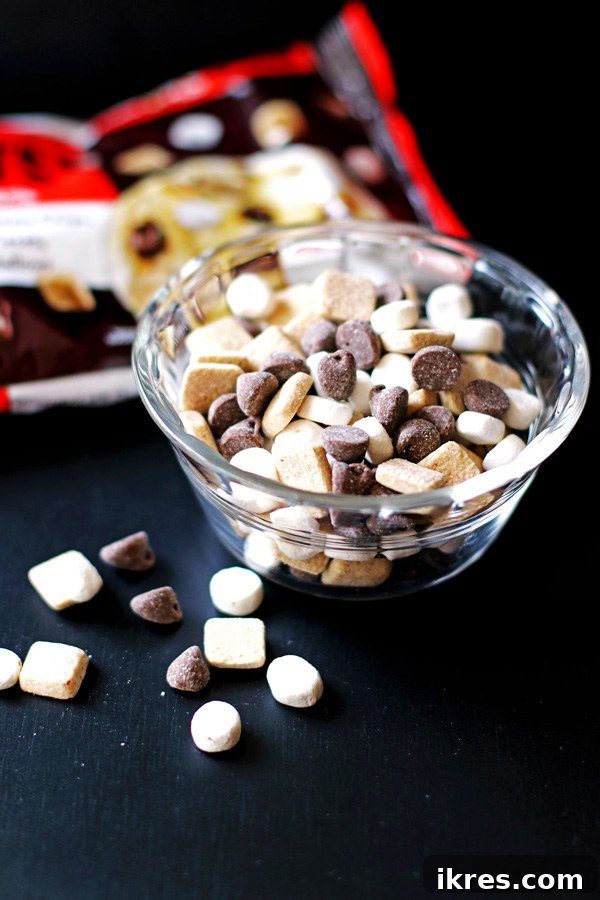
My kitchen is often a hub of experimentation, especially when it comes to baking cookies for my family. The joy of creating something new and delicious is always a delightful challenge. The journey to perfecting these S’mores Cookies began during one such culinary quest. While browsing the baking aisle of the grocery store, I stumbled upon a package of Hershey’s S’mores Pieces. Intrigued by the promise of effortless s’mores flavor, I knew I had to try incorporating them into a cookie recipe. And let me tell you, the results were absolutely spectacular!
The unique blend within the S’mores mix – a harmonious combination of chocolate chips, tiny marshmallows, and crunchy graham cracker bits – truly transformed the cookie dough. Each element contributed perfectly, infusing the cookies with that authentic, craveable s’mores taste. It was an instant hit, becoming a treasured family recipe that captured the essence of summer fun in every bite. The beauty of this mix was its convenience; all the essential s’mores components were pre-portioned and ready to fold into the dough, simplifying the process while maximizing flavor.
Over time, I’ve noticed that finding these specific Hershey’s S’mores Baking Pieces has become increasingly challenging. If you encounter the same difficulty, don’t despair! You can easily create your own “S’mores mix” at home. Simply combine an equal ratio of your favorite chocolate chips (milk, semi-sweet, or even dark chocolate work wonderfully), mini marshmallows, and either finely crushed graham crackers or Golden Grahams cereal. This homemade blend should amount to approximately 2 cups total, ensuring your cookies are still packed with that signature s’mores goodness. This DIY approach not only guarantees you can make these cookies anytime but also allows for personal customization of the ingredients.
Crafting the Perfect Jumbo S’mores Cookie: A Step-by-Step Guide
The “jumbo” aspect of these S’mores cookies is not just for show; it’s integral to their delightful texture and flavor profile. By making them generously sized, using a 1/4 cup cookie scoop for each, we ensure that every cookie has that satisfying chewiness, a wonderfully soft center, and plenty of space for the melty chocolate and gooey marshmallows to work their magic. This generous portion size truly elevates the s’mores experience, making each cookie a substantial and deeply satisfying treat.
The Secret to Success: Chilling Your Cookie Dough
One of the most crucial steps, which I cannot stress enough for this recipe, is to chill the cookie dough. When freshly mixed, the dough for these cookies tends to be a bit soft and sticky, making the cookie dough balls prone to losing their shape before baking. If baked immediately, this often results in thinner, flatter cookies that spread excessively during their time in the oven. While still delicious, they won’t have that desirable thick, chewy texture.
Chilling the dough serves several vital purposes. Firstly, it allows the butter to re-solidify, which significantly reduces the spread of the cookies during baking, leading to a much thicker and chewier result. Secondly, and perhaps just as importantly, chilling gives all the ingredients time to “mingle” and for the flavors to deepen and meld together. This process hydrates the flour, leading to a more consistent texture and a richer taste. Think of it as marinating your cookie dough; it builds character and complexity.
So, plan ahead! While a minimum of three hours of chilling is necessary to achieve noticeable benefits, I highly recommend making the dough and letting it chill overnight for the absolute best results. The patience truly pays off in the final product.
When you retrieve the dough from the refrigerator, it will be quite firm. To make it easier to scoop and shape, allow it to sit out at room temperature for about ten minutes while your oven preheats. This brief softening period will make the dough more pliable, and it will continue to soften as you work with it.
Mixing the Masterpiece: Creating Your S’mores Cookie Dough
Let’s dive into the delicious process of bringing this cookie dough to life. Begin by combining all your dry ingredients in a large bowl. This includes the all-purpose flour, baking soda (for lift), salt (to balance sweetness), ground cinnamon (adding a warm, subtle spice that complements the s’mores flavors beautifully), and cornstarch (which contributes to that coveted soft and chewy texture). Whisk these together until they are well combined, ensuring an even distribution of leavening agents and spices, then set the bowl aside.
Next, in a medium-sized, heavy-bottomed pot, gently melt the unsalted butter over low heat. It’s essential to stir frequently to prevent it from browning or burning, which can impart an undesirable nutty flavor. You want the butter to be just melted, with perhaps a tiny bit of solid butter remaining. Remove it from the heat once almost fully melted and give it a final stir to complete the melting process. Allow it to cool slightly; it should be warm but not hot enough to scramble the eggs.
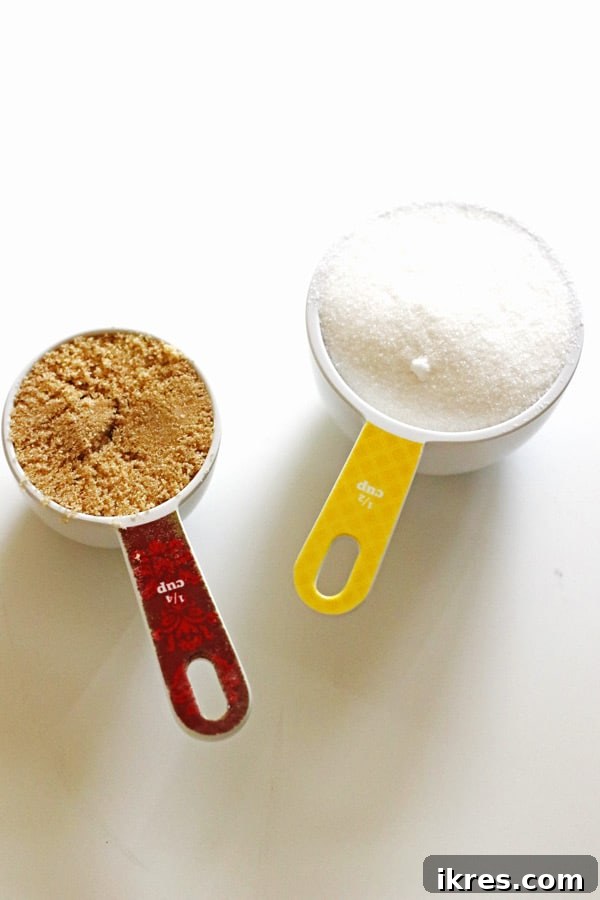
While the butter is still slightly warm, whisk in the granulated sugar and brown sugar. The warmth of the butter helps dissolve the sugars, creating a smoother base. Follow with the eggs, ensuring they are at room temperature for better emulsification with the butter and sugar, and the vanilla extract, a classic flavor enhancer. Whisk everything thoroughly until it is well combined and creamy. Having both sugars measured out beforehand is a good practice, allowing you to add them to the melted butter seamlessly.
Now, it’s time to bring the wet and dry ingredients together. Gradually add the reserved dry ingredient mixture to the butter-sugar-egg mixture, mixing slowly until just combined. Be careful not to overmix, as this can lead to tough cookies. If your pot isn’t spacious enough, transfer the butter mixture to the large mixing bowl you used for the flour, then incorporate the dry ingredients. A large spoon or a sturdy spatula is perfectly adequate for this step; a stand mixer is not required, making this recipe accessible to all bakers.
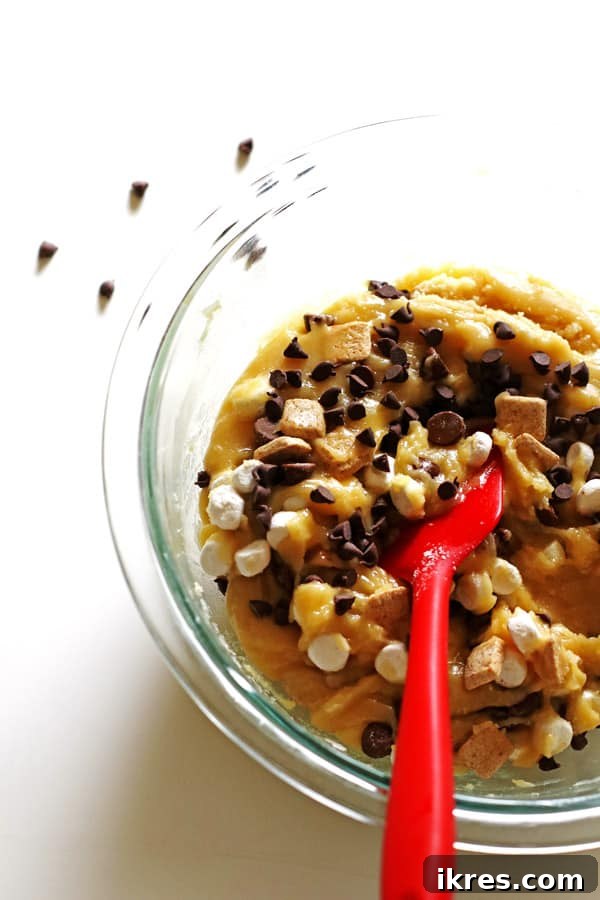
Finally, gently fold in your S’mores Baking Pieces (or your homemade mix) with a large spoon or spatula. I personally enjoy a little extra chocolate in my cookies, so I often add an additional ¼ cup of semi-sweet chocolate chips at this stage for an even richer chocolatey experience.
For an extra touch of visual appeal, you can reserve a couple of tablespoons of the S’mores mix. These can be gently pressed onto the tops of the cookie dough balls just before baking, giving your finished s’mores cookies a more professional and enticing look. This step is entirely optional but adds a lovely gourmet touch!
Once your dough is fully mixed, cover the bowl tightly with plastic wrap and transfer it to the refrigerator. Allow it to chill for a minimum of 3 hours, or ideally, overnight. This chilling process is key to achieving thick, chewy, and flavorful cookies.
Baking Bliss: Achieving Golden Perfection
When you’re ready to bake, preheat your oven to 350°F (175°C). Line your baking sheets with either parchment paper or a non-stick silicone baking mat. This step is crucial for several reasons: it prevents the cookies from sticking to the pan, promotes more even baking by insulating the bottom, and significantly simplifies cleanup – a baker’s dream!
While your oven is preheating, take the chilled cookie dough out of the refrigerator and let it sit on the counter for about ten minutes. This allows it to soften slightly, making it easier to scoop and shape.
Given that these are jumbo cookies, using a large cookie scoop is essential for consistent sizing. I recommend an OXO Good Grips Large Cookie Scoop, specifically one that measures out ¼ cup of dough. This ensures each cookie is substantial and uniformly shaped.
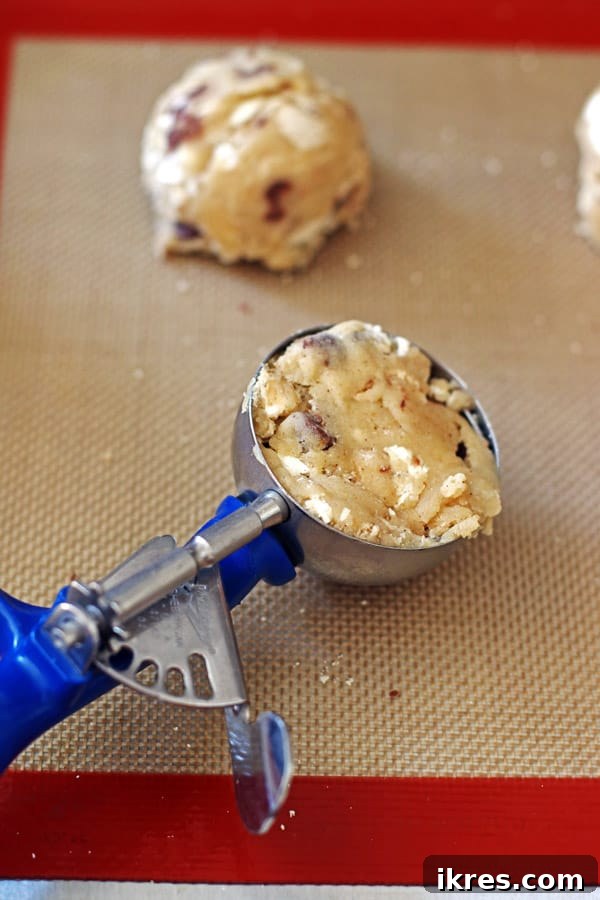
Scoop out portions of dough and place them onto your prepared baking sheet. If needed, gently roll them between your hands to create perfectly rounded balls. Remember, these are jumbo cookies, so proper spacing is key to prevent them from merging during baking. I suggest placing no more than six to eight cookie dough balls on a standard baking sheet at a time, allowing ample room for them to spread. I find Wilton Cookie Sheets to be exceptionally reliable for achieving consistent, evenly baked cookies.
Before popping them into the oven, take the reserved S’mores Baking Pieces and gently press a few onto the top of each cookie dough ball. This simple step creates a visually appealing finish, showcasing those delightful chocolate, marshmallow, and graham cracker elements on the surface. While optional, it certainly makes your cookies look even more tempting!
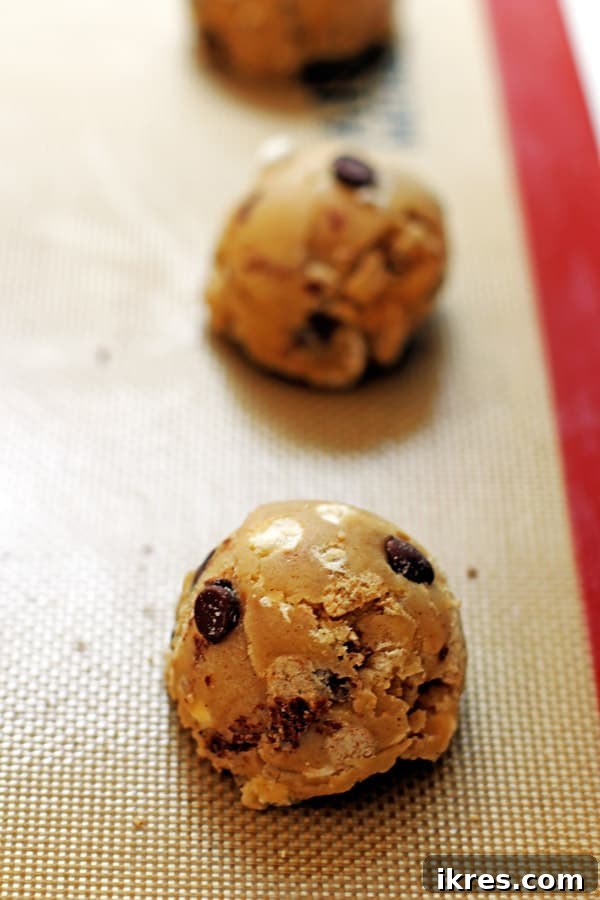
Bake the cookies for 12-14 minutes. They are ready when the edges are lightly golden brown and the centers still appear slightly soft and puffy. Avoid overbaking if you desire that wonderfully chewy interior.
Once baked, allow the cookies to cool on the baking sheet for five to ten minutes. This crucial resting period allows them to set up and firm, preventing them from breaking when transferred. After this initial cooling, carefully move them to a wire cooling rack to cool completely. For optimal baking results and consistent heat distribution, I highly recommend baking one sheet of cookies at a time, rotating it halfway through the baking cycle if your oven has hot spots.
Expert Tips for S’mores Cookie Perfection
Achieving the perfect Jumbo S’mores Cookies is an art, but with these expert tips, you’ll master it in no time. Each recommendation is designed to ensure your cookies are thick, chewy, and bursting with flavor:
- Embrace the Chill: This is arguably the most critical step. Chilling the dough for at least 3 hours, and ideally overnight, allows the butter to firm up and the dry ingredients to fully hydrate. This prevents excessive spreading, resulting in thicker, chewier cookies with a deeper flavor profile. Don’t skip this!
- Mise en Place for Sugars: Before you even start melting the butter, measure out both your granulated and brown sugars. This ensures they are ready to be whisked into the slightly cooled butter immediately, preventing the butter from getting too cold and ensuring a smooth, well-combined wet mixture.
- The Power of Parchment or Silicone: Always line your baking sheets with parchment paper or silicone baking mats. Not only does this prevent sticking and guarantee easy removal, but it also helps with more even heat distribution, reducing the chances of over-browning the bottoms of your cookies. Plus, cleanup becomes a breeze!
- Give Them Space: These are jumbo cookies, and they will spread! Ensure you leave at least two inches of space between each cookie dough ball on the baking sheet. Overcrowding will cause them to merge, leading to unevenly baked, oddly shaped cookies.
- Batch Baking is Best: To accommodate their size and allow for proper spreading, only place 6 to 8 cookies on a standard baking sheet at a time. This gives each cookie ample room to expand without running into its neighbors, ensuring beautifully round, perfectly baked treats.
- One Sheet at a Time: For the most consistent and optimal baking results, bake one baking sheet of cookies at a time. Place the baking sheet on the middle rack of your oven to ensure even heat circulation from all directions.
- Room Temperature Eggs: While not explicitly detailed above, using room temperature eggs helps them incorporate more smoothly into the butter-sugar mixture, creating a more cohesive and emulsified dough. This contributes to a better cookie texture.
- Don’t Overmix: Once you add the dry ingredients to the wet, mix only until just combined. Overmixing develops the gluten in the flour, which can lead to tough, dense cookies rather than soft and chewy ones.
Frequently Asked Questions About S’mores Cookies
Can I make these cookies smaller?
Absolutely! While these cookies are designed to be jumbo-sized for maximum s’mores enjoyment, you can certainly make them smaller. Use a smaller cookie scoop (e.g., 2-tablespoon size) and reduce the baking time accordingly, likely to 9-11 minutes. Keep a close eye on them to prevent overbaking.
How do I store S’mores Cookies?
Once completely cooled, store your S’mores cookies in an airtight container at room temperature for up to 3-4 days. For longer storage, you can freeze them for up to 3 months. To freeze, place cooled cookies in a single layer on a baking sheet to flash freeze for an hour, then transfer them to a freezer-safe bag or container.
Why did my cookies spread too much and become flat?
Several factors can contribute to flat cookies: the butter might have been too warm when mixed, the dough wasn’t chilled long enough (or at all!), your oven temperature might be too low, or you may have overmixed the dough. Ensure you follow the chilling instructions carefully and use accurate oven temperatures.
What kind of chocolate works best in S’mores Cookies?
Semi-sweet chocolate chips are a classic choice for their balanced sweetness, but milk chocolate chips will give a sweeter, creamier s’mores flavor. If you prefer a less sweet cookie, dark chocolate chips or even chopped dark chocolate bars can be used. Experiment to find your favorite!
Can I add other ingredients to these S’mores Cookies?
Certainly! Feel free to customize your S’mores cookies. Consider adding a sprinkle of sea salt on top before baking for a sweet and salty contrast, or mix in some chopped nuts like pecans or walnuts for an extra layer of crunch. A dash of espresso powder can also deepen the chocolate flavor without making the cookies taste like coffee.
Enjoying Your Homemade S’mores Cookies
These Jumbo S’mores Cookies are truly a versatile delight, perfect for a myriad of occasions. Imagine the smiles they’d bring to a kid’s birthday party, or the festive touch they’d add to holiday baking platters. However, don’t limit them to special events; I firmly believe these cookies are a fantastic treat for any ordinary day that needs a little extra joy! Pair them with a cold glass of milk for a classic comfort, or alongside a warm cup of coffee for a more indulgent moment. They are also incredible served slightly warm with a scoop of vanilla bean ice cream!
If you’re a fan of generously sized, incredibly satisfying cookies like these S’mores Cookies, then you absolutely must try my Ultimate Peanut Butter Chocolate Chip Cookies. They’re another personal favorite and promise the same level of jumbo deliciousness!
I hope you enjoy these cookies as much as my family and I do! Let me know how you liked them by leaving a comment below. I would love to hear from you and see your S’mores cookie creations!
Pin
Text

S’mores Cookies
Ingredients
- 1 cup unsalted butter 2 sticks
- 1 cup granulated sugar
- ½ cup brown sugar
- 2 eggs room temperature
- 1 teaspoon vanilla extract
- 3 cups all-purpose flour
- 1 teaspoon baking soda
- ½ teaspoon salt
- 1 teaspoon ground cinnamon
- 1 ½ teaspoons cornstarch
- 1 bag of Hershey’s S’mores Baking Pieces (Reserve about 2 tablespoons of S’mores Baking Pieces to gently place on top of cookies before baking.)
- ¼ cup semisweet chocolate chips
Instructions
-
Combine the flour, baking soda, salt, cinnamon, and cornstarch in a bowl. Set aside.3 cups all-purpose flour, 1 teaspoon baking soda, ½ teaspoon salt, 1 ½ teaspoons cornstarch, 1 teaspoon ground cinnamon
-
In a medium pot, soften the butter on low heat. Do not melt the butter completely…just until it is just about melted. Remove from heat.1 cup unsalted butter
-
Whisk the sugars, eggs and vanilla extract into the butter until well combined.1 cup granulated sugar, ½ cup brown sugar, 2 eggs, 1 teaspoon vanilla extract
-
Slowly add in the dry ingredients to the butter mixture until well blended.
-
Fold in the S’mores Baking pieces and extra chocolate chips with a spatula or wooden spoon. (I reserve a small amount of the S’mores Baking Pieces to place on top of the cookies before baking. This is optional but just makes the cookies look prettier.)1 bag of Hershey’s S’mores Baking Pieces, ¼ cup semisweet chocolate chips
-
Cover and chill the dough for at least three hours, but preferably overnight.
-
Preheat oven to 350°F.
-
Take out the cookie dough and let it warm up a little while oven is preheating. (about ten minutes)
-
Line baking sheets with parchment paper or a silicone baking mat.
-
Using large cookie scoop (I used ¼ cup size), scoop out dough and place on prepared baking sheet. Roll them into balls and place them on baking sheet. Only place six at a time as they are jumbo sized cookies.
-
Gently press a few pieces of the S’mores Baking Pieces on each cookie before baking, optional.
-
Bake 12-14 minutes.
-
Let them cool on baking sheet for 5-10 minutes before placing them onto a cooling rack to completely cool.
Notes
Chill the dough. Your cookies will turn out thicker and sturdier if you chill the dough.
Measure out the sugars before you melt the butter. This way the sugars are ready to be added to the melted butter right away.
Line your baking sheets with parchment paper or silicone mats. This will prevent the cookies to stick to the pan and also help with less browning. Also easier clean up for you!
Make sure you have at least two inches in between each cookie dough ball. They are jumbo-sized cookies and will spread out wider than an average cookie.
Only place 6 – 8 cookies on a baking sheet at a time so there is enough room for the cookies to spread while baking and not run into each other.
Bake one baking sheet of cookies at a time. Place the baking sheet on the middle rack of the oven for the best baking results.
Makes about 18 jumbo cookies.
Special Equipment Needed
-
oxo large cookie scoop
-
non-stick baking mat
-
Wilton cookie sheets
Nutrition
Nutrition information is approximate and is automatically calculated, so should only be used as a guide.
Update Note: This recipe was originally posted in 2017, but was thoroughly updated again in 2022 to include comprehensive step-by-step directions, enhanced baking tips, and captivating new photos for an even better user experience.