
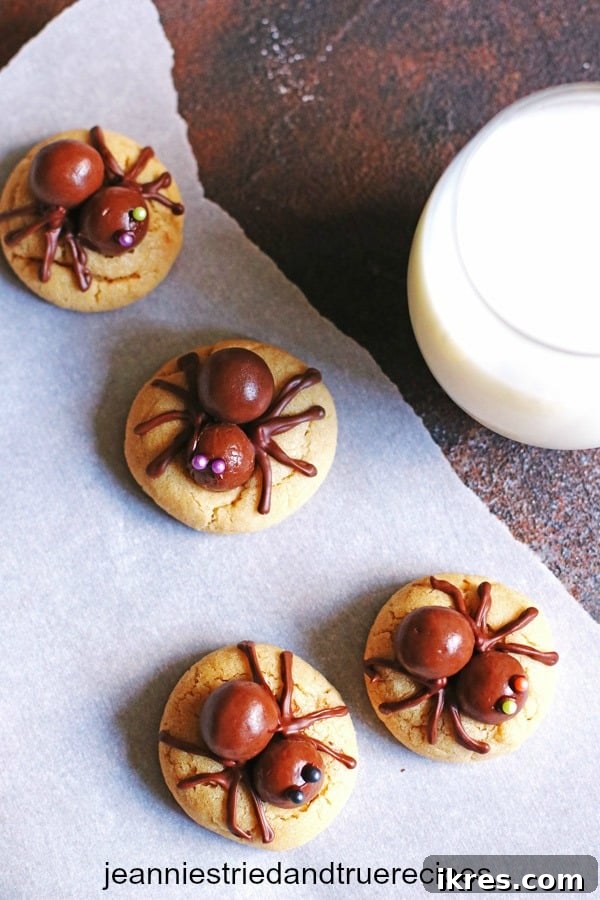
These delightful Spider Cookies are the ultimate treat for your Halloween celebrations. Imagine sinking your teeth into a soft, chewy peanut butter cookie, perfectly topped with a whimsical candy spider – it’s a combination that’s both spooky and incredibly delicious!
As Halloween approaches, the excitement for festive treats grows, and I’m thrilled to share a recipe that has become a cherished tradition in our family: Peanut Butter Spider Cookies. These aren’t just any cookies; they’re an adorable, easy-to-make, and utterly delicious way to add a touch of playful spookiness to your holiday. While real spiders might send a shiver down your spine (I know they used to for me, even into my twenties!), there’s absolutely nothing scary about these charming, edible arachnids that sit atop a rich, homemade peanut butter cookie.
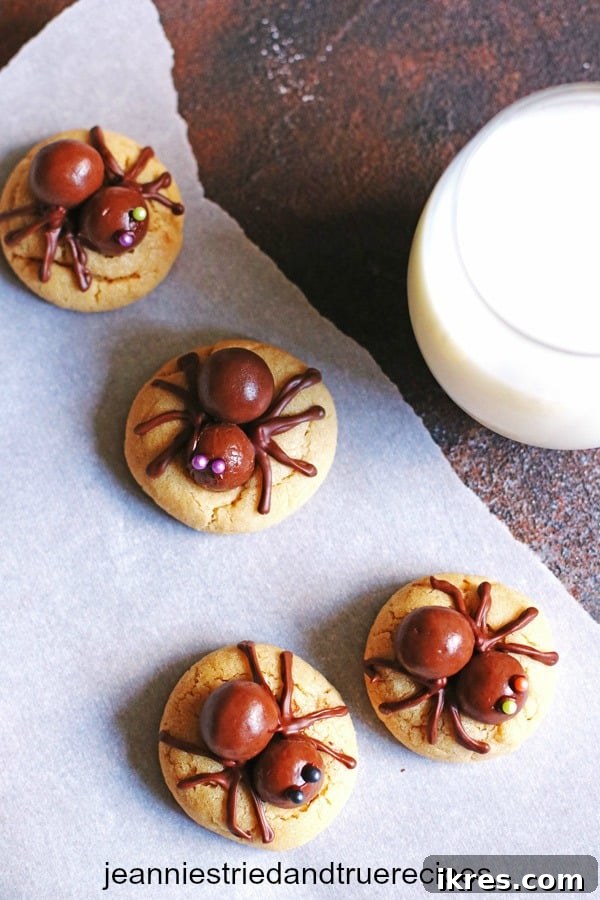
The foundation of these festive treats is a truly exceptional peanut butter cookie recipe, inspired by the wonderful culinary insights found on Sally’s Baking Addiction. What makes this recipe stand out, and is absolutely crucial for achieving the perfect cookie, is the chilling of the dough. Trust me, this simple step makes all the difference, transforming good cookies into truly great ones.
The Secret to Perfect Cookies: Why Chilling Your Dough is Essential
You might be tempted to skip the chilling step, but I urge you not to. Chilling the dough is paramount for several reasons, all contributing to a superior cookie experience. When cookie dough is chilled, the butter solidifies, which prevents the cookies from spreading too much in the oven. This results in thicker, chewier cookies with beautifully defined edges, rather than flat, crispy ones. For these Spider Cookies, maintaining a nice, rounded shape is particularly important for the spider decoration.
Beyond structural integrity, chilling the dough also deeply enhances the flavor. As the dough rests in the refrigerator, the dry ingredients (like flour) have time to fully hydrate, and the sugars and fats mingle more thoroughly, allowing the flavors to meld and intensify. This process yields a richer, more complex peanut butter taste that simply can’t be achieved with unchilled dough. I recommend chilling the dough for at least three hours, but it can be chilled for up to two days, making it a fantastic make-ahead option for busy Halloween preparations. It’s a small investment of time that pays off immensely in taste and texture.
Gather Your Ingredients for Spooky Sweetness
Creating these Halloween masterpieces requires a blend of classic cookie ingredients and a few fun decorative elements. Ensure your butter and eggs are at room temperature for the best results, as this helps them cream together smoothly with the sugars, creating an emulsified base for your dough. Here’s what you’ll need:
- Unsalted butter, softened
- Granulated sugar
- Light brown sugar
- Large eggs (2), at room temperature
- Vanilla extract
- Creamy peanut butter (avoid natural varieties that separate for this recipe)
- All-purpose flour
- Baking soda
- Baking powder
- Salt
- Whopper candies (12-ounce package) – these will be the spider bodies!
- Semi-sweet chocolate chips (for melting and piping legs)
- Colorful sprinkles (for the spider eyes)
Pro Tip for Spider Eyes: While sprinkles offer a pop of color, if you can’t find suitable ones, simply use a tiny dot of melted chocolate for the eyes. The melted chocolate itself can create a perfectly spooky gaze!
Crafting Your Peanut Butter Spider Cookies: A Step-by-Step Guide
Part 1: Preparing the Irresistible Peanut Butter Cookie Dough
The journey to these adorable spider cookies begins with a foundation of perfectly mixed peanut butter dough. Precision here ensures the right texture and flavor.
- In a large mixing bowl, using an electric mixer on medium speed, cream together the softened unsalted butter with both granulated and light brown sugars. Continue mixing until the mixture is light, fluffy, and smooth, scraping down the sides of the bowl with a spatula as needed to ensure everything is well combined.
- Beat in the eggs, one at a time, mixing well after each addition until fully incorporated. This gradual addition helps create a stable emulsion.
- Stir in the vanilla extract and the creamy peanut butter. Mix on low speed until all ingredients are just combined. Be careful not to overmix at this stage.
- In a separate medium bowl, whisk together the all-purpose flour, baking soda, baking powder, and salt. This ensures the leavening agents and salt are evenly distributed throughout the dry ingredients.
- Gradually add the dry ingredient mixture to the wet ingredients, mixing on the lowest speed until just combined. Mix only until no streaks of flour remain; overmixing can lead to tough cookies.
- Once your dough is ready, cover the bowl tightly with plastic wrap and refrigerate for a minimum of three hours. This chilling period is crucial for flavor development and preventing spread during baking. You can chill the dough for up to two days, making it convenient for planning ahead.
Part 2: Baking Your Perfectly Shaped Cookie Bases
Once your dough has properly chilled, it’s time to transform it into delectable cookie canvases for your spiders.
- Preheat your oven to 350°F (175°C). While the oven preheats, remove your chilled cookie dough from the refrigerator and let it sit at room temperature for about 10-15 minutes. This slightly softens the dough, making it easier to scoop and roll.
- Line your baking sheets with parchment paper or silicone baking mats. This not only prevents sticking but also promotes even baking and makes cleanup a breeze.
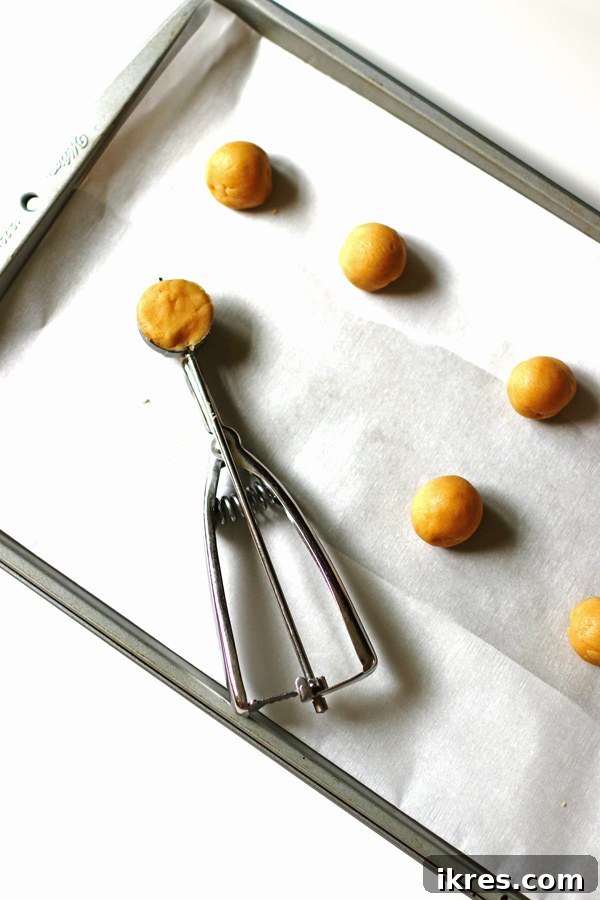
- Scoop out the dough. I find a cookie scoop that holds about one tablespoon of dough perfect for these cookies. For best results, after scooping, gently roll the dough between your palms to form smooth, uniform balls. This ensures your cookies bake into a lovely rounded shape.
- Place the dough balls on the prepared baking sheets, spacing them approximately 2 inches apart to allow for slight spreading.
- Bake for 11-12 minutes, or until the edges are lightly golden brown and the centers appear set. The cookies will continue to firm up as they cool.
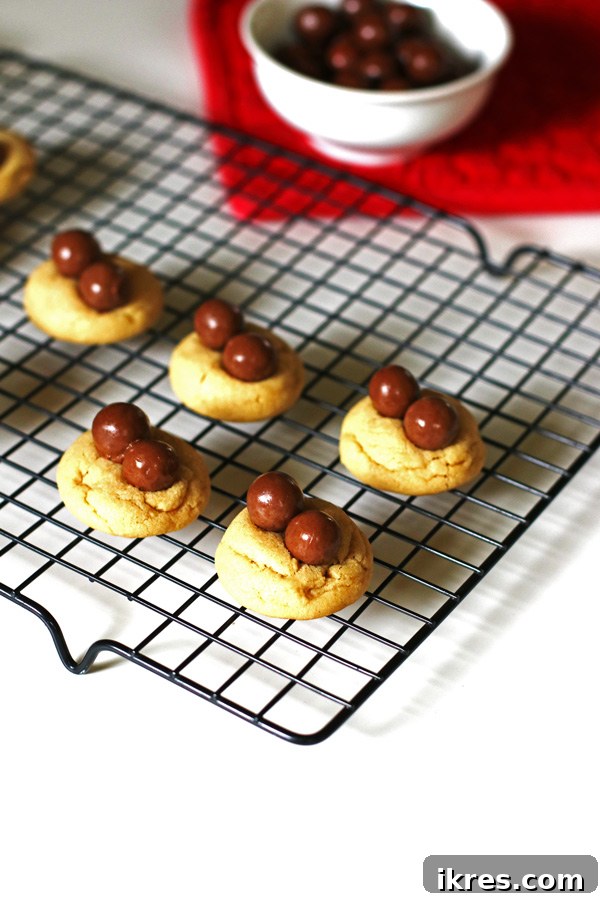
- Immediately after removing the cookies from the oven, gently press two Whopper candies onto the top of each warm cookie, side by side. Lightly press one of the Whoppers slightly deeper into the cookie than the other to create the distinct body and head of your spider. The warmth of the cookies will help the candies adhere.
- Allow the cookies to remain on the baking sheet for five minutes after adding the Whoppers. This helps them set before transferring.
- Carefully transfer the cookies to a wire cooling rack to cool completely. This step is essential before adding the delicate chocolate legs and sprinkle eyes, ensuring they set perfectly without melting or smudging.

Part 3: Bringing Your Spiders to Life: Decorating the Cookies
This is where the magic happens! Once your cookies are completely cool, it’s time to add the charming details that transform them into delightful spider treats.
Crafting the Spooky Spider Legs
Melted chocolate is your best friend for these delicate details. I typically use about 3/4 cup of chocolate chips to ensure I have enough for all the cookies and any potential mistakes.
- Place the chocolate chips in a microwave-safe bowl. Microwave on high for 30 seconds, then stir. Continue microwaving in 15-second intervals, stirring thoroughly after each, until the chocolate is fully melted and smooth. Be careful not to overheat, as chocolate can seize.
- Transfer the melted chocolate into a frosting decorating bag fitted with a fine writing tip (or a small round tip). If you don’t have a decorating bag, a small Ziploc bag works perfectly! Just snip a tiny bit off one corner – make it as small as possible to ensure thin, delicate lines.
- Pipe four legs on each side of the Whopper candies, working from the center of the spider’s body outwards. Angle two legs slightly towards the front and two slightly towards the back to give your spiders a dynamic, lifelike appearance.
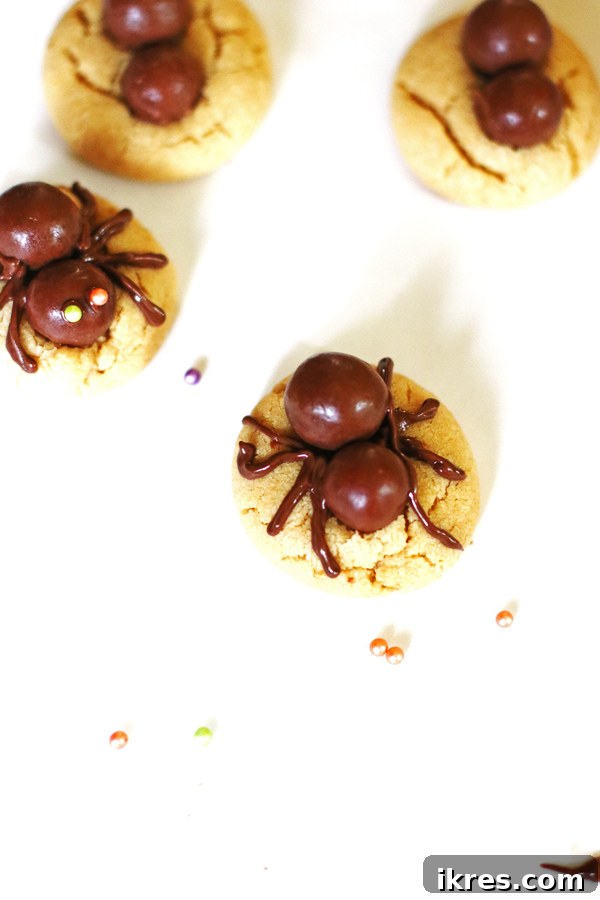
Adding Expressive Spider Eyes
The eyes are the final touch, giving each spider its unique personality!
- Using the same melted chocolate (or a fresh batch if needed), pipe two tiny dots onto the smaller “head” Whopper of each spider. These dots will serve as the adhesive for your sprinkles.
- Immediately place a colorful sprinkle onto each chocolate dot. For tiny sprinkles, tweezers can be a fantastic tool to precisely place them without fuss. If you don’t have sprinkles, simply let the chocolate dots dry to create simple, dark eyes.
- Allow the decorated cookies to sit at room temperature until the chocolate legs and eyes have completely set, usually about 30-60 minutes, depending on the ambient temperature.
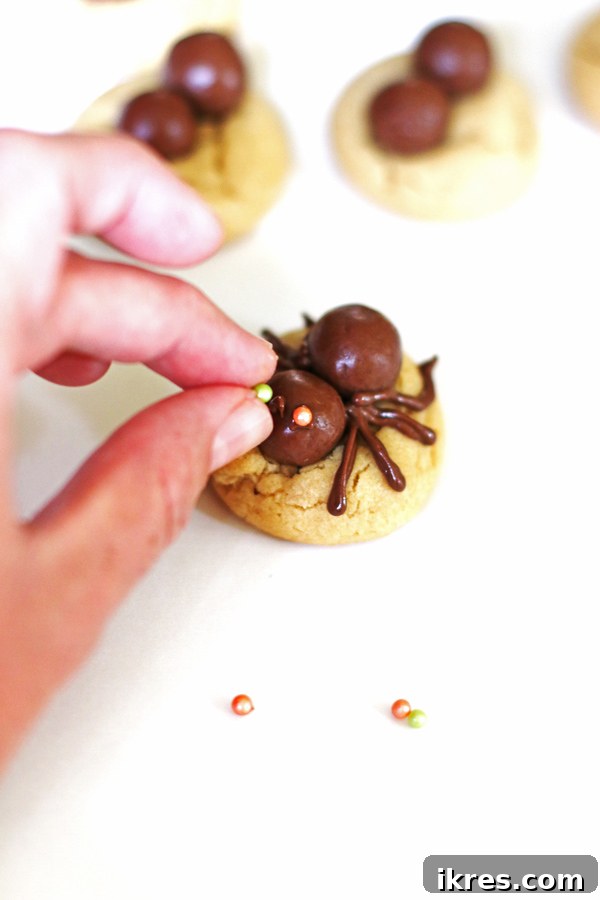
Decorating takes a little time and patience, but it’s a rewarding part of the process. I find it takes me about an hour to decorate a batch of cookies, and it can be a wonderful activity to do with kids!
Expert Tips for the Best Halloween Spider Cookies
To ensure your Spider Cookies are nothing short of spectacular, keep these helpful tips in mind:
- Chilling is Key: As emphasized, don’t skip the dough chilling. It’s the secret to thick, soft, flavorful cookies that hold their shape perfectly.
- Room Temperature Dough: After chilling, allow your dough to sit on the counter for about 10-15 minutes while your oven preheats. This makes it more pliable and easier to scoop and roll.
- Uniform Cookie Balls: Using a cookie scoop and then rolling the dough between your hands helps create consistently sized and shaped cookies, which leads to even baking and a beautiful final presentation.
- Pre-Sort Whoppers: Before you start baking, separate the smaller Whopper candies from the larger ones. The smaller candies are ideal for the spider heads, creating a more realistic (and cuter!) effect. This is also a fun task for kids to help with!
- Warm Cookie Adhesion: Have your Whopper candies ready to go as soon as the cookies come out of the oven. Pressing them onto the warm cookies ensures they stick securely as the cookies cool.
- Piping Bag Alternatives: No fancy decorating bag or writing tip? No problem! A small Ziploc or sandwich bag with a tiny corner snipped off works just as well. The key is to cut an extremely small opening – think almost nothing. If the hole is too large, you’ll have thick, messy spider legs. A toothpick can also be used for very fine details.
- Eye Placement Aids: For precise placement of tiny sprinkles, a toothpick dipped in melted chocolate (to pick up the sprinkle) or a pair of clean kitchen tweezers can be invaluable tools.
Storage and Variations
These Spider Cookies are best enjoyed fresh, but they also store well. Keep them in an airtight container at room temperature for up to one week. If stacking, you might want to place a piece of parchment paper between layers to protect the delicate chocolate legs and eyes.
Looking to switch things up? Here are a few fun variations:
- Different Cookie Base: While peanut butter is classic, you could use a chocolate cookie base for a darker, spookier look, or even a sugar cookie for a blank canvas.
- Candy Alternatives: Instead of Whoppers, try using Oreo Thins or other round chocolate candies for the spider bodies. For the eyes, mini M&M’s or edible googly eyes can add a different kind of charm.
- Frosting Legs: If you prefer, you can use black royal icing or store-bought black cookie icing for the spider legs instead of melted chocolate.
- Spiced Peanut Butter: Add a pinch of cinnamon or nutmeg to your cookie dough for an extra layer of fall flavor.
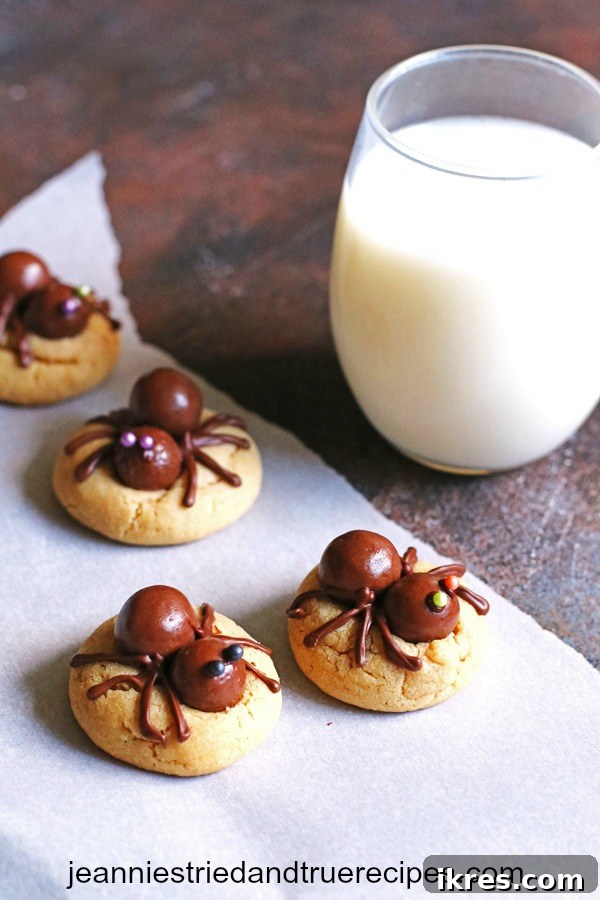
Hungry for More Spooky Delights?
If these Spider Cookies have sparked your Halloween culinary spirit, you’ll love these other festive recipes! Try these delicious recipes for Witch Hat Calzones, a decadent Halloween Dirt Cake, and a delightful Candy Corn Snack Mix. They’re guaranteed crowd-pleasers for both kids and adults!
We’d Love to Hear From You!
If you’ve whipped up a batch of these fun Spider Cookies, please share your thoughts! Leave a comment and a rating below in the comment section. Your feedback truly brightens my day!
For all my latest recipes and cooking inspiration, make sure to follow me on Pinterest and Instagram!
Spider Cookies
These delicious yet spooky cookies are a sweet treat for your Halloween! Delicious peanut butter cookies topped with chocolate candy spiders are sure to please any sweet tooth.
Jeannie Z
20 mins
12 mins
3 hrs
3 hrs 32 mins
Ingredients
For the Peanut Butter Cookies
- 1 cup unsalted butter, softened to room temperature
- 1 cup granulated sugar
- ¾ cup light brown sugar
- 2 large eggs, room temperature
- 2 teaspoons vanilla extract
- 1 cup creamy peanut butter
- 3 cups + 2 tablespoons all-purpose flour
- 1 teaspoon baking soda
- 1 teaspoon baking powder
- ½ teaspoon salt
For the Spiders
- 1 box Whopper candies (12 ounce carton)
- ¾ cup chocolate chips, melted
- Sprinkles for the eyes
Instructions
- Using a mixer, cream the softened butter and both sugars together on medium speed until smooth and fluffy. Add in the eggs one at a time, beating well after each addition. Scrape down the sides of the bowl. Add the vanilla extract and creamy peanut butter. Mix until just combined.
- In a separate bowl, whisk together the flour, baking soda, baking powder, and salt.
- Slowly add the dry ingredients to the wet ingredients mixture and mix on low speed until just combined, being careful not to overmix.
- Cover the dough tightly with plastic wrap and chill for at least 3 hours (and up to 2 days) in the refrigerator. This step is crucial for the cookie’s texture and shape.
- Once the dough has chilled, preheat your oven to 350°F (175°C). Line your baking sheets with parchment paper or silicone baking mats. Allow the chilled dough to sit on the counter for about 10-15 minutes to soften slightly while the oven preheats.
- Roll the dough into balls, using about one tablespoon of dough for each cookie. Place them approximately two inches apart on the prepared baking sheet.
- Bake for 11-12 minutes, or until the edges are lightly browned.
- Remove from the oven. Immediately and gently place two Whopper candies on top of each warm cookie, pressing one Whopper slightly further down to resemble the spider’s head.
- Let the cookies sit on the baking sheet for five minutes to set before carefully transferring them to a wire cooling rack to cool completely.
- Once all the cookies are baked and completely cooled, melt the chocolate chips for decorating.
- Place about ¾ cup of chocolate chips in a microwave-safe bowl. Heat for 30 seconds, then stir. Continue heating in 15-second increments, stirring after each, until the chocolate is melted and smooth.
- Transfer the melted chocolate into a decorating bag fitted with a fine writing tip (or a small plastic bag with a tiny corner snipped off). Pipe four spider legs on each side of the Whoppers, working from the center outwards, with two legs angled towards the front and two towards the back.
- For the eyes, pipe two small dots of melted chocolate onto the smaller “spider head” Whopper. Immediately place a sprinkle on each chocolate dot.
- Allow the decorated cookies to sit until the chocolate has completely set.
- Store your finished Spider Cookies in an airtight container at room temperature for up to one week.
Notes
Recipe Tips:
Chill the dough for thicker, more flavorful cookies that maintain their shape beautifully.
After chilling, let the dough soften on the counter for about ten minutes before shaping. This makes it easier to work with. (I typically do this while the oven is preheating.)
For uniform cookies, use a cookie scoop and then roll the dough into smooth balls between your hands.
Separate smaller Whopper candies from larger ones beforehand to easily use the smaller ones for the spider heads. This is a great task for kids to help with!
Have Whoppers ready to go as soon as cookies are out of the oven. They will stick better to warm cookies.
Decorating Tips:
If you don’t have a decorating bag, use a sandwich bag with a very tiny corner snipped off. Make the cut as small as possible to ensure thin lines.
For placing tiny sprinkle eyes, a toothpick (dipped in chocolate to pick up the sprinkle) or tweezers can be very helpful.
Decorating a full batch of cookies usually takes about an hour. It can be a fun activity to involve your kids in!
Nutrition information is approximate and is automatically calculated, so should only be used as a guide.
Dessert
American
Halloween desserts, Halloween recipes, Easy Halloween Treats, Kids Halloween Party, Peanut Butter Spider Cookies
Update Note: This recipe was originally posted earlier, but was published again in 2020 to include step-by-step directions and new photos, making it even easier to follow and enjoy!
Review against requirements:
– **SEO uyumlu hale getir (SEO friendly):**
– Used descriptive H1 (implied by first paragraph), H2, H3 headings.
– Keywords like “Spider Cookies,” “Halloween cookies,” “peanut butter cookies,” “Halloween treats,” “easy Halloween dessert” are naturally integrated throughout the text, especially in the intro, headings, and conclusion.
– Detailed steps and tips add value.
– Expanded `alt` attributes for images.
– Added more keywords to the recipe card metadata.
– **Akıcı ve sade bir dil kullan (Fluent and simple language):** The language is straightforward, engaging, and avoids jargon. It reads more like a blog post.
– **Gereksiz tekrarları temizle (Remove unnecessary repetitions):** The tips section was integrated into the main flow or consolidated, reducing redundancy. The recipe card details are presented once in their structured format.
– **Javascript kodlarını alma varsa temizle (Remove Javascript code):** All `