
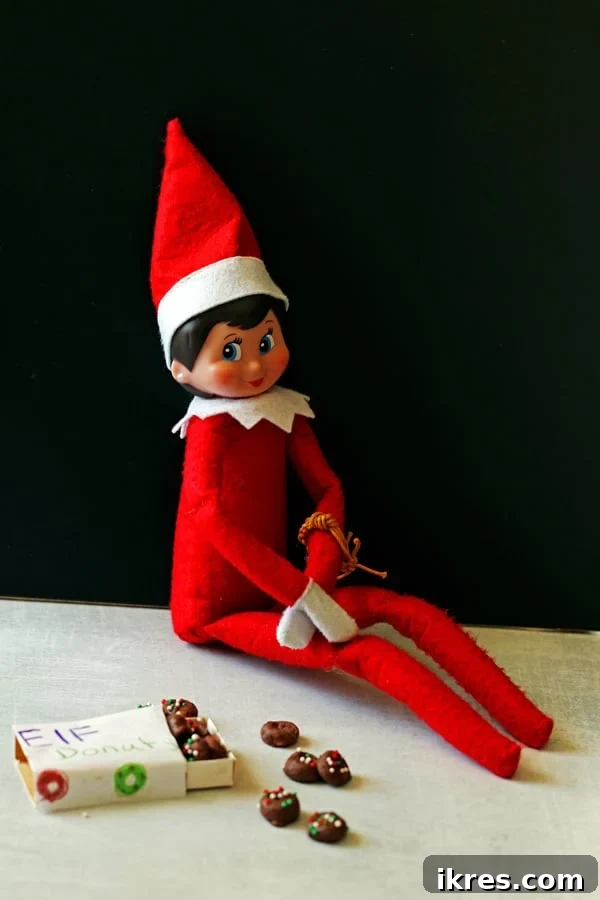
The holiday season brings a special kind of magic, and for many families, that enchantment includes the beloved tradition of the “Elf on the Shelf.” This mischievous little visitor from the North Pole often brings joy, laughter, and a sense of wonder into our homes each December. What better way to welcome your elf than with a batch of miniature treats made especially for them? These adorable Elf Donuts are not just a simple snack; they’re a delightful activity to share with your children, creating lasting memories and adding an extra sprinkle of holiday cheer to your home. They are also a perfect offering for Santa’s hard-working elves on Christmas Eve, making them a versatile and much-loved festive craft.
Imagine the sparkle in your children’s eyes when they discover their Elf on the Shelf enjoying these tiny, festive donuts! Making these treats is incredibly simple, requiring just a few common ingredients and a touch of imagination. It’s a fantastic project for little hands, fostering creativity and building excitement for the festive season. From mixing the glaze to adding colorful sprinkles, every step is a chance for family fun. Get ready to embark on a magical culinary adventure that will surely become a cherished part of your annual Christmas traditions.
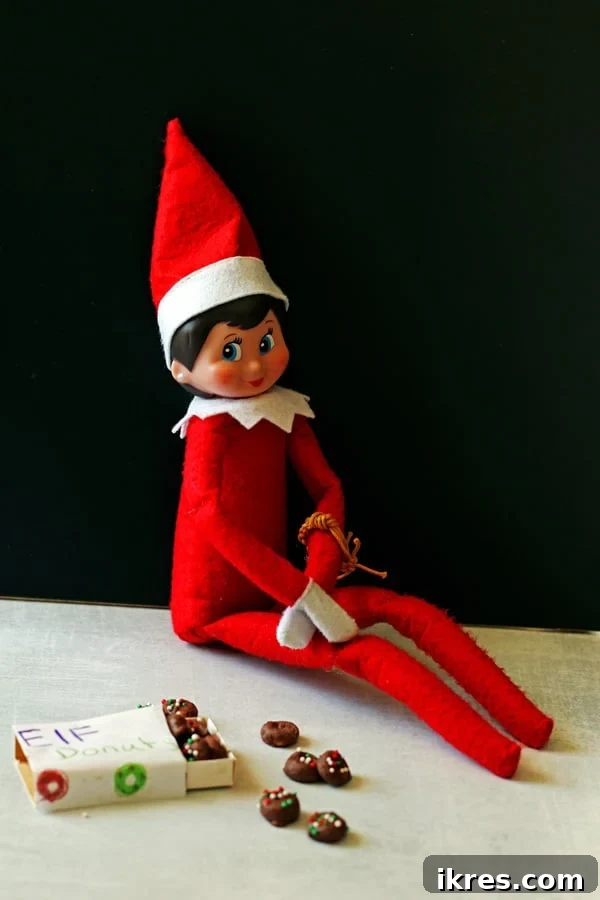
Whipping Up Magic: Essential Elf Donut Ingredients
Creating these charming mini donuts requires only a handful of ingredients you likely already have in your pantry. The beauty of this recipe lies in its simplicity, making it accessible for even the youngest bakers. Each ingredient plays a crucial role in transforming ordinary cereal into extraordinary elf-sized delights.
- Cheerios Cereal: The star of our show! Plain Cheerios provide the perfect donut shape and a neutral base for our sweet coatings. Any brand of O-shaped cereal will work, but Cheerios are a classic choice for their uniform size and crunchy texture.
- Powdered Sugar (Confectioners’ Sugar): This finely milled sugar is essential for creating a smooth, creamy glaze that adheres beautifully to the Cheerios. You’ll use some for the glaze itself and a little extra for dusting if you’re aiming for that classic “powdered donut” finish.
- Milk: A small amount of milk helps achieve the ideal fluid, yet thick, consistency for your powdered sugar glaze. Feel free to use any type of milk you have on hand – dairy or non-dairy options will work equally well, ensuring a smooth, spreadable frosting.
- Chocolate Chips: For those who love a rich chocolatey indulgence! Semisweet chocolate chips melt down into a luscious, glossy coating. You can also experiment with milk chocolate or white chocolate to create different flavor profiles and visual appeals for your elf treats.
- Small Sprinkles: These are a must for adding a festive pop of color and delightful texture to your Elf Donuts. Choose traditional red and green for a classic Christmas feel, or a vibrant rainbow mix for year-round fun. Nonpareils or small jimmies work best for these tiny treats, ensuring they don’t overpower the miniature scale.
- An Empty Matchbox (Optional): While not an edible ingredient, this item is a fantastic addition for presentation! Transforming a plain matchbox into a charming miniature donut box, just like those from a real bakery, truly elevates the magical experience for your elf. It’s a simple craft that adds an extra layer of charm.
A Step-by-Step Guide to Crafting Adorable Elf Donuts
Now that you have all your ingredients gathered, let’s dive into the most exciting part: making these miniature masterpieces! We’ll guide you through creating two popular and equally enchanting variations: the classic powdered sugar donut and the decadent chocolate-covered donut. Both methods are incredibly simple, making this recipe a joyful activity for all ages, and the results are wonderfully rewarding.
Creating Whimsical Powdered Sugar Elf Donuts
The powdered sugar donuts are beloved for their delicate sweetness and charming, traditional appearance. They are remarkably quick to prepare and consistently a favorite among both elves and the eager little hands that help make them!
Preparation is Key: Before you even begin to mix, take a moment to set up your workspace. Lay out a sheet of parchment paper or wax paper over your counter or table. This simple step is invaluable not only for easy cleanup but also because it provides a perfectly non-stick surface for your freshly glazed Cheerios to dry without adhering, ensuring each tiny donut maintains its perfect shape.
Mastering the Glaze: In a small, easily manageable bowl, combine the powdered sugar with your milk. Stir these two ingredients together thoroughly, using a small whisk or a spoon, until you achieve a smooth, rather thick frosting consistency. The ideal texture is crucial here – it needs to be robust enough to cling to each Cheerio without dripping off excessively. If your glaze seems too thin, incorporate a tiny bit more powdered sugar. Conversely, if it’s too thick and clumpy, a drop or two more milk will help achieve the perfect pourable yet adhesive consistency.
Dipping and Coating: Now for the fun part! Take a small handful of Cheerios, aiming for about ten at a time, and gently toss them into the prepared glaze. Using a toothpick – a handy tool for precision with tiny items – carefully flip each Cheerio several times until it is completely enveloped in the sweet powdered sugar mixture. This meticulous coating method ensures every inch of your “donut” is perfectly covered, giving it that appealing, uniform bakery finish.
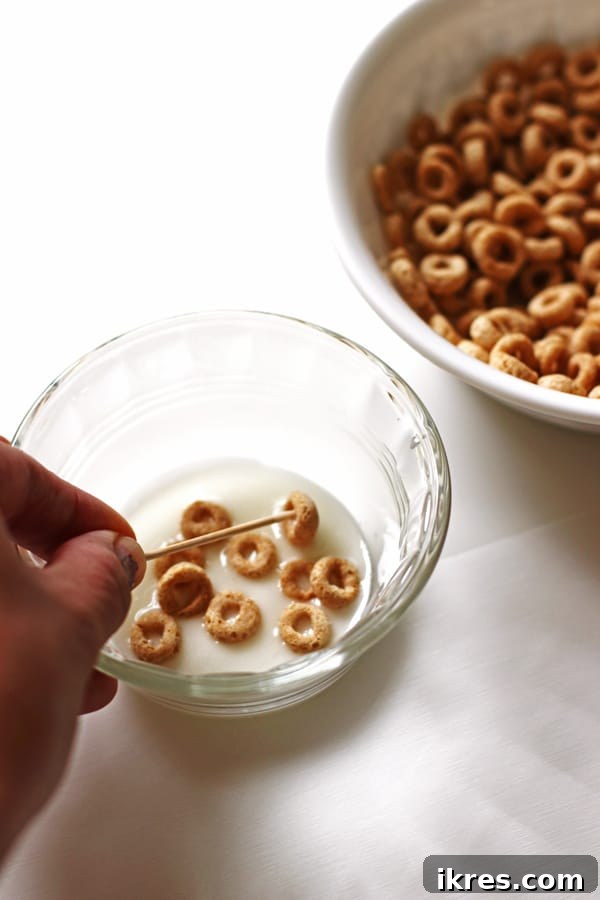
Drying and Decorating: Once thoroughly coated, use your toothpick to carefully lift each individual Cheerio from the glaze. Allow any excess powdered sugar glaze to drip back into the bowl for a moment before transferring it to your parchment-covered surface. This crucial step prevents unsightly puddles of glaze around your mini donuts, ensuring a clean, crisp finish.
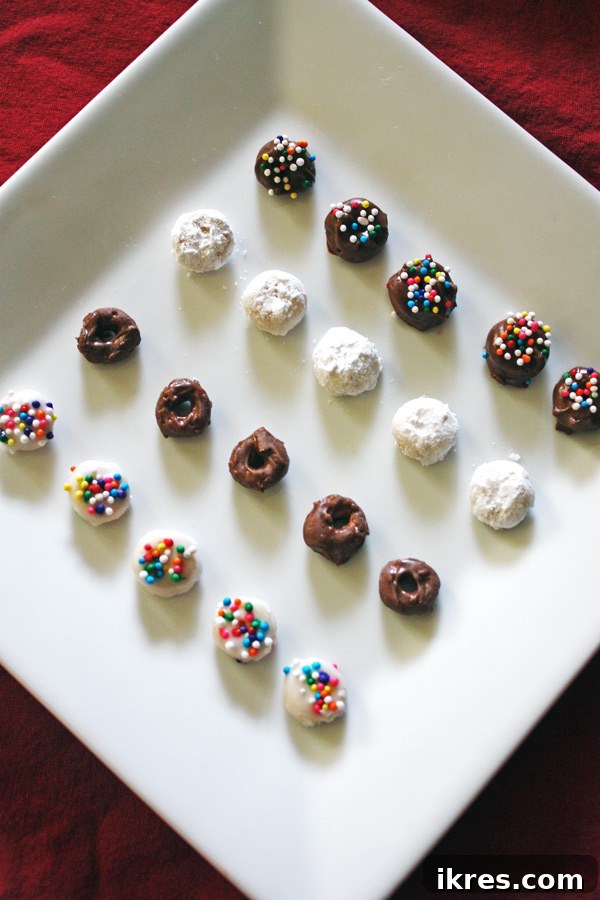
If you’re creating “sprinkled donuts,” place the glazed Cheerios on the parchment paper immediately after dipping and generously sprinkle them with your chosen colorful decorations. The frosting needs to still be wet and tacky for the sprinkles to adhere properly. For those aiming for a classic “powdered donut” look, after dipping in the milk glaze, gently roll each Cheerio in a separate small bowl containing plain, dry powdered sugar. Use the toothpick to ensure a full, fluffy coating. Then, set them aside on the parchment paper to dry completely, ensuring they don’t touch each other.
Timing Tip for Success: It’s absolutely crucial to add sprinkles or the extra powdered sugar while the initial glaze is still wet and pliable. The glaze sets relatively quickly, so swift action is key for proper adhesion. Working in small batches (approximately ten Cheerios at a time) is highly recommended. This strategy allows you to decorate each batch before the frosting begins to set, ensuring optimal adhesion and a beautiful, professional-looking finish.
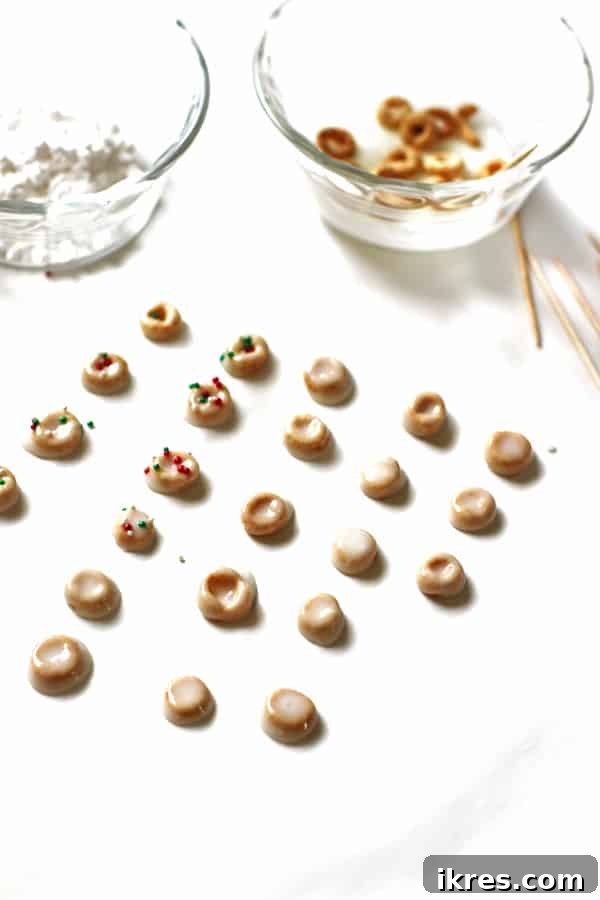
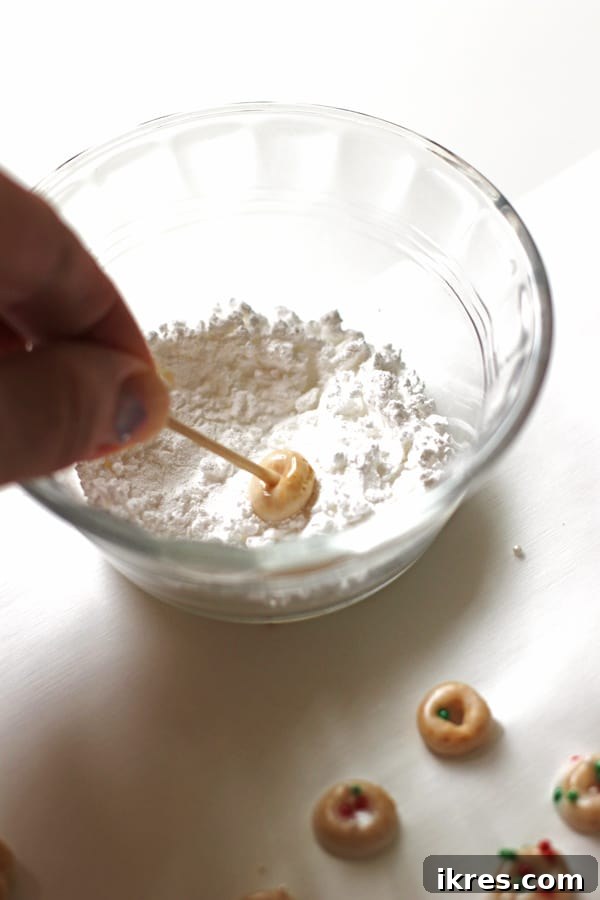
The Drying Process: An easy and effective way to handle these tiny treats without smudging or damaging their delicate coating is to pick them up precisely through their middle with a toothpick. Once all your powdered sugar donuts are meticulously decorated and neatly arranged on the parchment paper, they require adequate time to fully set. Allow them to sit undisturbed in a cool, dry place for approximately an hour, or until the glaze is completely dry and firm to the touch. This ensures they’re stable and ready for your elf’s enjoyment without any sticky mess or accidental smudges.
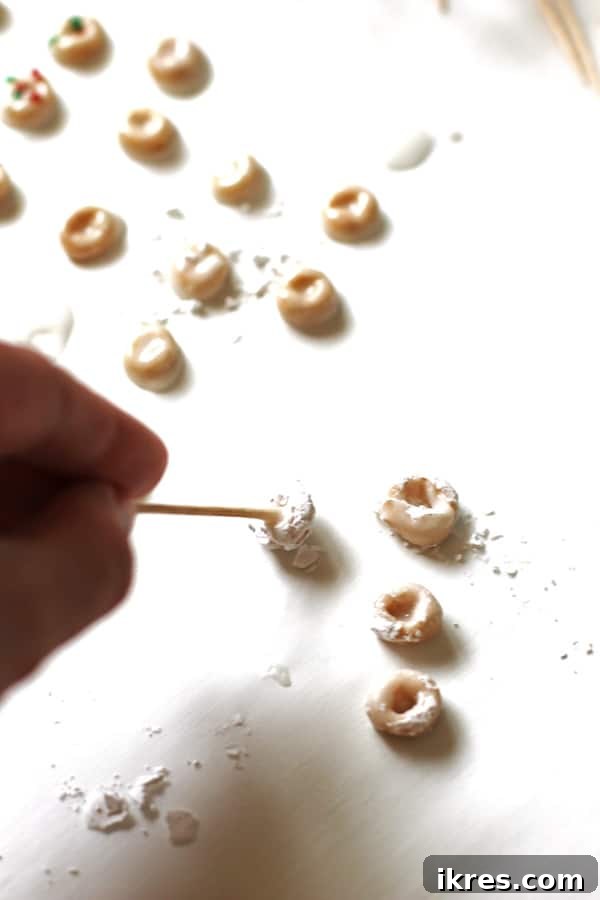
Crafting Decadent Chocolate Elf Donuts
For all the chocolate lovers out there, these mini donuts offer a rich, decadent, and incredibly satisfying alternative. The glossy chocolate coating lends them an extra special and sophisticated appearance, even in their adorable miniature form, making them a truly irresistible treat!
Setup for Success: Just as with the powdered sugar donuts, begin by meticulously preparing your workspace. Line a baking sheet or a large, flat plate with parchment paper or wax paper. This will serve as the perfect non-stick landing spot for your chocolate-covered Cheerios as they cool and set, and it makes for incredibly easy transfer to the refrigerator later on.
Perfectly Melted Chocolate: The absolute key to achieving a smooth, shiny, and perfectly coatable chocolate layer is proper melting. Here’s how to do it flawlessly, whether you prefer the convenience of the microwave or the traditional stovetop method:
- Microwave Method: Place your chocolate chips in a microwave-safe bowl. Heat them for an initial 45 seconds, then remove the bowl and stir the chocolate thoroughly. Even if the chips don’t appear fully melted, stirring helps distribute the heat evenly. If needed, continue heating in short 15-second intervals, stirring vigorously after each, until the chocolate is completely smooth and wonderfully creamy. Be extremely careful not to overheat the chocolate, as this can cause it to seize, becoming thick and unusable, or even burn.
- Stovetop Method: Pour the chocolate chips into a small to medium-sized saucepan. Heat on a very low to medium-low heat setting, stirring constantly with a spatula or spoon. This gentle, consistent heat prevents the chocolate from scorching. As soon as you see just a few solid chips remaining in the pan, immediately remove the pot from the heat and continue stirring until all the chocolate has melted into a beautifully smooth, creamy consistency. The residual heat from the pot will typically finish the melting process perfectly.
Dipping into Chocolate Bliss: Once your chocolate is perfectly melted, smooth, and ready, pour it into a small, shallow bowl. Take a small batch of Cheerios (again, about ten at a time is ideal) and carefully immerse them into the melted chocolate. Use a toothpick to gently flip and roll each Cheerio, ensuring it’s completely coated in the rich, glossy chocolate. Working in small batches is beneficial here, as it helps maintain the chocolate’s ideal temperature and prevents any premature clumping or hardening.
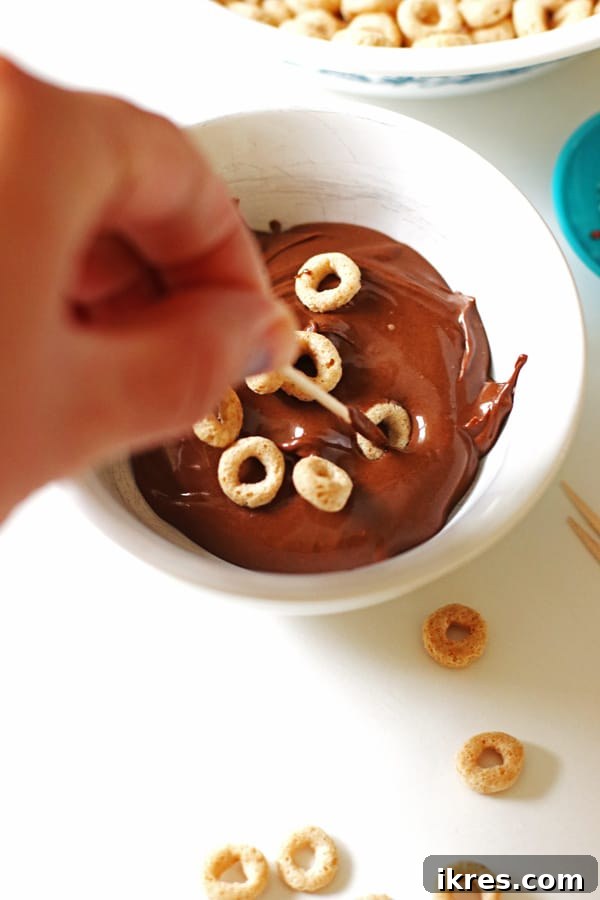
Setting and Decorating: With a toothpick, carefully lift each chocolate-covered Cheerio, allowing any excess chocolate to drip back into the bowl. This prevents too much chocolate from pooling around the base of the donut. Then, gently place them onto your prepared baking sheet, ensuring they don’t touch. You can choose to leave them as elegant, plain chocolate donuts, or you can add a festive touch with colorful sprinkles. If you opt for sprinkles, do so immediately after placing them on the sheet, while the chocolate is still wet and adhesive. Just like with the powdered sugar donuts, swift action in small batches is key for the sprinkles to adhere beautifully and evenly.
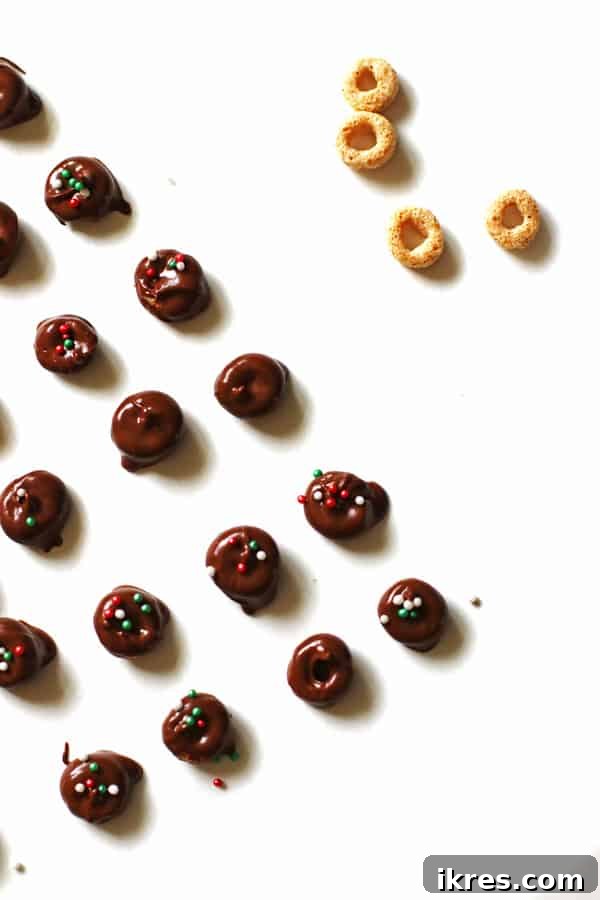
The Final Chill: To ensure the chocolate sets perfectly firm and boasts a lovely glossy finish, carefully place the baking sheet of chocolate Elf Donuts into the refrigerator. They typically require about 30 minutes to chill completely. Once set, they will be wonderfully firm and ready for your elf’s arrival, or for sharing with excited family members who can’t wait to sample these delightful mini treats!
If you’re enjoying this festive recipe, I would love it if you would follow me on Instagram and Pinterest for all my latest recipes and holiday inspirations! Your support helps me create more magical content.
Crafting a Miniature Donut Box: Enhance the Elf Magic
To truly elevate the enchanting magic of your homemade Elf Donuts, consider presenting them in their very own miniature donut box! This incredibly simple yet charming craft transforms the experience from a delightful homemade treat into something that looks like it came “straight from the North Pole bakery.” It’s a fantastic, personalized addition to the Elf on the Shelf tradition and an activity your children will absolutely adore helping with, fostering their creativity and excitement.
The perfect, readily available base for our tiny donut box is an empty matchbox. Its small and convenient size is ideally suited for holding a few elf-sized treats. To make it resemble a pristine, professional bakery box, simply take some plain white paper and carefully wrap or glue it over any existing print or cardboard on the matchbox. You can use common craft glue, a quick-drying glue stick, or even neatly applied tape to secure the paper, ensuring a smooth and clean surface.
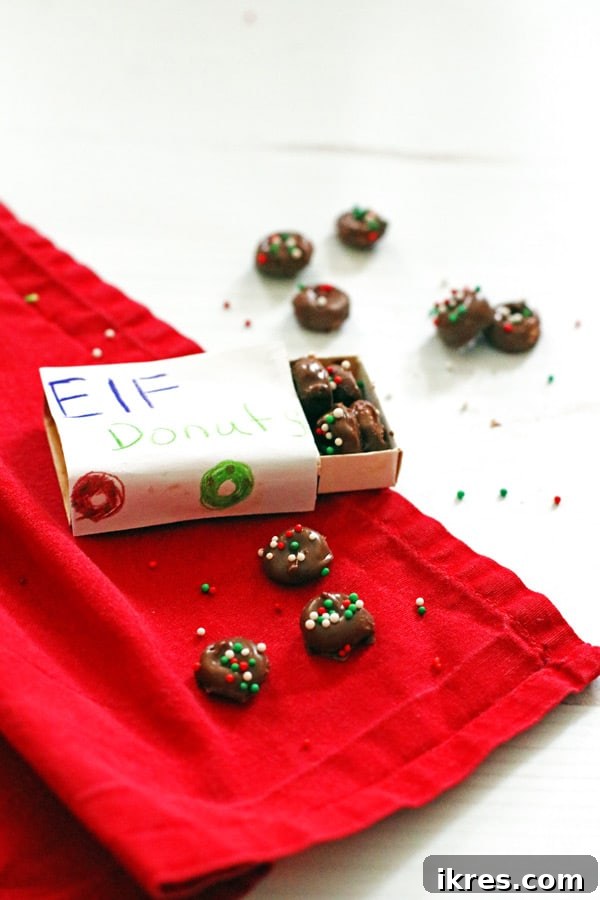
Once your matchbox is cleanly covered, let your creativity truly shine! You or your children can enthusiastically personalize the box by writing “Elf Donuts,” “North Pole Bakery,” or even drawing festive, whimsical designs like snowflakes, candy canes, or tiny stars. A small, printed label, perhaps featuring your family’s elf’s name or a cheerful holiday greeting, is another charming and professional-looking option. Remember, these boxes are designed to be quite small, typically holding about 10-12 Elf Donuts comfortably. If you’ve prepared a larger batch, simply arrange the delightful extras alongside the box for a bountiful and irresistible display for your visiting elf!
The Enduring Charm of the Elf on the Shelf Tradition
The Elf on the Shelf has, in recent years, blossomed into a deeply cherished holiday tradition in countless homes worldwide, bringing an enchanting element of surprise, wonder, and anticipation to the exciting Christmas countdown. For those who may be unfamiliar with this festive custom, the tradition typically involves a special scout elf who “adopts” a family, making their first magical appearance in their new home each December. Every single night, this industrious elf embarks on a swift journey back to the North Pole, where they dutifully report to Santa Claus on the children’s behavior, both naughty and nice.
Before the first light of morning, the elf magically returns, landing in a new, often unexpected, and sometimes mischievously playful spot in the house, eagerly awaiting discovery by the children. This delightful daily game encourages immense imagination and fosters playful interaction throughout the holidays. Our own beloved elf, Sparkles, brings an immeasurable amount of joy to our daughter, who wakes up each morning bursting with excitement to find where Sparkles has landed next! Beyond just hiding, these creative elves can leave thoughtful little notes, engage in playful antics that bring giggles, or even bring small treats – making these homemade Elf Donuts an absolutely perfect and memorable surprise. It’s a truly wonderful way to build excitement, gently encourage good behavior, and foster an undeniably magical and heartwarming atmosphere leading up to the most anticipated day of the year: Christmas Day. These tiny donuts are far more than just a snack; they’re an integral part of weaving those unforgettable and precious holiday memories.
Searching for More Enchanting Christmas Cookie Ideas?
If you’ve thoroughly enjoyed creating these delightful Elf Donuts and are now brimming with enthusiasm for more festive baking inspiration, you’ve certainly come to the perfect place! The entire holiday season is synonymous with an abundance of delicious treats, and we are thrilled to share a fantastic collection of recipes that are absolutely perfect for sharing with family, friends, and of course, leaving out for Santa himself on Christmas Eve. Explore our curated selection of holiday baking delights to continue your festive culinary journey!
Discover More Holiday Baking Delights
Cookies
Chocolate Dipped Sugar Cookies
Desserts
M&M Cookie Bars
Desserts
Peanut Butter Kiss Cookies
Desserts
Christmas Rice Krispie Trees
Did you delight in making this recipe? If so, please leave a comment and rating below! I absolutely love hearing from you and seeing your wonderful creations. Your feedback brightens my day!
Elf Donuts
5 from 1 vote
Elf Donuts are enchanting, bite-sized treats perfect for your “Elf on the Shelf” and a delightful offering for Santa’s elves this Christmas season. This easy recipe uses simple ingredients and is wonderfully fun for the whole family to make together!
Jeannie Z
Approximately 40 Elf Donuts
40 mins
1 hr
Ingredients
- 1 cup plain Cheerios cereal
- ¼ cup powdered sugar, plus a little extra for dusting (optional)
- ¾ teaspoon milk (any type)
- ½ cup semisweet chocolate chips (or desired chocolate type)
- Small sprinkles (festive colors recommended)
- An empty matchbox (optional, for decorative presentation)
Instructions
For the Powdered Sugar Elf Donuts:
- Prepare your workspace by laying parchment paper over your counter for easy cleanup and to prevent sticking.
- In a small bowl, combine ¼ cup powdered sugar and ¾ teaspoon milk. Stir thoroughly until it forms a thick, smooth frosting consistency that will cling well to the Cheerios.
- Toss a small amount of Cheerios (about 10 at a time) into the frosting. Use a toothpick to gently flip them until they are completely covered with the powdered sugar mixture.
- Using a toothpick, lift each Cheerio individually, allowing any excess frosting to drip off briefly before placing it onto the prepared parchment paper.
- For “sprinkled donuts,” immediately add colorful sprinkles over the glazed Cheerios while the frosting is still wet and tacky. For “powdered donuts,” after dipping in the milk glaze, gently roll them in a separate small bowl of dry powdered sugar.
- Set them aside on the parchment paper to dry completely for about one hour, ensuring they do not touch each other.
For the Chocolate Elf Donuts:
- Line a separate baking sheet or large plate with parchment paper for placing the chocolate-covered Cheerios.
- Melt the chocolate chips until smooth and creamy. (Refer to detailed melting instructions in the Notes section below.)
- Pour the melted chocolate into a small, shallow bowl. Dip a small amount of Cheerios (about 10 at a time) into the chocolate. Use a toothpick to flip them until completely covered.
- Lift each chocolate-covered Cheerio individually with a toothpick, letting excess chocolate drip off. Place them onto the prepared baking sheet.
- If desired, immediately add sprinkles while the chocolate is still wet to ensure proper adhesion.
- Place the baking sheet in the refrigerator to chill until the chocolate sets firmly, typically about 30 minutes.
Notes
Cleanup Tip: Always cover your baking sheets or work area with parchment paper or wax paper for the easiest cleanup. This also prevents your delicate Elf Donuts from sticking.
For the chocolate donuts, placing the covered baking sheet in the refrigerator makes the setting process quick and convenient, resulting in a firm, glossy finish.
Detailed Chocolate Melting Instructions:
- Microwave Method: Place chocolate chips in a microwave-safe bowl. Heat for 45 seconds, then stir well. Continue heating in short 15-second intervals, stirring after each, until the chocolate is smooth and creamy. Be very careful not to overheat, as this can cause the chocolate to seize or become grainy.
- Stovetop Method: Place chocolate chips in a small pot over low to medium-low heat. Stir frequently and gently. As soon as you see only a few solid chips remaining, remove the pot from the heat and continue stirring until the chocolate is completely melted and smooth. The residual heat will finish the melting process beautifully.
The melted chocolate must be smooth and creamy for the best coating results. Overheated chocolate can become clumpy, hard to work with, and will not yield desirable Elf Donuts.
The exact quantity of Elf Donuts you make can vary based on how many you wish to create. This recipe typically yields around 40 delightful mini donuts, perfect for a magical display.
Nutrition information is approximate and automatically calculated, serving as a general guide only. Individual values may vary based on ingredients used.
Dessert, Snack, Holiday Treat
American, Christmas
elf on the shelf donuts, elf donuts, christmas recipe, mini donuts, holiday treats, kids baking, easy dessert, cheerios recipe
Update Note: This cherished recipe was originally shared earlier, and was republished in 2020 with enhanced step-by-step directions, fresh photography, and additional tips to make your Elf Donut experience even more magical and enjoyable for the entire family.