
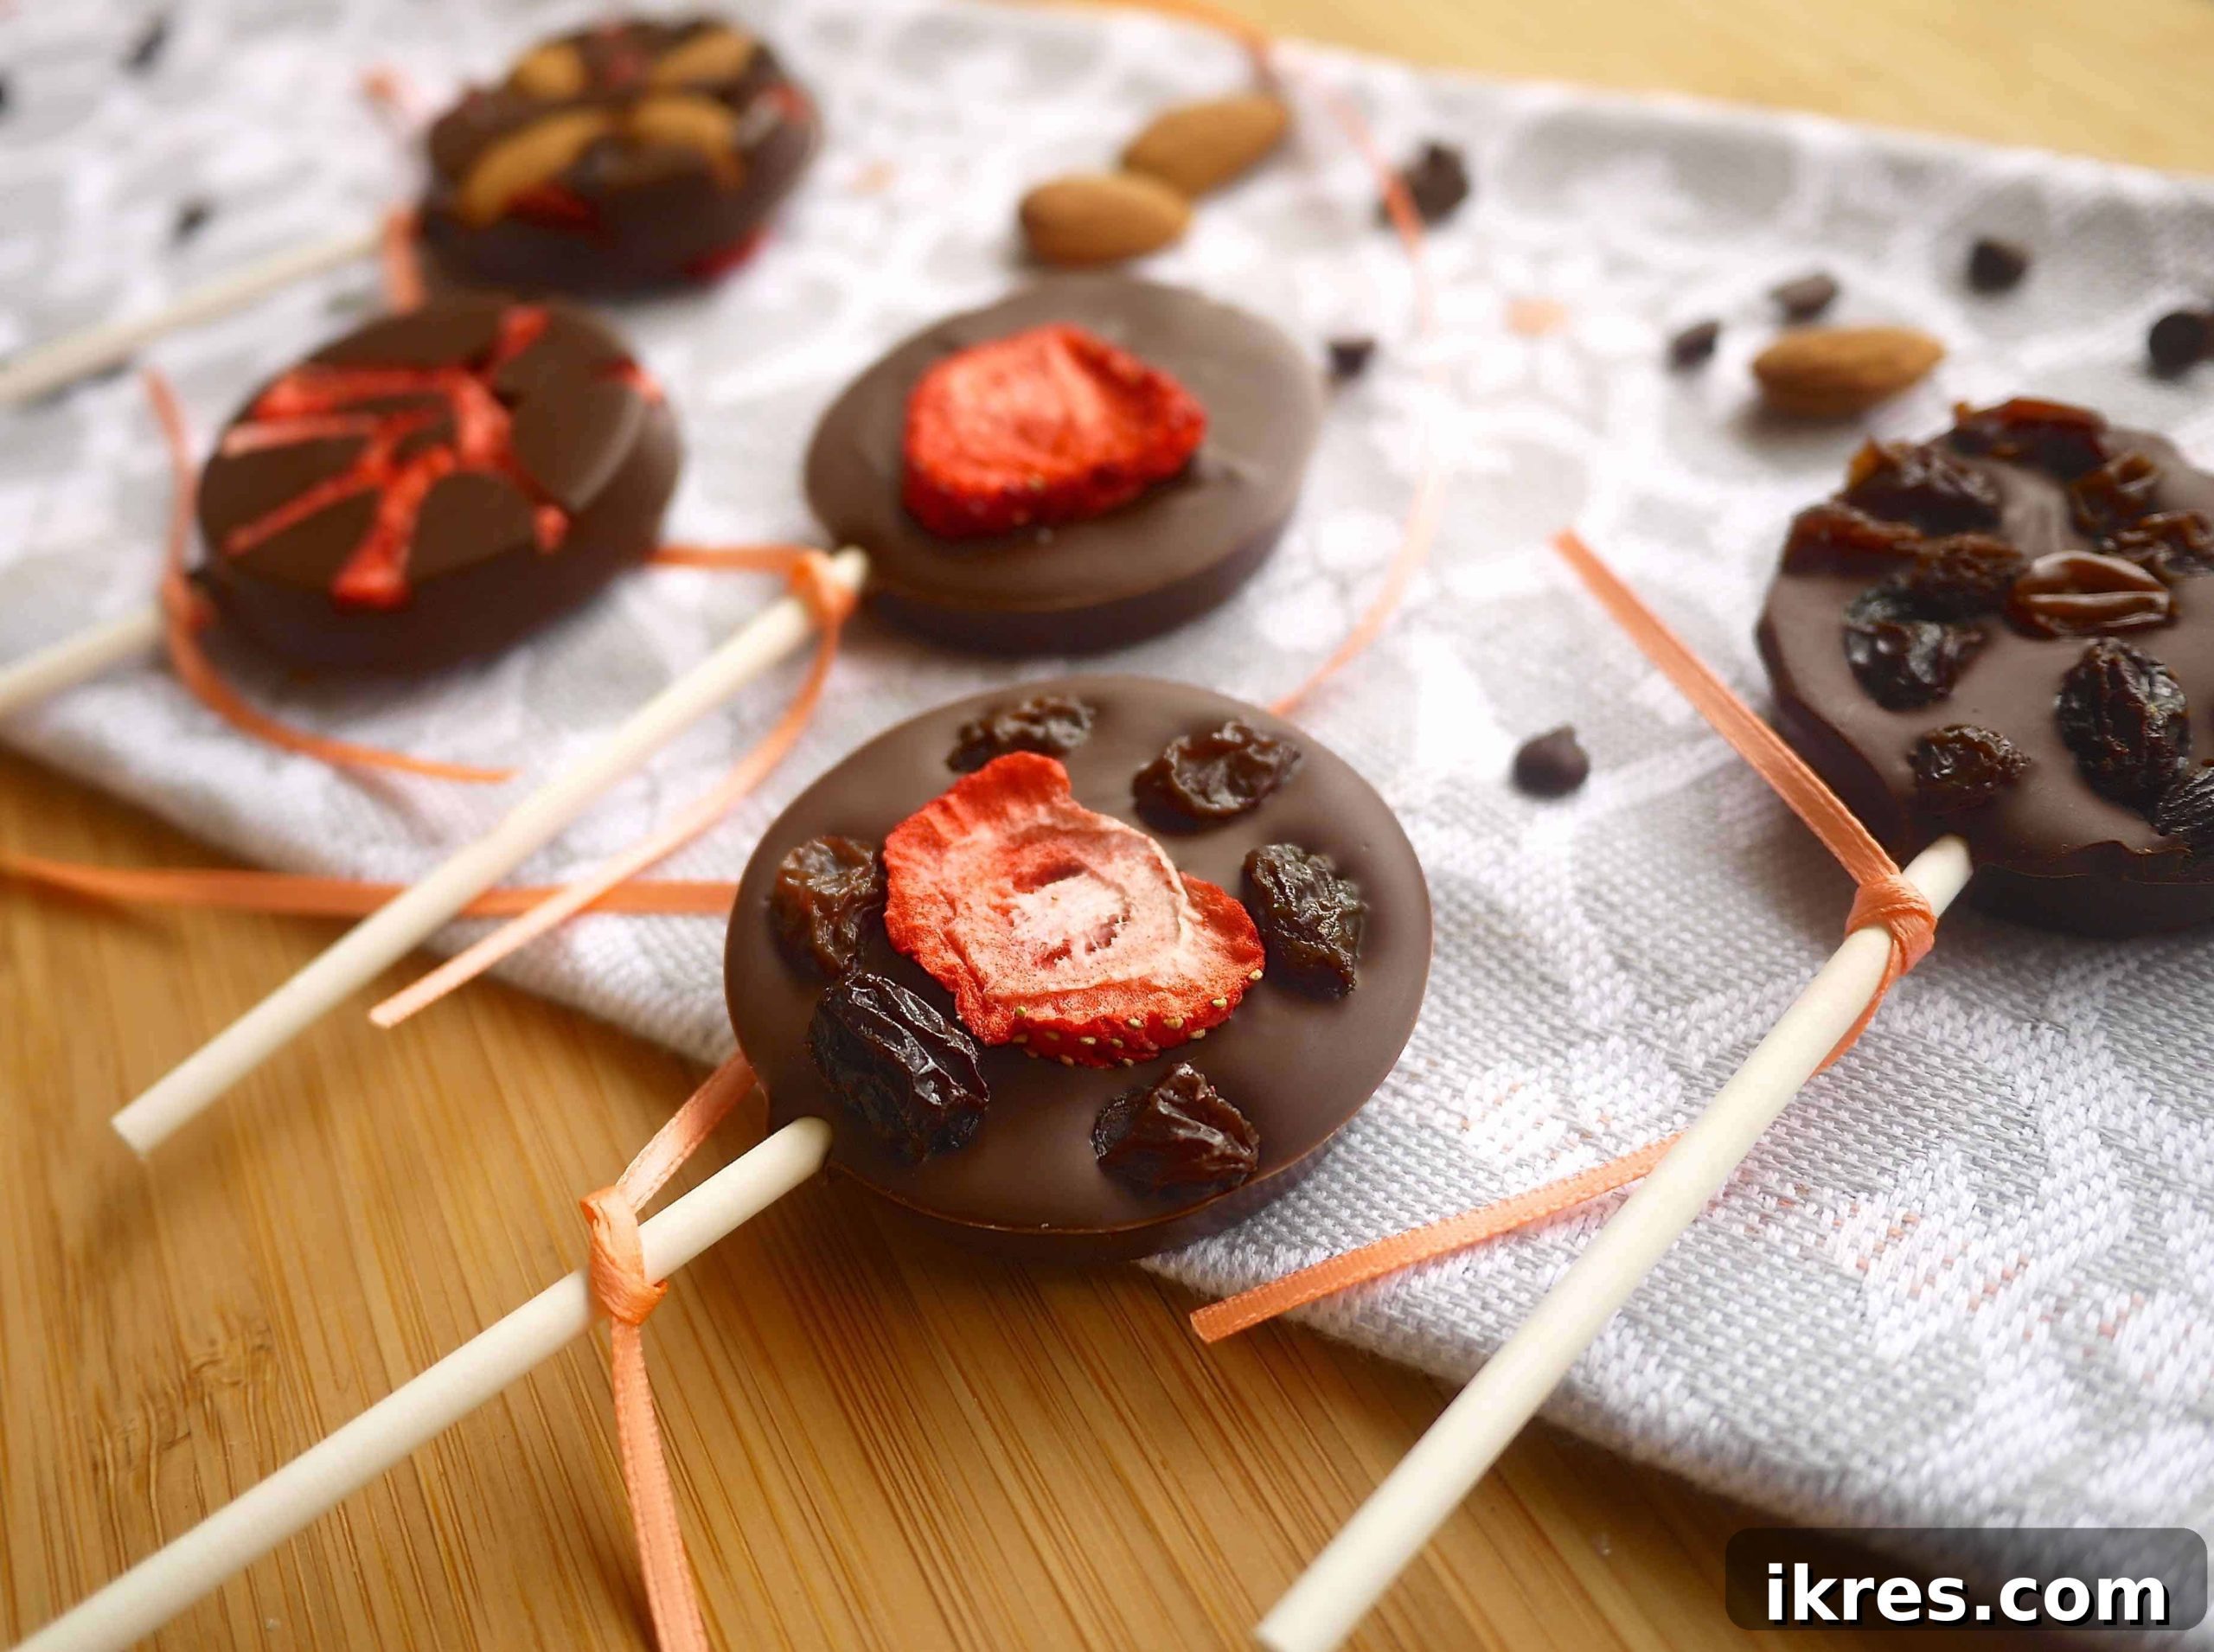
These **chocolate lollipops** are a delightful and visually stunning treat, featuring a harmonious blend of rich chocolate with your choice of dried fruits, freeze-dried fruits, and crunchy nuts.
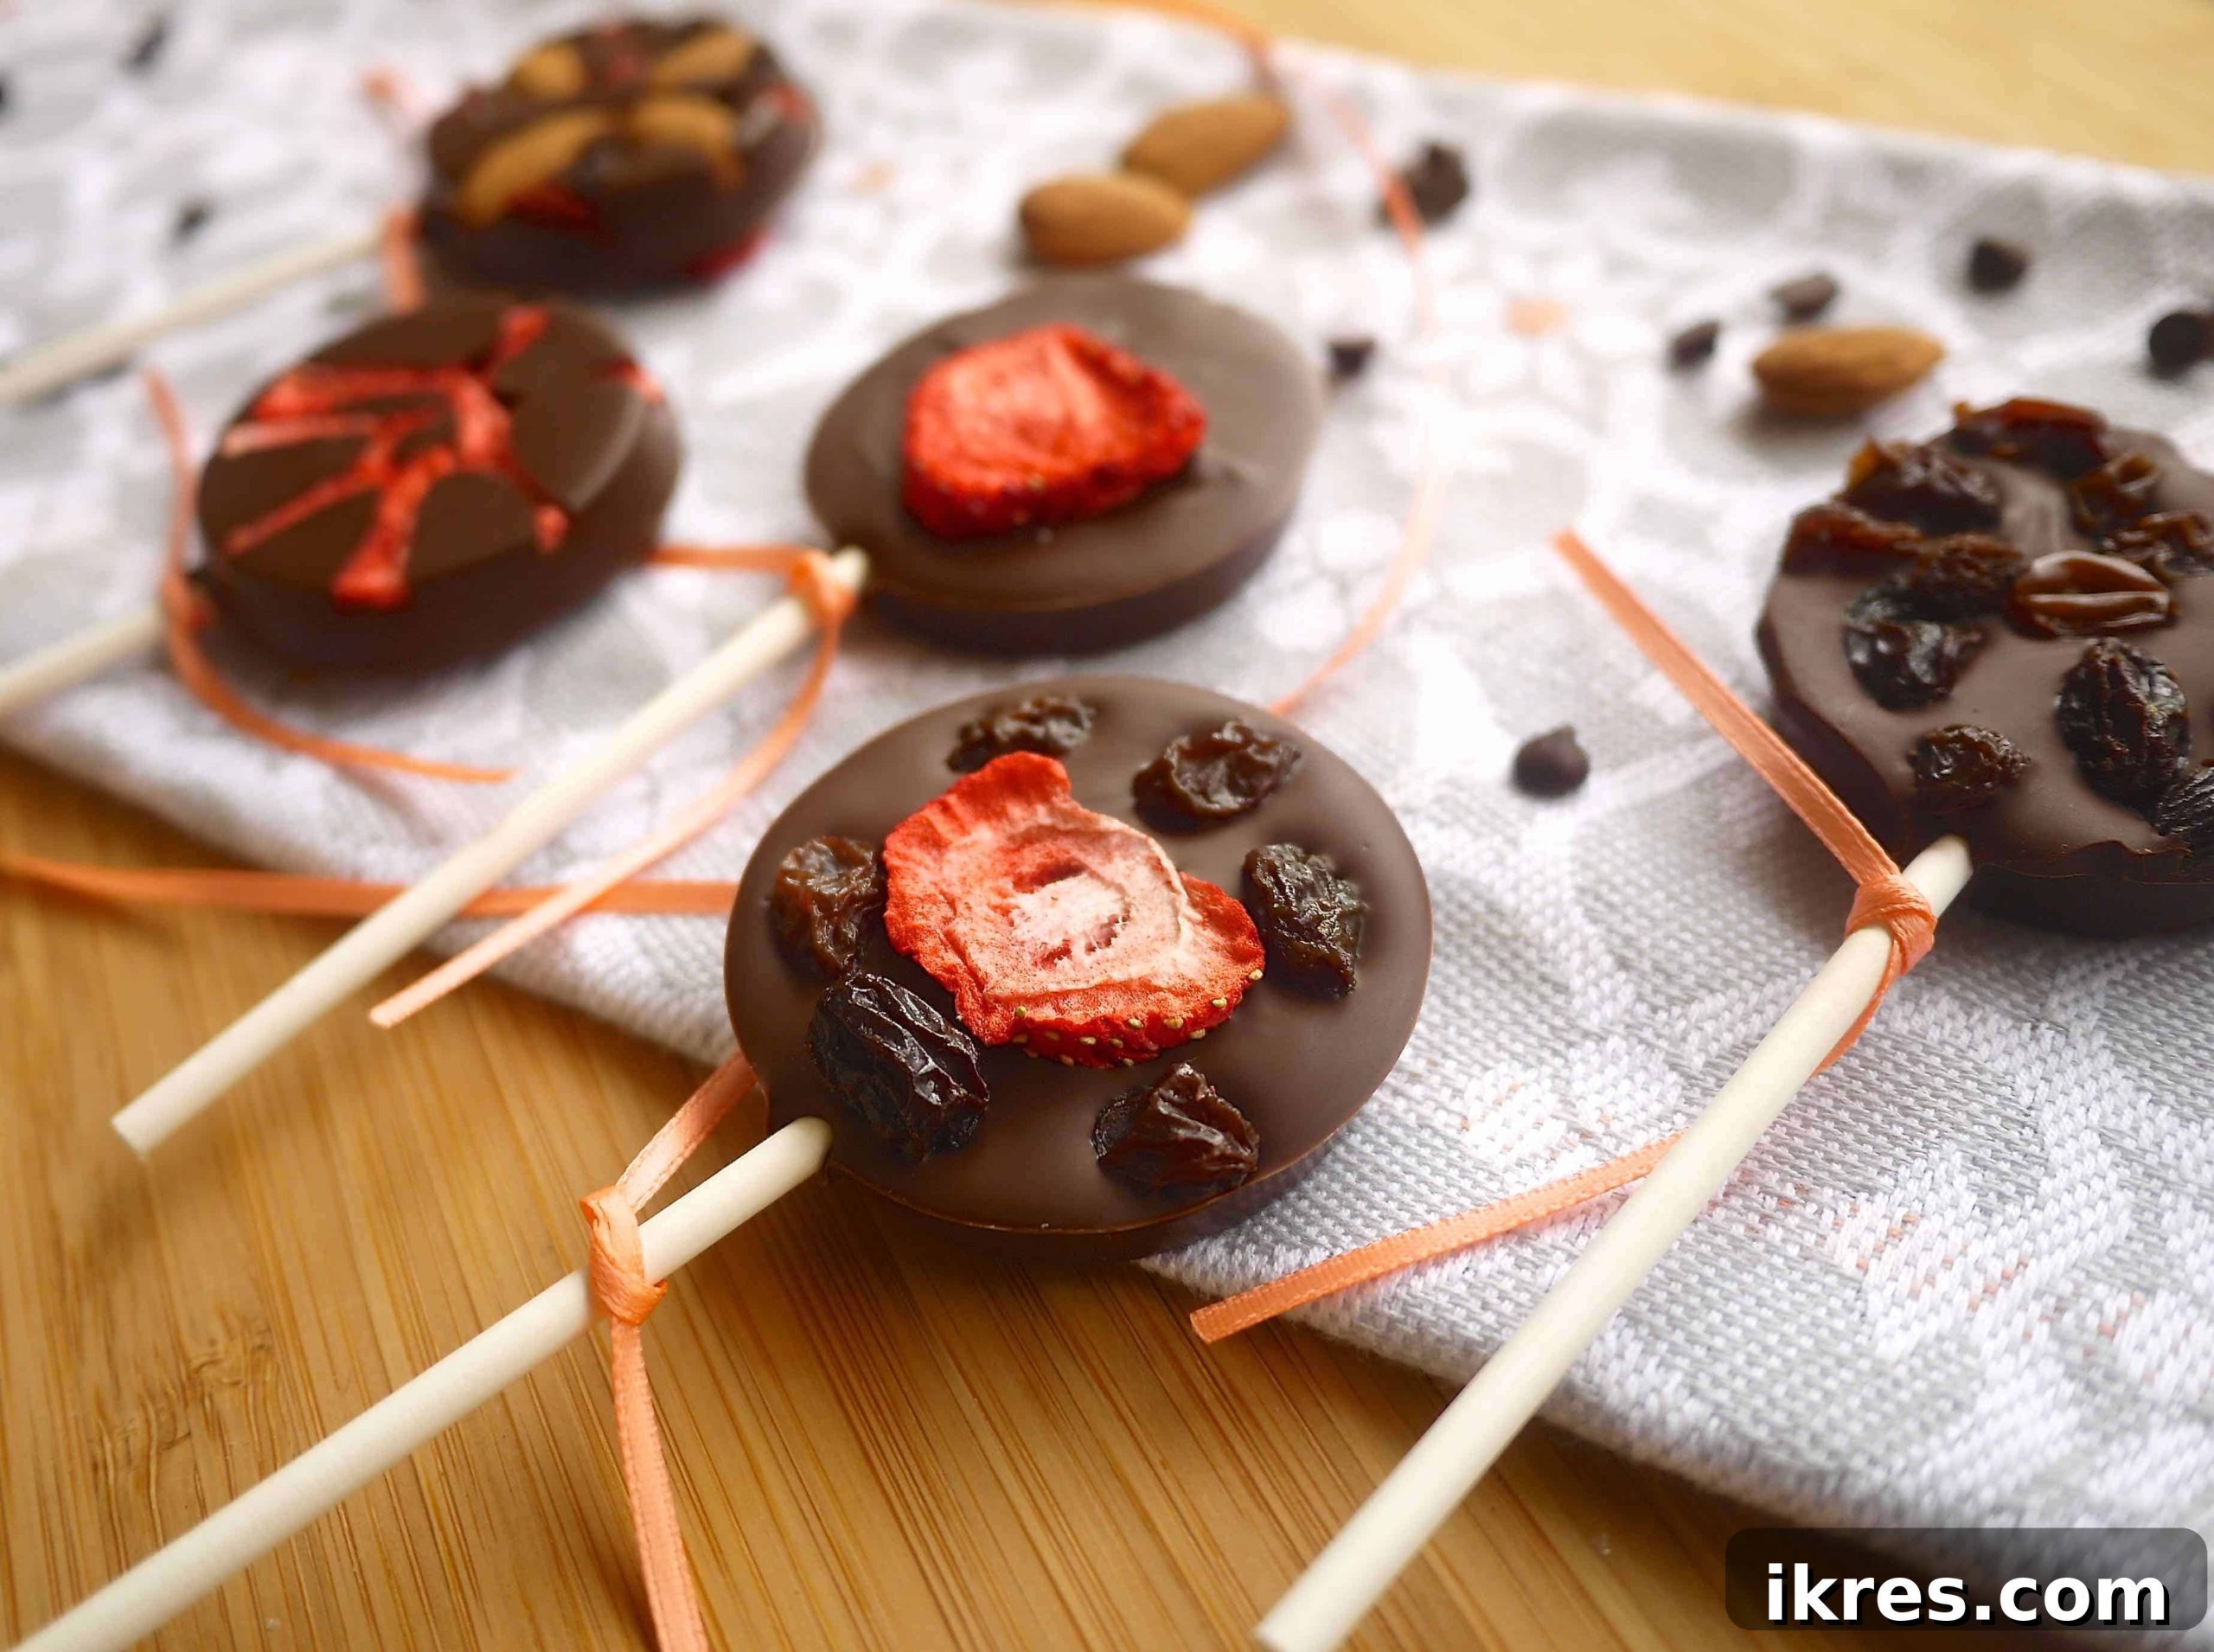
Crafting exquisite chocolate lollipops right in your own kitchen is simpler than you might imagine! Not only are these treats incredibly beautiful and bursting with flavor, but they also come together quickly, offering endless possibilities for customization to perfectly suit your preferences and dietary needs. Whether you’re looking for a fun kitchen project, a unique homemade gift, or a special dessert, these chocolate lollipops are an ideal choice.
The inspiration for this recipe stems from a memorable culinary experience during my time living in Bordeaux, France. I stumbled upon local chocolate shops selling artisanal lollipops adorned with vibrant dried kiwi and succulent dried strawberries – they were truly unforgettable. The combination of fruity tartness and rich chocolate was simply divine. Determined to recreate that magic, I developed this recipe, bringing a taste of Bordeaux into your home. If you share a passion for the wonderful pairing of chocolate and fruit, you might also love my Chocolate Covered Pumpkin Stuffed Dates or my cozy Fall Chocolate Bark.
Table of Contents
- Why You’ll Love These Chocolate Lollipops
- Essential Recipe Ingredients
- Creative Additions & Substitutions
- Step-by-Step Guide to Making Lollipops
- Expert Tips for Perfect Chocolate Lollipops
- Other Irresistible Chocolate Desserts You’ll Love
- Chocolate Lollipops with Dried Fruit Recipe Card
Why You’ll Love These Chocolate Lollipops
These homemade chocolate lollipops aren’t just a dessert; they’re an experience waiting to happen. Here’s why this recipe deserves a spot in your culinary repertoire:
- Effortlessly Simple to Make: You don’t need to be a chocolatier to create these stunning treats. The process is straightforward, requiring only a few basic kitchen tools like a reliable chocolate mold, lollipop sticks, and your chosen ingredients. Minimal fuss, maximum reward!
- Infinitely Customizable: This recipe is a blank canvas for your creativity. Experiment with a vast array of nuts, a kaleidoscope of dried fruits, or the exciting crunch of freeze-dried varieties. Beyond toppings, you can select any type of chocolate – from rich dark to creamy milk, sweet white, or even dairy-free options – to perfectly match your taste or accommodate dietary preferences.
- Perfect for Gifting and Decor: With their artisanal charm and vibrant toppings, these chocolate lollipops make truly beautiful and thoughtful gifts. Wrap them individually in cellophane with a pretty ribbon, and you have a personalized present for any occasion. They also serve as stunning edible decorations for dessert tables, adding a touch of elegance and homemade flair to parties or celebrations.
Essential Recipe Ingredients
Creating these delightful chocolate lollipops begins with selecting quality ingredients. Here’s a detailed look at what you’ll need:
- Chocolate Chips: The foundation of your lollipops. You have a wide range of options here. **Dark chocolate** offers intense, rich flavor; **semi-sweet chocolate** provides a balanced sweetness; **milk chocolate** delivers a creamy, familiar taste; and **white chocolate** adds a buttery, vanilla-like profile. For those with dietary restrictions, **dairy-free chocolate** and **gluten-free chocolate** chips are excellent alternatives. Brands like Enjoy Life chocolate chips are fantastic dairy-free and gluten-free choices, while HU chocolate chips are perfect for a Paleo diet.
- Dried Fruit: These add chewiness, sweetness, and a burst of fruity flavor. I’ve found that **raisins**, sweet **apricots**, and rich **figs** pair exceptionally well with chocolate. For an exciting textural contrast and a vibrant tang, **freeze-dried fruits** are incredible. Freeze-dried strawberries, in particular, provide a wonderful crunch and intense berry flavor. Don’t hesitate to explore other options like dried cranberries, blueberries, cherries, or even exotic dried mango.
- Nuts: Nuts contribute a satisfying crunch and nutty depth that complements chocolate beautifully. **Almonds** offer a classic crunch, **pistachios** add a distinct color and mild flavor, **hazelnuts** bring a rich, buttery taste, and **peanuts** provide a savory note. You can also use walnuts, pecans, or even seeds like pumpkin seeds or sunflower seeds for an allergen-friendly alternative.
- Coconut Oil (or Olive Oil): A small amount of oil helps the chocolate melt smoothly, making it easier to pour into molds and giving your lollipops a lovely sheen. Coconut oil is often preferred for its subtle flavor and firming properties, but a neutral olive oil can also work.
The full list of ingredients and precise measurements can be found in the detailed recipe card below.
Creative Additions & Substitutions
The beauty of homemade chocolate lollipops lies in their versatility. Don’t be afraid to experiment and personalize your creations:
- Flavor Boosters: Elevate your melted chocolate by stirring in a few drops of **food-grade orange oil** or **peppermint extract** for a refreshing twist. A pinch of chili powder can add an unexpected kick, while a sprinkle of cinnamon or cardamom can introduce warmth.
- Endless Fruit Combinations: The world of dried and freeze-dried fruit is vast! Go beyond the basics with dried kiwi, tart dried cherries, sweet dried mango, or vibrant dried cranberries. Mix and match for unique flavor profiles and visual appeal.
- Alternative Toppings: Consider adding mini marshmallows, shredded coconut, edible glitter, a sprinkle of sea salt for a salty-sweet contrast, or various seeds like chia or flax for added texture and nutrients. The possibilities are truly limitless!
- Different Chocolate Types: While chocolate chips are convenient, you can also use chocolate bars, finely chopped. This offers even more control over the quality and flavor of your chocolate base.
Step-by-Step Guide to Making Lollipops
Follow these easy steps to create your own irresistible chocolate lollipops:
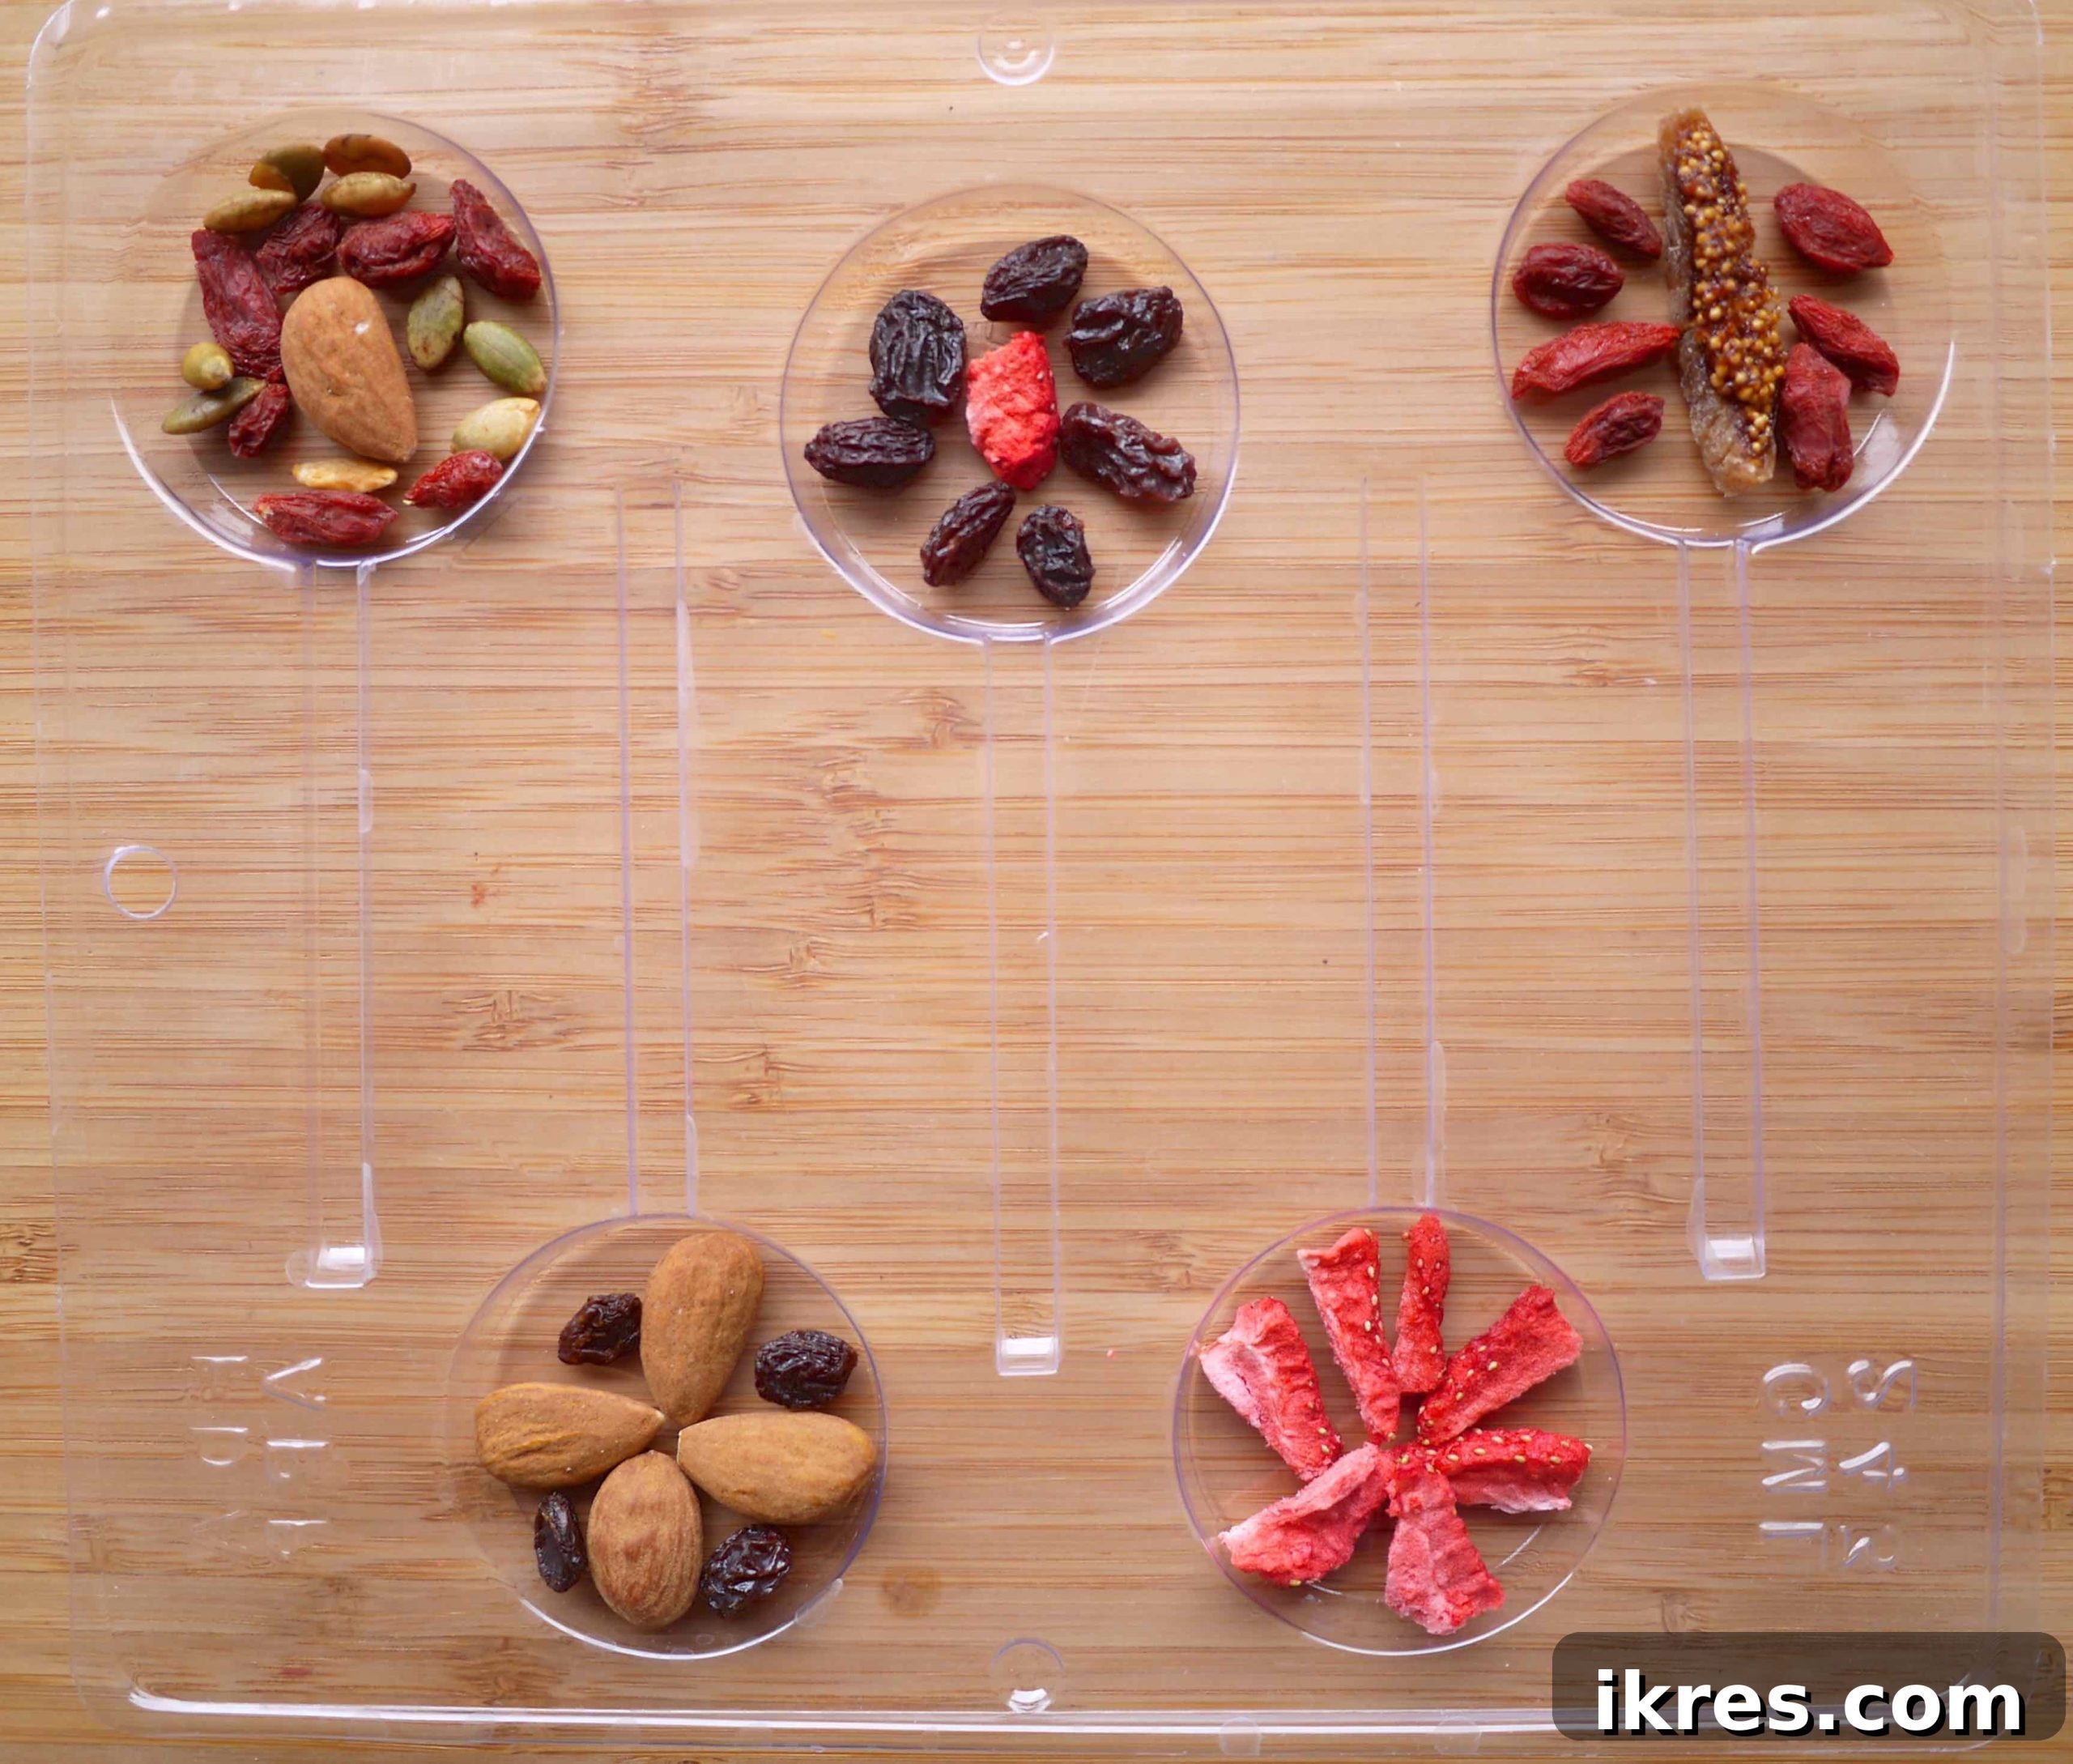
Step 1: Prepare Your Molds with Toppings. Begin by thoughtfully arranging your desired dried fruits and nuts into the bottom of your chocolate mold. This initial layer will be visible on the front of your lollipops, so consider color and pattern for the best aesthetic. Don’t overcrowd them; leave space for the chocolate.
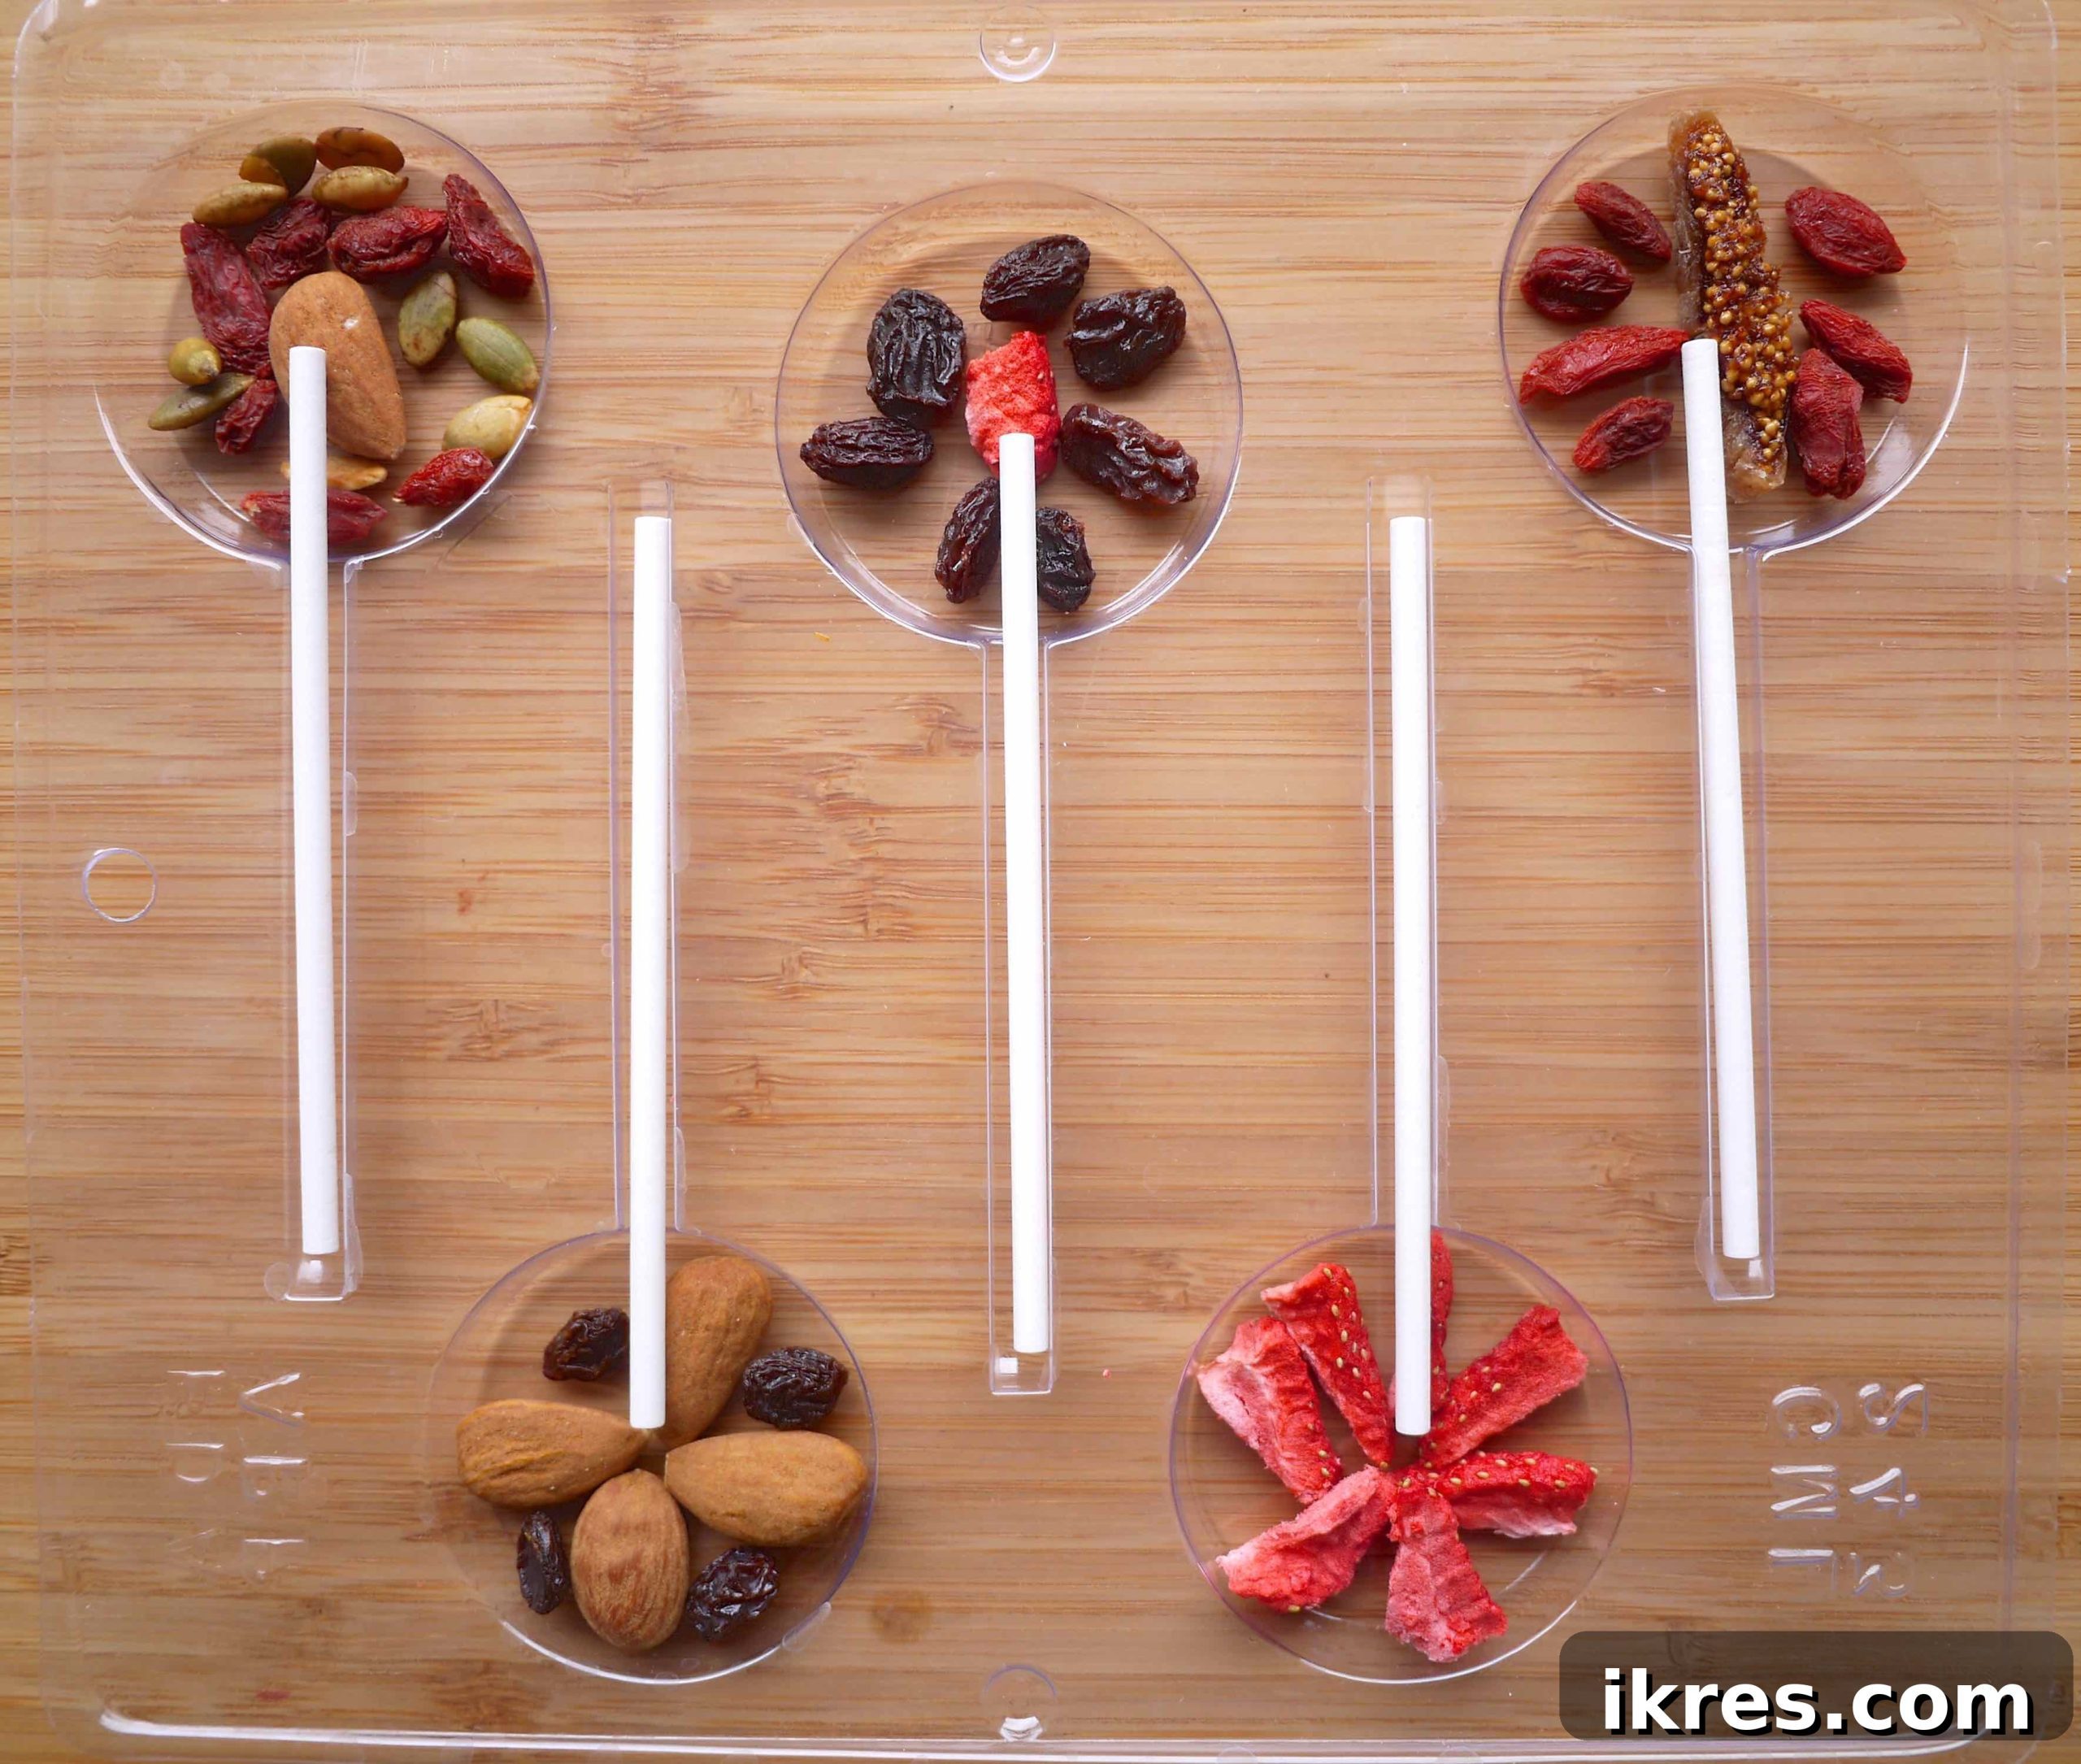
Step 2: Position the Lollipop Sticks. Gently insert the lollipop sticks into each mold, pushing them down just enough so the chocolate can securely grip them, but not so far that they protrude too much from the front. Ensure they are relatively centered for a balanced lollipop.
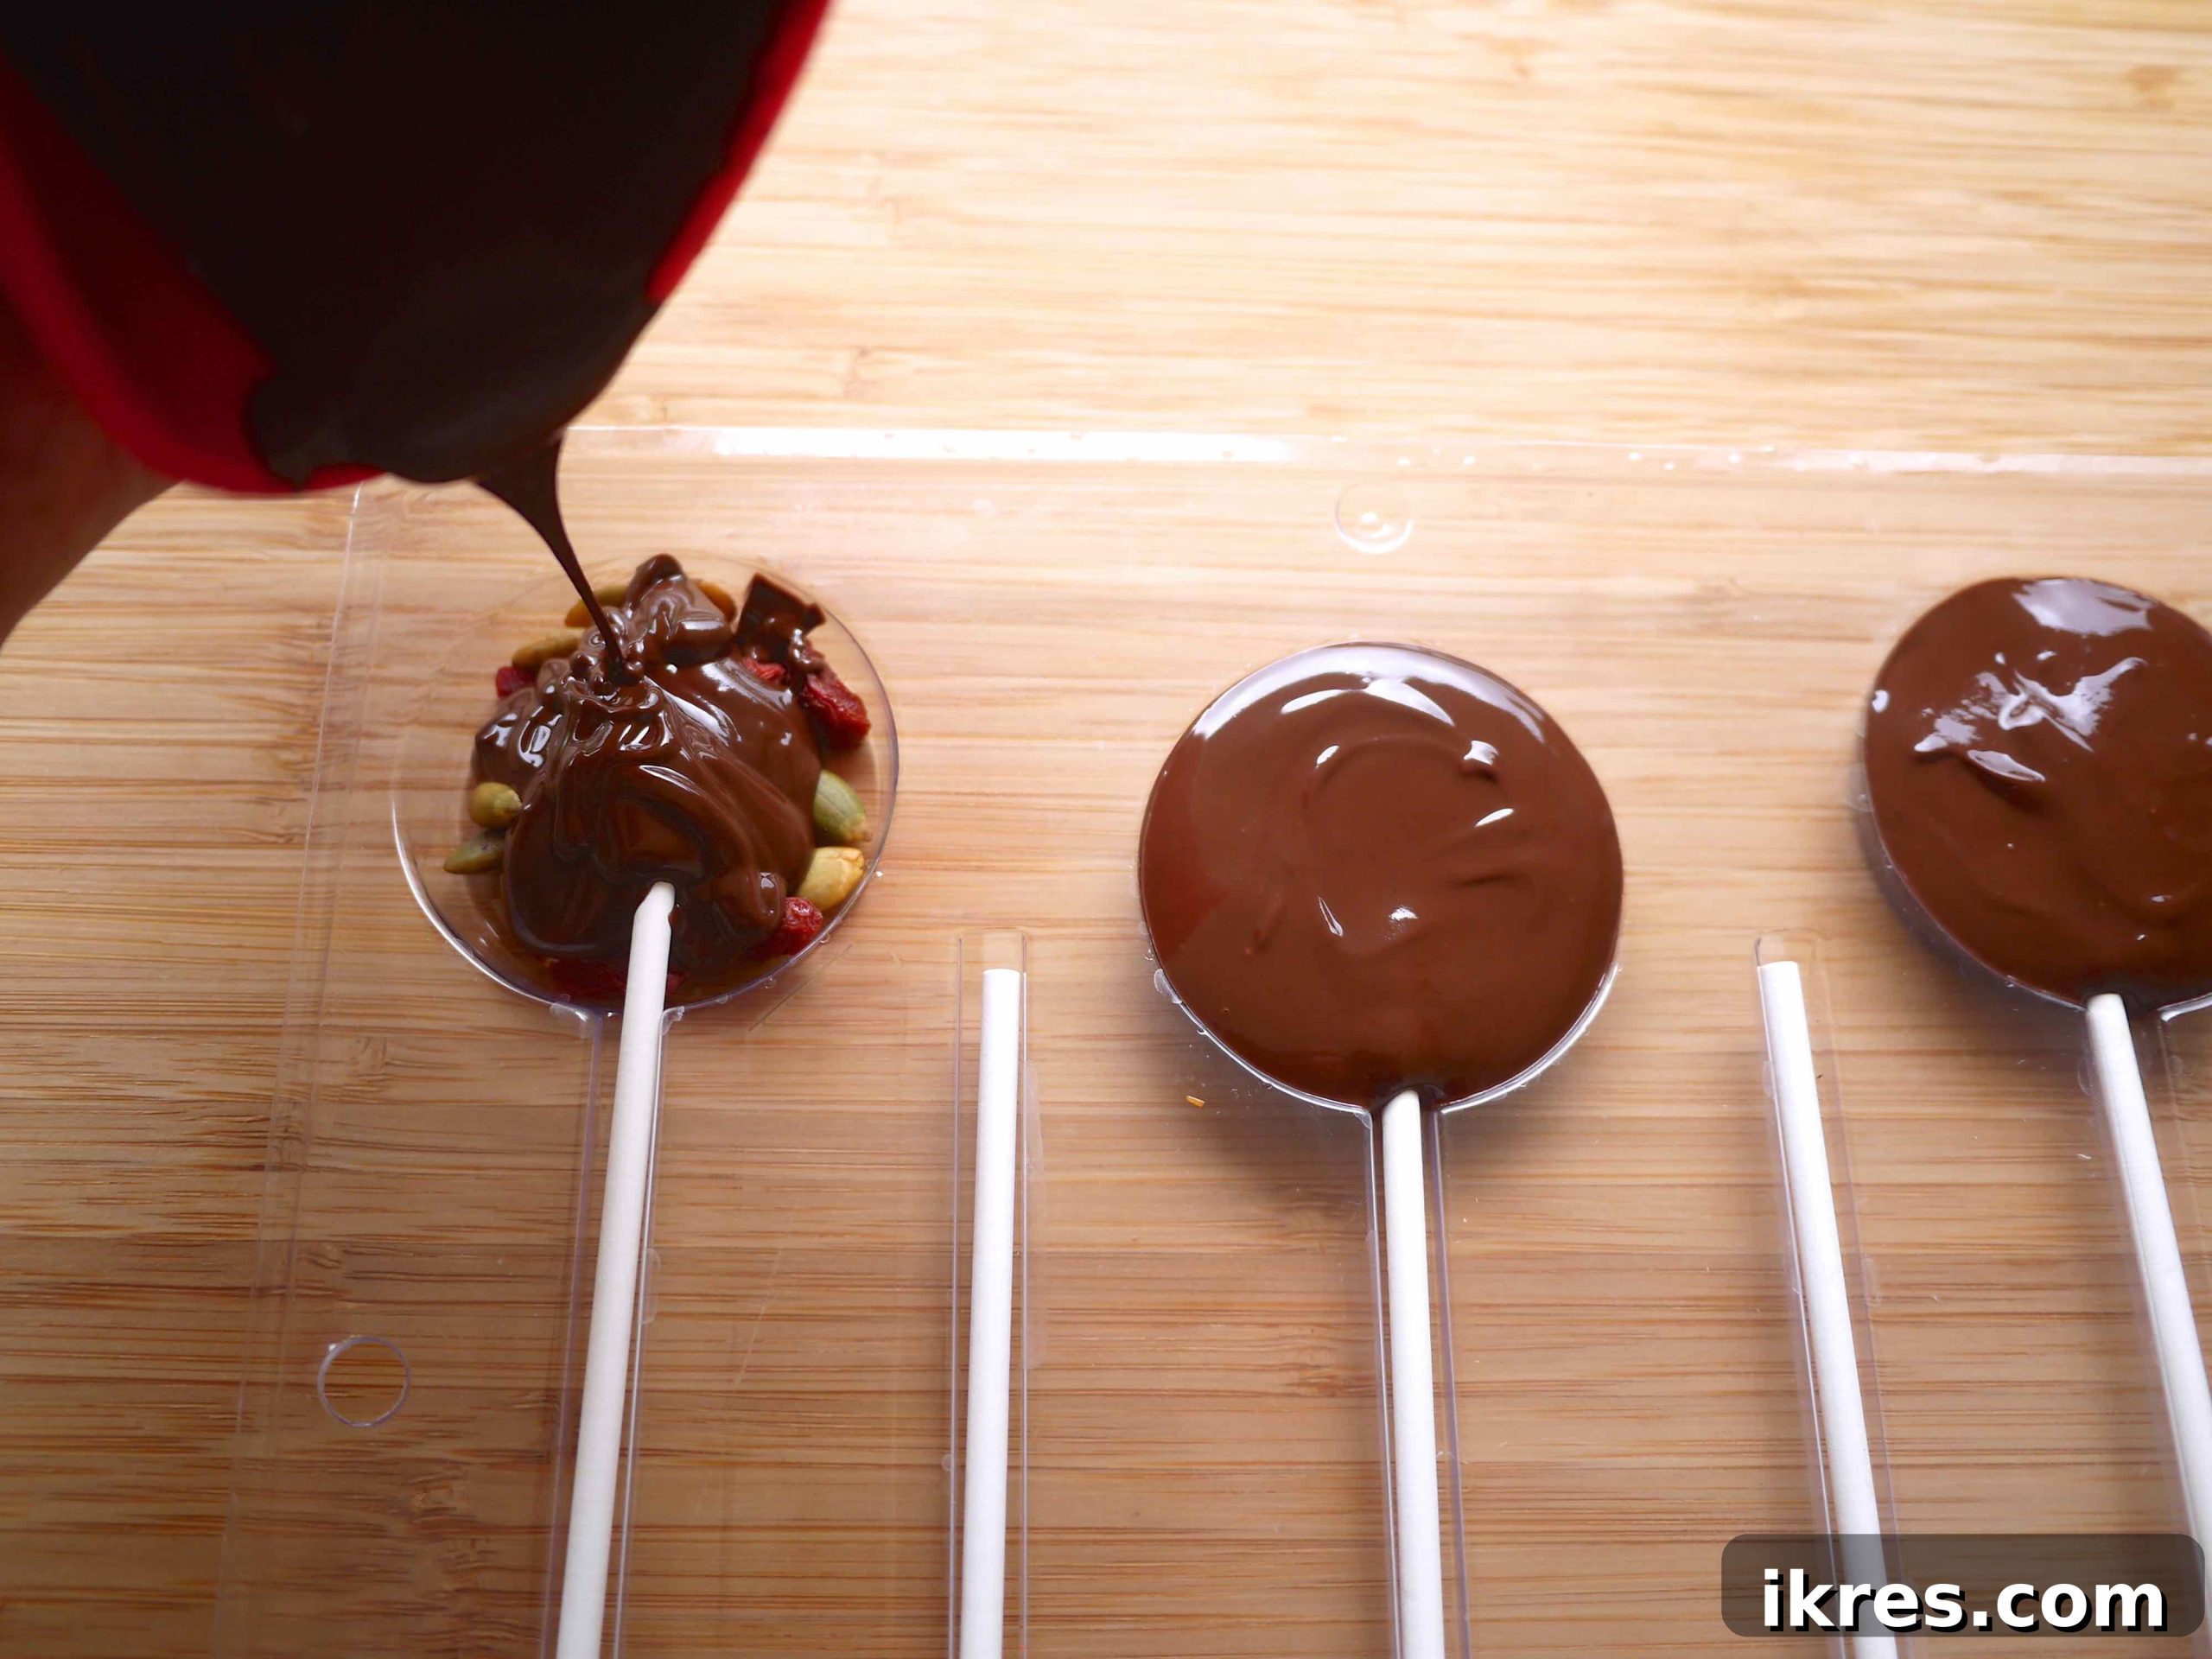
Step 3: Melt Your Chocolate. In a microwave-safe bowl (silicone is ideal for easy pouring!), combine your chocolate chips with the coconut or olive oil. Microwave in 30-second intervals, stirring thoroughly after each interval, until the chocolate is smooth and fully melted. Be careful not to overheat it, as burnt chocolate becomes hard and difficult to work with. Aim for a velvety consistency.
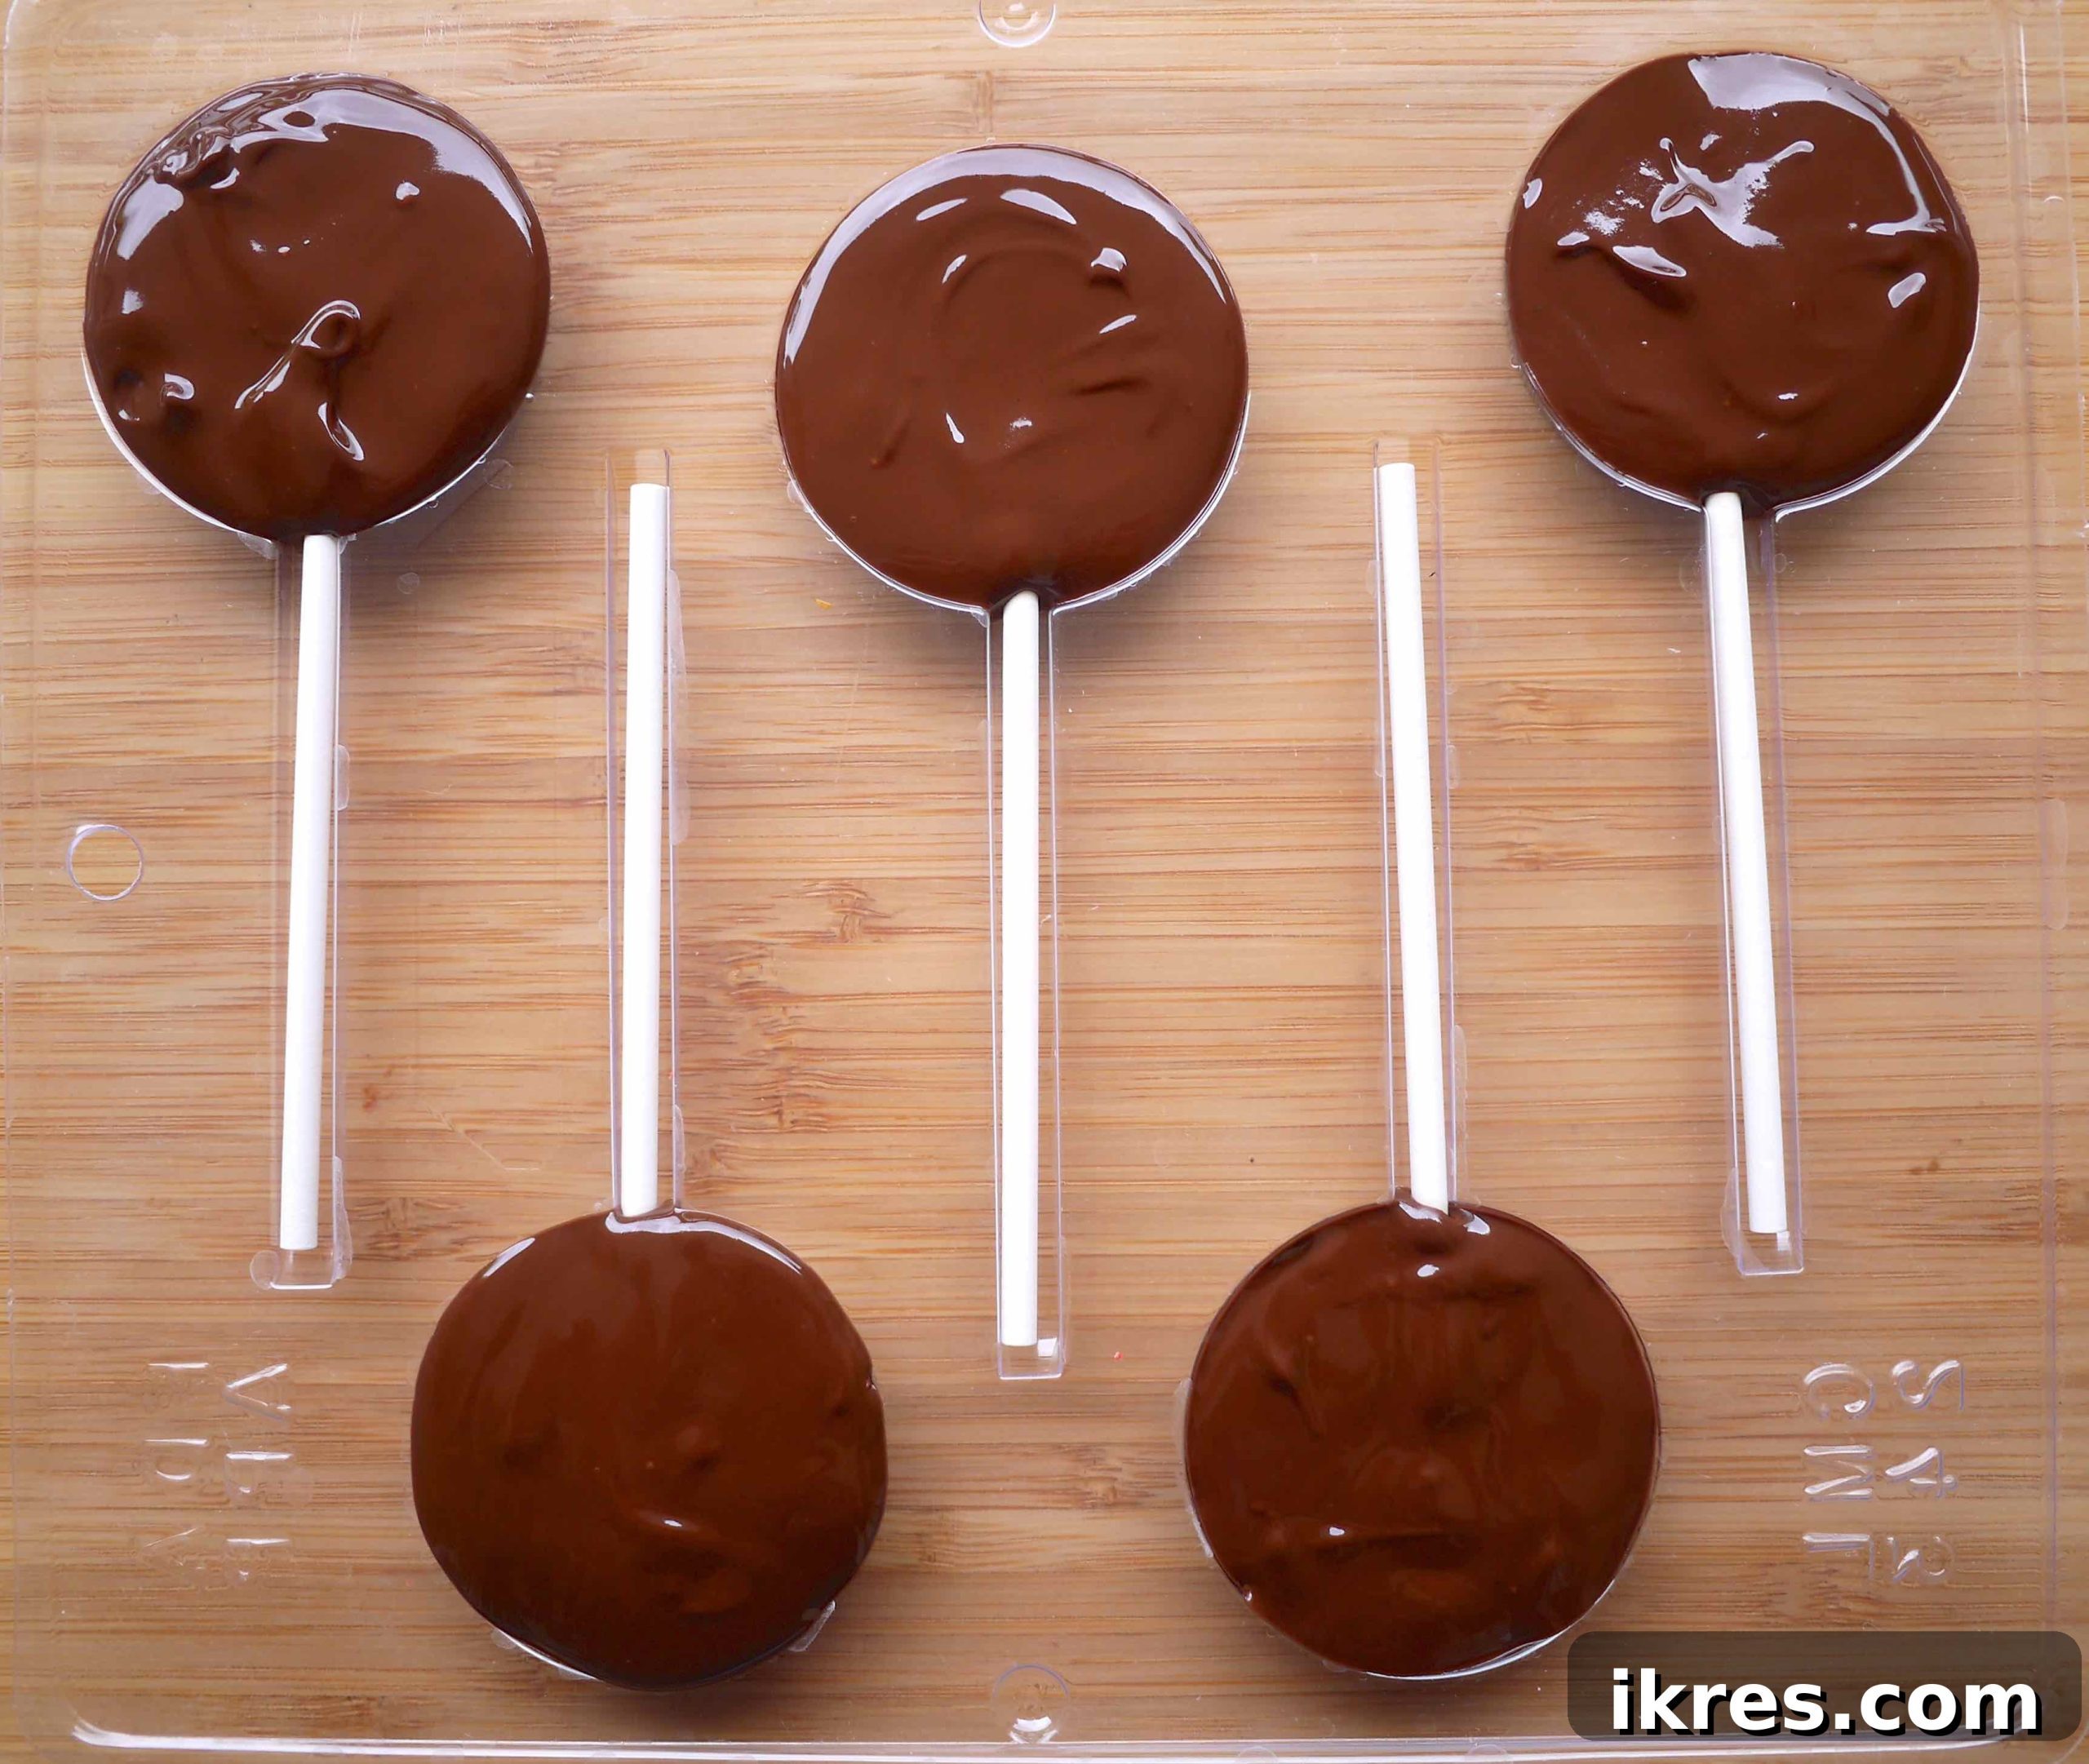
Step 4: Fill the Molds Evenly. Carefully pour the melted chocolate over the arranged fruits and nuts in each mold, ensuring the chocolate fills every crevice and completely covers the lollipop sticks. Tap the mold gently on your countertop a few times to release any trapped air bubbles and help the chocolate settle smoothly. If the chocolate starts to thicken, microwave it for an additional 10-15 seconds to regain its pourable consistency.
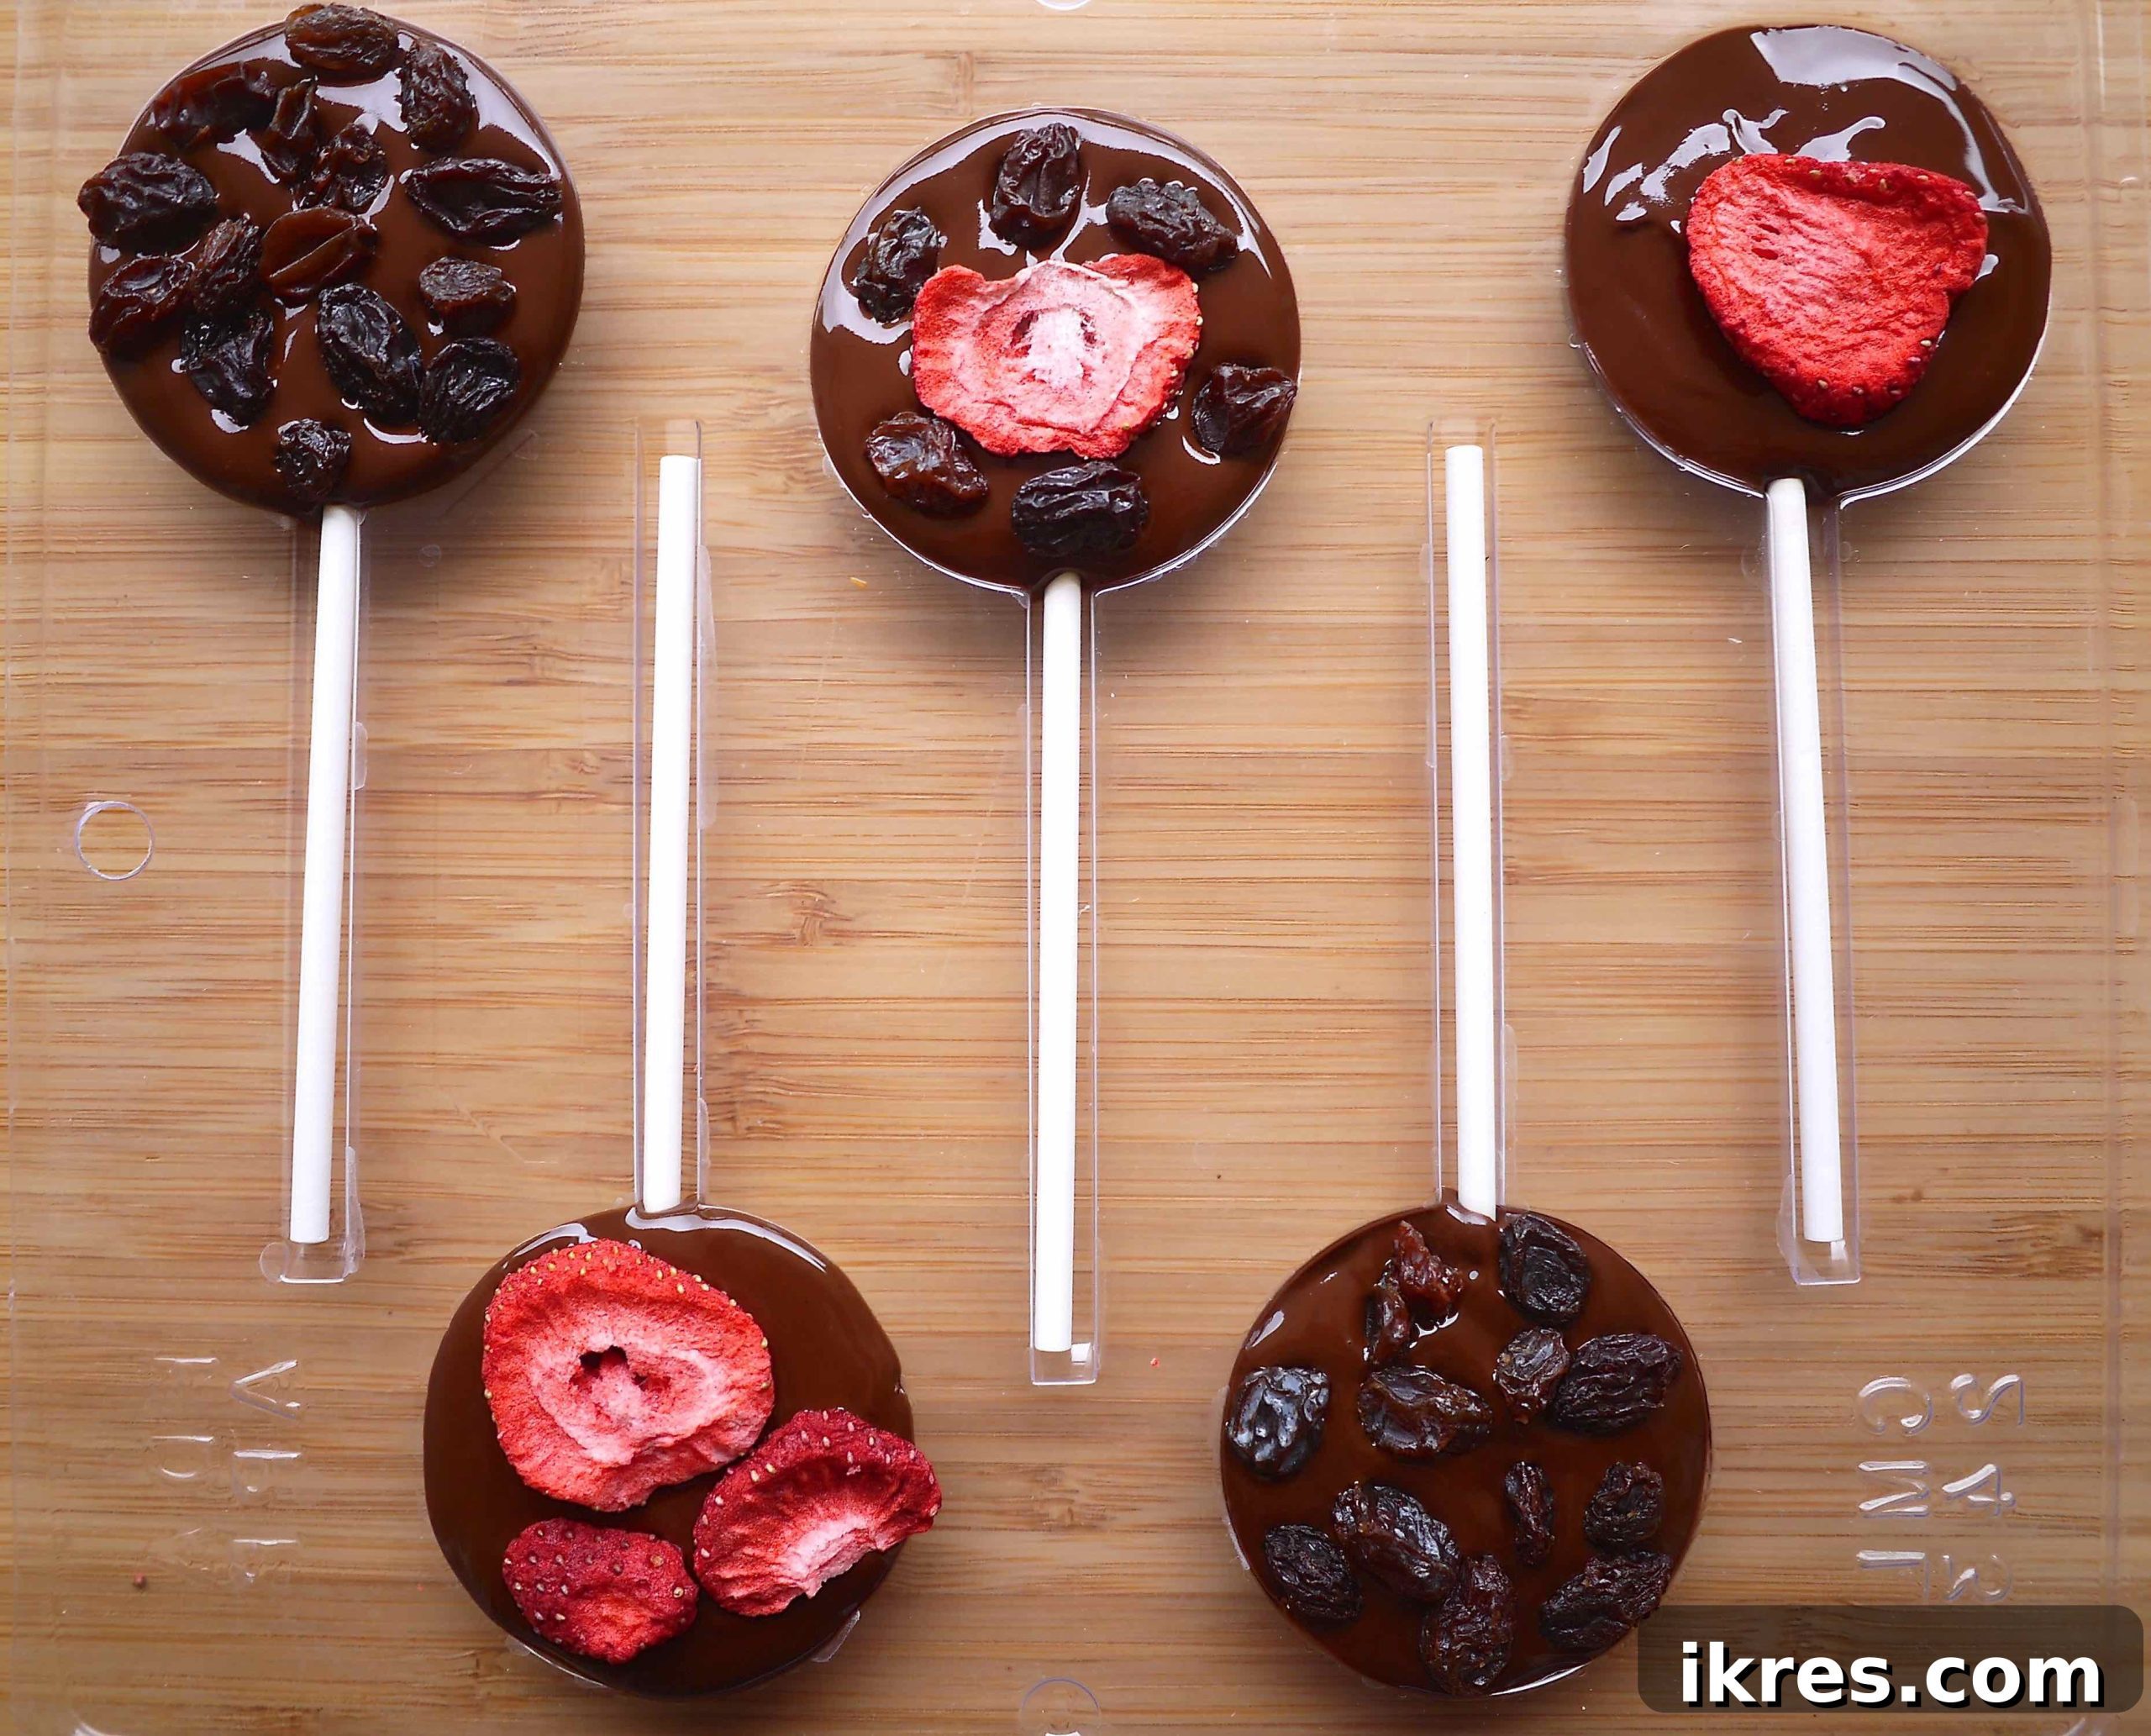
Step 5: Decorate with Additional Toppings. For an even more gourmet touch and a double-sided aesthetic, lightly press additional dried fruits, nuts, or other toppings onto the still-wet surface of the melted chocolate. This allows them to adhere beautifully as the chocolate sets, enhancing both flavor and visual appeal.

Step 6: Chill Until Firm. Carefully transfer the lollipop mold to the refrigerator. Allow it to chill for at least 1 hour, or until the chocolate is completely firm and easily releases from the mold. Rushing this step can result in broken lollipops.
Step 7: Gently Demold and Enjoy. Once fully set, gently push from the back of the silicone mold or carefully lift the lollipop sticks upward. The chocolate lollipops should pop out cleanly and easily. Your beautiful homemade chocolate lollipops are now ready to be enjoyed, shared, or wrapped as gifts!
Expert Tips for Perfect Chocolate Lollipops
Achieve professional-looking and tasting chocolate lollipops with these invaluable tips:
- Choose the Right Melting Bowl: I highly recommend using flexible silicone mixing bowls for melting chocolate. Their bendable nature makes pouring the melted chocolate incredibly easy and mess-free, minimizing drips and waste.
- Master the Art of Melting Chocolate: Patience is key! Never overheat your chocolate. Heating it too quickly or for too long can cause it to “seize,” becoming hard, grainy, and unmanageable. Always melt chocolate slowly, in short bursts (30 seconds at a time in the microwave), stirring well after each interval. This gradual heating ensures a smooth, luscious consistency.
- Consider Tempering for Shine and Snap: For truly professional results, especially if you want your lollipops to have a glossy finish and a satisfying snap when broken, consider tempering your chocolate. This involves a precise heating and cooling process that stabilizes the chocolate’s cocoa butter crystals. While not strictly necessary for delicious lollipops, it greatly enhances their texture and shelf life.
- Creative Presentation for Gifting: If you’re making these as gifts, presentation matters! Once demolded, allow the lollipops to come to room temperature to prevent condensation. Wrap each lollipop individually in small cellophane bags, tying them with colorful ribbons. You can also arrange them upright in a decorative container filled with candy or floral foam.
- Storage Solutions: Store your finished chocolate lollipops in an airtight container at room temperature, away from direct sunlight and heat, for up to two weeks. If your kitchen is particularly warm, a cool pantry is preferable. Avoid refrigerating them for extended periods, as this can cause condensation and dull the chocolate’s shine.
Other Irresistible Chocolate Desserts You’ll Love
If you have a fondness for chocolate, especially when combined with wholesome ingredients, you’ll certainly enjoy these other recipes:
These moist and flavorful muffins are a delightful combination of rich chocolate and juicy cherries, perfect for a guilt-free breakfast or snack.
Indulge in a decadent chocolate cake that’s both dairy-free and gluten-free, topped with a luscious chocolate frosting. Simple, elegant, and utterly delicious.
A unique twist on a classic, this banana bread boasts the rich flavors of espresso and chocolate chips, while being friendly to gluten-free, dairy-free, and Paleo diets.
Did you try this recipe? We’d love to hear your thoughts! **Please leave a review below and share your creations!**
Chocolate Lollipops with Dried Fruit
By: Dominique
Servings: 5 Lollipops
Prep Time: 1 hour
Total Time: 1 hour

These chocolate lollipops are a delicious and beautiful chocolate treat full of the dried fruit, freeze dried fruit, and nuts of your choice.
Equipment
- 1 chocolate candy mold
- 5 lollipop sticks
- Microwave-safe bowl (silicone recommended for easy pouring)
Ingredients
- 3/4 cup semi-sweet chocolate chips (or your preferred type)
- 1/2 tsp melted coconut oil (or neutral olive oil)
- Assorted dried fruit or freeze-dried fruit of your choice (e.g., raisins, goji berries, pumpkin seeds, dried figs, almonds, freeze-dried strawberries, dried kiwi, apricots, etc.)
Instructions
- In a microwave-safe bowl, combine the chocolate chips with your chosen oil. Heat in the microwave for 30 seconds, then stir thoroughly. Repeat this process for another 30 seconds, stirring again. If the chocolate isn’t completely melted and smooth, heat for a final 20-30 seconds and mix until velvety. Set the melted chocolate aside.
- Arrange your selected dried fruits and nuts in the bottom of each section of the chocolate candy molds, creating your desired pattern. Then, gently place a lollipop stick into each mold, ensuring it’s centered and secured by the future chocolate.
- Pour the melted chocolate into the individual molds, filling them completely and ensuring all the fruit, nuts, and the stick are covered. If the chocolate starts to become too thick to pour easily, microwave it for an additional 10-15 seconds. Use a small knife or spatula to smooth out the tops if needed, and gently tap the mold on the counter to release any air bubbles.
- Optionally, immediately after pouring the chocolate, add more dried fruit or nuts on top of the melted chocolate to create attractive double-sided lollipops. Arrange these additional toppings in your preferred pattern.
- Carefully transfer the filled mold to the refrigerator and chill for at least 1 hour, or until the chocolate is completely firm and set.
- Once firm, gently lift the lollipop sticks upward, and the chocolate lollipops should easily pop out of the molds. Enjoy your beautiful homemade treats!
Notes
- For easy pouring and cleanup, I highly recommend using flexible silicone mixing bowls when melting your chocolate.
- To prevent your chocolate from burning and becoming unusable, always melt it slowly and in short intervals (30 seconds at a time in the microwave). Stir well after each interval to ensure even melting and a smooth consistency.
Nutrition
Calories: 129 kcal
Carbohydrates: 16g
Fat: 8g
Saturated Fat: 6g
Polyunsaturated Fat: 0.01g
Monounsaturated Fat: 0.03g
Fiber: 2g
Calcium: 0.004mg
Iron: 1mg
Nutrition information is automatically calculated, so should only be used as an approximation.
Additional Info
Course: Dessert
Cuisine: American
Tried this recipe? Mention @perchancetocook or tag #perchancetocook on social media! We love seeing your delicious creations!