
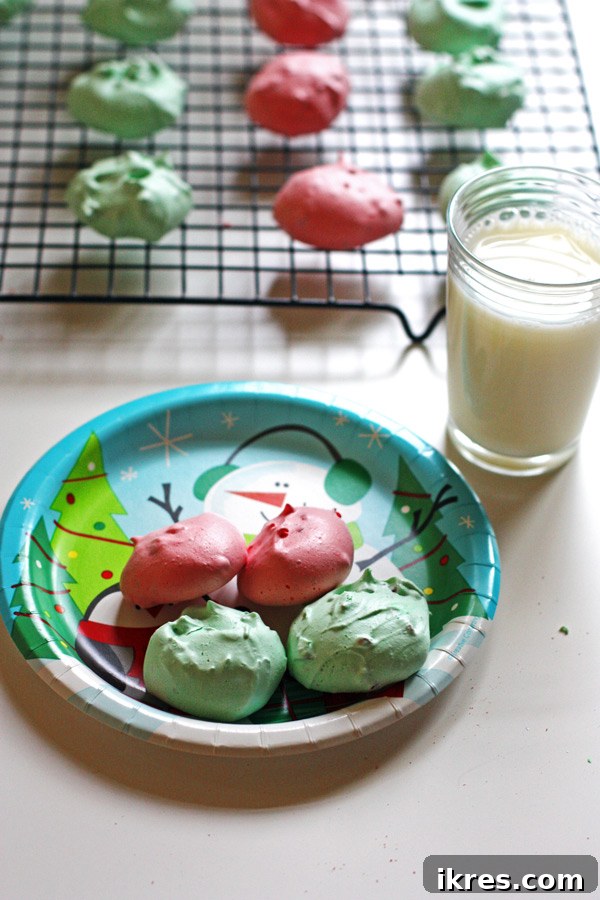
Melt-in-Your-Mouth Chocolate Chip Meringue Cookies: An Irresistible, Easy Holiday Treat
Step into a world where cookies are light as air, crisp to perfection, and melt effortlessly on your tongue, leaving behind a delightful chocolatey whisper. These Chocolate Chip Meringue Cookies are not just a dessert; they are a cherished memory, a simple pleasure, and an absolute must-have for any celebration, especially during the festive holiday season.
A Sweet Journey Back to Childhood: My Mom’s Secret Meringues
Some flavors have the power to transport you through time, back to the warmth and comfort of childhood. For me, these delicate Chocolate Chip Meringue Cookies are that magical portal. Growing up, Christmas wasn’t truly Christmas until my mom baked her legendary meringues. The aroma alone would fill our home with anticipation, and I would eagerly count down the days until those enchanting little clouds of sweetness made their annual appearance.
Each bite was a revelation – so impossibly light, dissolving in an instant, and studded with just the right amount of mini chocolate chips. They were, without a doubt, my favorite holiday cookie. As I started my own family, I knew I had to carry on this beautiful tradition. The joy of baking these cookies for my children, watching their eyes light up with each ethereal bite, is a heartwarming experience I wouldn’t trade for anything. And now, I’m thrilled to share this tried-and-true recipe with you, so you can create your own cherished memories and perhaps even start a delightful new tradition in your home.
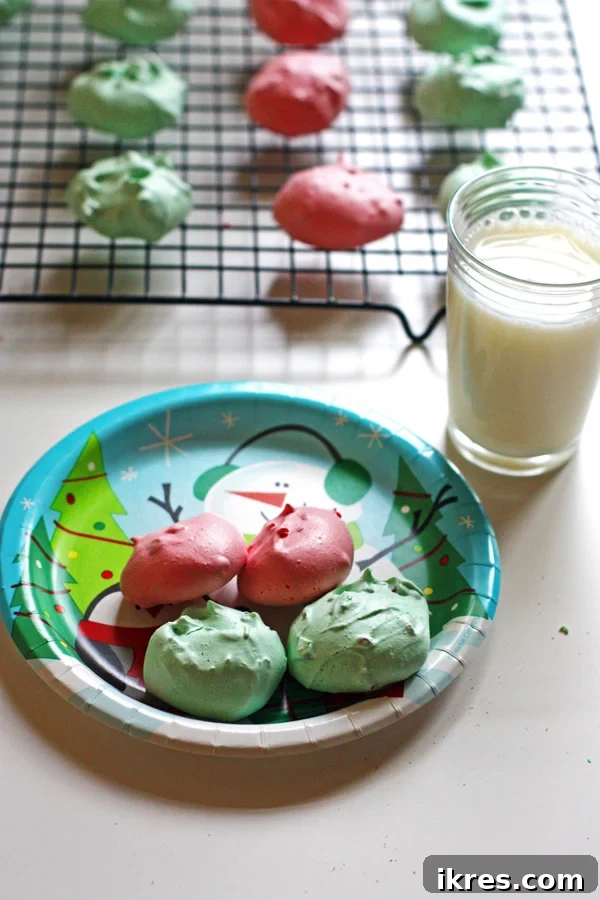
The Allure of Melt-in-Your-Mouth Meringues
What makes these meringue cookies so captivating? It’s their unique texture and versatile charm. They are effortlessly elegant, yet surprisingly simple to create, making them a fantastic choice for both seasoned bakers and beginners alike. Here’s why these cookies will quickly become a favorite:
- Unparalleled Texture: The defining characteristic of a meringue is its delicate, crisp, and utterly melt-in-your-mouth quality. There’s nothing quite like it – a cookie that vanishes almost instantly, leaving a whisper of sweetness and chocolate.
- Light and Airy: Unlike denser cookies, meringues are incredibly light, making them a perfect palate cleanser or a delightful finish to any meal.
- Minimal Ingredients: With just a few basic pantry staples – egg whites, sugar, cream of tartar, and a pinch of salt – you can whip up an impressive batch of these ethereal treats.
- Perfectly Portioned Chocolate: The inclusion of mini chocolate chips is a game-changer. Their smaller size ensures that every single bite delivers a balanced burst of rich chocolate, harmoniously complementing the sweet, airy meringue. It’s a subtle touch that makes a big difference.
- Versatile for All Occasions: While they hold a special place as a holiday cookie, their delicate charm makes them suitable for literally any occasion – from elegant tea parties and baby showers to casual gatherings and everyday indulgences.
Tailor-Made Treats: Flavor and Color Customizations
Beyond their delightful texture, one of the most exciting aspects of baking meringue cookies is the boundless opportunity for customization. You can easily adapt them to suit any taste preference or theme, making them truly unique and memorable.
A Refreshing Peppermint Twist (Optional)
To infuse your meringues with a wonderfully festive and cooling sensation, consider adding a touch of peppermint extract. My mom always included this ingredient, and it adds an extra layer of holiday cheer, making these cookies truly special for Christmas. However, if peppermint isn’t your preferred flavor, or if you simply don’t have it on hand, don’t fret! I’ve forgotten it once or twice myself, and the cookies were still absolutely delicious and disappeared just as quickly. So, if you’re a fan of that classic minty zest, feel free to incorporate about ¼ teaspoon into your batter for a subtle, refreshing kick.
A Spectrum of Color: Making Them Festive and Fun
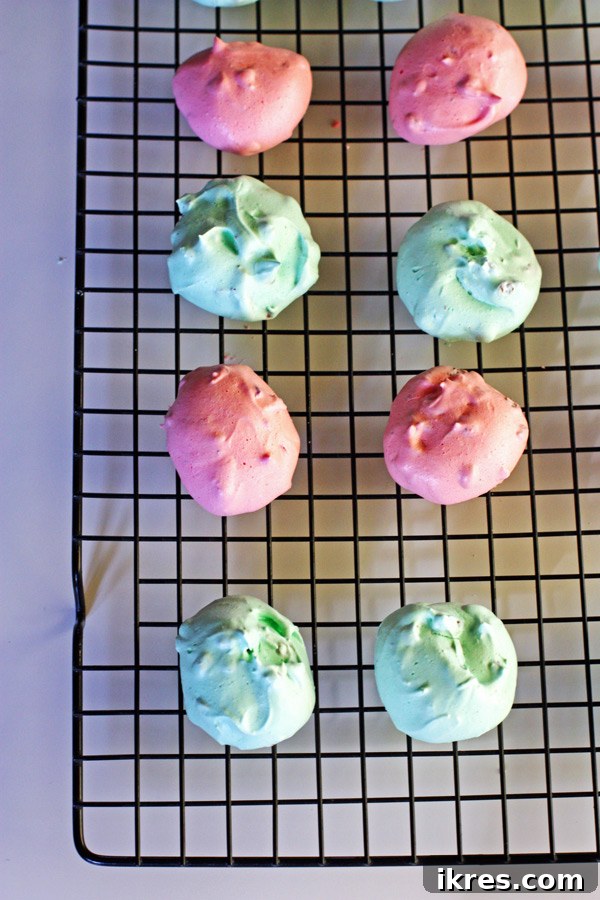
Meringue cookies serve as a fantastic blank canvas for vibrant food coloring, allowing you to create stunning visual displays. For Christmas, my mom would transform them into festive green and red delights. But the possibilities extend far beyond the holidays! Imagine delicate pastels for an elegant springtime brunch or an Easter celebration, bold blues and yellows for a summer gathering, or even spooky oranges and blacks for Halloween. To add color, simply divide your prepared meringue batter into separate bowls before folding in the chocolate chips. Then, gently stir in a few drops of gel food coloring until your desired hue is achieved. Gel colors are recommended as they provide intense pigment without adding excess liquid, which can affect the meringue’s consistency. This simple step can elevate your cookies from delicious to absolutely show-stopping!
The Art of Meringue: How to Make Chocolate Chip Meringue Cookies
Creating perfect meringues is more about technique and patience than difficulty. Follow these detailed steps, and you’ll be rewarded with light, crisp, and beautifully delicate chocolate chip meringue cookies every time.
Getting Started: Essential Equipment and Oven Preparation
- Stand Mixer: A stand mixer with a whisk attachment is highly recommended for consistent and effortless whipping, though a powerful hand mixer can also work.
- Cleanliness is Paramount: Ensure your mixing bowl and whisk attachment are impeccably clean and completely grease-free. Any trace of fat can prevent the egg whites from whipping properly. Wiping the bowl with a little lemon juice or vinegar on a paper towel can offer extra assurance.
- Baking Sheets: Use sturdy baking sheets for even heat distribution.
- Parchment Paper or Silicone Mats: These are crucial! They prevent sticking and make cleanup a breeze. Do NOT grease the baking sheets directly.
- Rubber Spatula: Essential for gently folding ingredients without deflating your meringue.
Begin by preheating your oven to a low 250°F (120°C). This low temperature is vital; meringues don’t truly “bake” but rather slowly dry out, transforming into their signature crisp texture. Position your oven racks to ensure they are evenly spaced, allowing you to bake two cookie sheets simultaneously for consistent results. Line your baking sheets generously with parchment paper or place silicone baking mats on them. This step is critical for preventing the delicate meringues from sticking.
Whipping Egg Whites to Perfection
The foundation of a great meringue is perfectly whipped egg whites. Start with two large egg whites, ensuring no speck of yolk makes its way into the bowl. Egg whites separate best when cold, but whip to a greater volume at room temperature, so separate them cold and then let them sit for 30 minutes. Pour the egg whites into your clean stand mixer bowl fitted with the whisk attachment. Begin beating on medium speed. The egg whites will start to become frothy, developing a texture reminiscent of foam on a refreshing beverage.
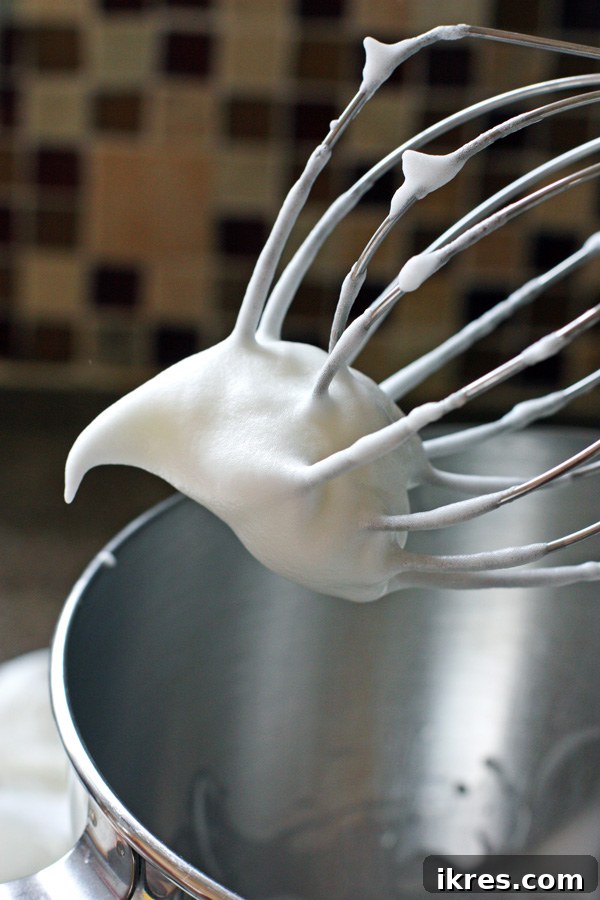
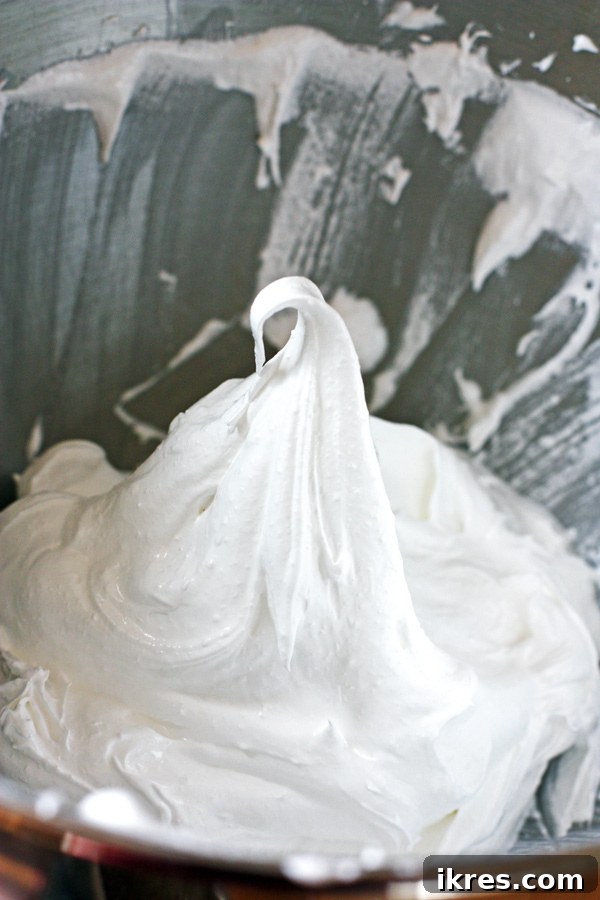
Once frothy, add ¼ teaspoon of cream of tartar and ½ teaspoon of salt. Cream of tartar acts as a stabilizer, helping the egg whites reach their full volume and preventing them from collapsing. Increase the mixer speed to medium-high and continue beating. You’re looking for stiff peaks: when you lift the whisk, the meringue should hold its shape firmly, with a slight curl at the tip, without drooping. The mixture should be voluminous and opaque white.
Gradual Sugar Incorporation for Glossy, Stable Meringue
Once your egg whites are at stiff peaks, switch the whisk attachment to the paddle attachment. This helps maintain the meringue’s structure as you add sugar. With the mixer running on medium to high speed, begin adding ¾ cup of granulated sugar, one tablespoon at a time. This gradual addition is crucial; it allows the sugar granules to dissolve completely into the egg whites, creating a stable, glossy, and beautifully smooth meringue. Rushing this step can result in a grainy, unstable meringue that won’t hold its shape. Continue beating constantly for several minutes – typically 5-7 minutes after all sugar is added – until the mixture is incredibly stiff, thick, and wonderfully glossy. You should be able to rub a tiny bit of meringue between your fingers and feel absolutely no sugar granules. This indicates a perfectly stable meringue, ready for its delicious additions.
Adding Flavor, Chocolate, and Color
If you’re opting for the peppermint variation, gently fold in ¼ teaspoon of peppermint extract now. Then, with a rubber spatula, carefully scrape down the sides of the bowl. Add ¾ cup of mini chocolate chips (or any other desired mix-ins like sprinkles or finely chopped nuts). Using a gentle “cut and fold” motion, carefully incorporate the chocolate chips into the meringue. The goal is to distribute the chips evenly without deflating the airy meringue you’ve worked so hard to create. Overmixing at this stage can lead to flat, dense cookies.
If you plan to add food coloring, this is the time to do it. Divide the meringue batter into separate bowls according to the number of colors you wish to use. Add a few drops of gel food coloring (gel works best for vibrant colors without adding excess liquid) to each bowl. Gently stir with a clean spatula until the color is uniformly combined. Remember, a light hand is key to preserving the meringue’s volume.
Shaping and Drying: The Baking Process
Now, it’s time to bring your meringues to life! You can either use a piping bag fitted with a decorative tip for a more elegant and uniform look, or simply drop rounded teaspoons of batter onto your prepared baking sheets. Leave a little space between each dollop to allow for air circulation. Place the baking sheets in your preheated 250°F (120°C) oven and bake for 30 minutes. During this time, the meringues won’t visibly brown or expand; instead, they will slowly dry out, forming that irresistible crisp exterior while remaining delightfully tender inside. The cookies will look largely the same as when you placed them in the oven, just slightly firmer.
Once the 30 minutes are up, turn off the oven completely. This next step is crucial for achieving truly crisp meringues: leave the cookies inside the turned-off oven with the door slightly ajar for at least one hour, or ideally, overnight. This gradual cooling and extended drying time prevents thermal shock (which can cause cracking) and ensures your meringues are perfectly crisp and completely dry throughout.
Expert Tips for Meringue Perfection
Meringues are a delicate art, but with these pro tips, you’ll achieve flawless results every time:
- Spotless Equipment: Reiterate the importance of a completely clean, grease-free mixing bowl and whisk. Even a minuscule amount of oil or fat can prevent egg whites from whipping.
- Room Temperature Egg Whites: Separate eggs while cold (they separate cleaner), then let the whites warm to room temperature for about 30 minutes before whipping for maximum volume.
- Watch the Weather: Humidity is meringue’s enemy! Avoid making meringues on rainy or very humid days, as the moisture in the air can prevent them from drying out and make them sticky.
- Low and Slow is the Way: The oven temperature is low for a reason – it’s about drying, not baking. Resist the urge to turn up the heat, as this will lead to browning, cracking, or a chewy interior.
- Patience with Sugar: Add sugar slowly, one tablespoon at a time, allowing each addition to dissolve before adding more. This ensures a stable, glossy, and non-grainy meringue.
- Gentle Folding: Once the meringue is whipped and sugar is incorporated, be incredibly gentle when folding in flavorings and chocolate chips to maintain the precious air you’ve built into the mixture.
- The Cooling Process is Key: Don’t remove the meringues from the oven immediately. The slow cooling and drying in the residual heat are essential for their crisp texture and to prevent them from deflating or cracking.
Serving Suggestions and Storage
These Chocolate Chip Meringue Cookies are wonderfully versatile. Enjoy them on their own as a light, sweet treat, or pair them with a cup of hot coffee, tea, or even a glass of milk. They are also perfect for:
- Holiday Dessert Platters: Their festive appearance and unique texture make them a standout.
- Homemade Gifts: Package them beautifully in cellophane bags or decorative boxes for a thoughtful, edible gift.
- Elegant Garnishes: Crumble them over ice cream, puddings, fruit tarts, or trifles for an added layer of texture and sweetness.
To preserve their crispness, store meringue cookies in an airtight container at room temperature for up to two weeks. Avoid refrigeration, as the moisture can quickly turn them soft and chewy. If your meringues happen to lose some of their crispness due to humidity, you can try refreshing them by placing them on a baking sheet in a 200°F (90°C) oven for about 10-15 minutes, then letting them cool completely in the oven.
Frequently Asked Questions About Meringue Cookies
- Why did my meringues crack?
- Meringues often crack due to sudden temperature changes. This can happen if the oven temperature is too high, or if they are removed from the oven too quickly before cooling completely. Ensure your oven temperature is accurate and allow for slow cooling inside the turned-off oven.
- Why are my meringues sticky or chewy?
- This is typically a sign that the meringues didn’t dry out sufficiently. Possible causes include high humidity in your kitchen, not beating the sugar in long enough for it to fully dissolve, or insufficient drying time in the oven after baking.
- Can I make these cookies ahead of time?
- Absolutely! Meringues are an excellent make-ahead dessert. When stored properly in an airtight container at room temperature, they will maintain their crispness for up to two weeks, making them ideal for holiday preparations or party planning.
- What’s the best type of food coloring to use?
- Gel food coloring is highly recommended for meringues. Unlike liquid food coloring, gel provides vibrant colors with only a small amount, thus avoiding the introduction of excess moisture that could destabilize the meringue.
Chocolate Chip Meringue Cookies Recipe
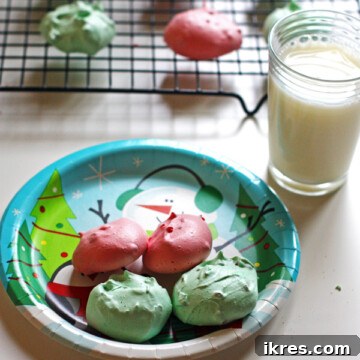
These melt-in-your-mouth Chocolate Chip Meringue Cookies are perfect for any occasion and are a favorite holiday cookie recipe in my house.
Author: Jeannie Z
Ingredients
- 2 large egg whites, at room temperature
- ¼ teaspoon cream of tartar
- ½ teaspoon salt
- ¾ cup granulated sugar
- ¼ teaspoon peppermint extract (optional, for a festive touch)
- ¾ cup mini chocolate chips
- Food coloring (optional, for festive cookies)
Instructions
- Preheat your oven to 250°F (120°C). Position oven racks to bake two cookie sheets evenly. Line baking sheets with parchment paper or silicone baking mats; do not grease.
- In a meticulously clean stand mixer bowl (or large bowl with a hand mixer), beat egg whites on medium speed with the whisk attachment until they are frothy, resembling beer foam.
- Add the cream of tartar and salt. Increase the mixer speed to medium-high and continue beating until the egg whites form stiff peaks. When you lift the whisk, the meringue should hold its shape firmly with a slight curl at the tip.
- Switch to the paddle attachment. Gradually add the granulated sugar, one tablespoon at a time, while the mixer continues to beat on medium-high speed. Continue beating constantly for 5-7 minutes after all sugar is added, until the mixture is very stiff, glossy, and no sugar granules can be felt when rubbed between your fingers.
- If using, gently fold in the peppermint extract. Then, using a rubber spatula, carefully fold in the mini chocolate chips until just combined, taking care not to deflate the meringue.
- If adding food coloring, divide the batter into separate bowls. Add a few drops of gel food coloring to each bowl and gently stir until the desired color is achieved.
- Drop rounded teaspoons of meringue mixture onto the prepared baking sheets, leaving a small space between each cookie.
- Bake for 30 minutes at 250°F (120°C). The cookies will retain their shape and color, slowly drying out to a firm texture.
- After 30 minutes, turn off the oven. Leave the cookies inside with the oven door slightly ajar for at least 1 hour, or preferably overnight, to cool completely and ensure maximum crispness.
- Cool completely on the baking sheets before handling and storing.
Nutrition information is approximate and is automatically calculated, so should only be used as a guide.
Course: Dessert
Did you make this delightful recipe? We would love to hear about your experience! Please leave a comment and rating below. Your feedback is incredibly valuable and helps other bakers too!